Unbound DNS and Network Wide ad blocking!
Overview
This article will cover the benefits of using OPNsense + Unbound + Blocklists and how it can be a faster, better, and more streamlined approach to network-wide ad blocking over Pi-Hole.
Benefits
Using Unbound DNS with ad-blocking offers several benefits over Cloudflare DNS: 1. Enhanced privacy: Unbound eliminates the need for a third-party upstream DNS service, ensuring no single DNS server has your full DNS history. This prevents companies like Cloudflare from collecting and potentially selling your data.
-
Recursive resolution: Unbound resolves DNS queries recursively, starting with root servers, which improves privacy through qname minimisation. This process reveals less information about your browsing habits to higher-level DNS servers.
-
Local control: By running Unbound locally, you have complete control over your DNS resolver, without relying on external services. This allows for customization and reduces dependence on third-party infrastructure.
-
Improved caching: Unbound's efficient caching algorithm and pre-fetching capabilities can lead to faster DNS resolution times for frequently accessed domains.
-
Reduced tracking: By eliminating third-party DNS providers, you limit the ability of companies to track your online activities through DNS requests.
-
DNSSEC validation: Unbound supports DNSSEC, which helps protect against DNS spoofing and cache poisoning attacks.
-
Compatibility with ad blocking: Unbound can be easily integrated with ad-blocking solutions like Pi-hole, providing a comprehensive solution for both privacy and ad filtering
Check out our video on this topic
Guide to setup Unbound DNS + Ad Blocking
- First you need to login to your OPNsense machine and go to Services / Unbound DNS / General
- Next you need to click Enable Unbound and click Apply

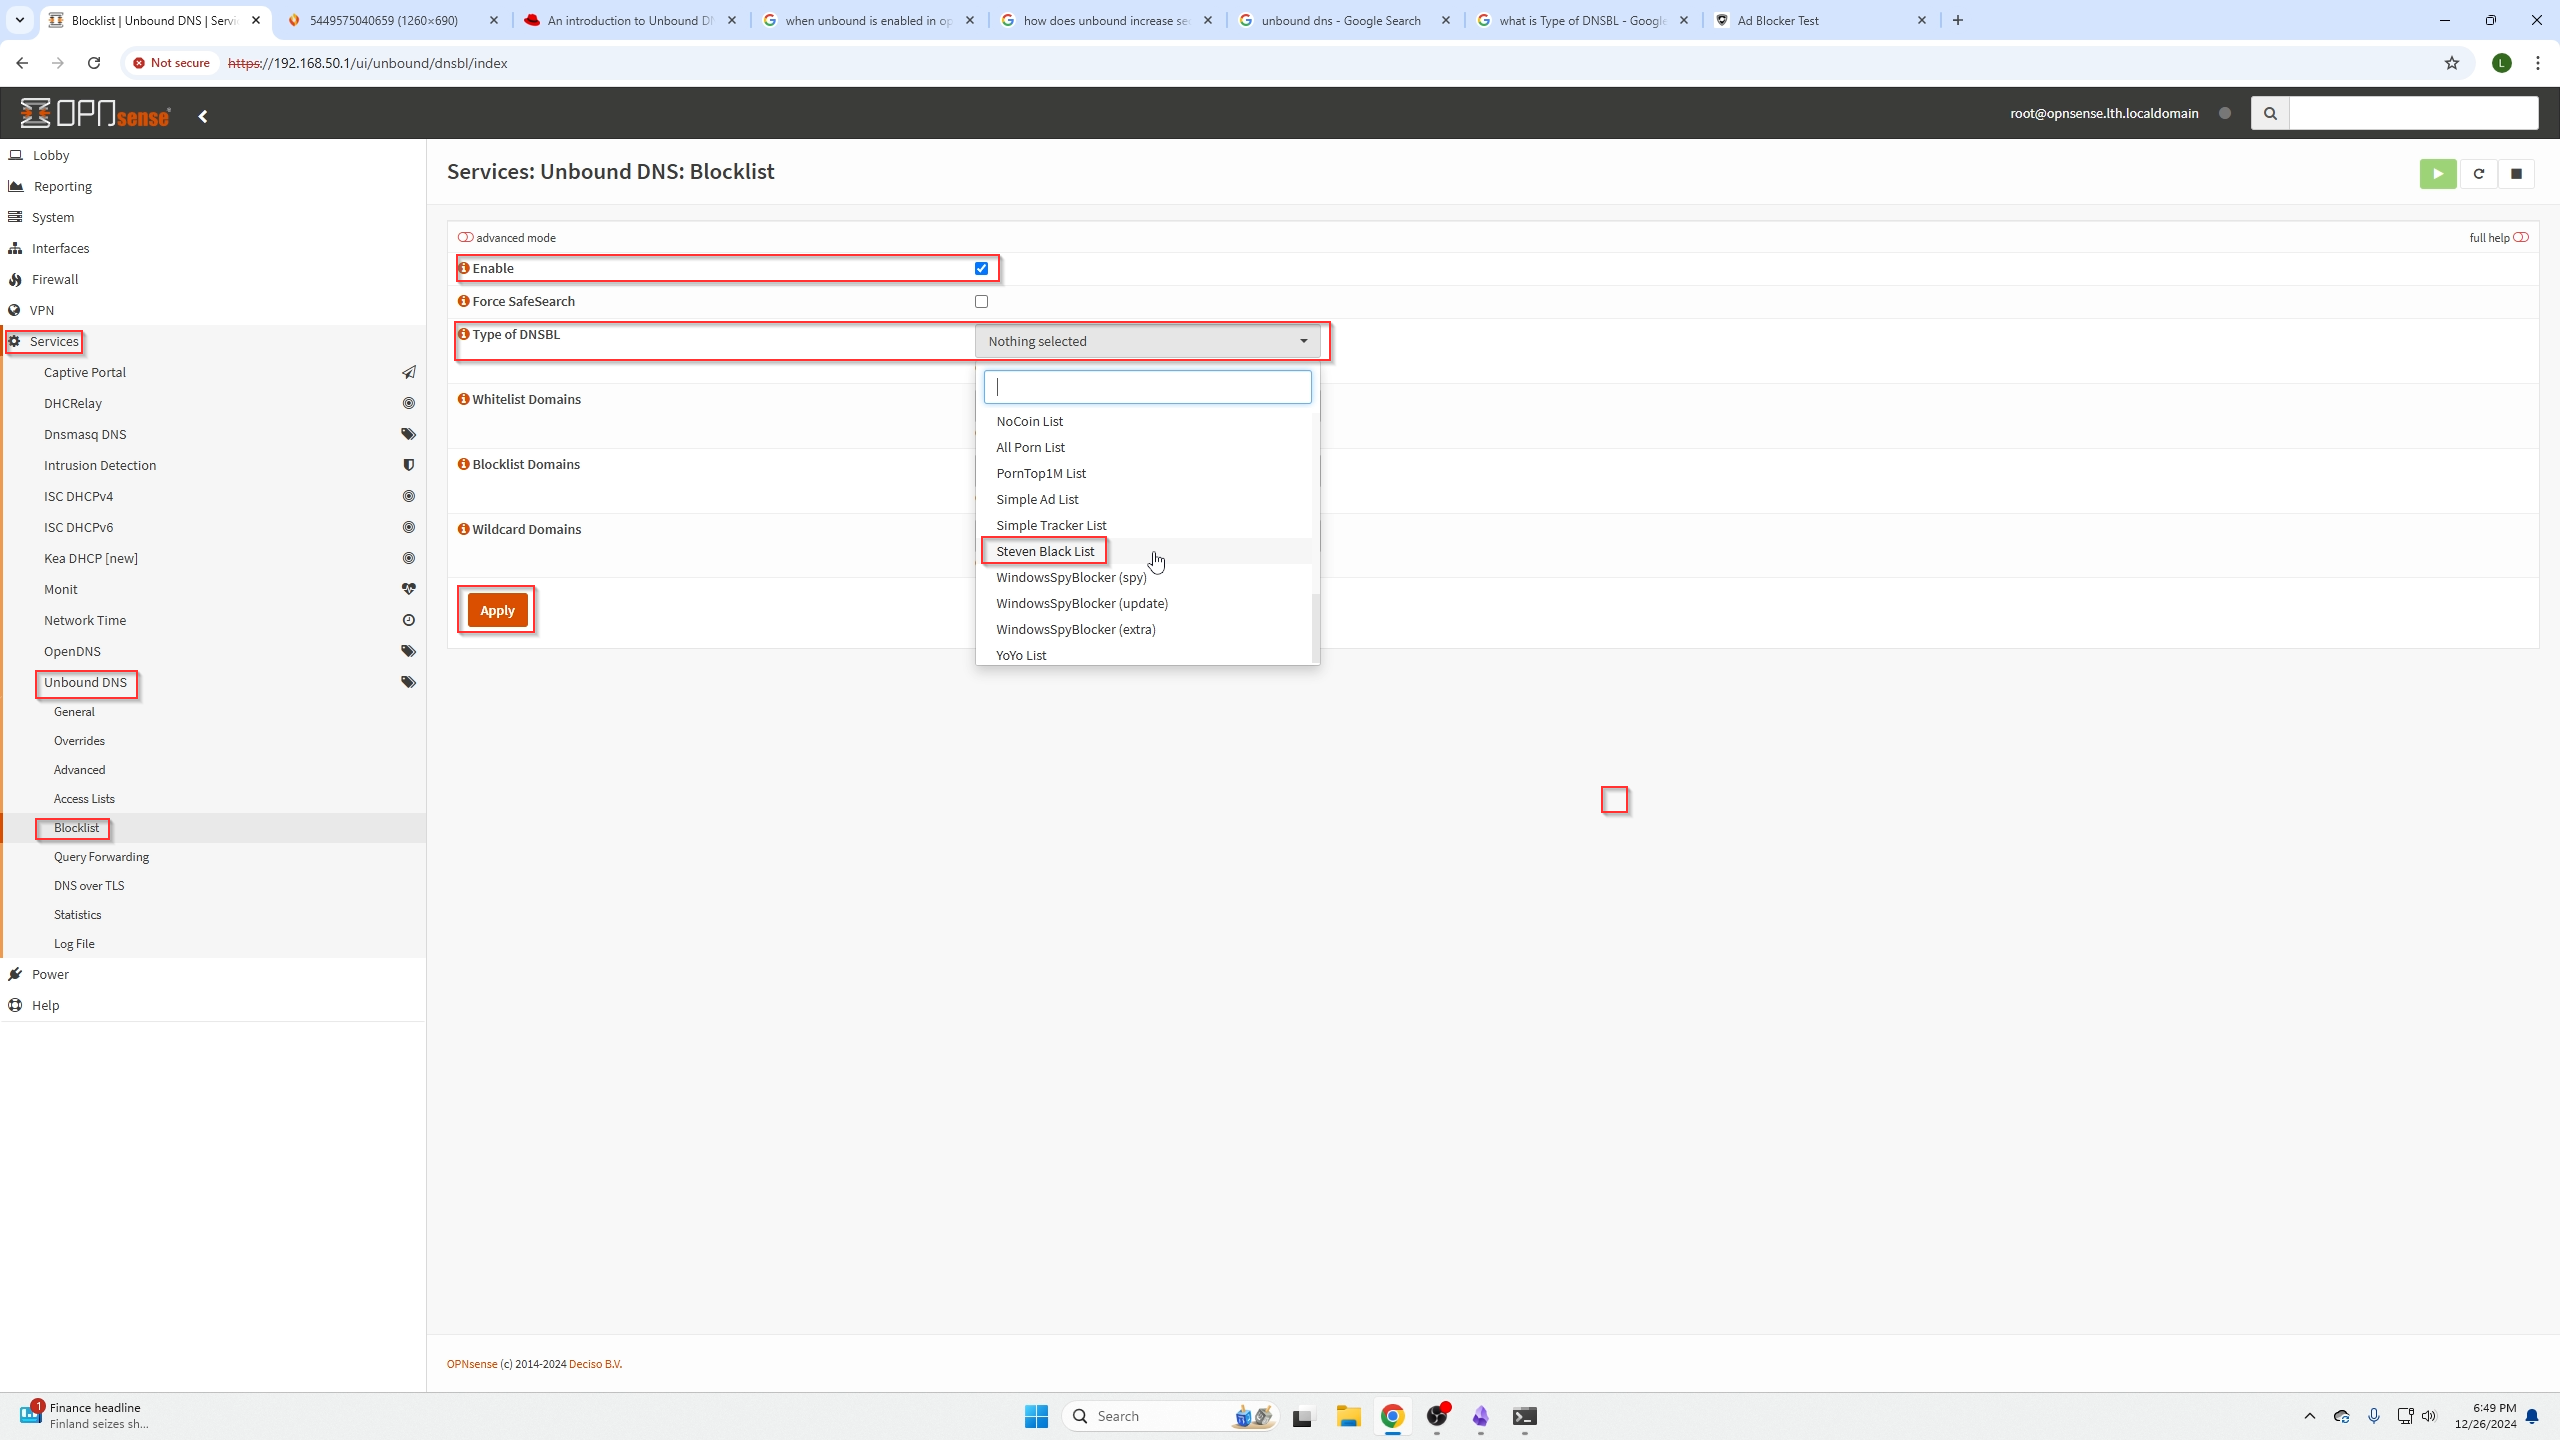
- Next, we need to go into Services / Unbound DNS / Blocklist
- Select Enable to turn Block lists on.
- Select Type of DNSBL and your desired blocklist; in our case, we are going to use (Steven Back List).
- Click Apply.
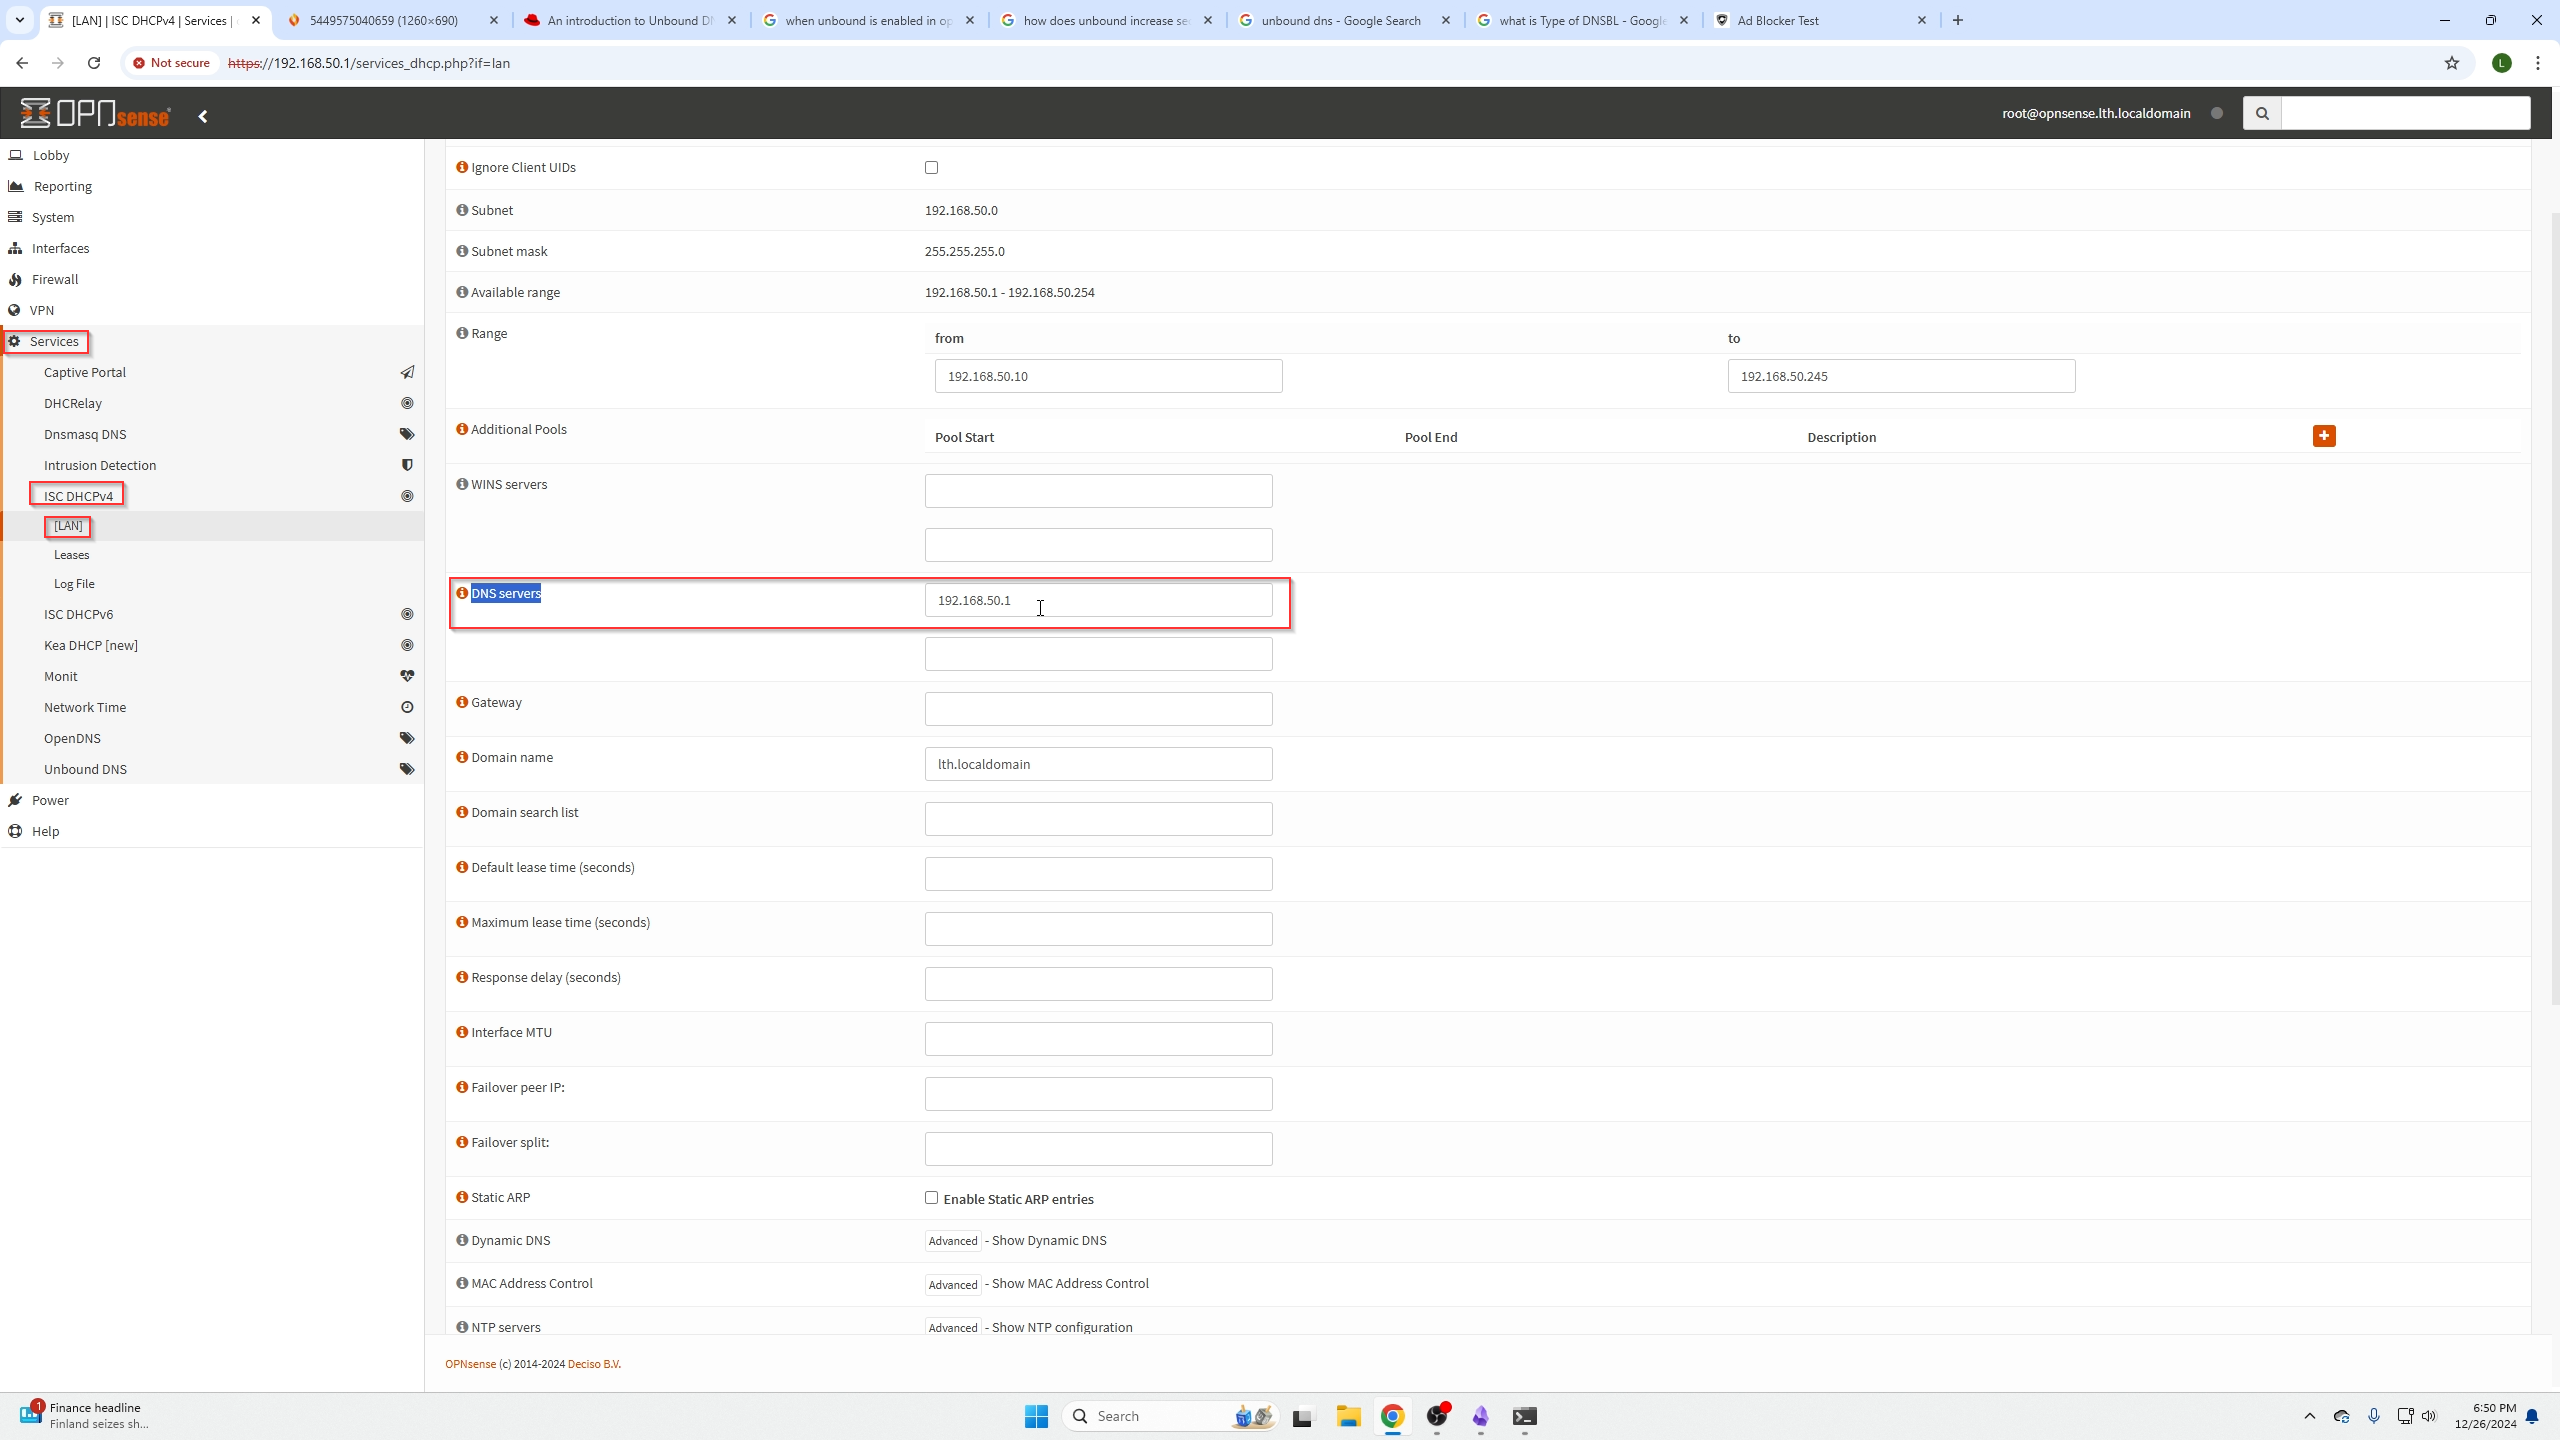
Now we need to change our DNS settings in TWO locations as shown in the following two screenshots. Now that Unbound is handling our DNS requests, we are removing Cloudflare from the picture.
We are going to assign our OPNsense machines IP address to our DNS records now that it is handling the requests.
The two locations you need to assign your OPNsense machines IP address to are:
- Services / ISC DHCPv4 / [LAN]
- System / Settings / General
AND

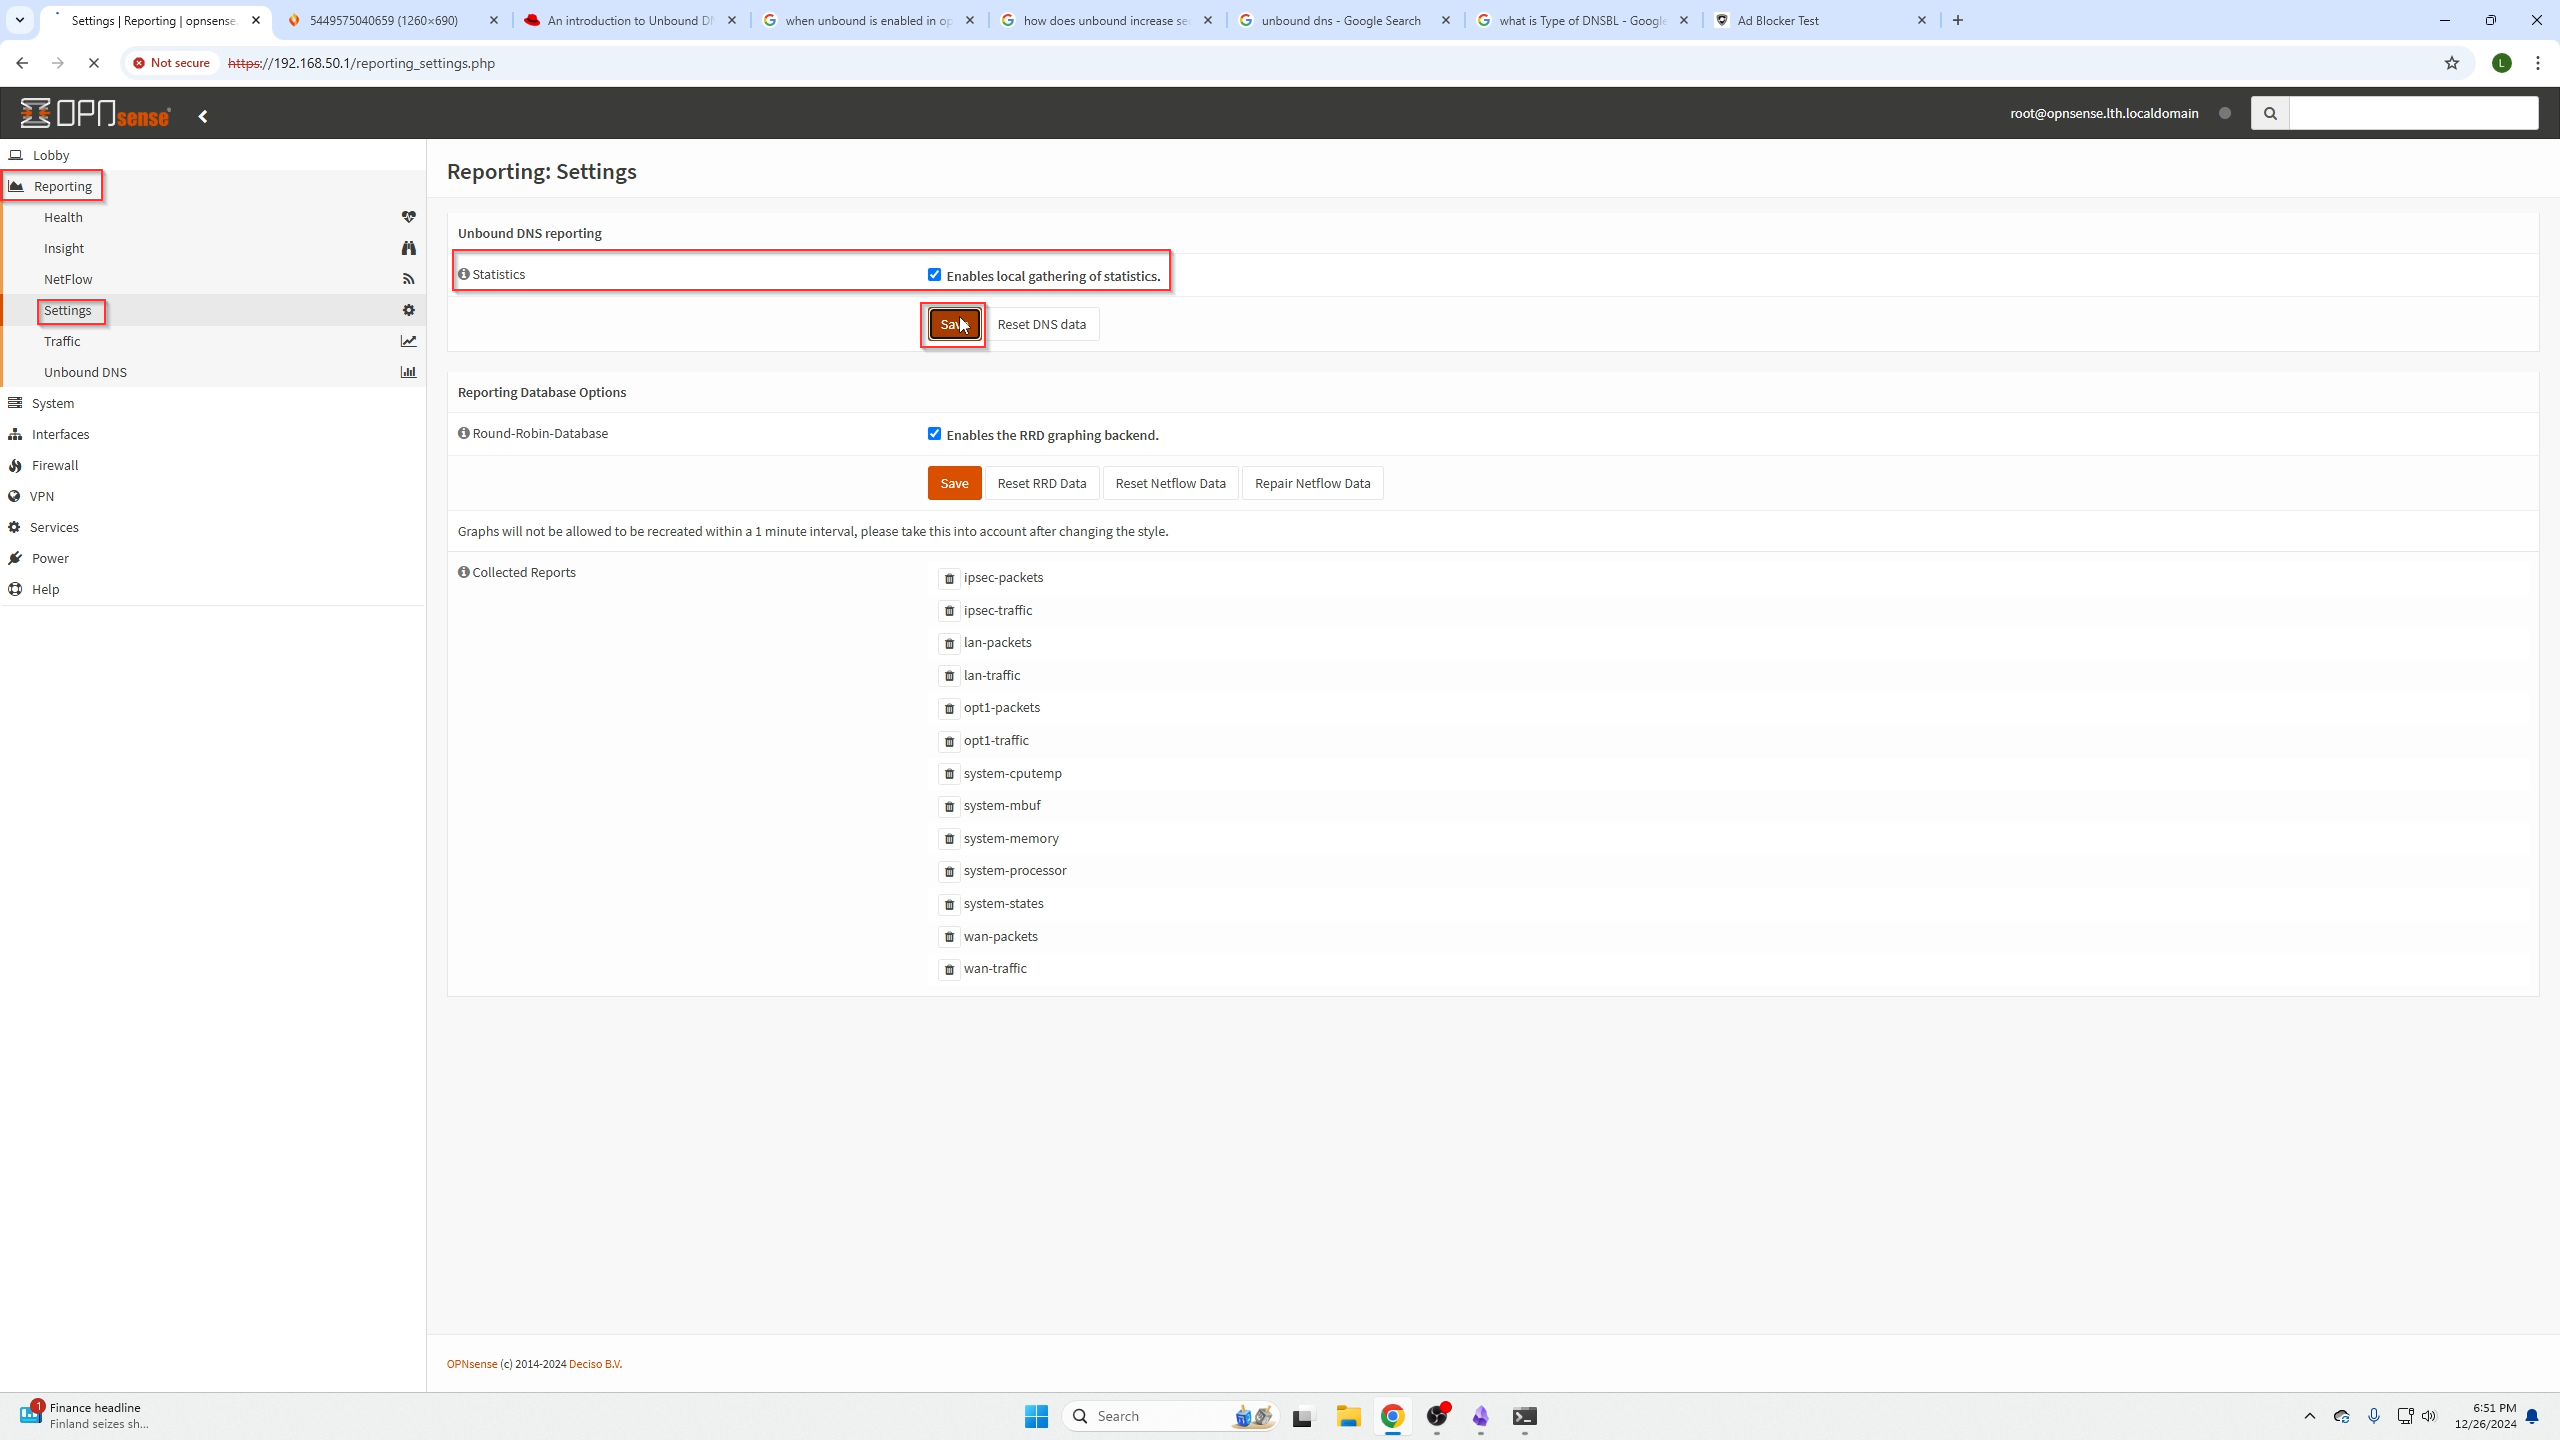
Getting User Stats for Unbound
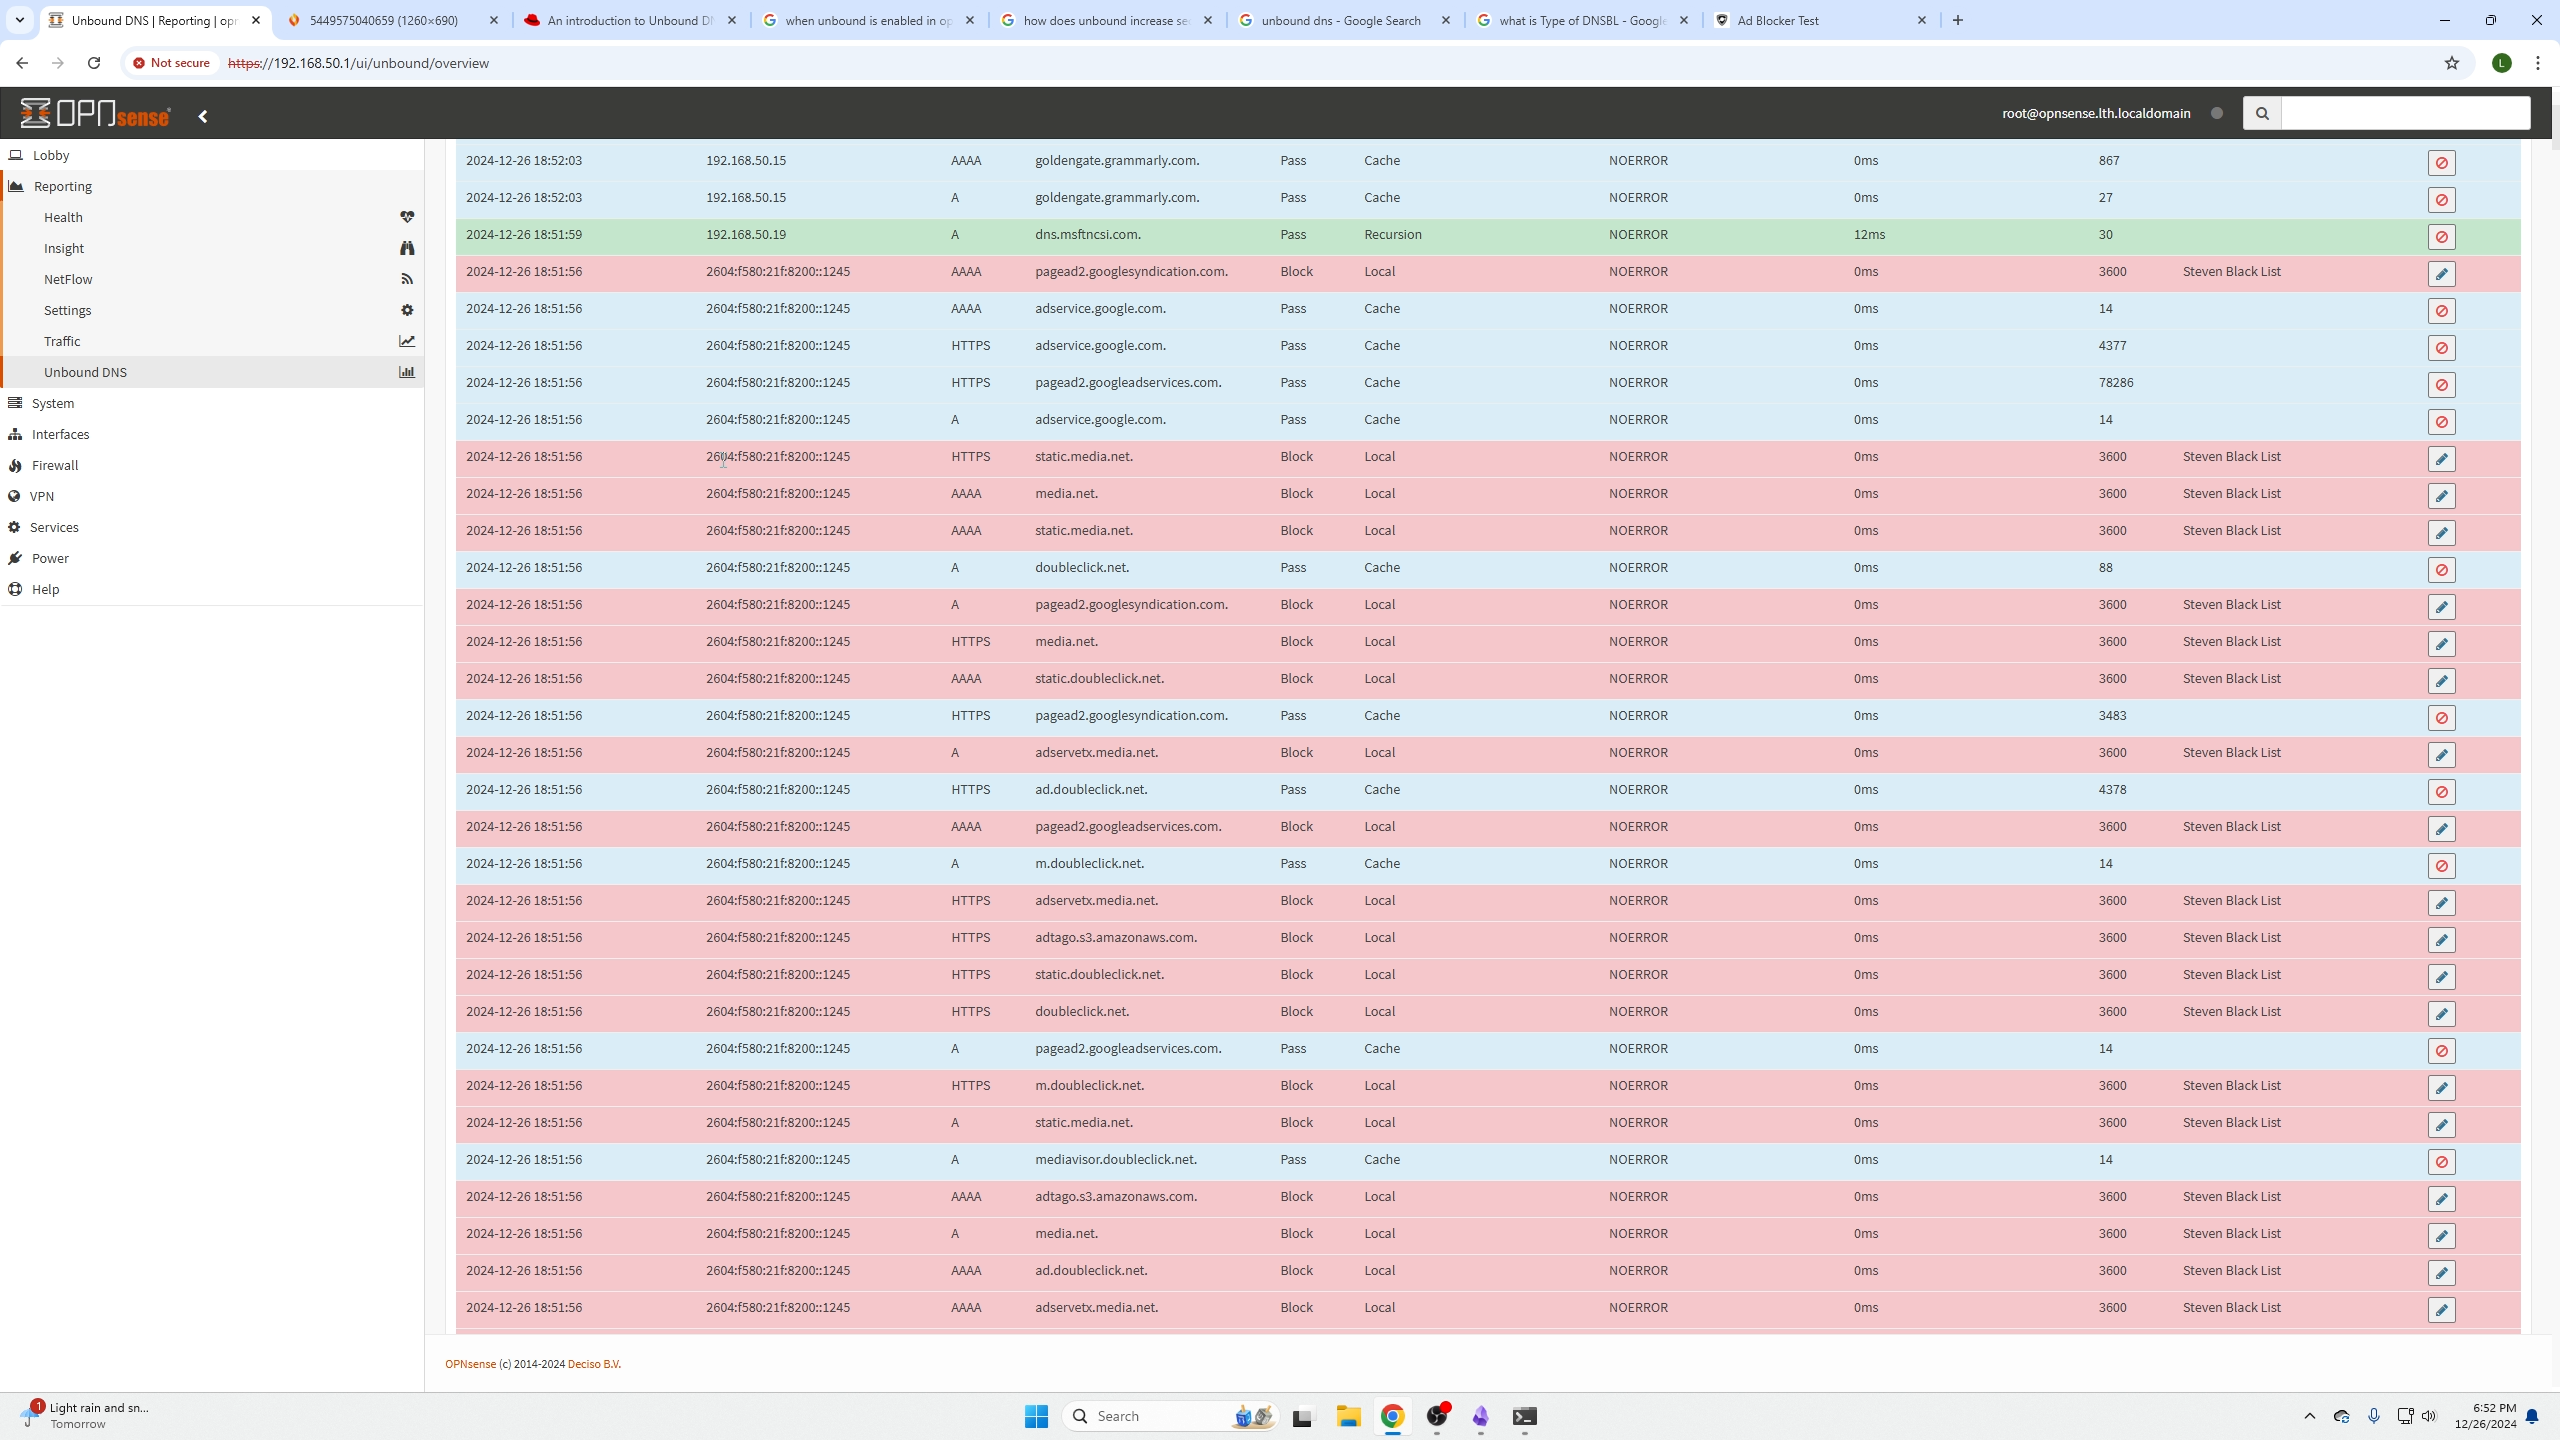
We can verify Unbound is working with ad blocking by enabling Unbound DNS under:
- Reporting / Unbound DNS
and selecting *Go to the reporting configuration.
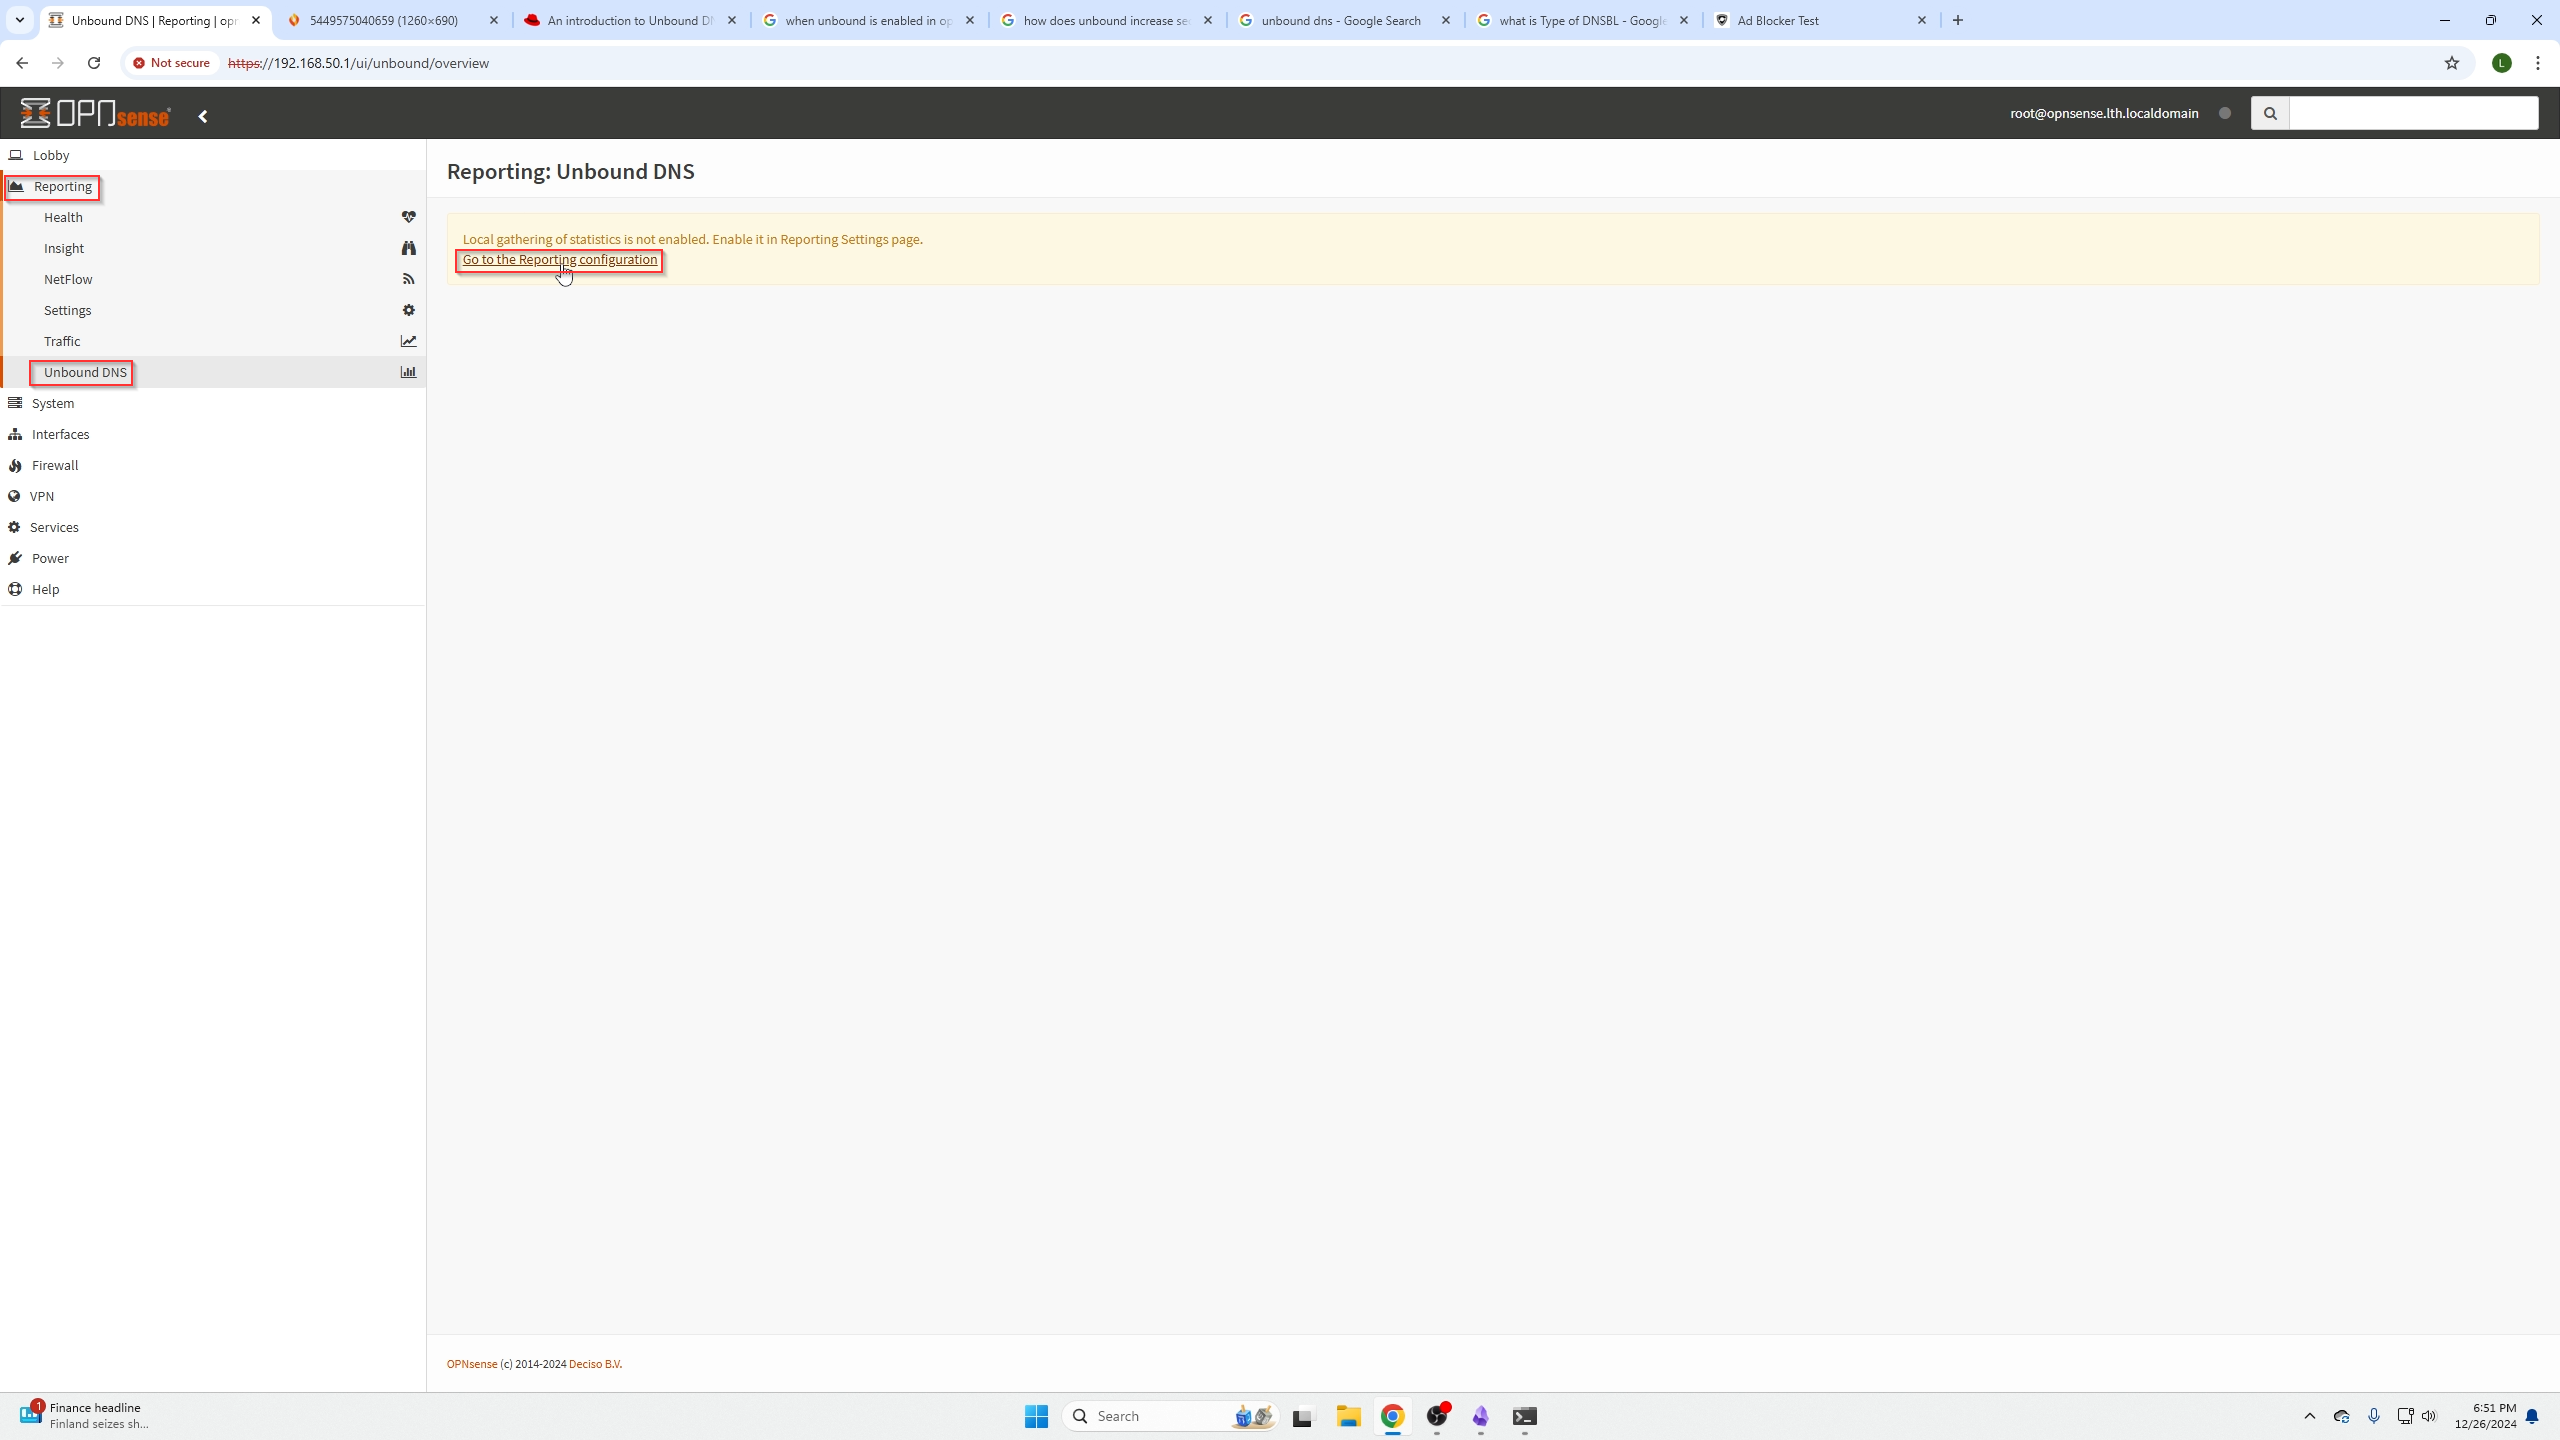
On this screen you will select Enable local gather of Statistics
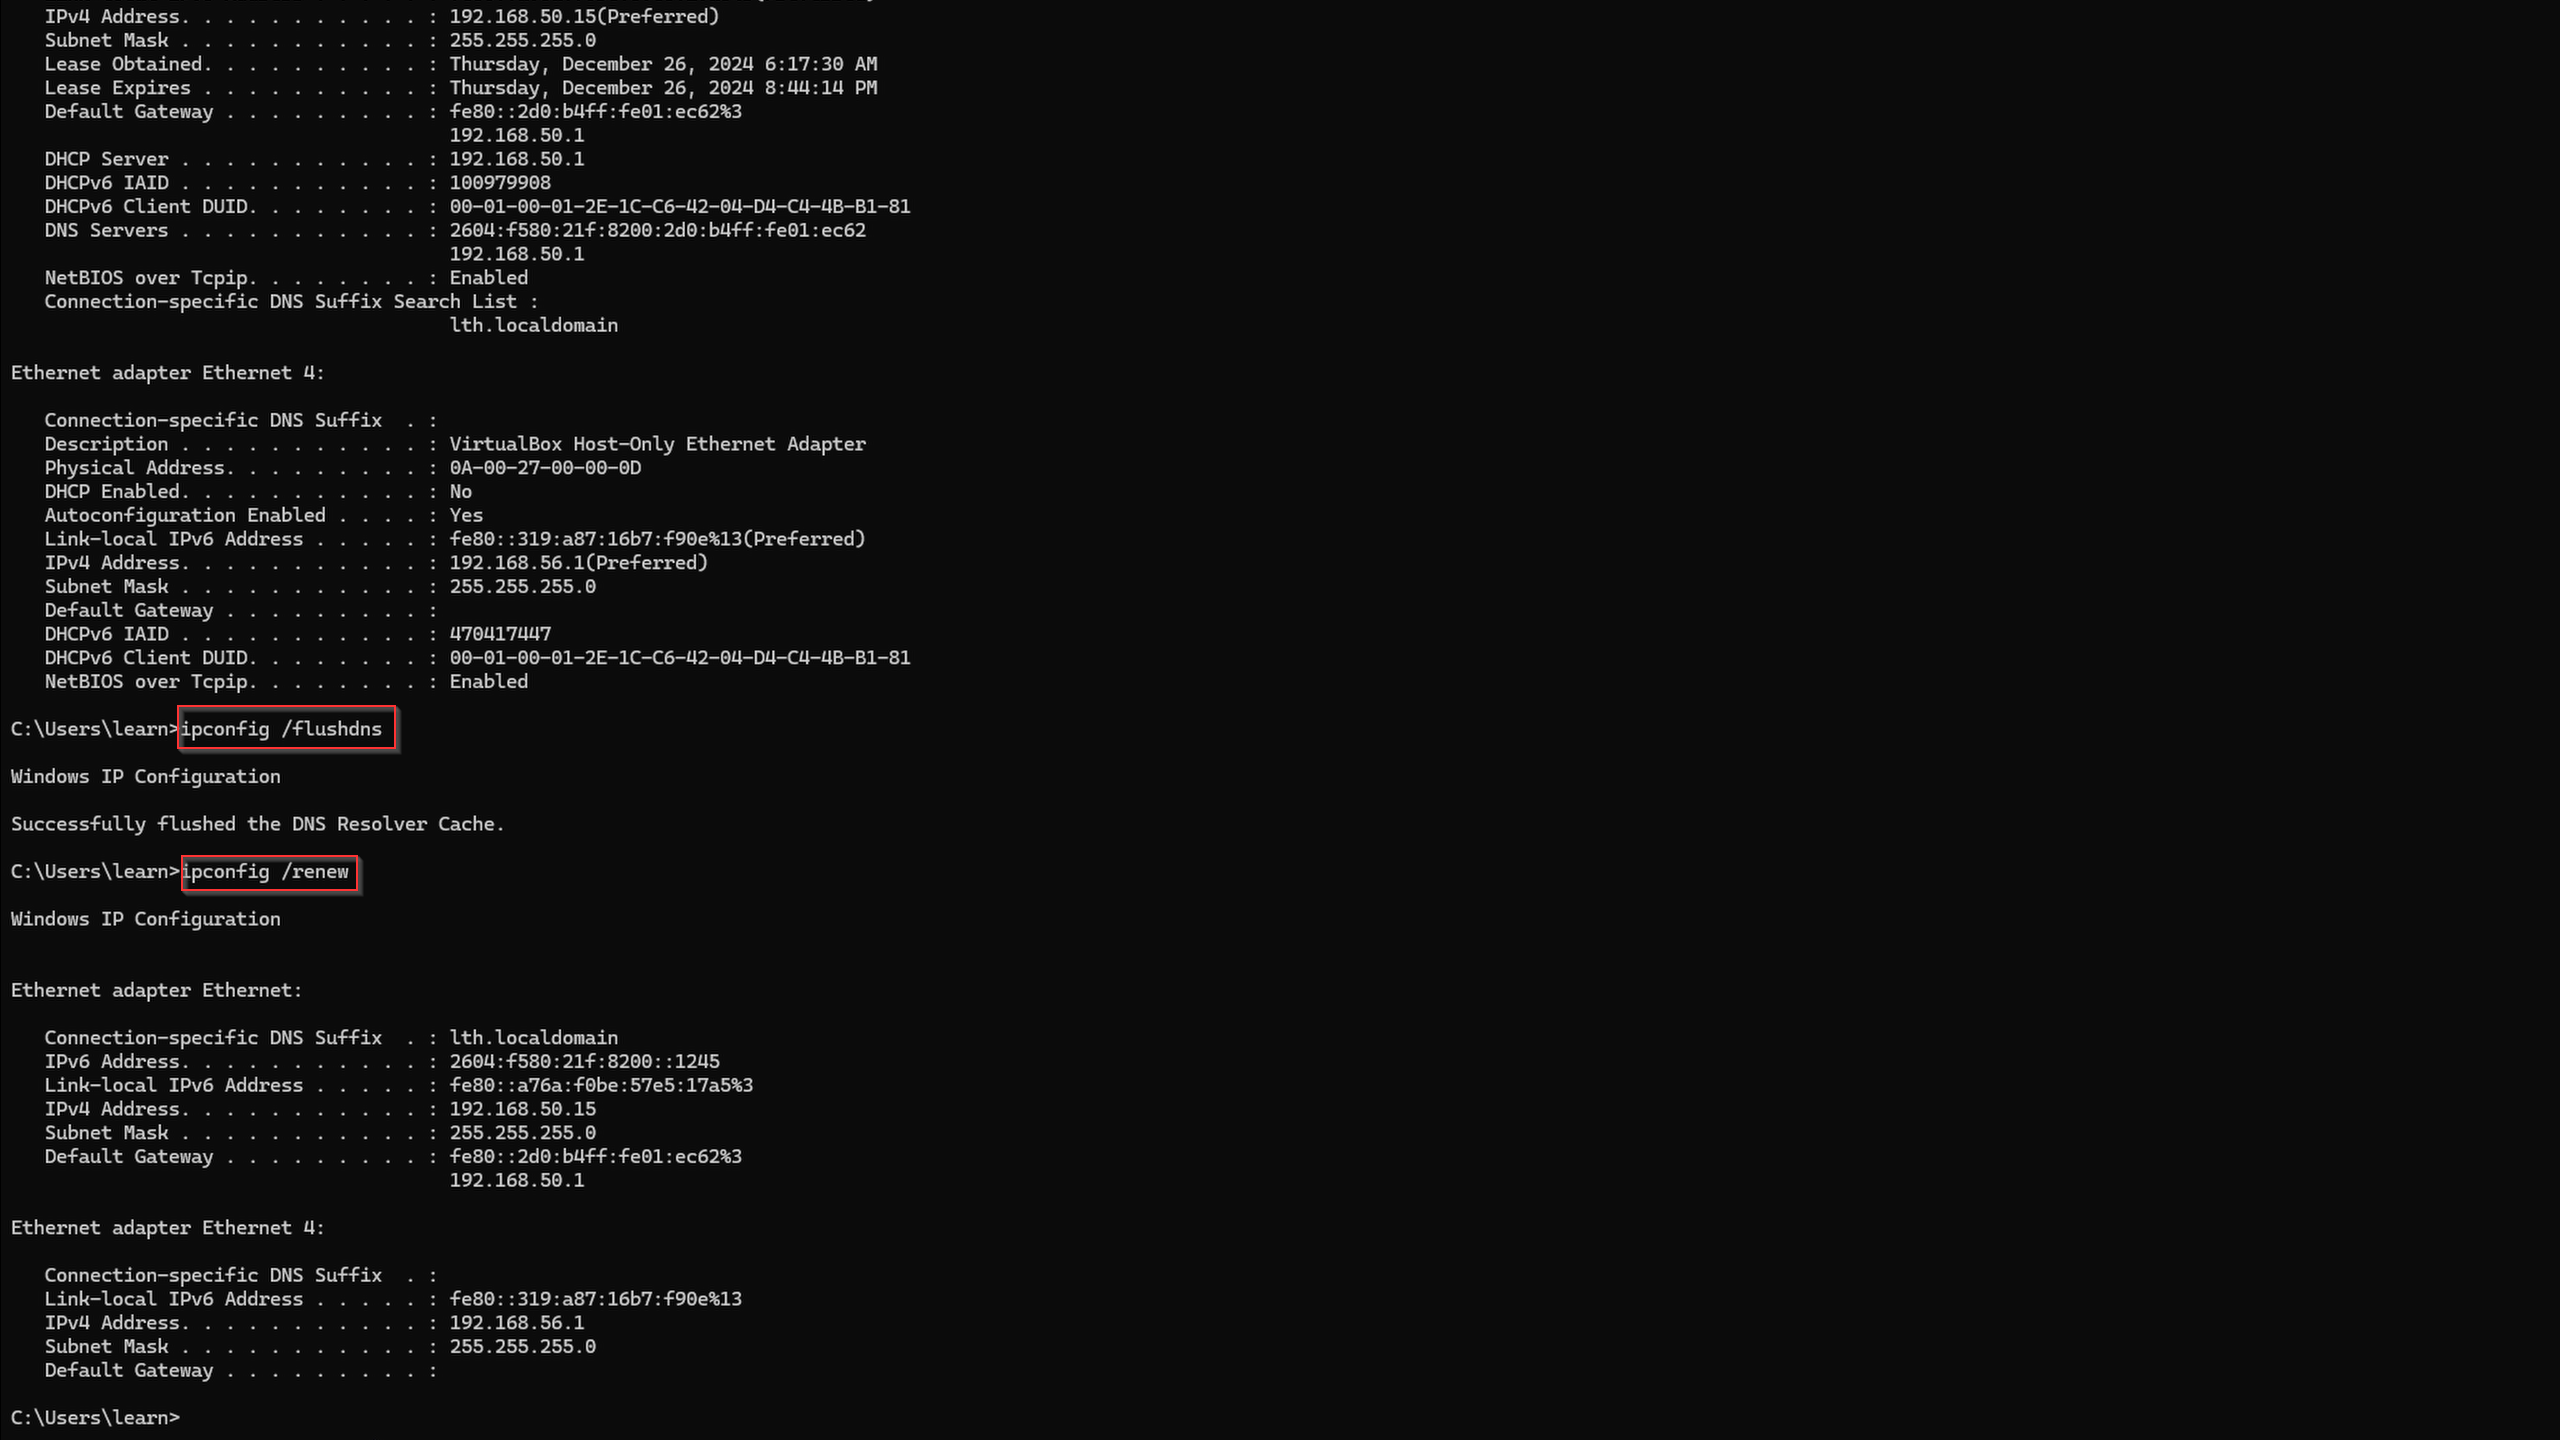
Clearing our DNS records on Windows
DNS across your network will reset to our new DNS IP within 5-20 minutes WITHOUT you doing anything but to quickly verify your setup is correct, you can do the following commands on your host before verifying it works.
We are going to run a ad blocking test from AdminForge which can be found here
You can see we already have a 41% block rate with a single block list, adding more can increase that number!
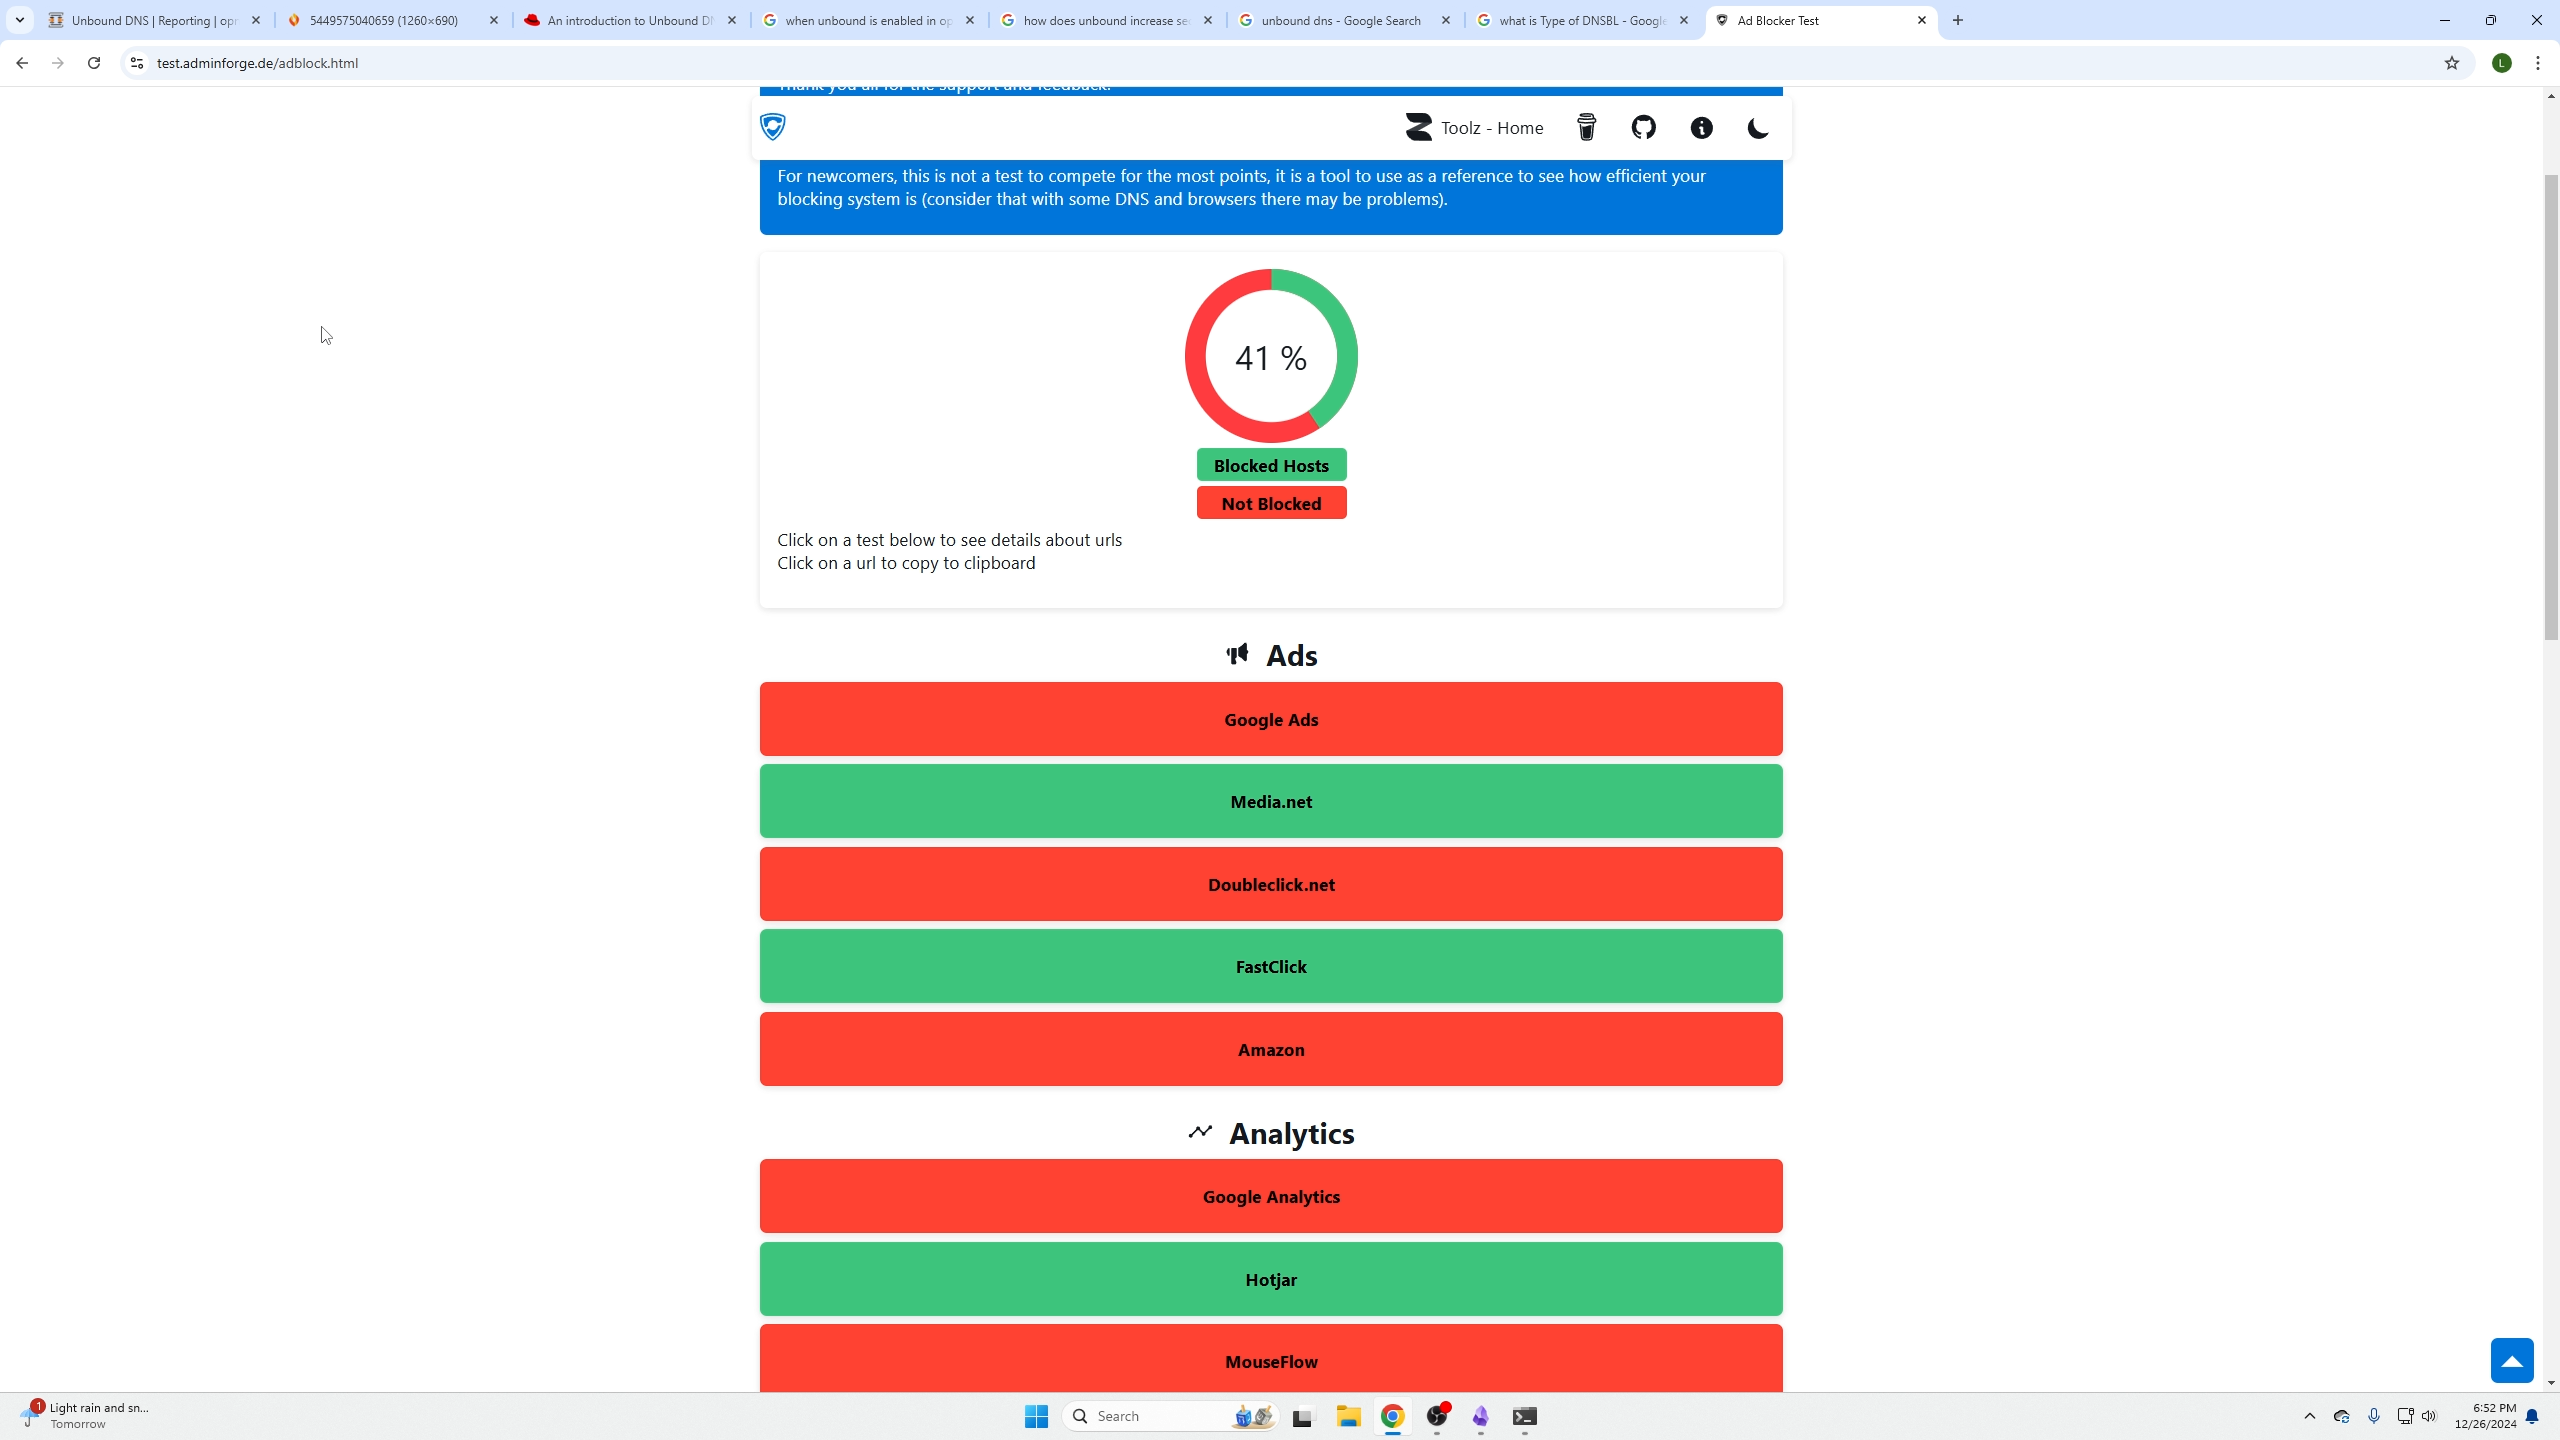
Remember, the more blocklists you add, the higher the chance it could affect your browsing experience or prevent you from accessing sites you would like to.
We can go over to the Reporting / Unbound DNS page, then click the details tab and verify we are getting blocks. If you are, then you have set everything up correctly!