Zabbix Server Install
Zabbix is an open-source monitoring tool that monitors IT infrastructure, including: Networks, Servers, Virtual machines (VMs), Cloud services, Applications, Databases, and Websites
In this episode we will cover how to setup the server side of Zabbix and in the followin episode/article we will show you the agent side.
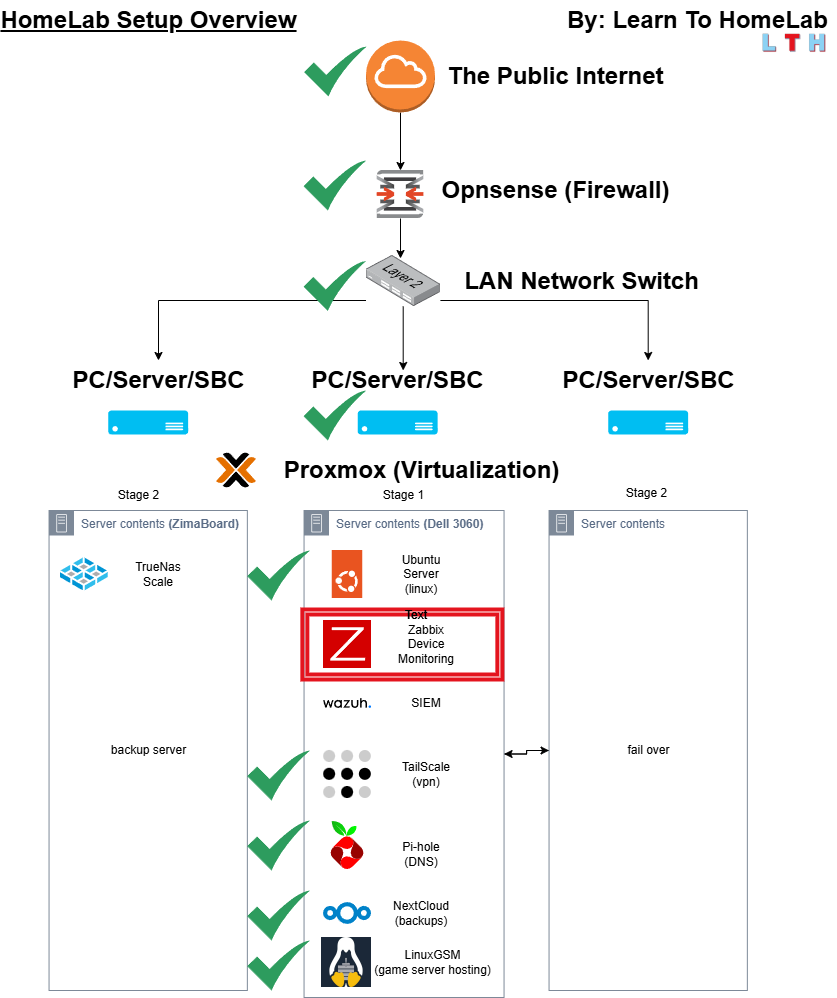
Our Homelab Topology
The Order of Commands
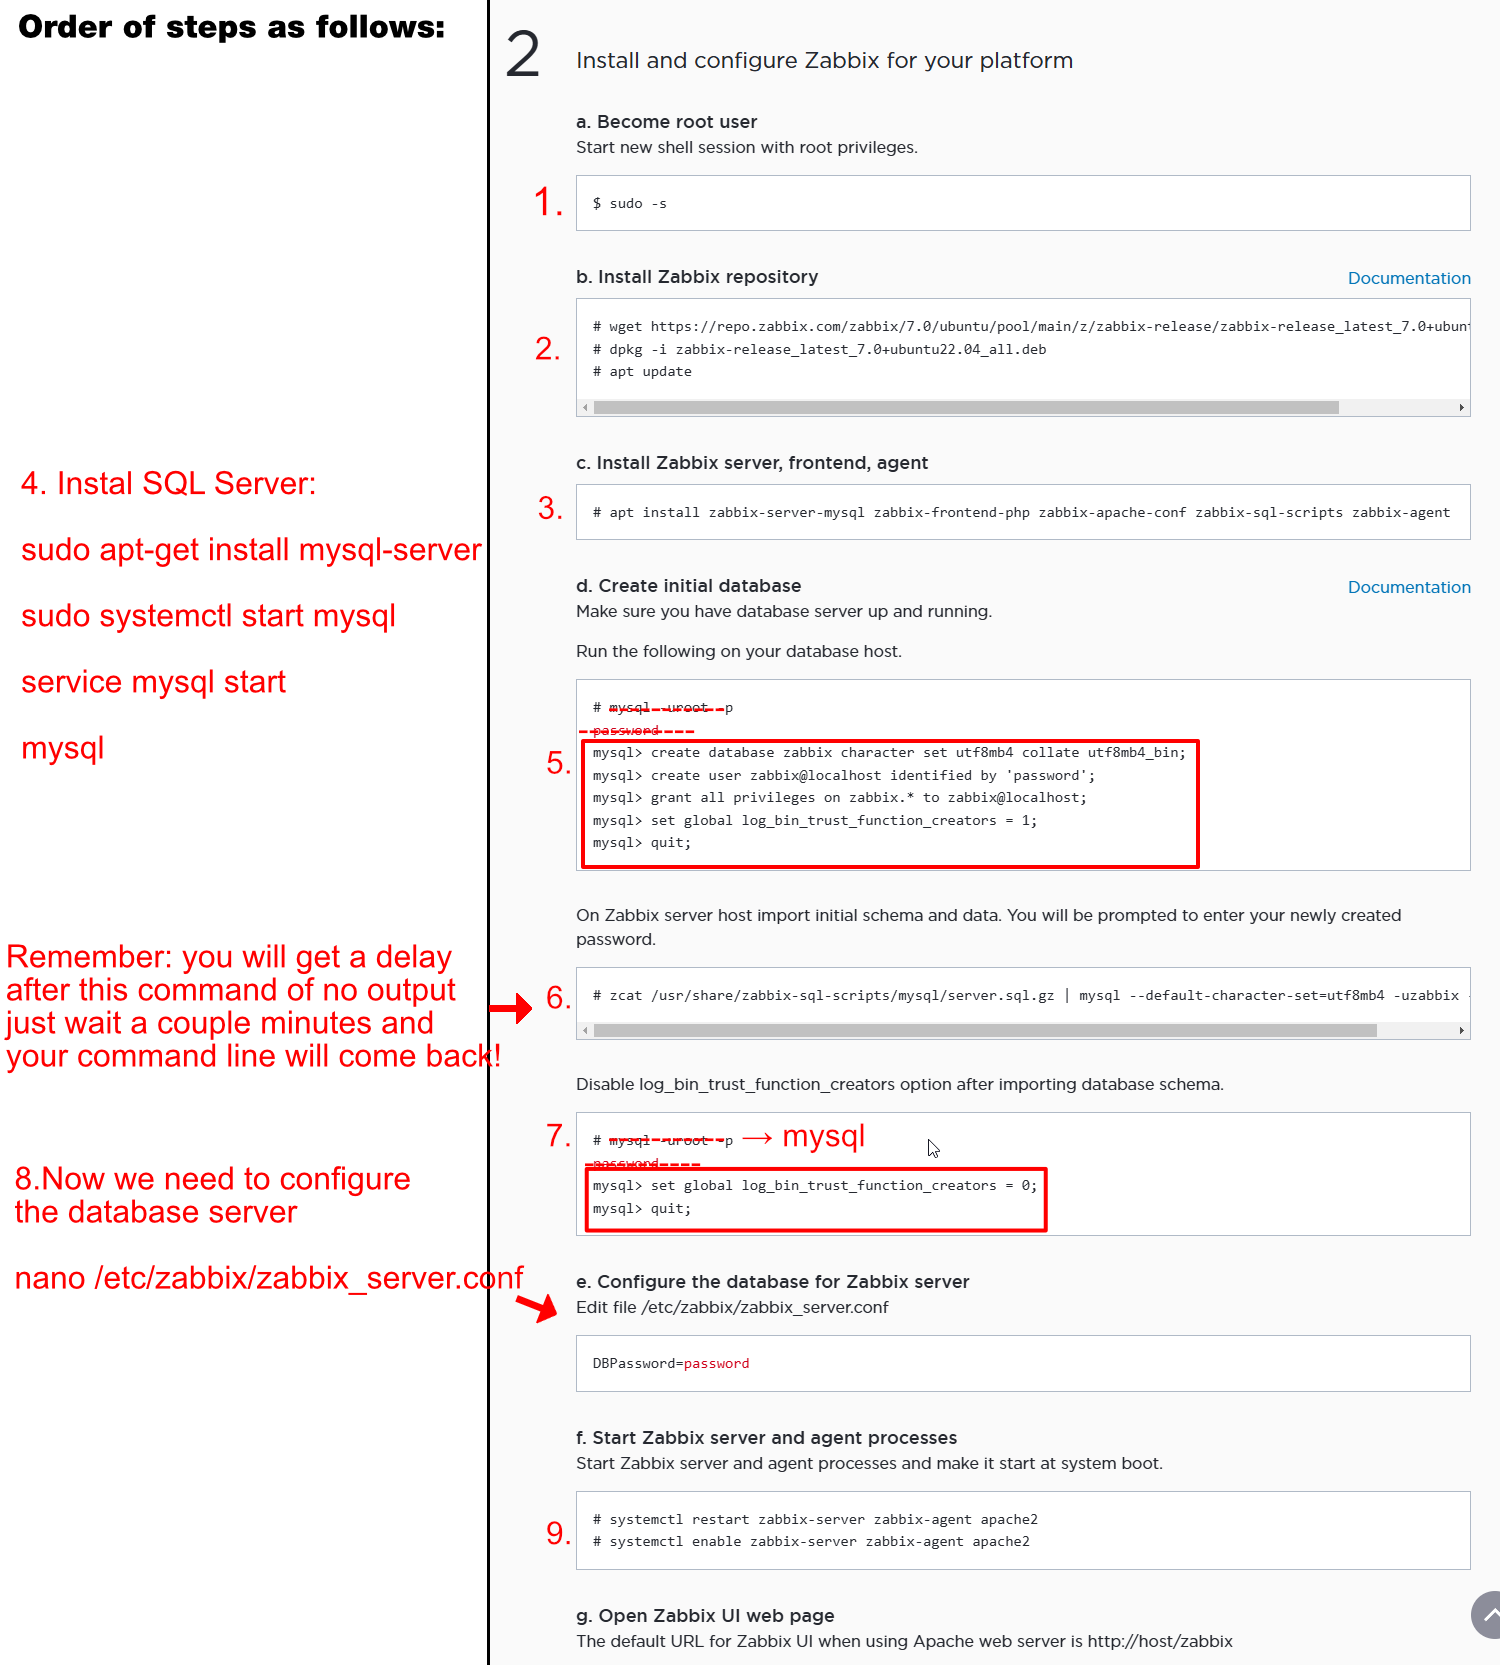
List of commands used
If you do not care about the screenshots, here is a list of commands used!
Some commands MAY change usually just step 2 based on the current version of Zabbix. All other commands should work though.
Install zabbix Commands:
Link to Zabbix's site and the commands can be found here
wget https://repo.zabbix.com/zabbix/7.0/ubuntu/pool/main/z/zabbix-release/zabbix-release_latest_7.0+ubuntu22.04_all.deb
apt install zabbix-server-mysql zabbix-frontend-php zabbix-apache-conf zabbix-sql-scripts zabbix-agent
Install SQL server
installs mySQL
Starts mySQL on boot start it then doCreate the database
Formats the database type to a the format Zabbix can understand (utf8mb4) With this one thepassword section is where you assign your database password
Giving your user access to read and write to this database
Set trust for the database
Exit mySQL
wait a couple minutes after doing the following command, the script takes awhile to work. You won't see any output for a couple minutes
zcat /usr/share/zabbix-sql-scripts/mysql/server.sql.gz | mysql --default-character-set=utf8mb4 -uzabbix -p zabbix
Go back into mySQL
then go into the following config file and update the section (DBPassword=) section with the password you set earlier. It will be under the Database user=Zabbix section.
Start the services with the following commands:
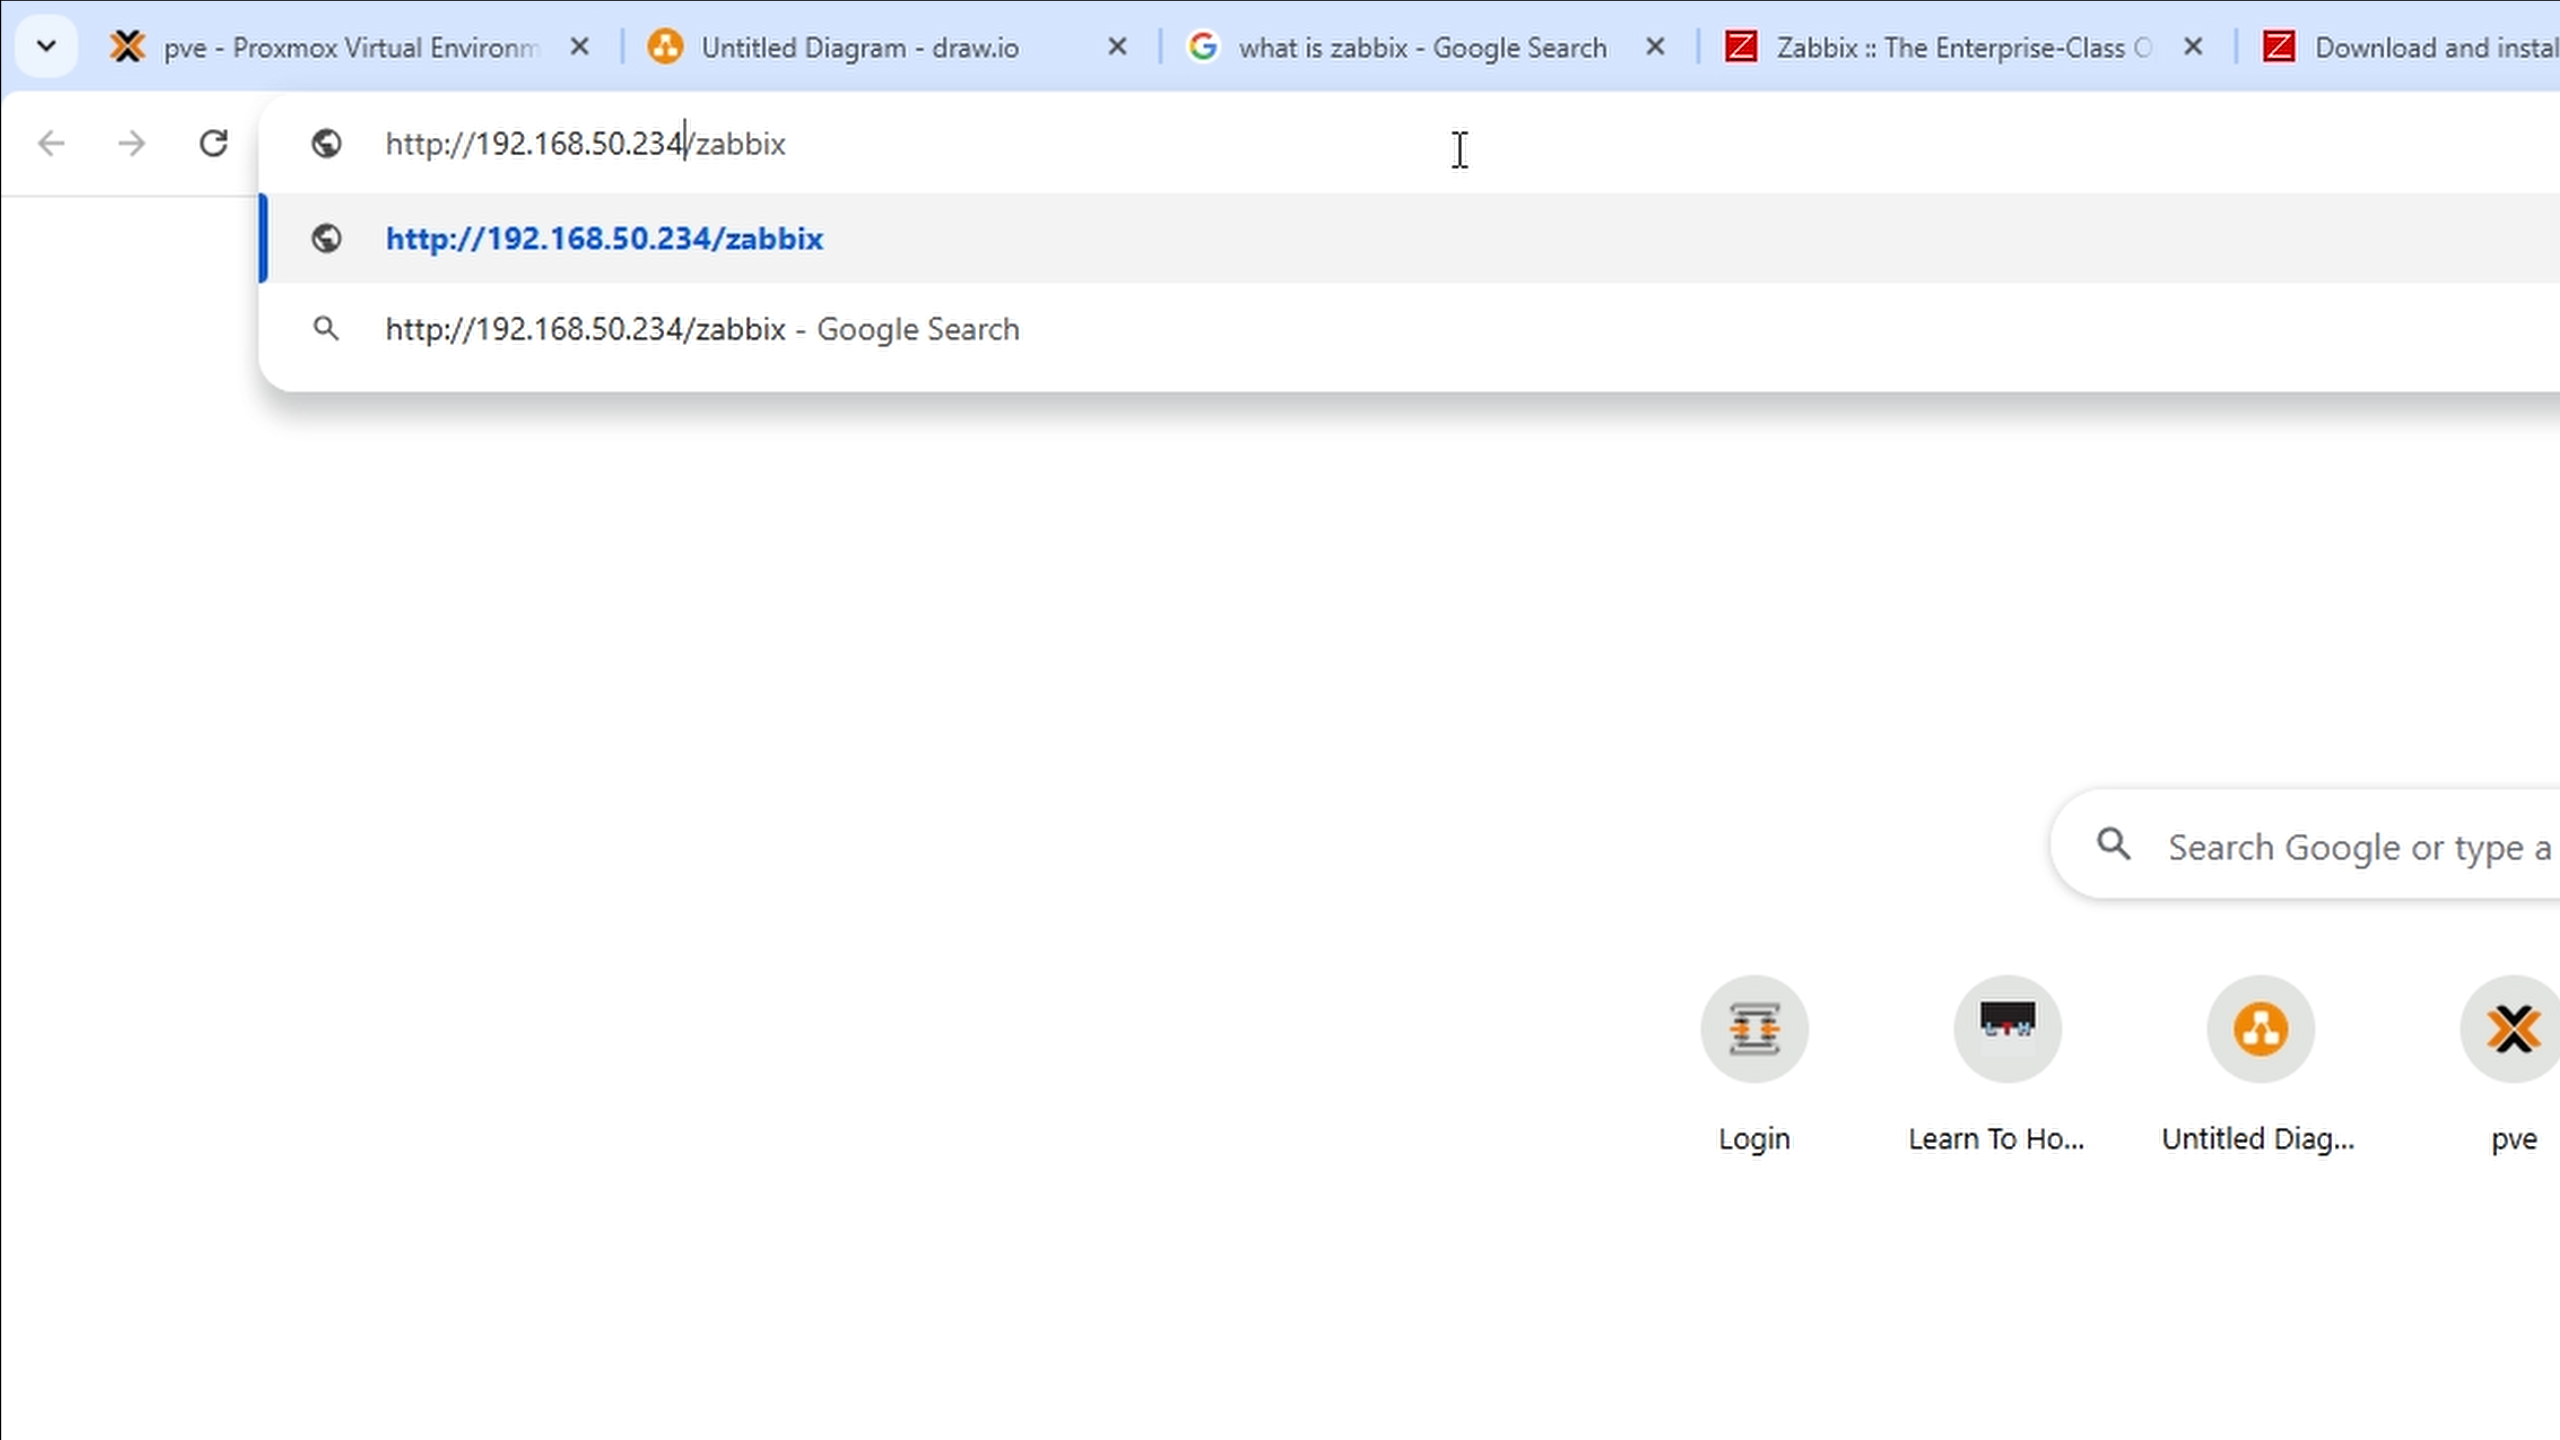
Now you can go to your Zabbix servers URL with the following format:
Walkthrough
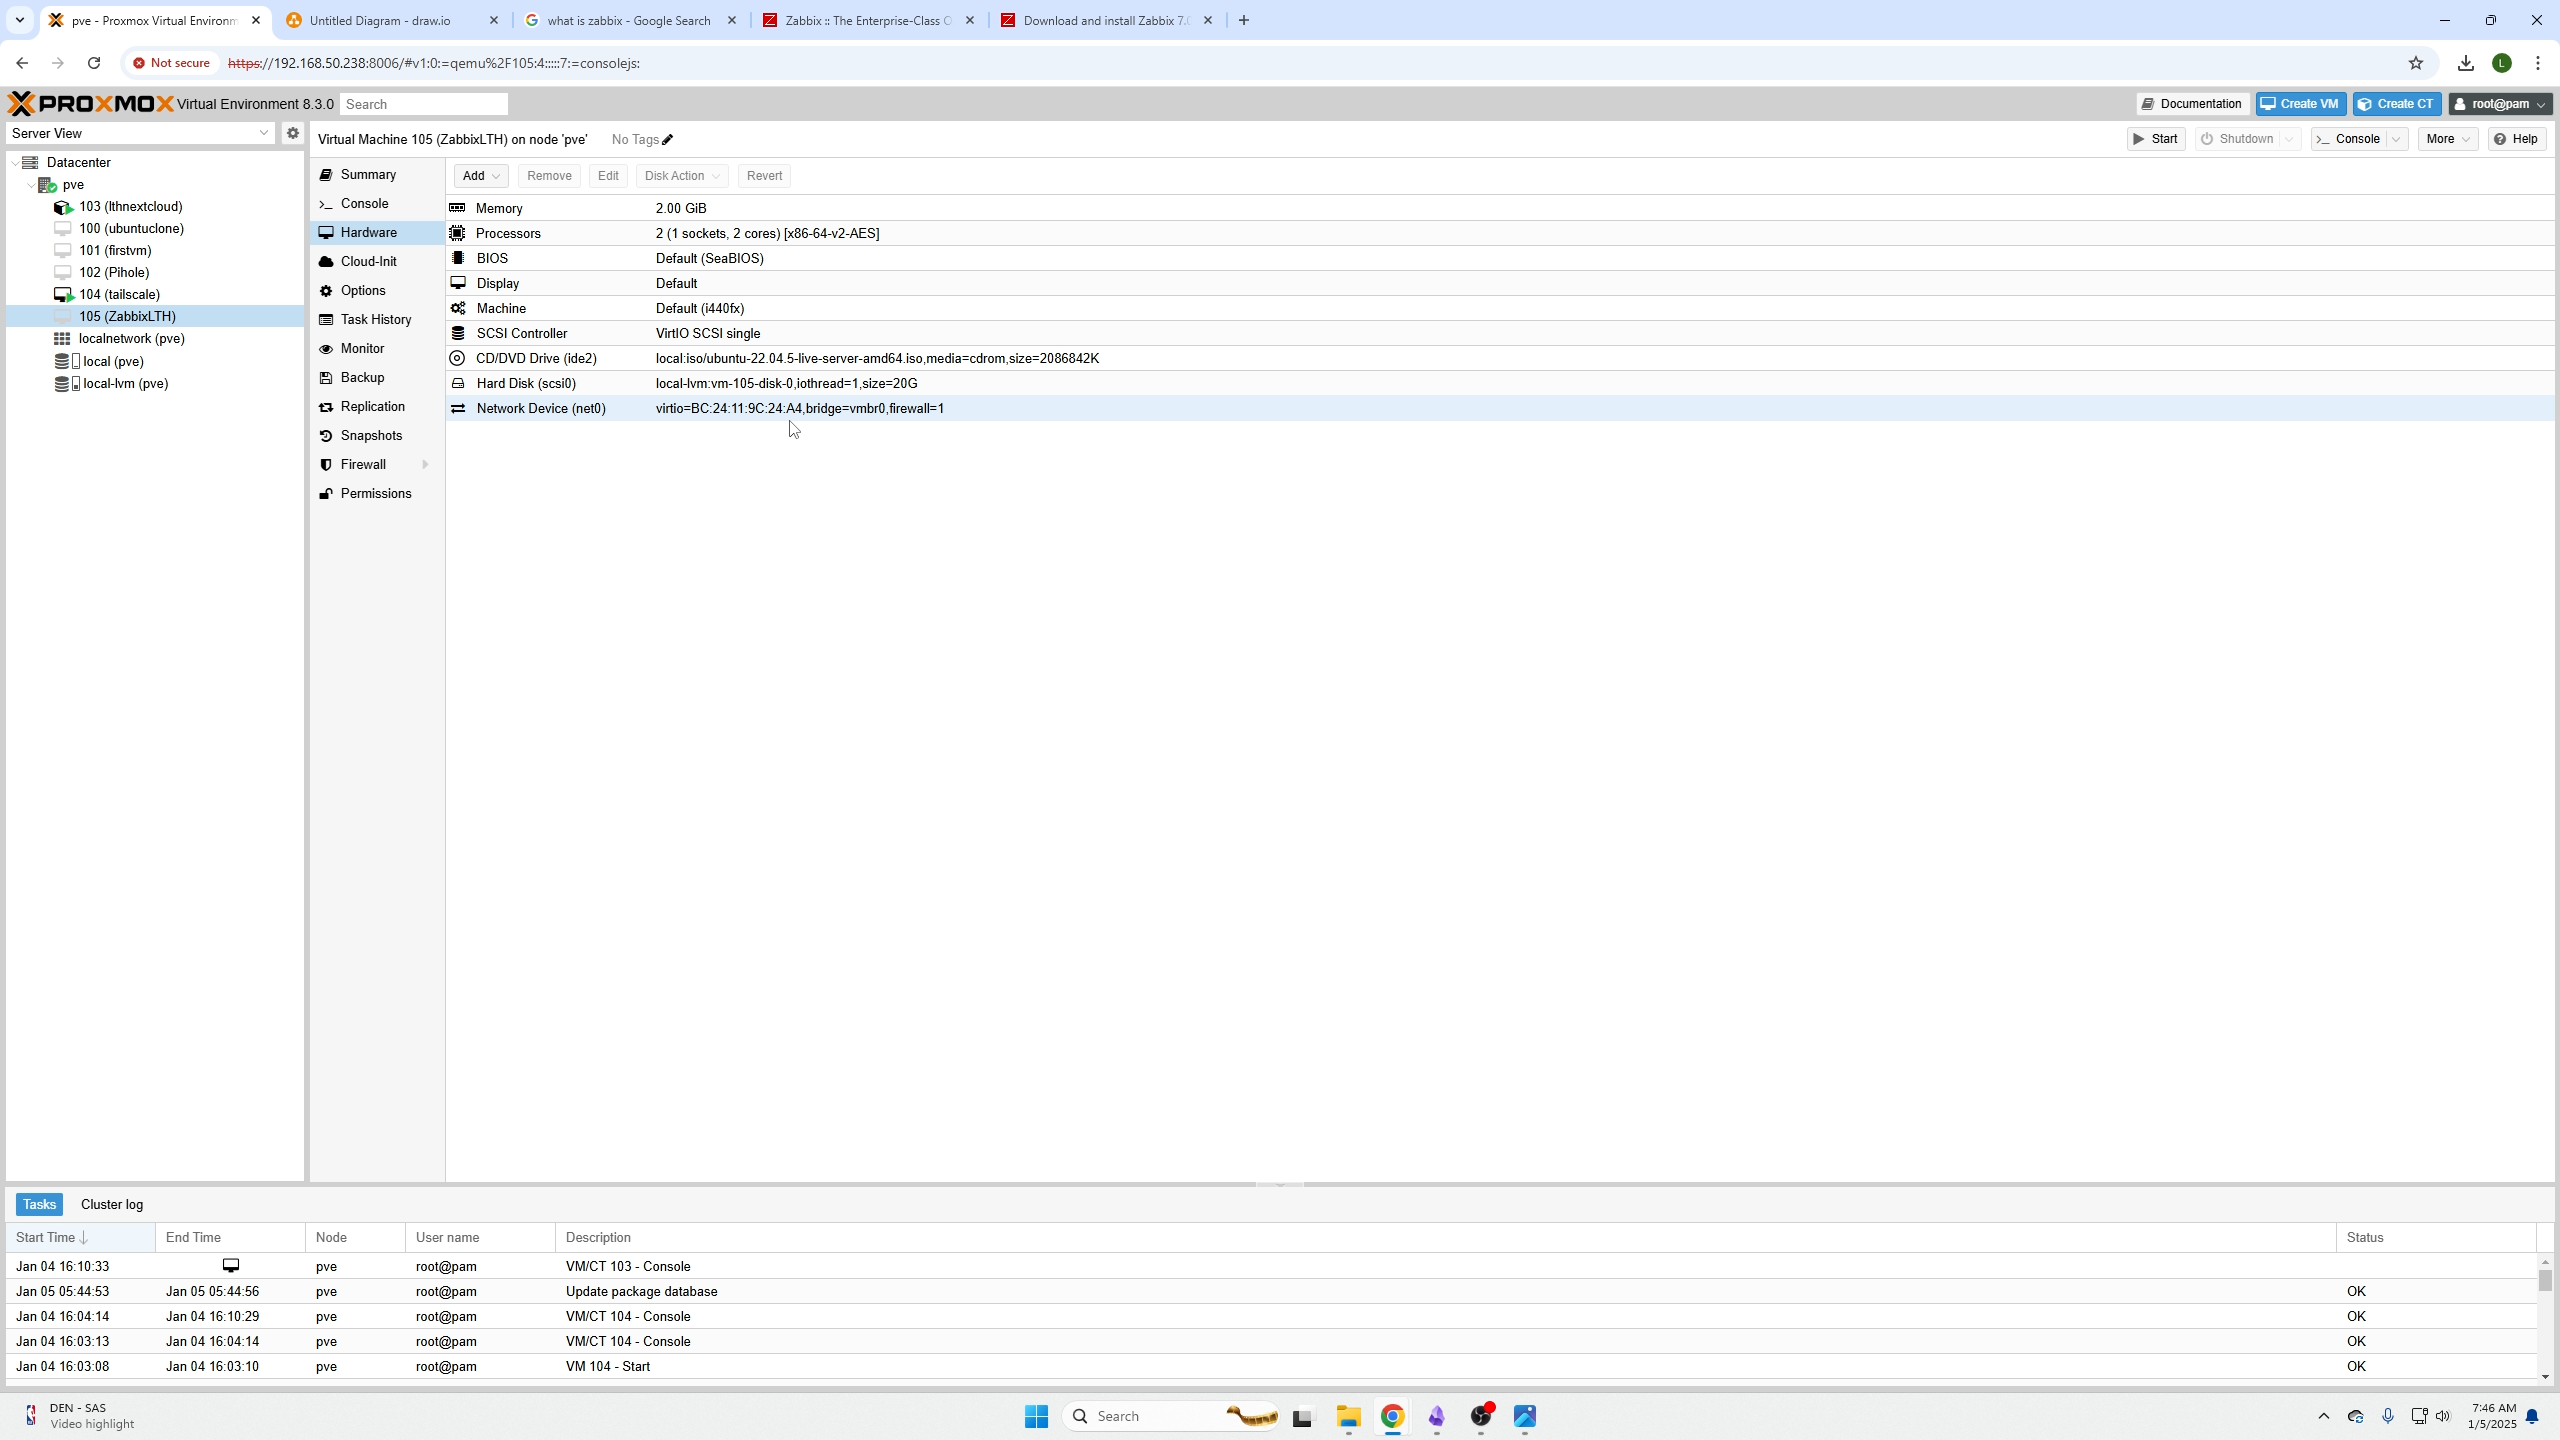
Create a virutal machine for your Zabbix server. We used 2 cores, 2gb of RAM, and 20gb of storage on an Ubuntu Linux ISO 22.04 Jammy. Here is the ISO
First go to Zabbix's site and grab the current version of Zabbix you are downloading, this is very important specifically for step 2 as shown under the order of commands section. Go here

Now go ahead and login (SSH) to your freshly created VM for the Zabbix Server
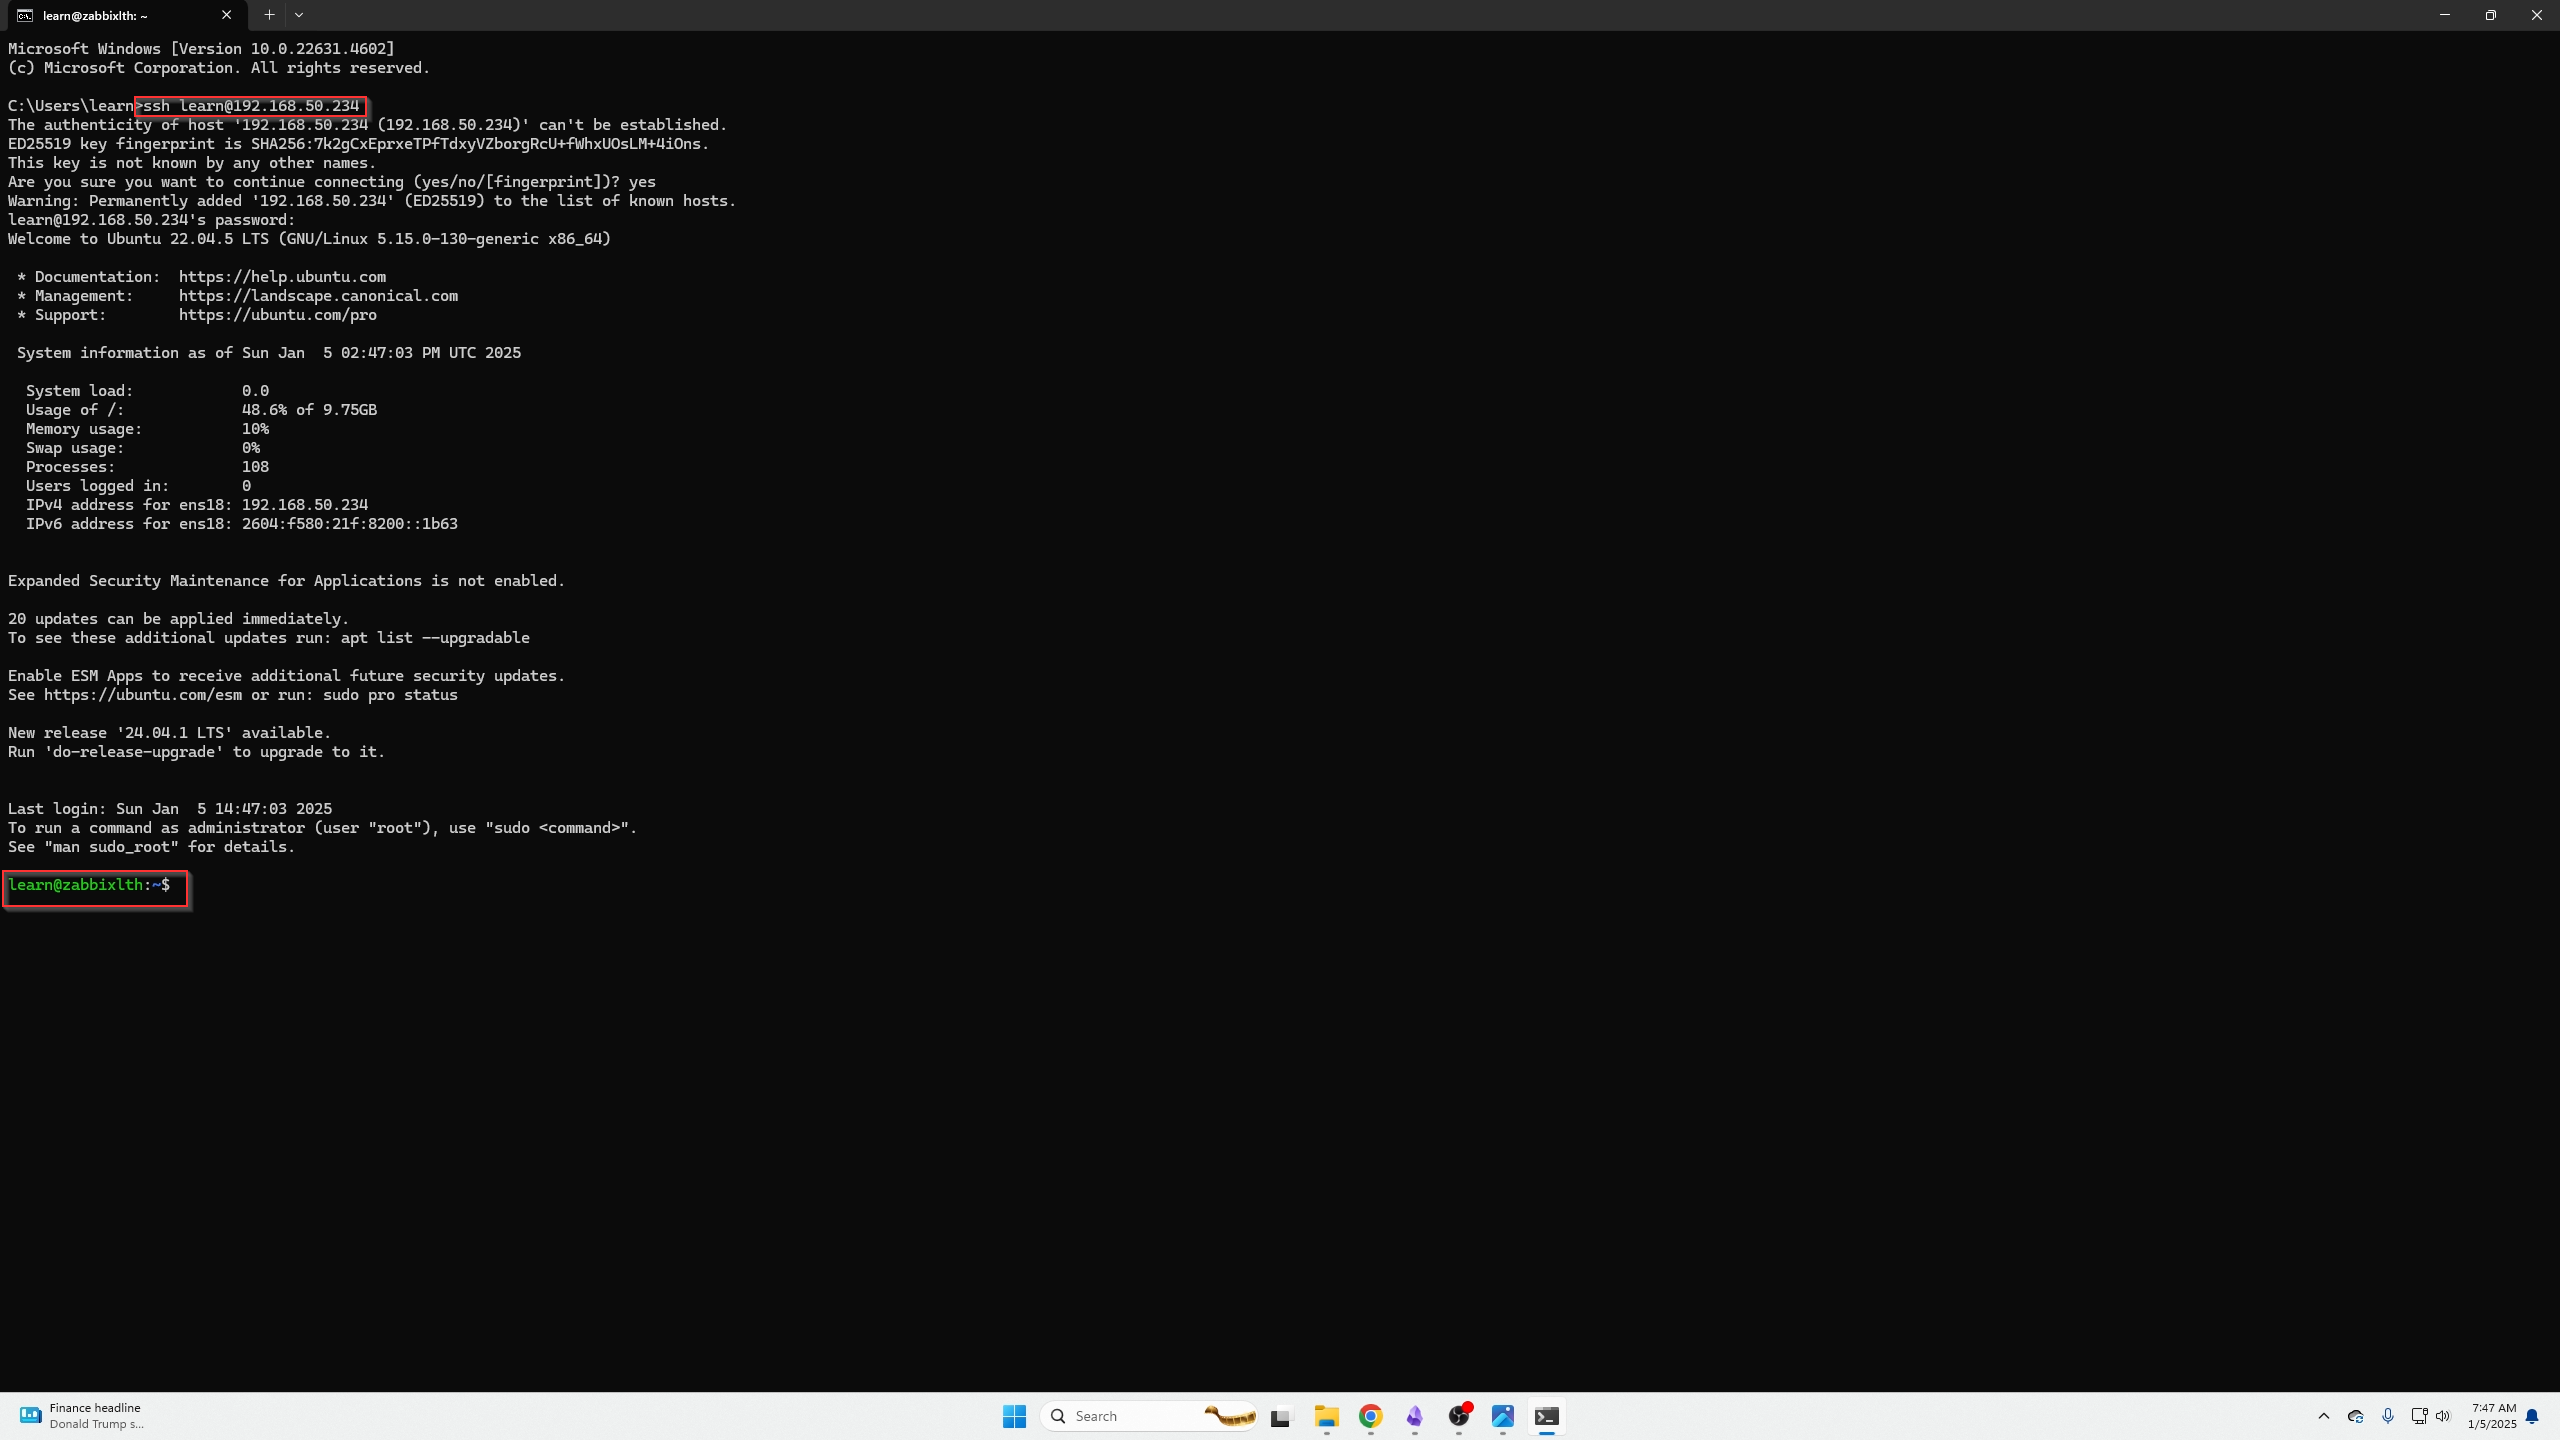
Perform the following commands:
wget https://repo.zabbix.com/zabbix/7.0/ubuntu/pool/main/z/zabbix-release/zabbix-release_latest_7.0+ubuntu22.04_all.deb
apt install zabbix-server-mysql zabbix-frontend-php zabbix-apache-conf zabbix-sql-scripts zabbix-agent
Install SQL server
installs mySQL
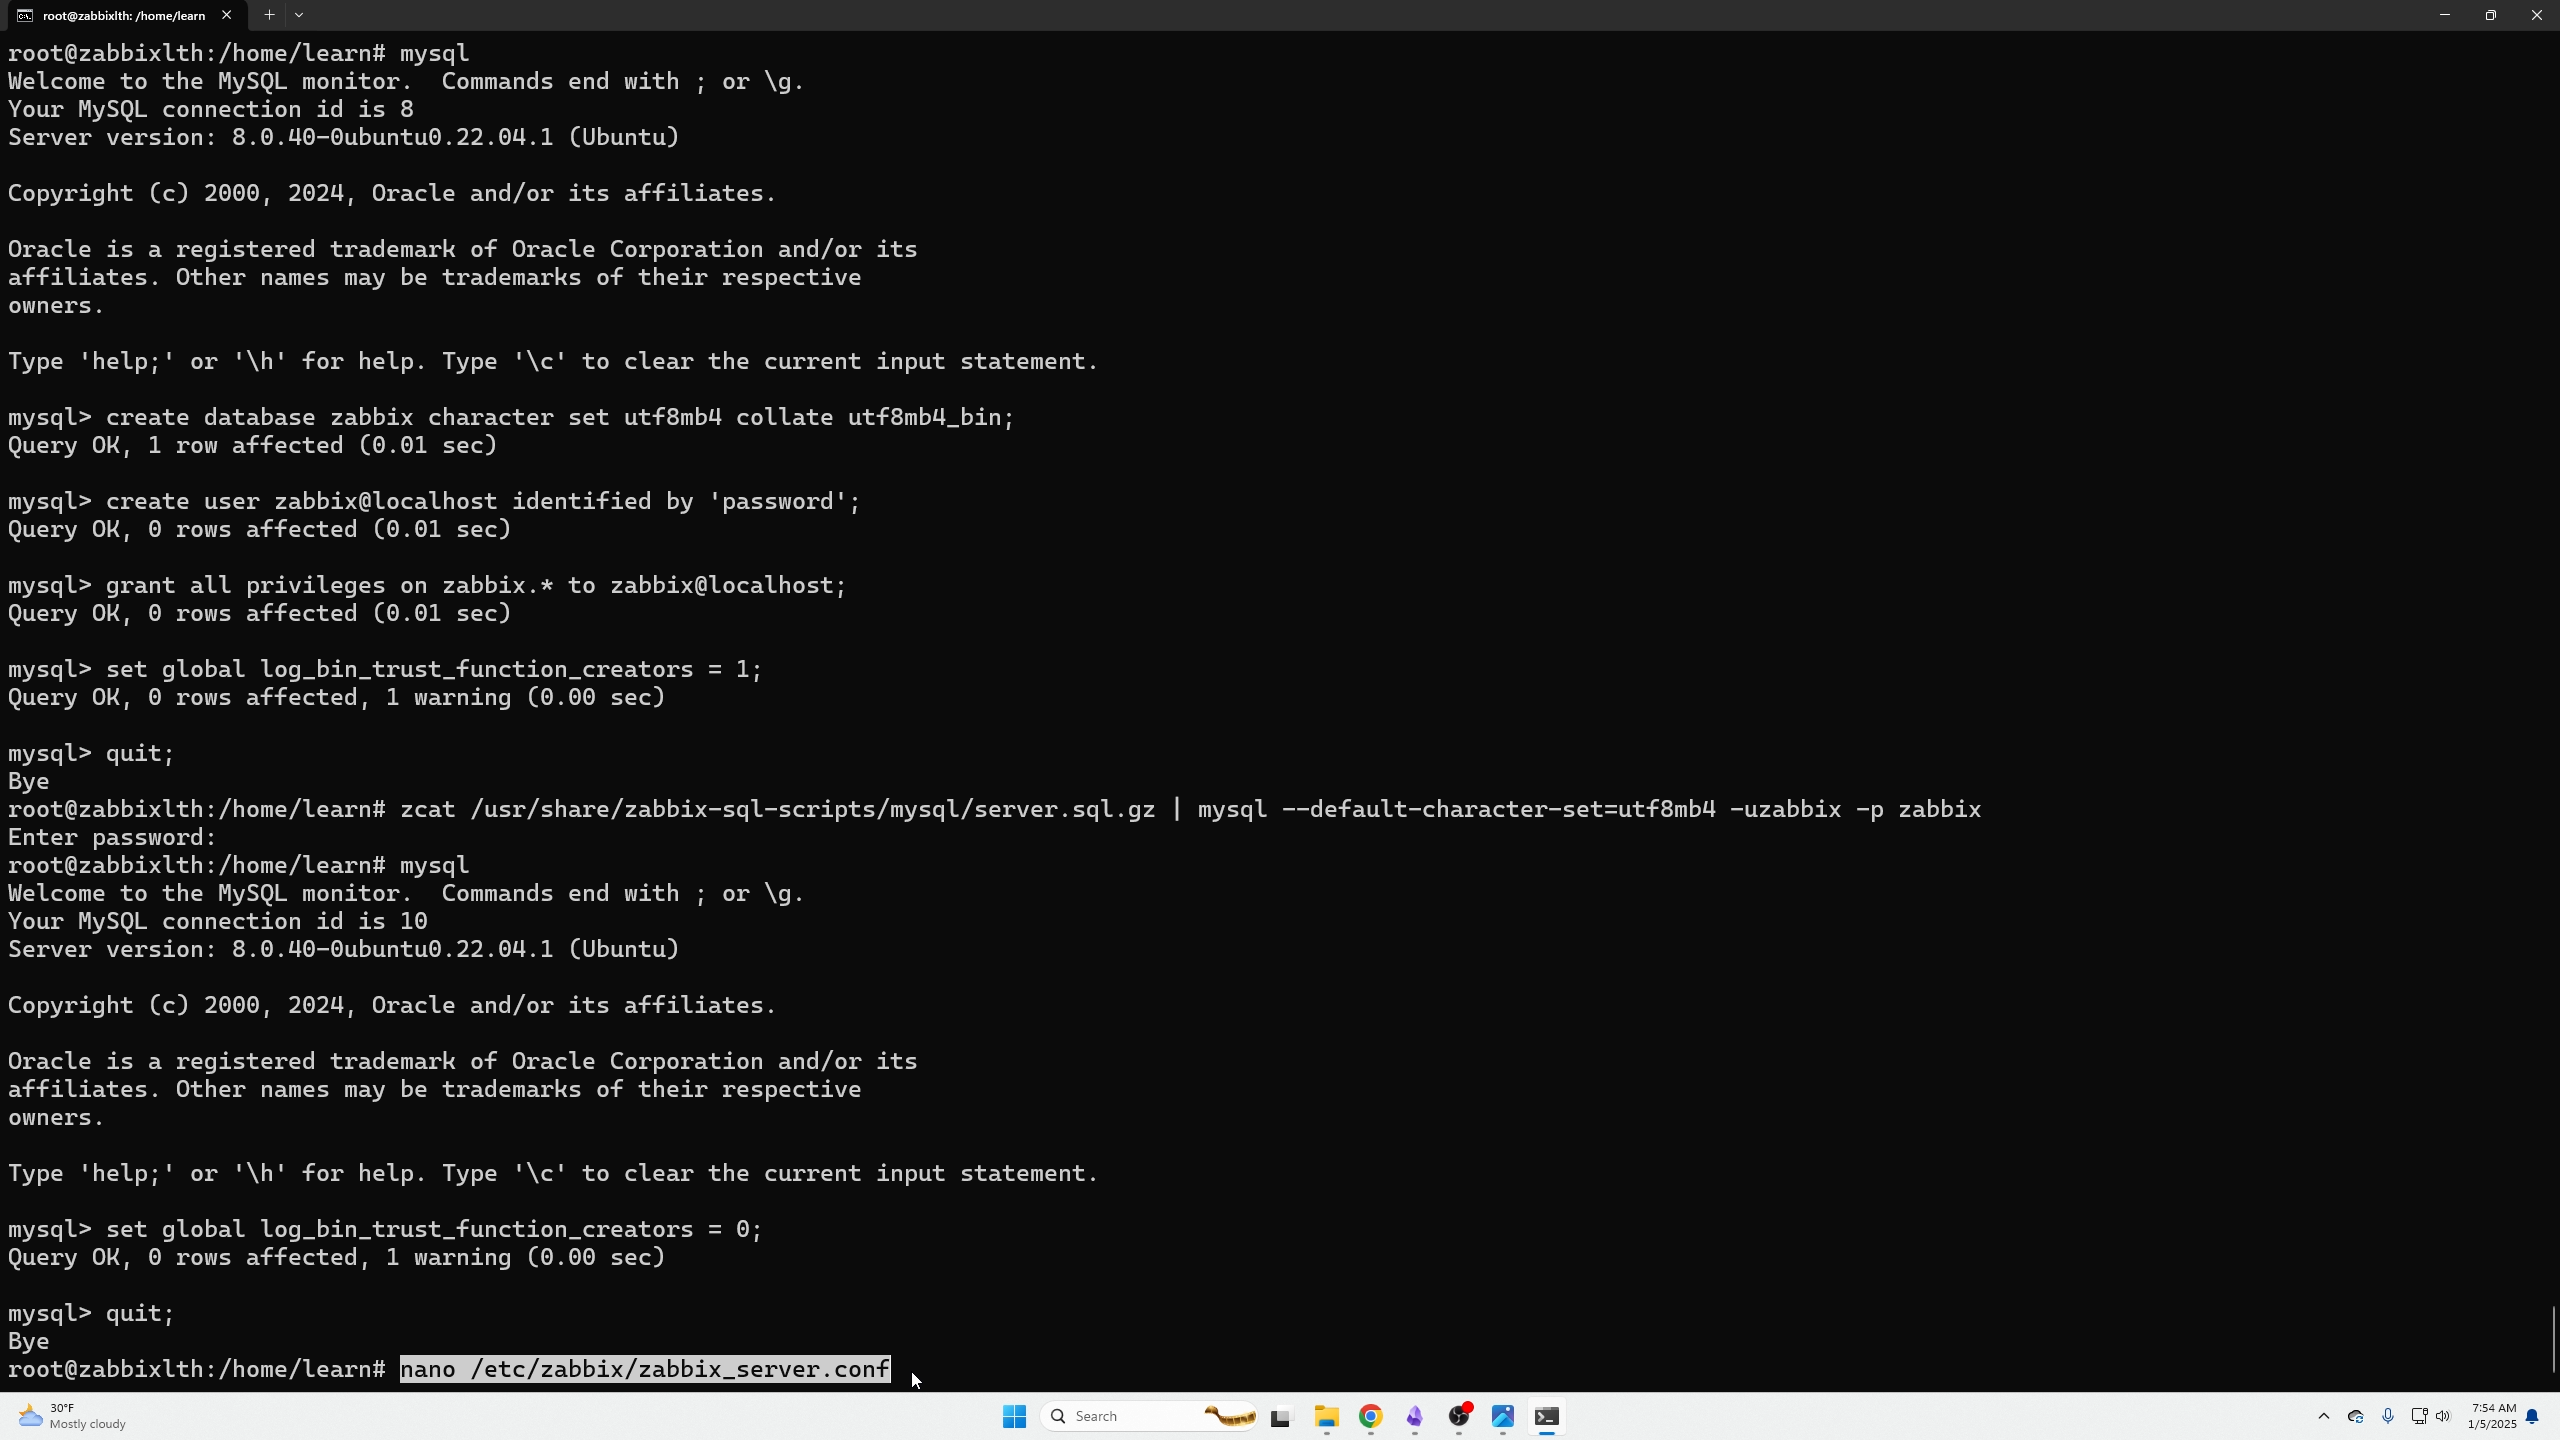
Starts mySQL on boot start it then doCreate the mySQL database:
Formats the database type to a the format Zabbix can understand (utf8mb4) With this one the
password section is where you assign your database password
Giving your user access to read and write to this database
Set trust for the database
Exit mySQL
At this point we are going to execute the following command, you will notice no response after inputting the command and entering the password for the zabbix user you just created 7 command ago. That is normal, give the script a couple minutes to do its thing.
zcat /usr/share/zabbix-sql-scripts/mysql/server.sql.gz | mysql --default-character-set=utf8mb4 -uzabbix -p zabbix

Now perform the following commands after the CLI comes back from being blank.
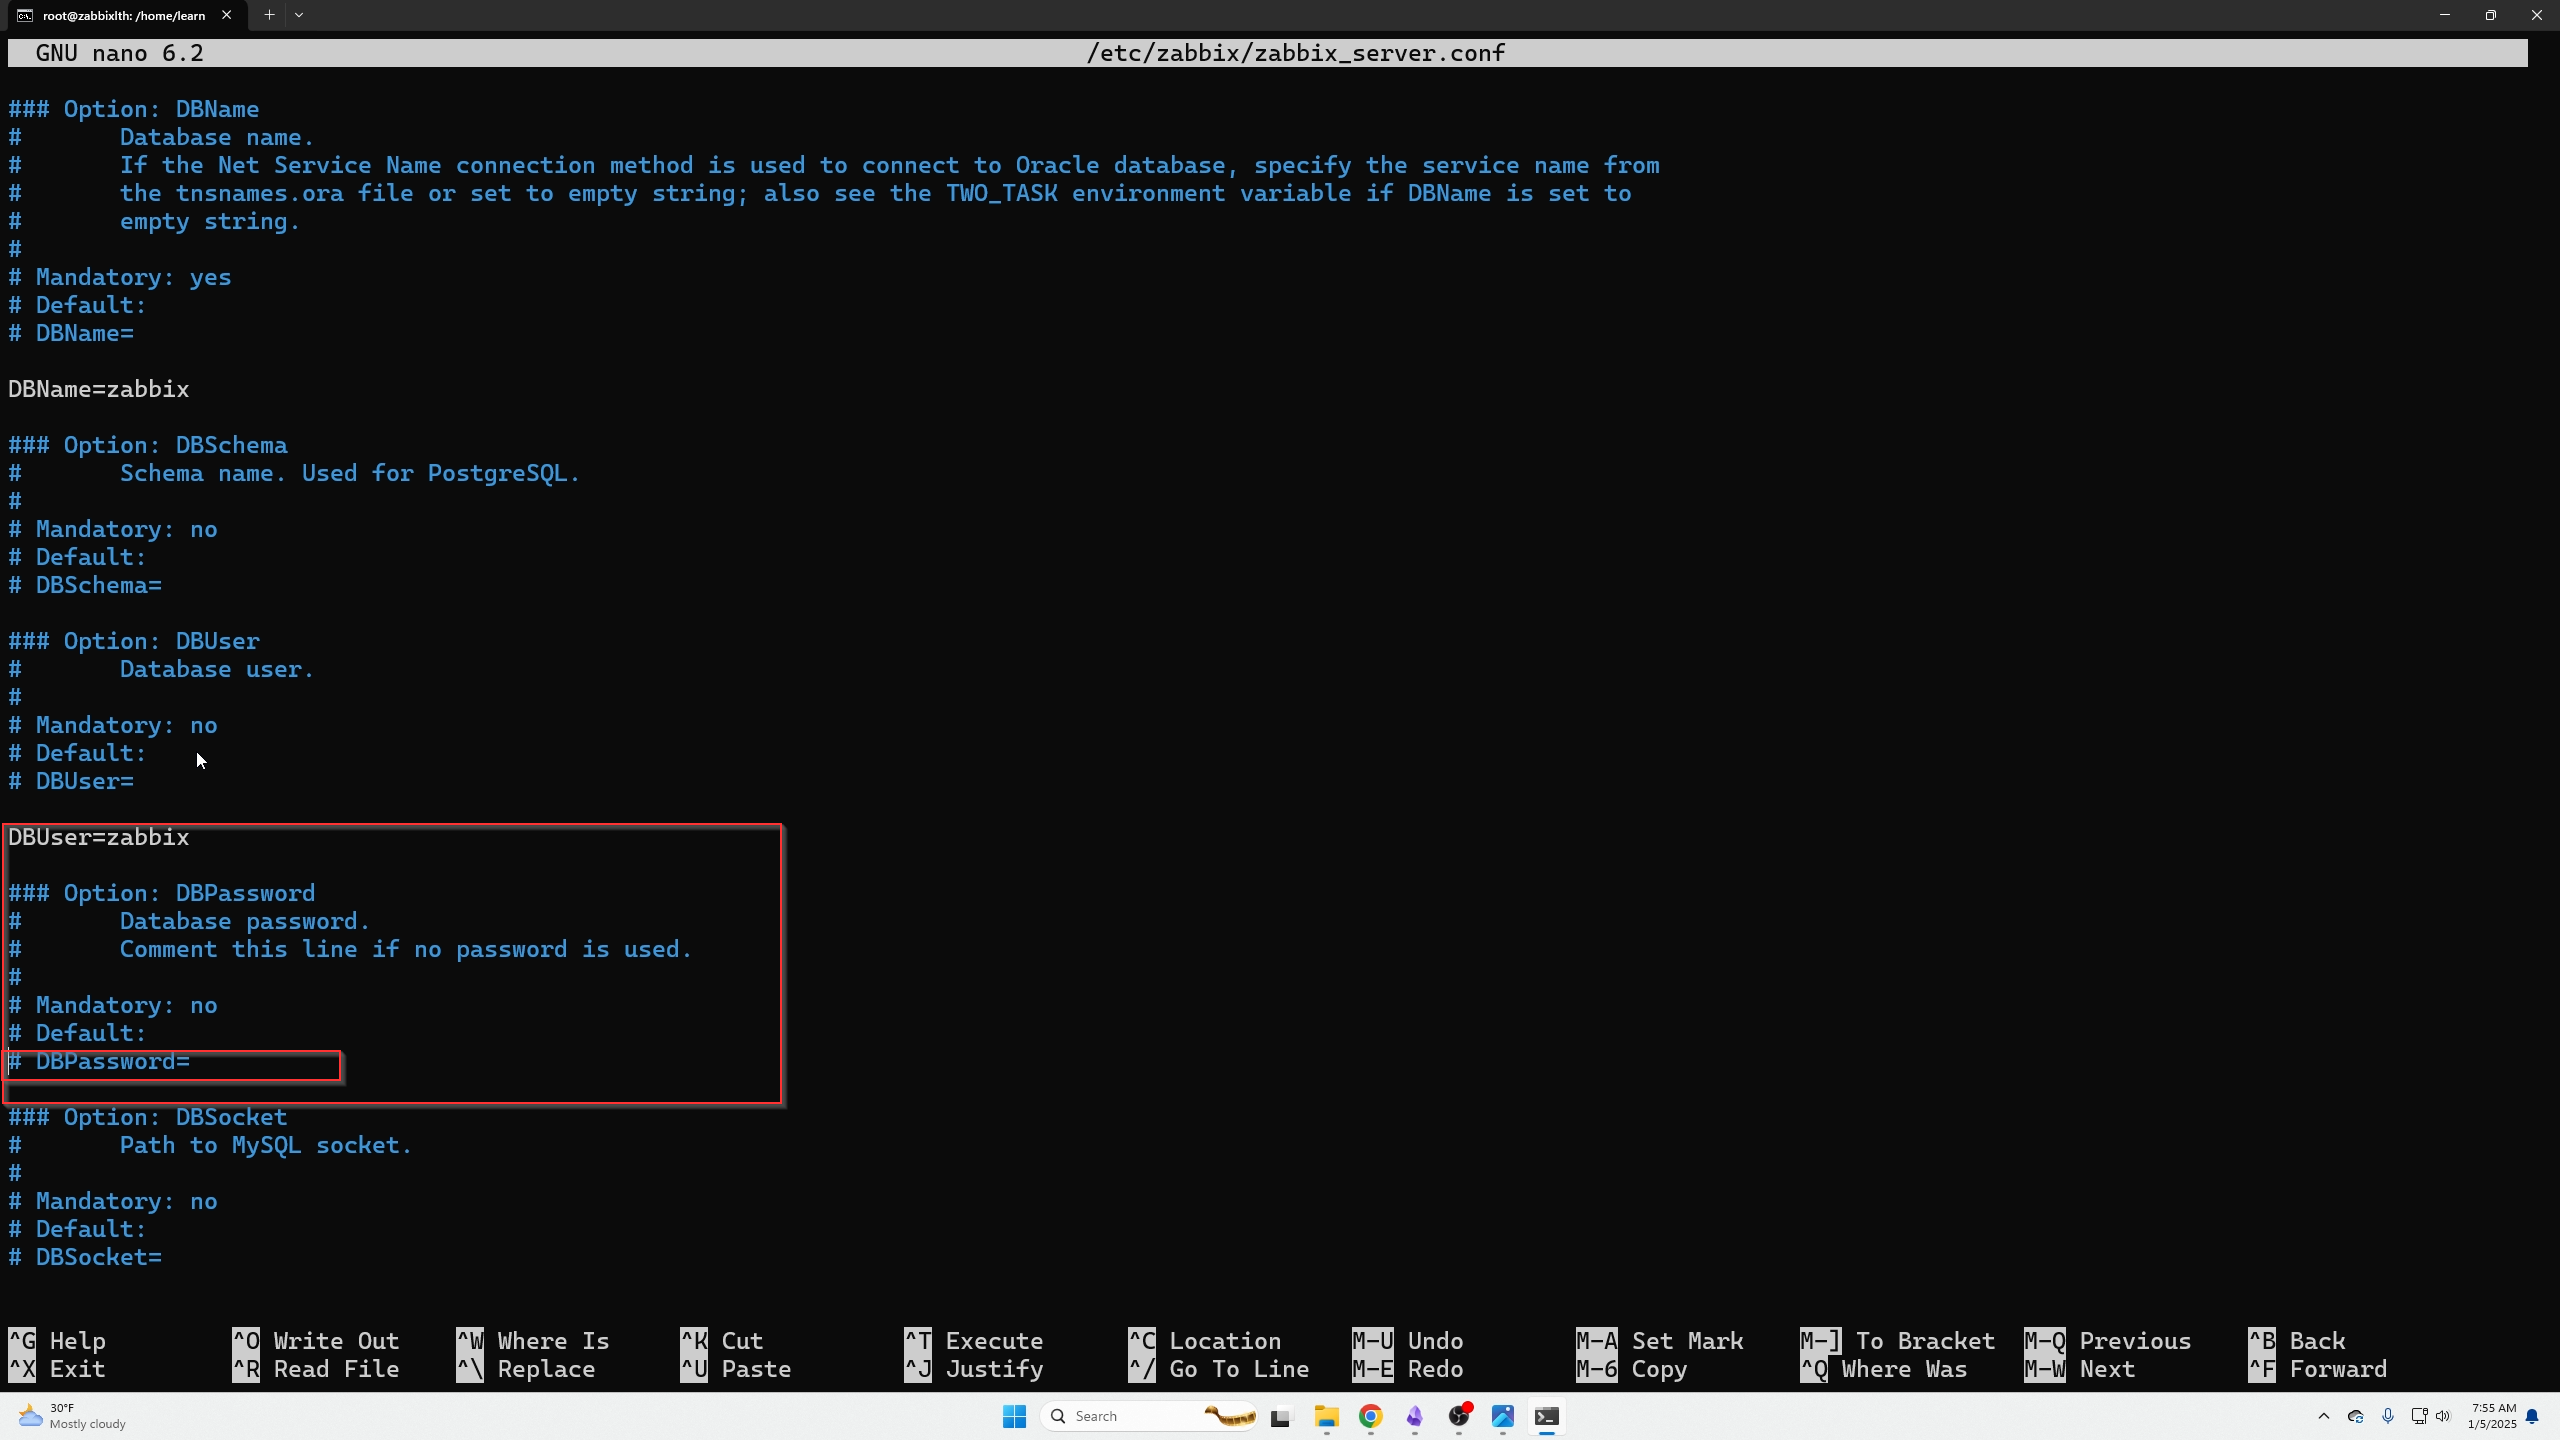
We need to now edit the following config file, open it with:
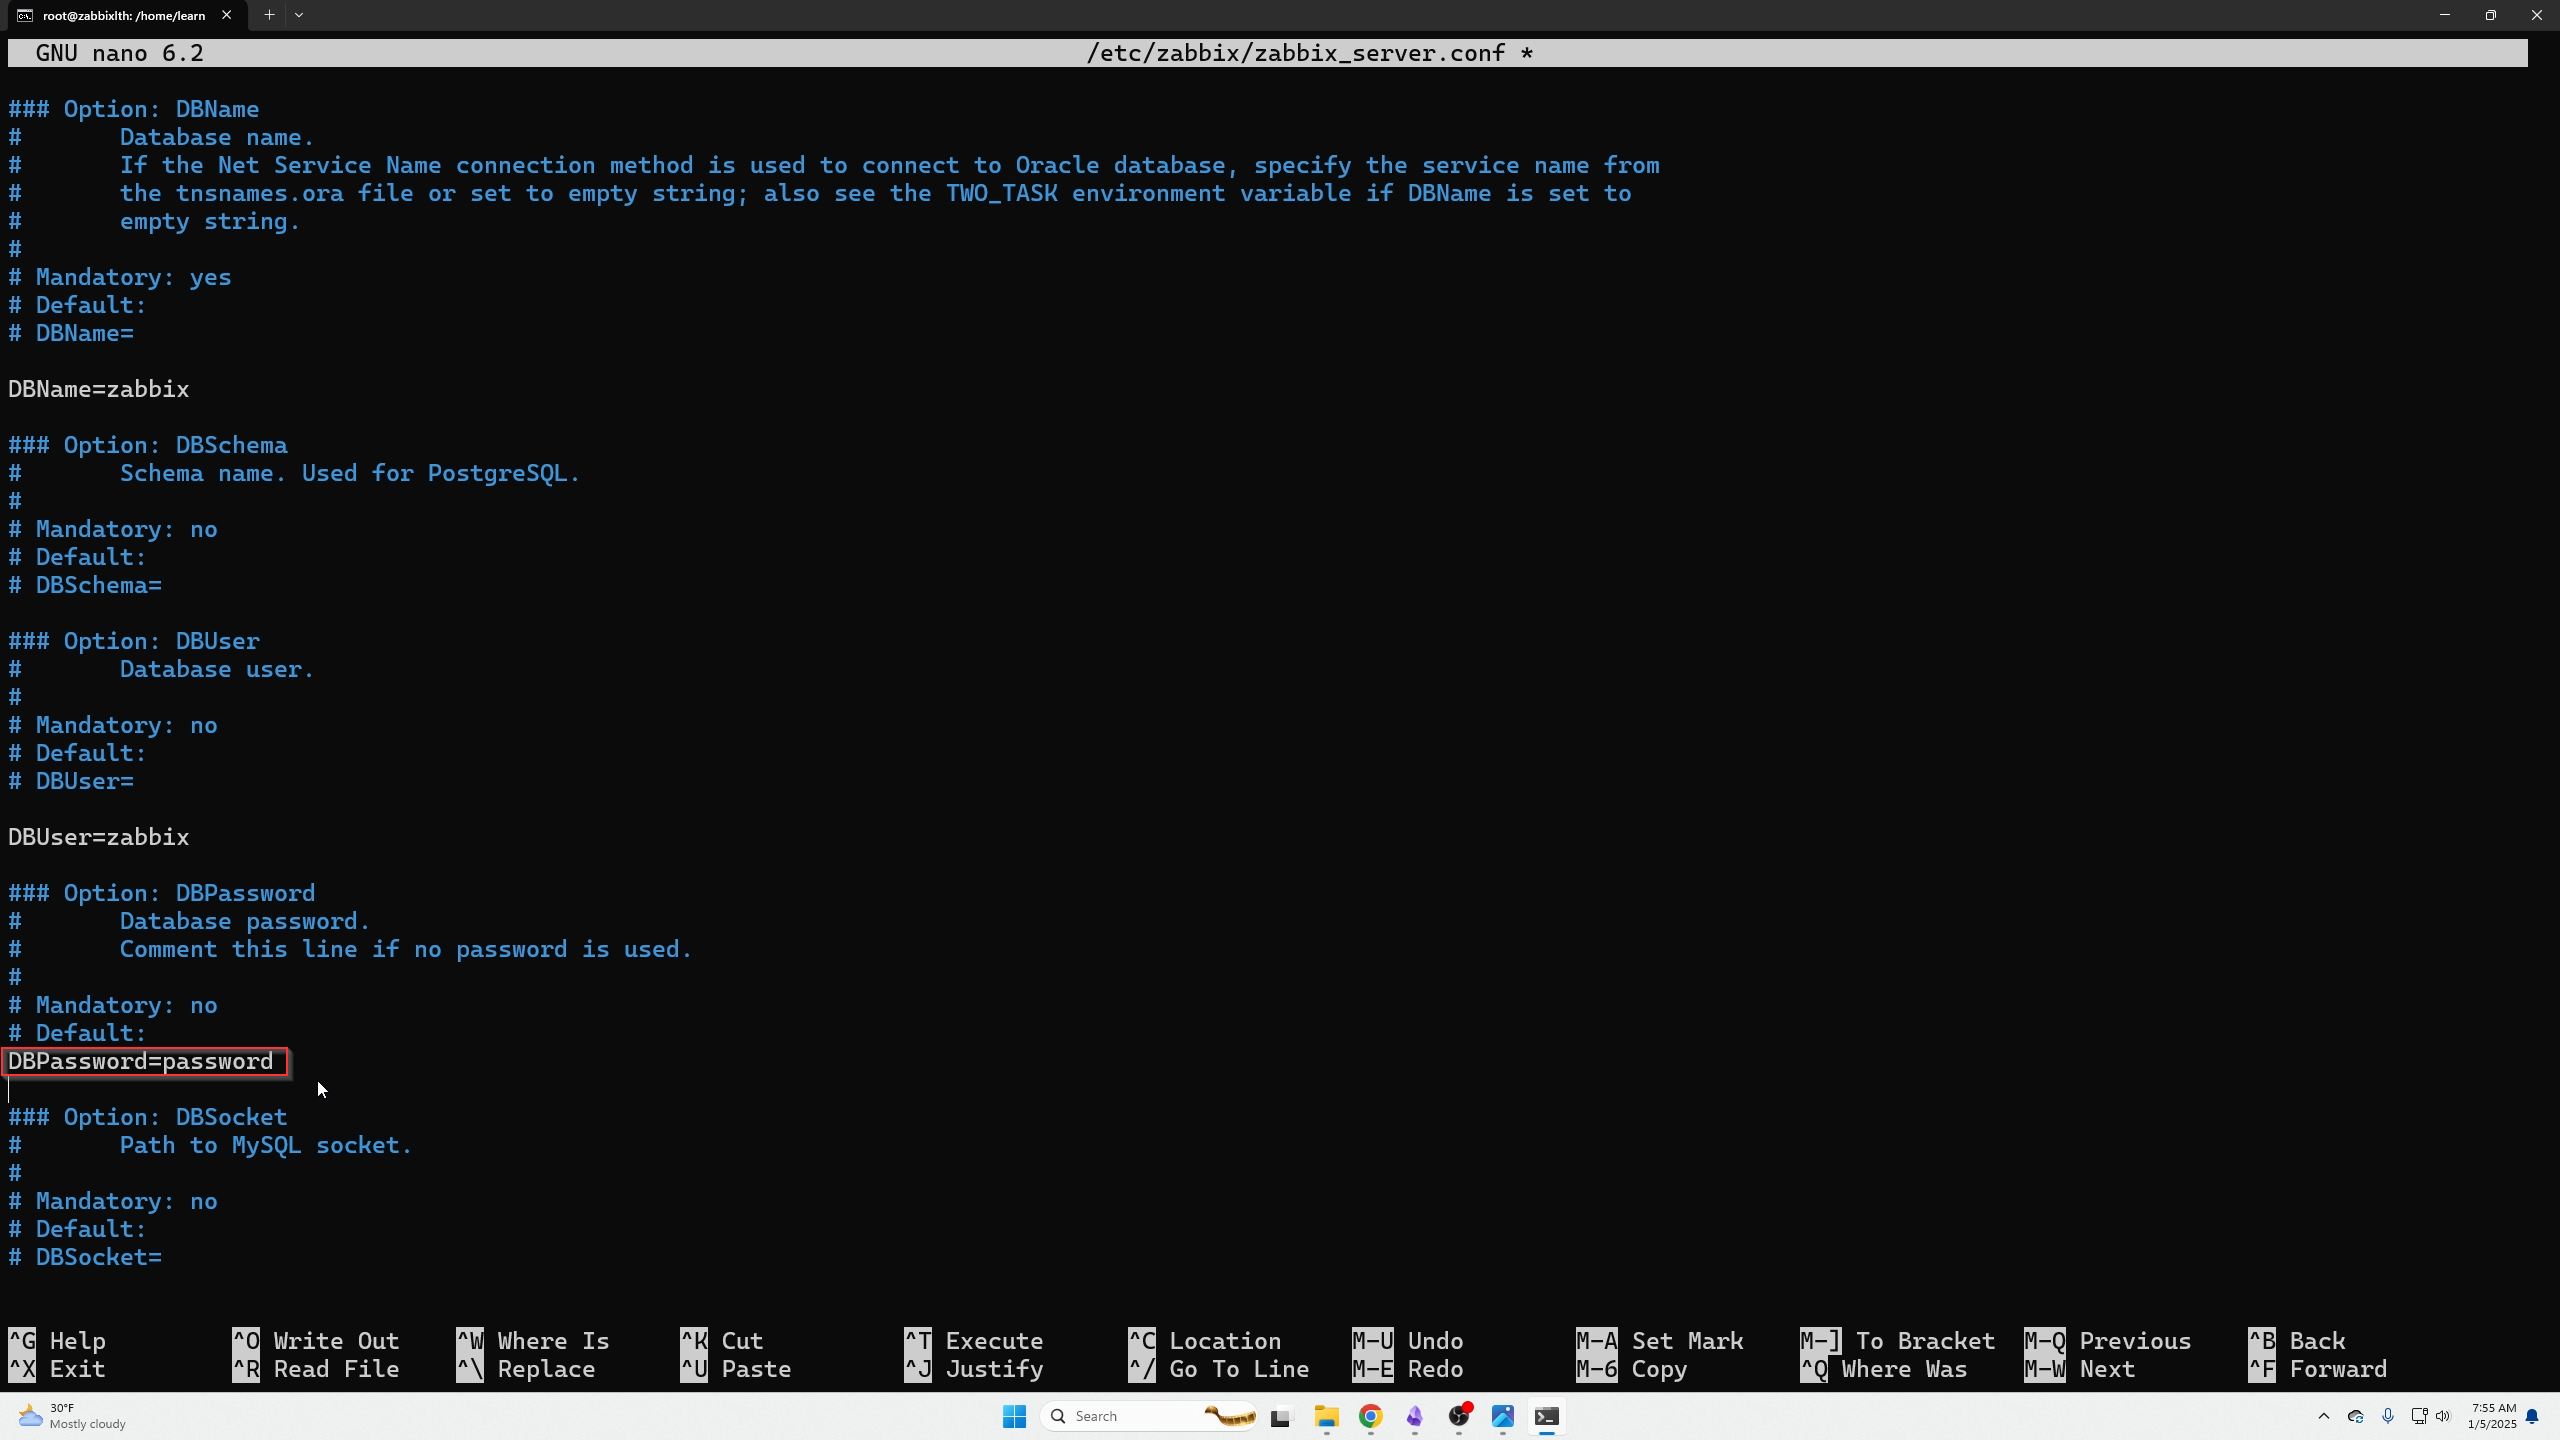
Look for the DBuser=zabbix section and edit the DBPassword= section with the password you just set earlier.
It will look like this when you are done. You can then save and exit with ctrl + X then click Y and lastly to save it click enter
Now perform the following commands to start the Zabbix server and all its needed counterparts.
Now go to your browser and we need to login with the following format:
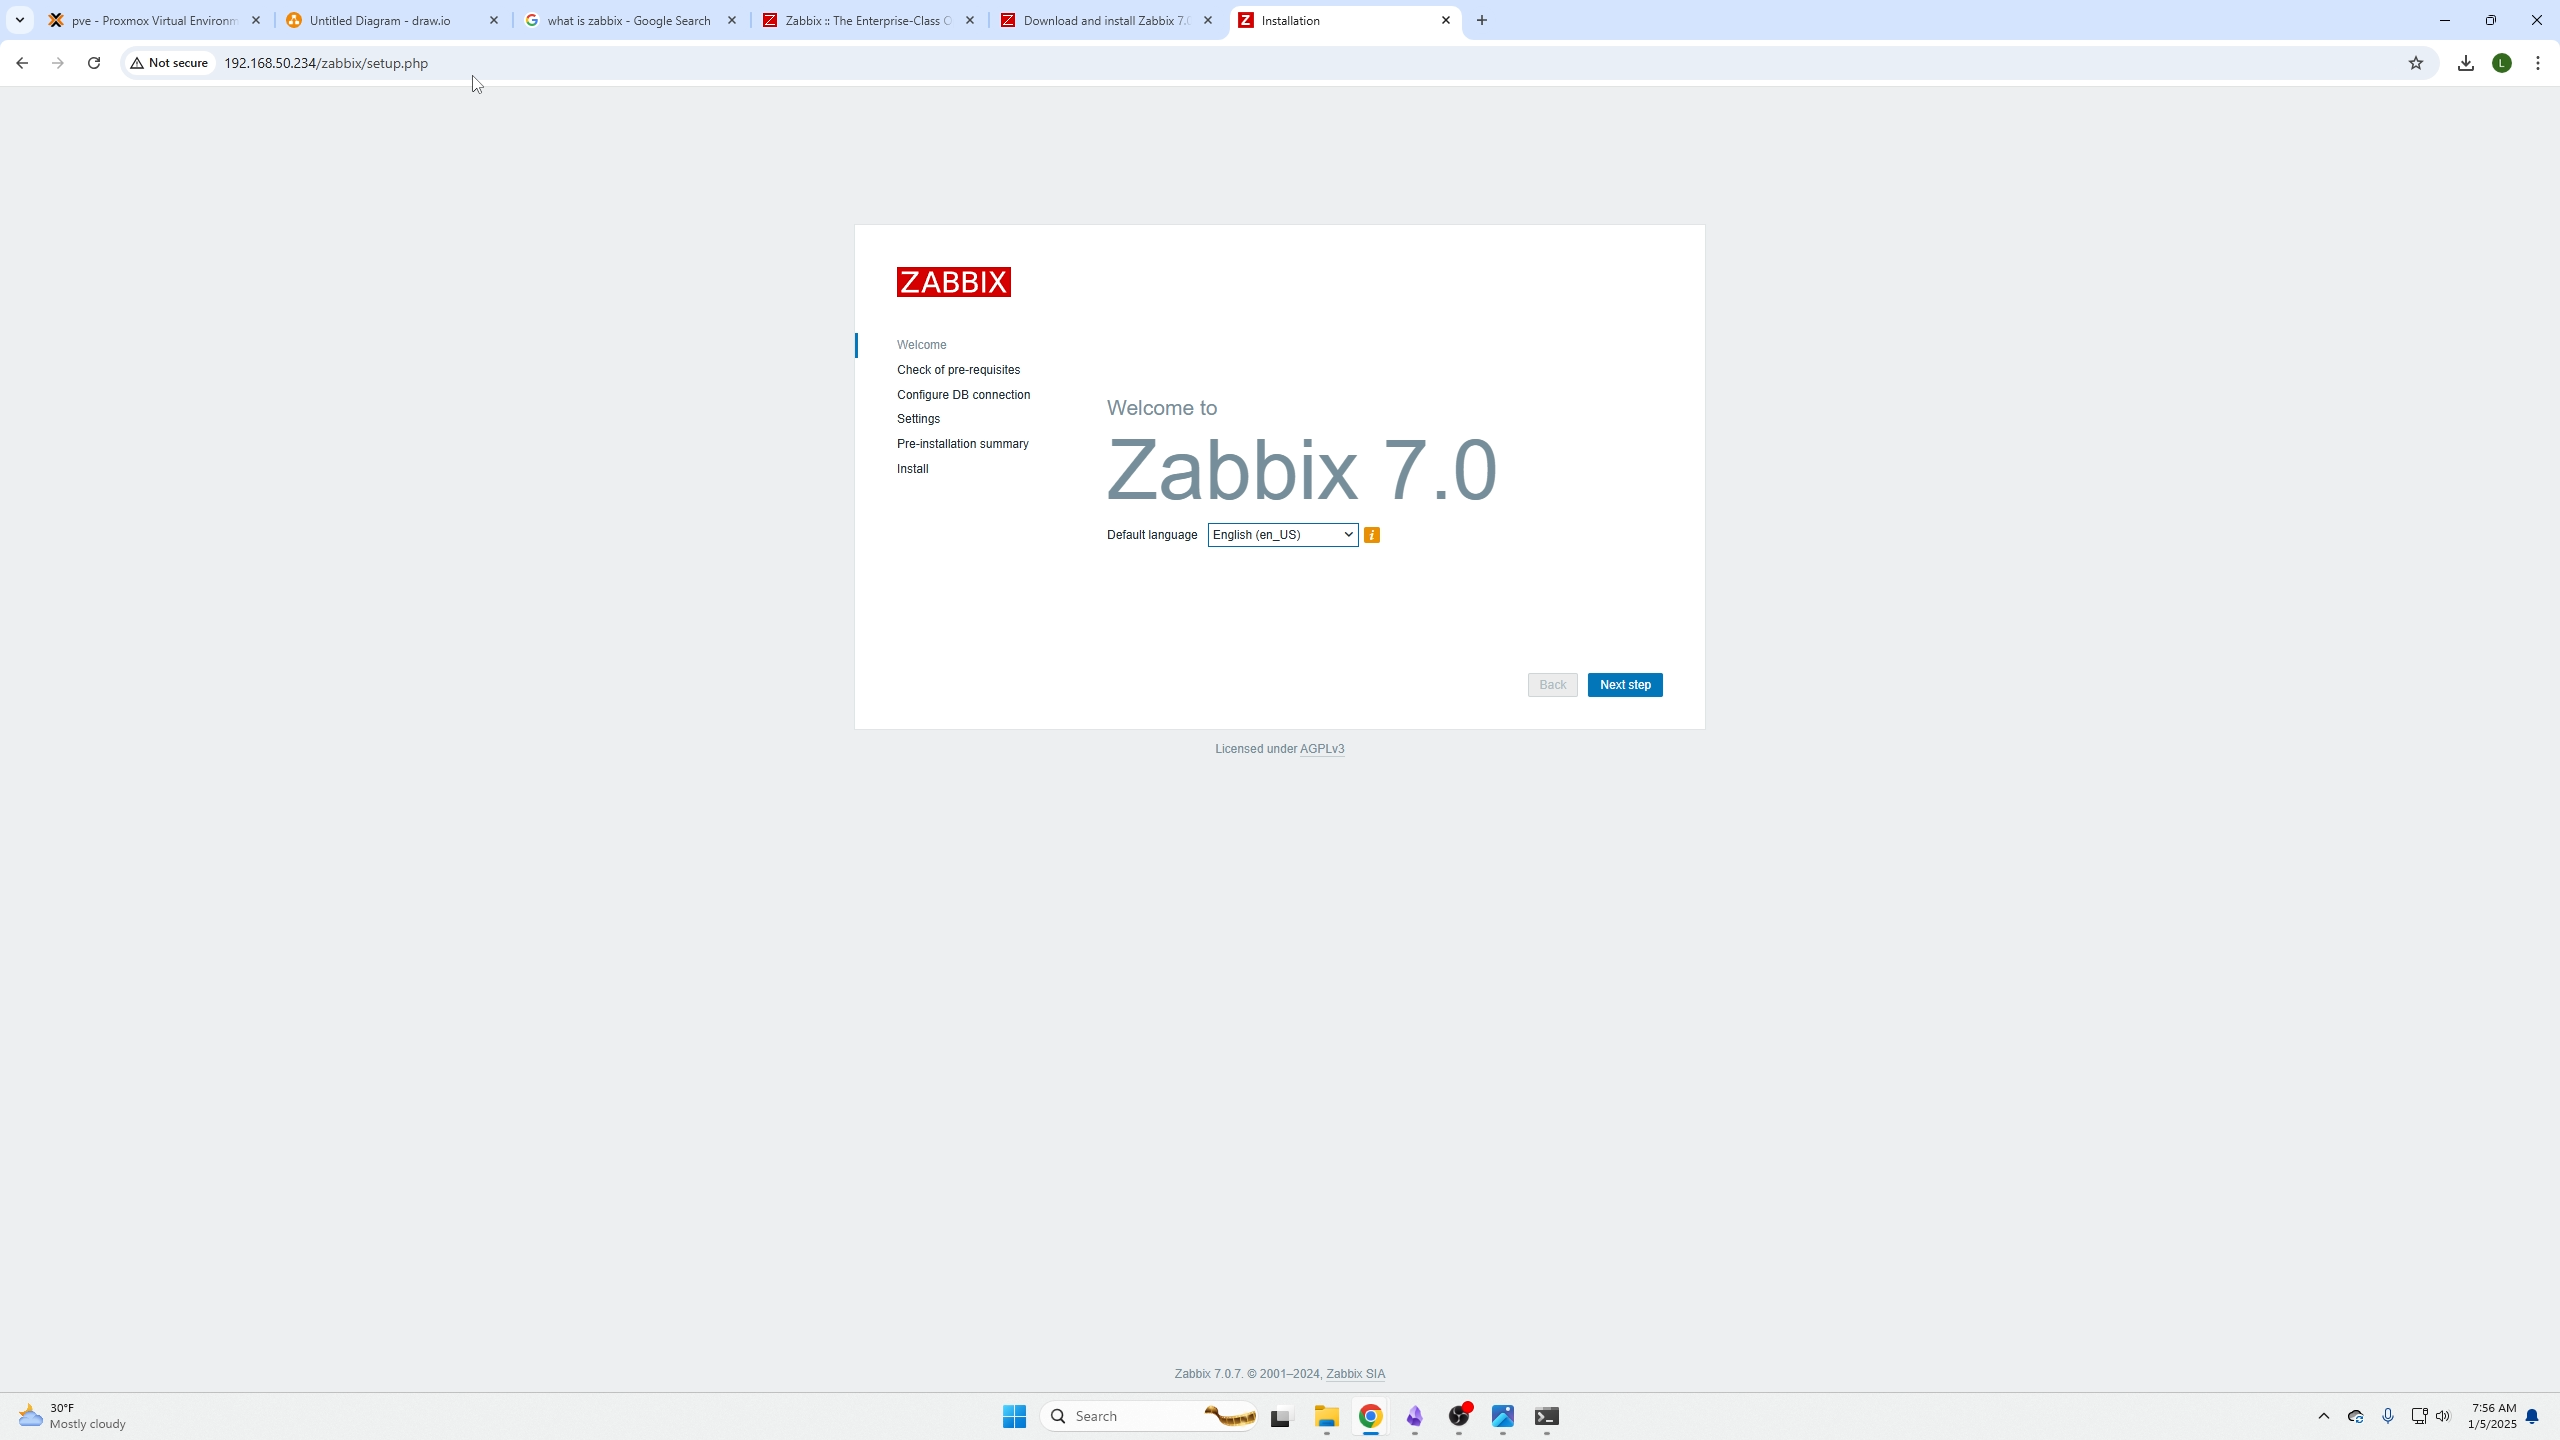
You will be presented with the following landing page, click next.
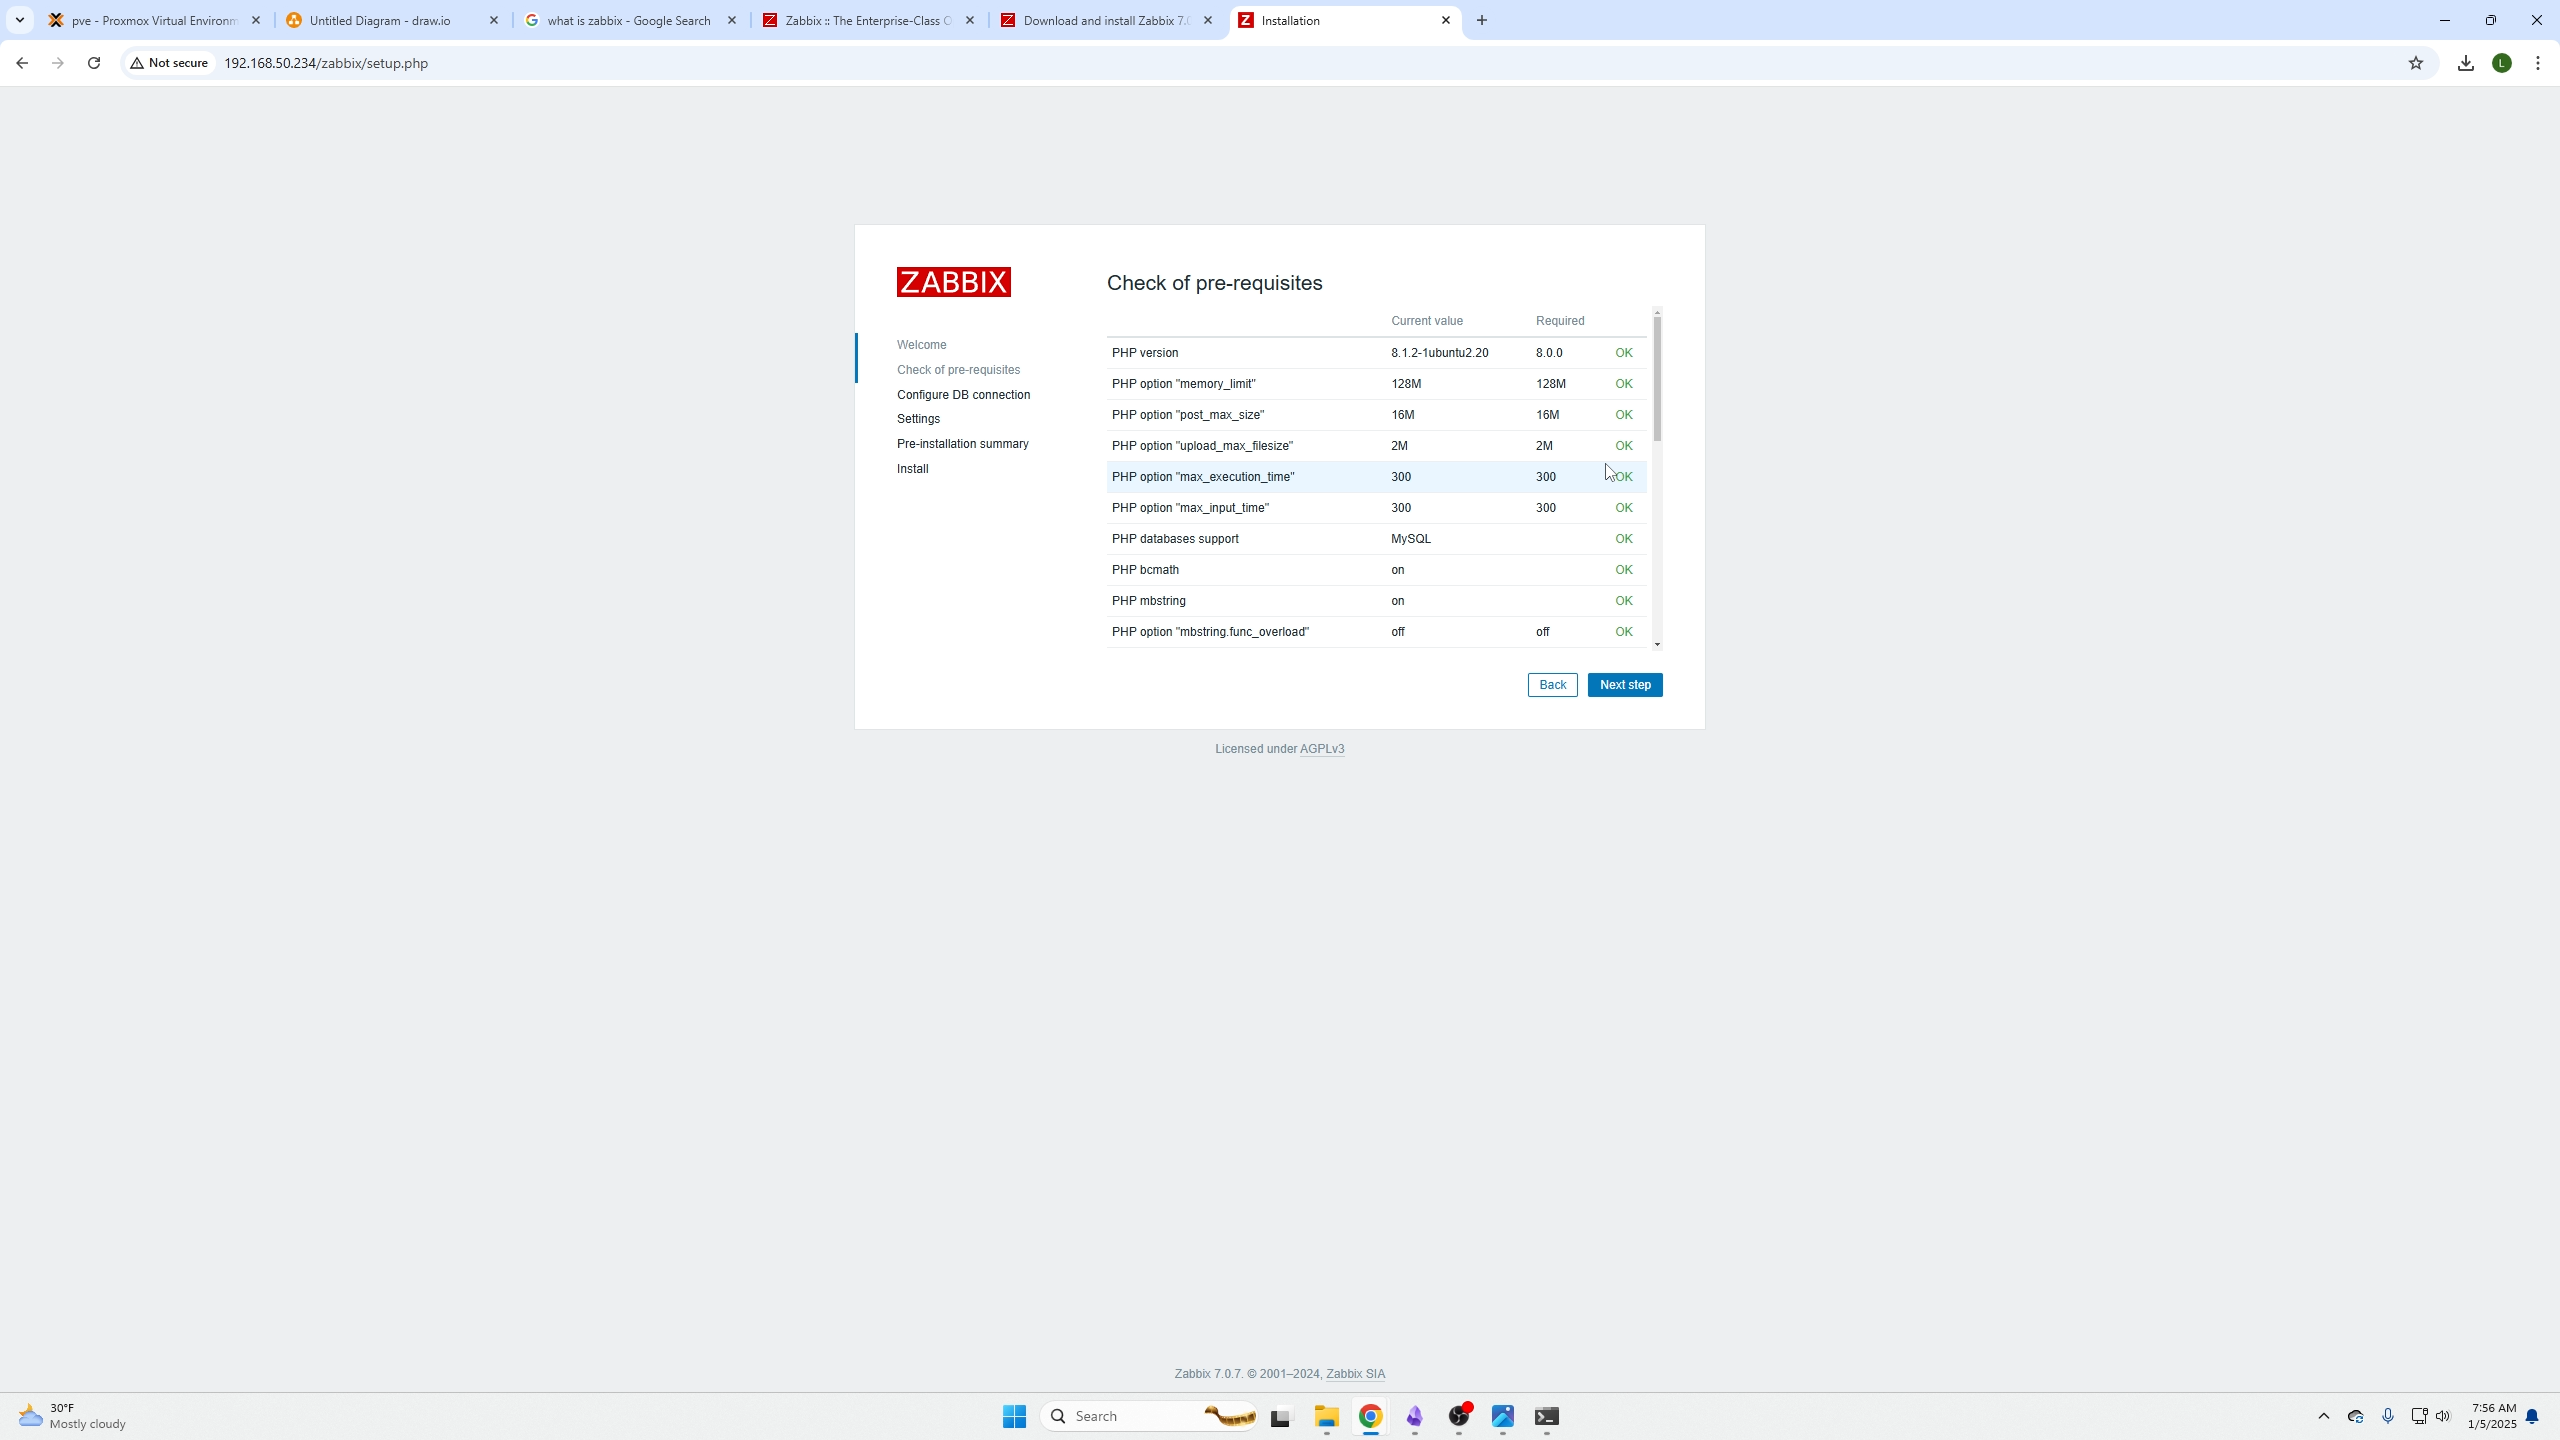
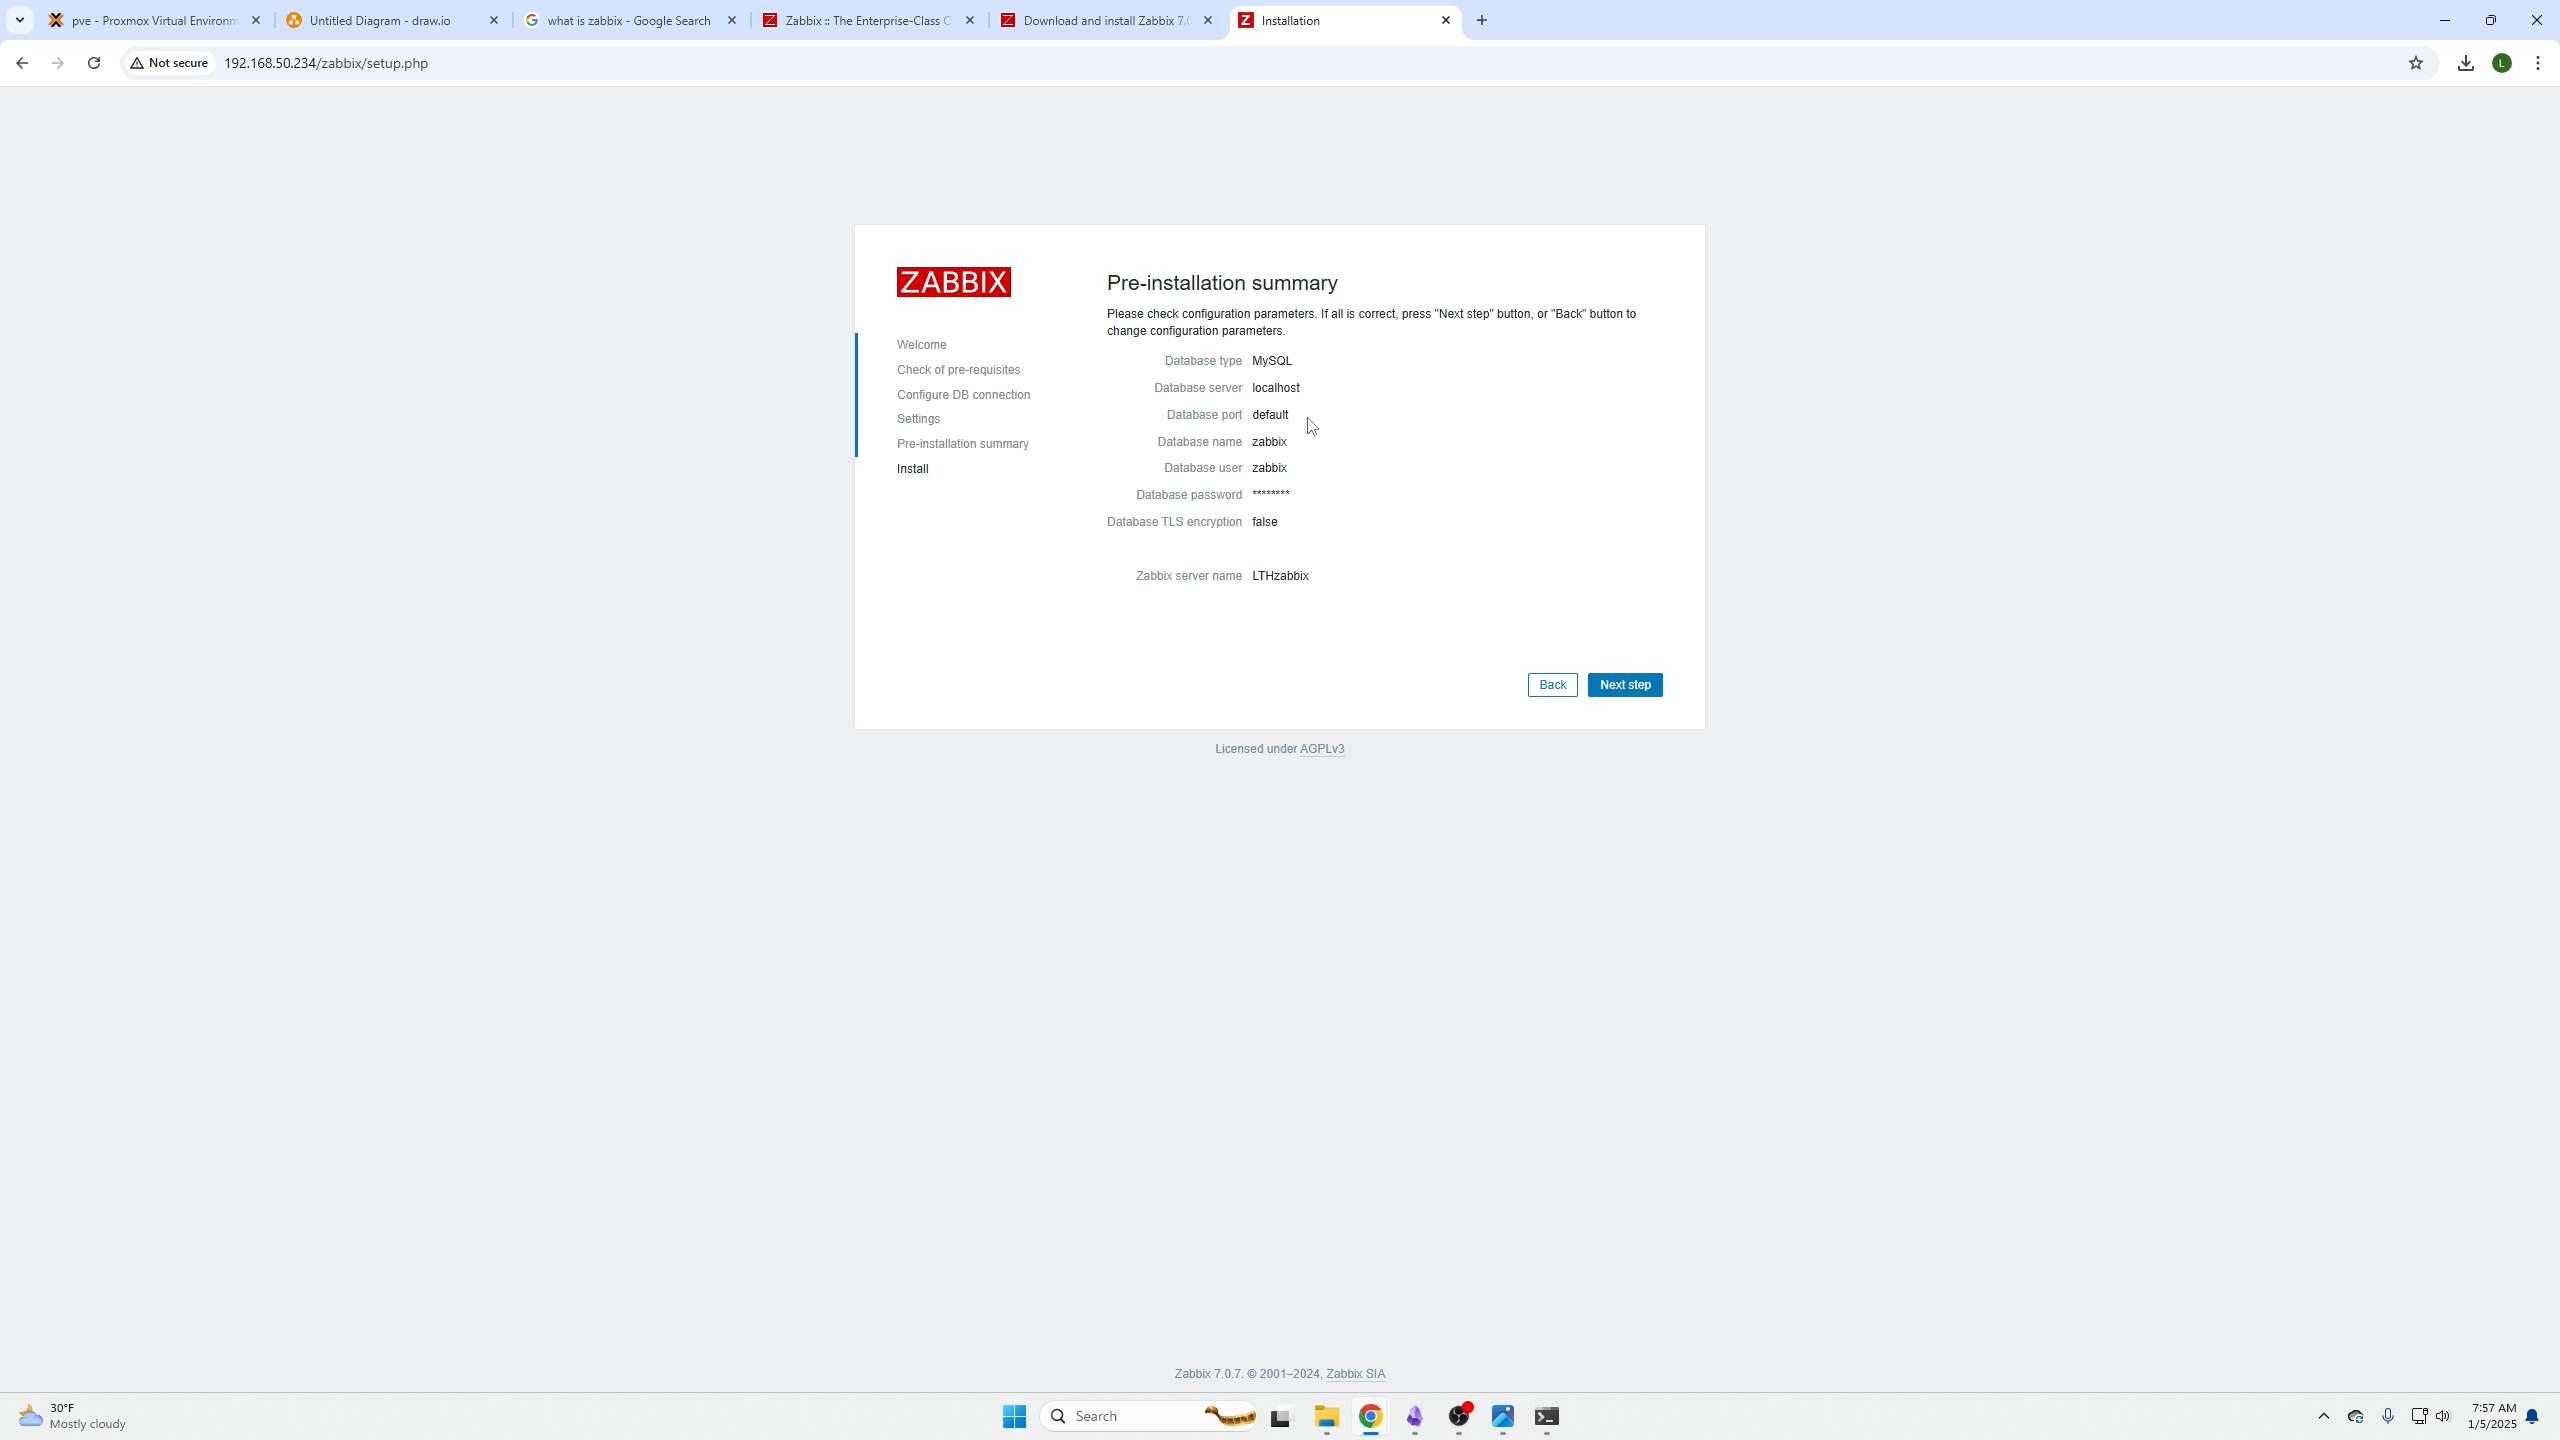
Make sure everything has a green ok so you know you did it right.
Ensure you add the database user password you just set in that config file so Zabbix's panel can access it.

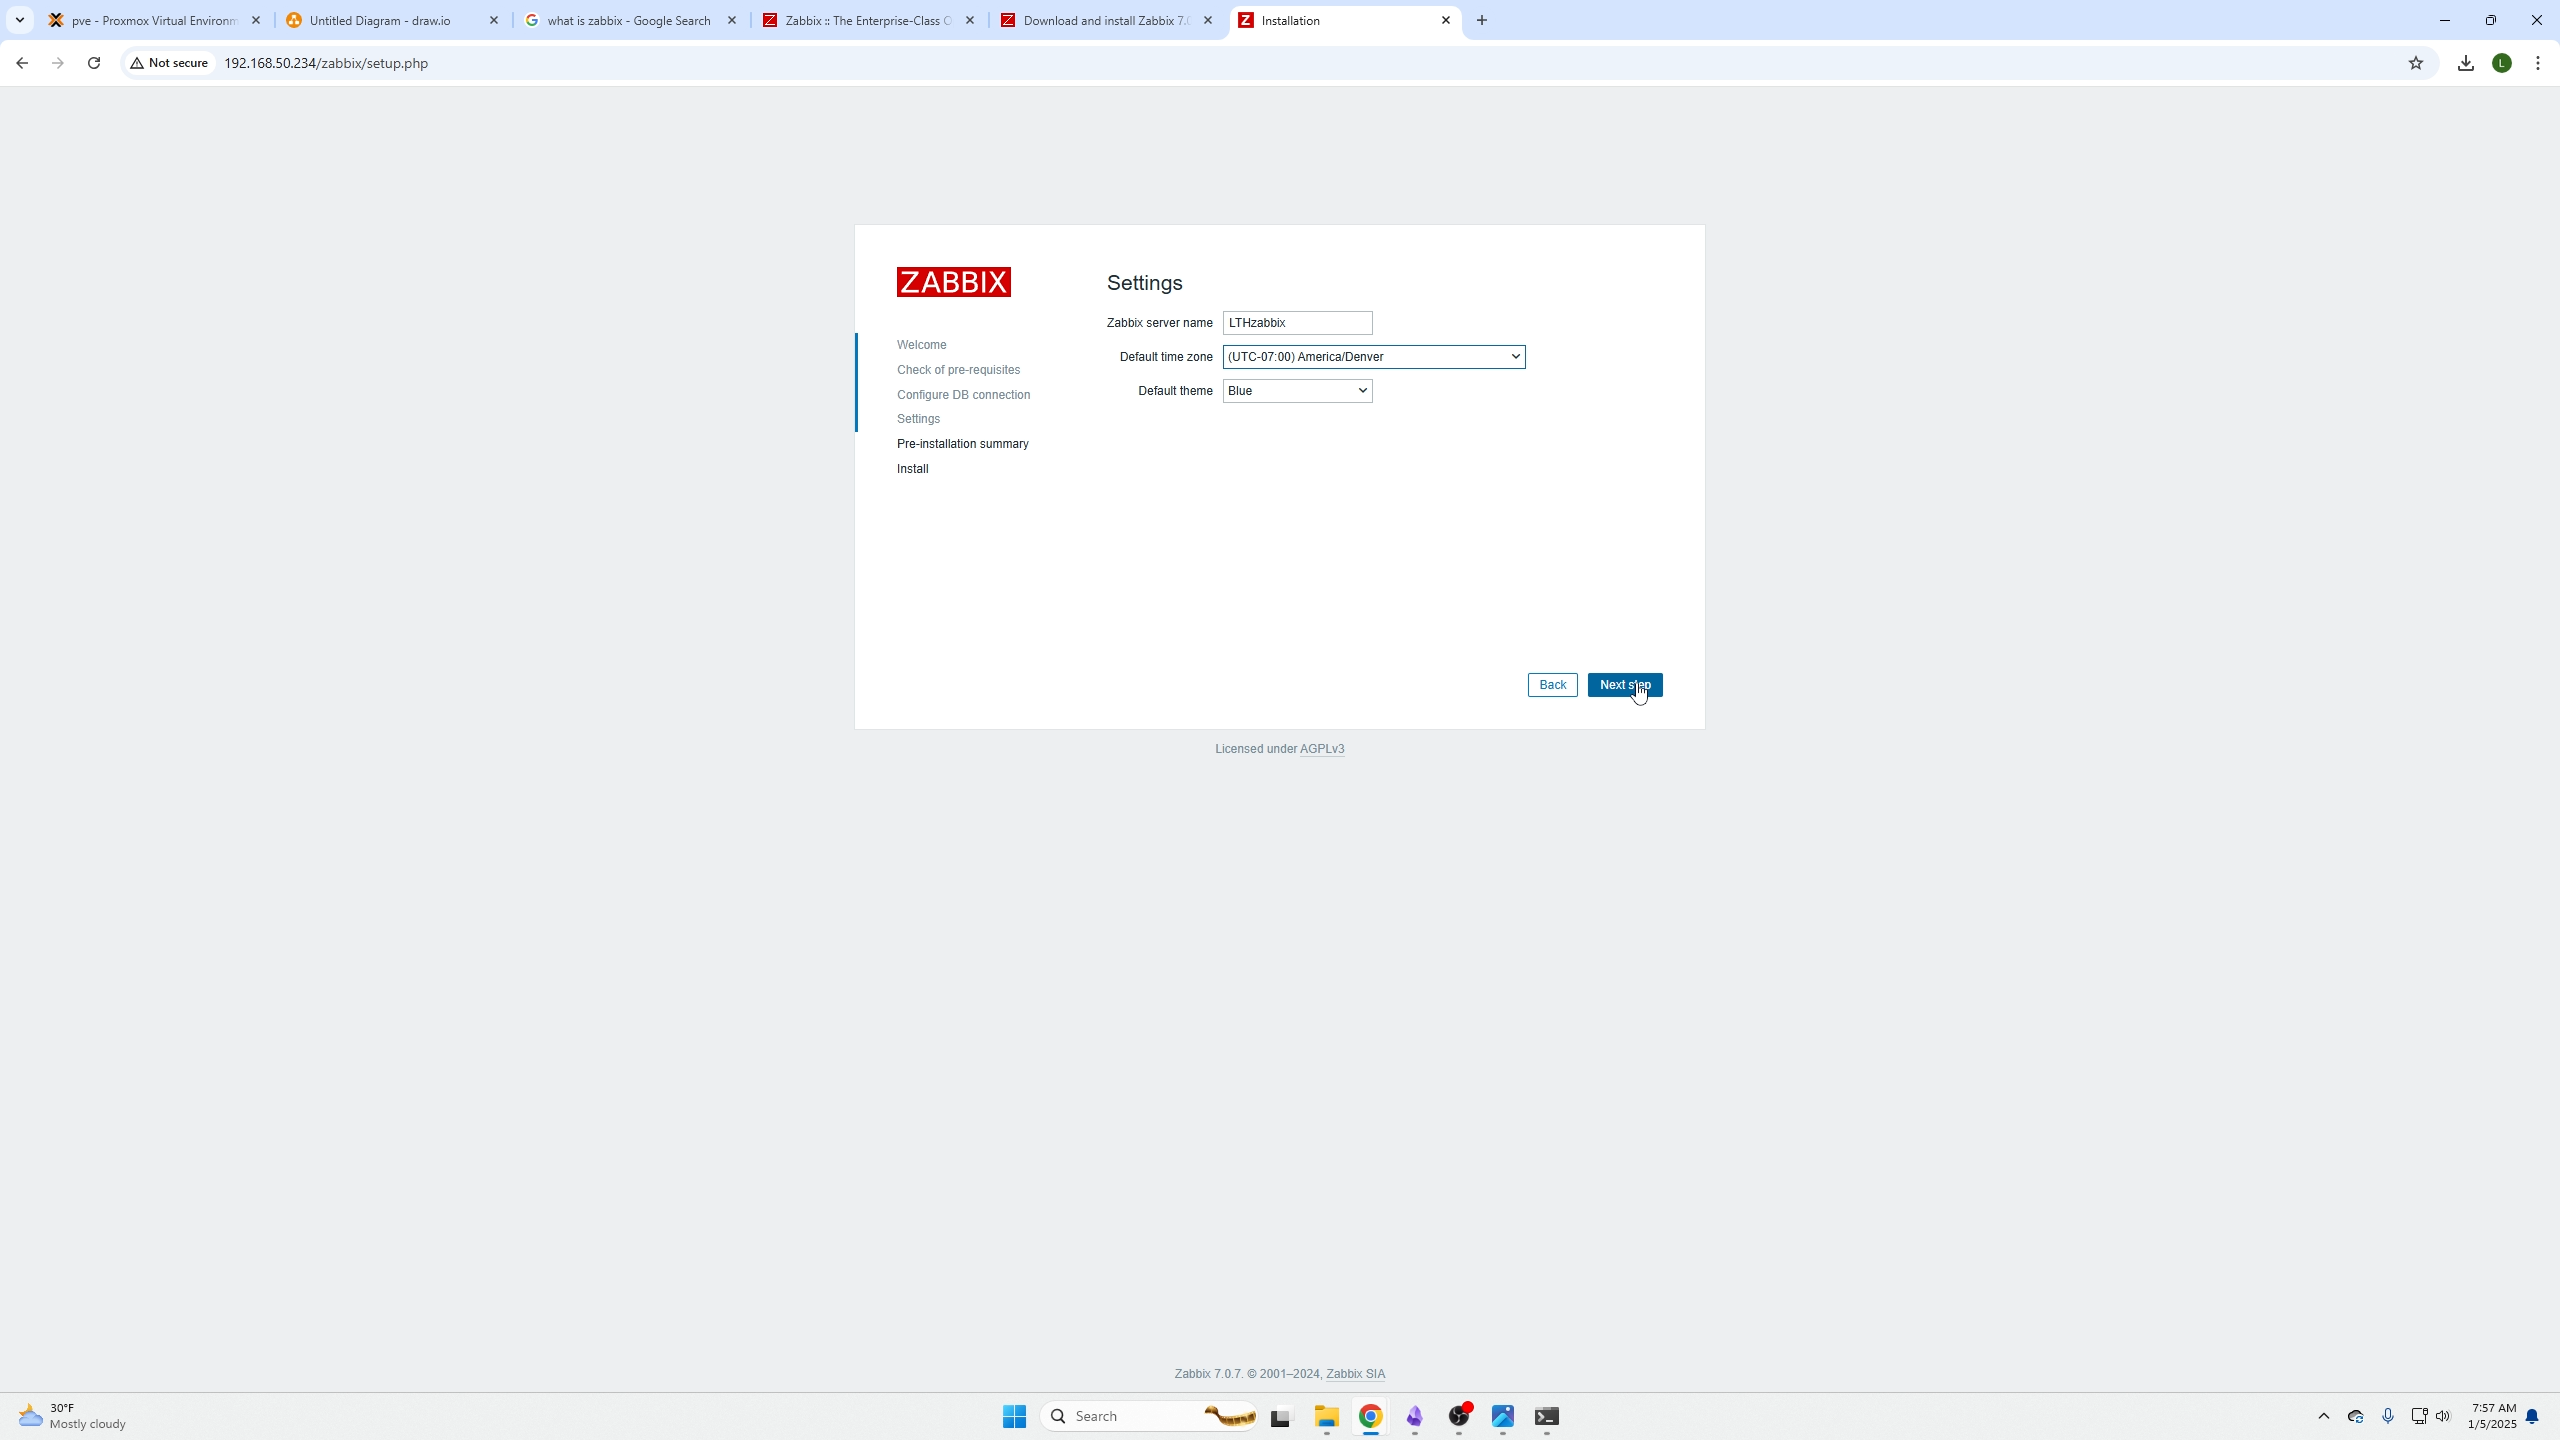
Set your server name and timezone
ensure all settings have been filled out or go back and fix them
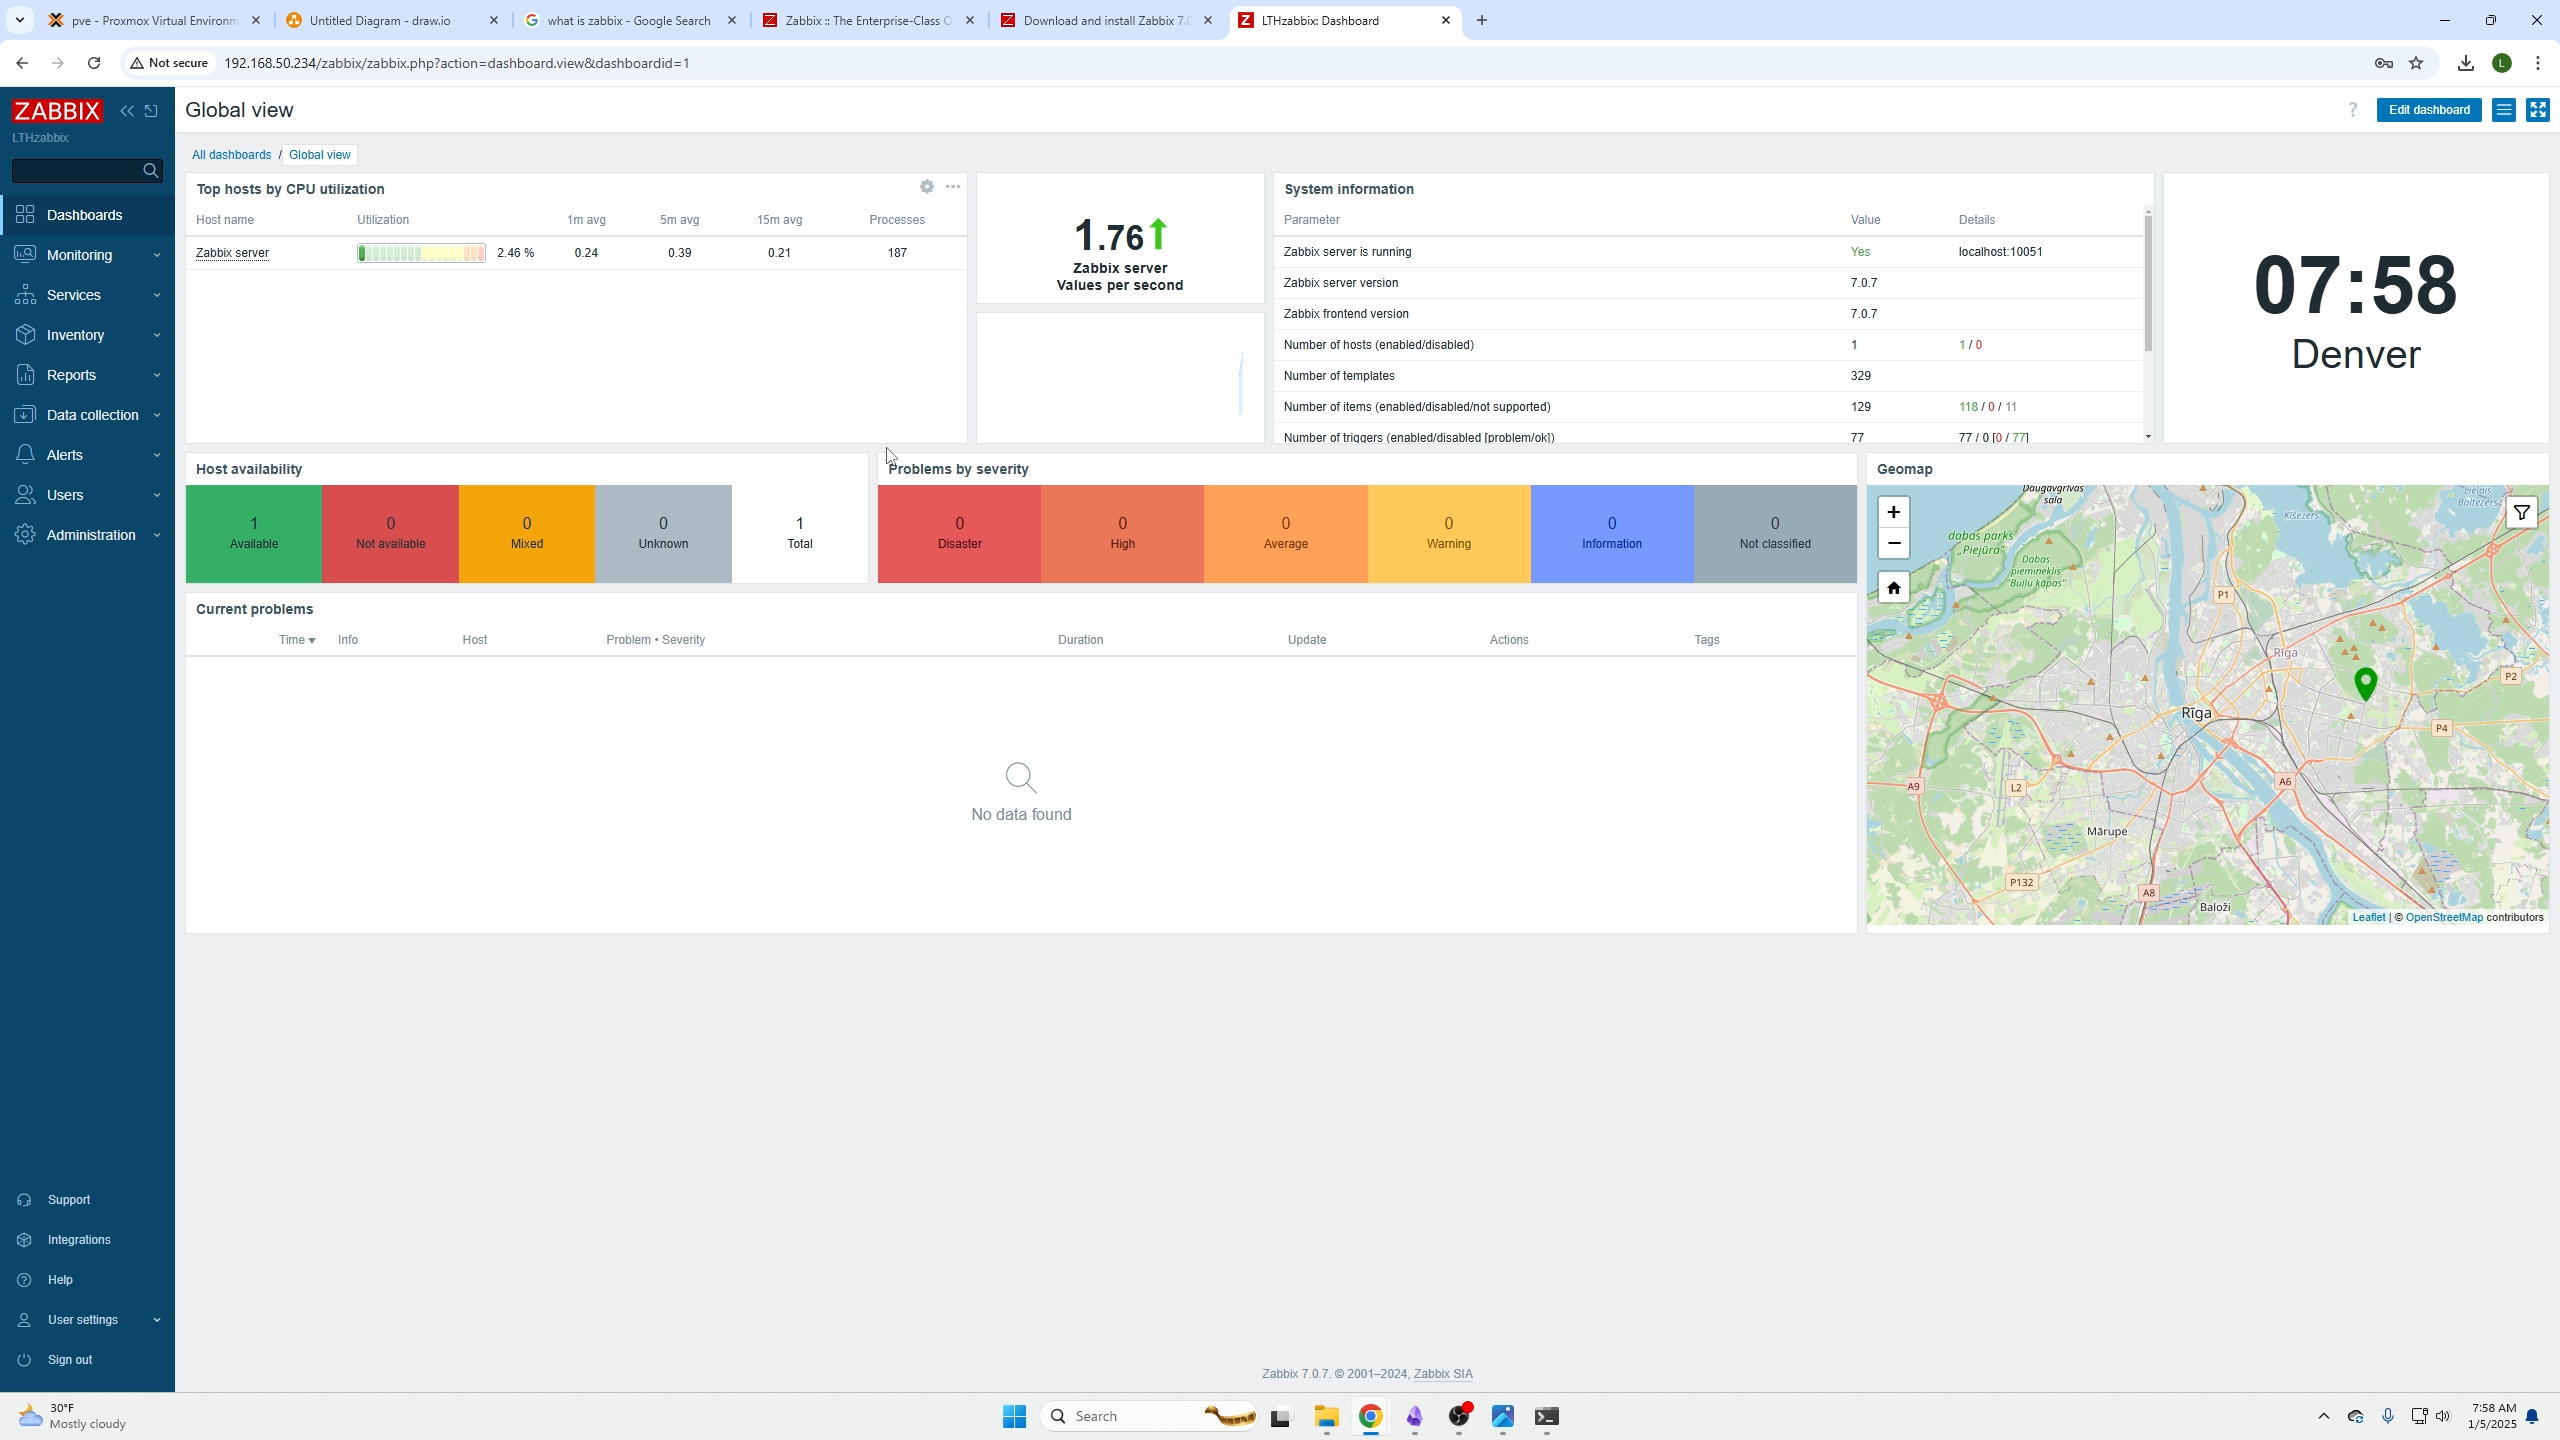
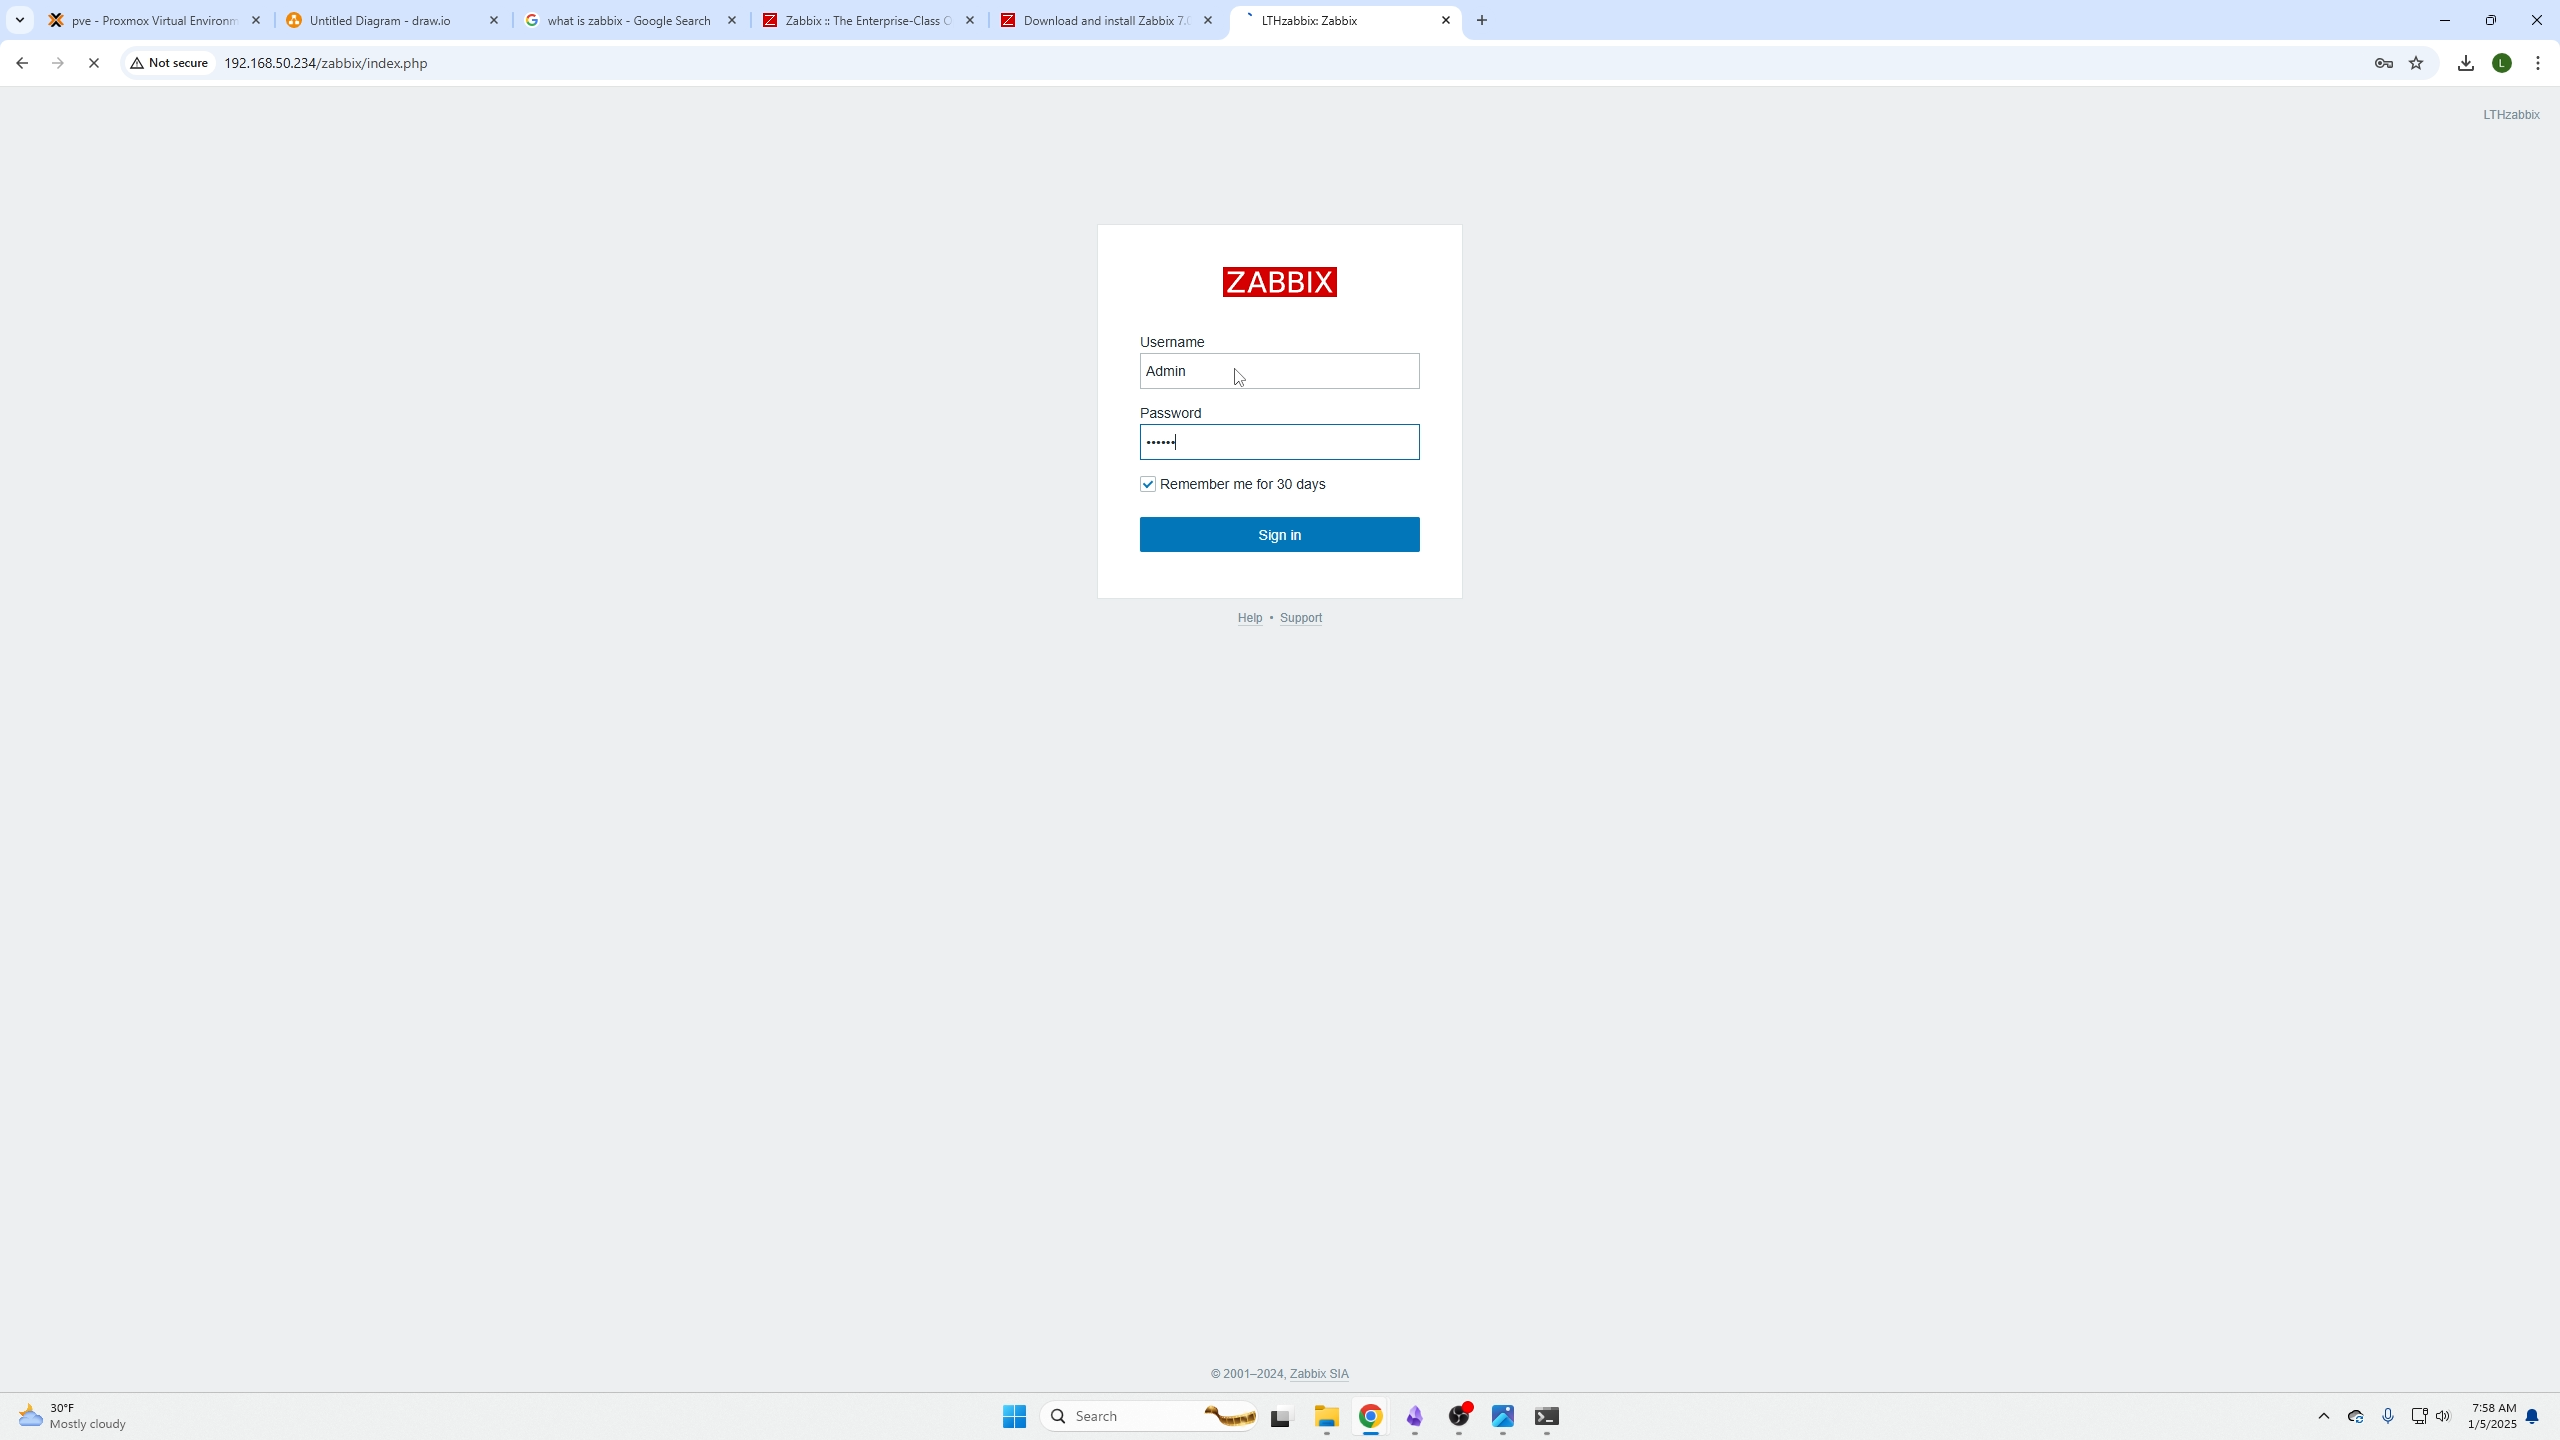
login, remember the login for username and password is case sensitive! it is Admin NOT admin.
User: Admin
Pass: zabbix
You are in, stay tuned for next episode on how to setup an agent on your servers, VMs, firewalls, etc!