How to Install Proxmox Statistics on The Homarr Dashboard

EP 22 - Homarr 1.0 Install/Upgrade:
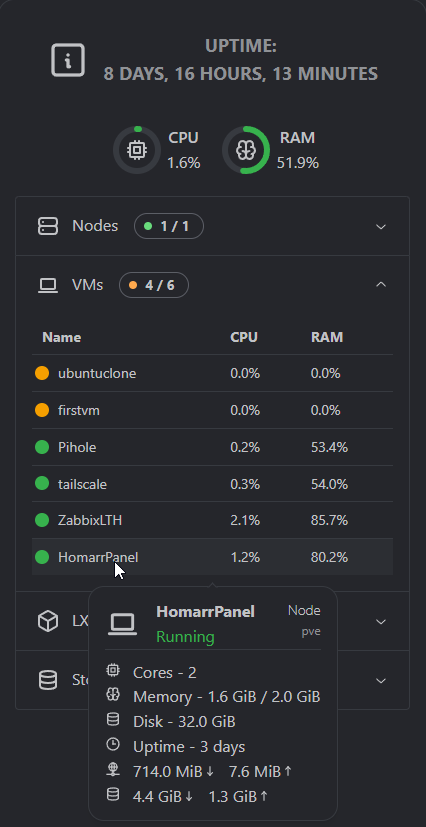
Here is the example of what we will be covering:
Follow the steps on your own
If you would like to follow the 13 steps on your own here is a link to Homarrs documentation.
Before getting started
-
Make sure you login to your Homarr dashboard like we setup in the previous episode.
-
Make sure you login to your Proxmox Machine to create the API key required for stats to be shown in Homarr.
Step by Step Instructions
-
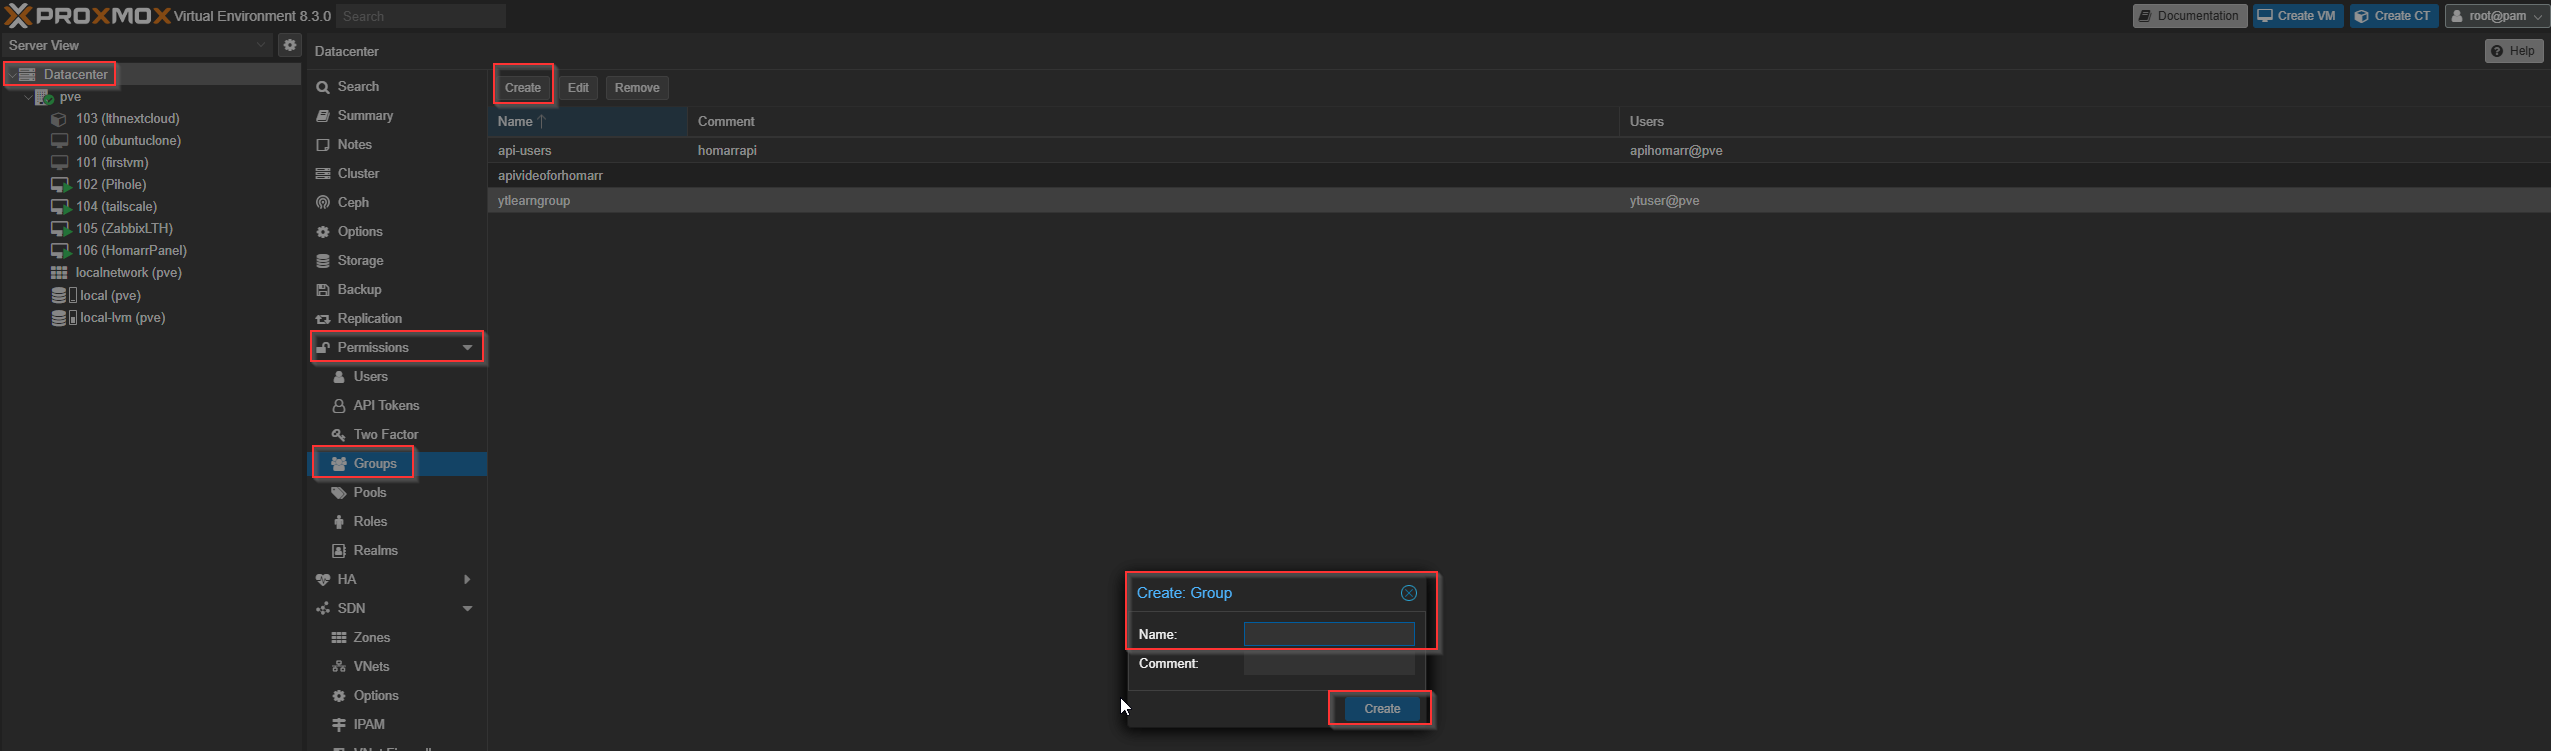
Navigate to the Proxmox portal, click on Datacenter
-
Expand Permissions, click on Groups
-
Click the Create button
-
Name the group something informative, like api-users (our case we did ytlearngroup)
- Click on the Permissions "folder"
Click Add -> Group Permission

-
Path: /
Group: group from Step 4 above
Role: PVEAuditor
Propagate: Checked

-
Expand Permissions, click on Users
-
Click the Add button
User name: something informative like api
Realm: Proxmox VE authentication server
Password: create a secure password for the user
Confirm Password: re-enter the password
Group: group from Step 4 above

-
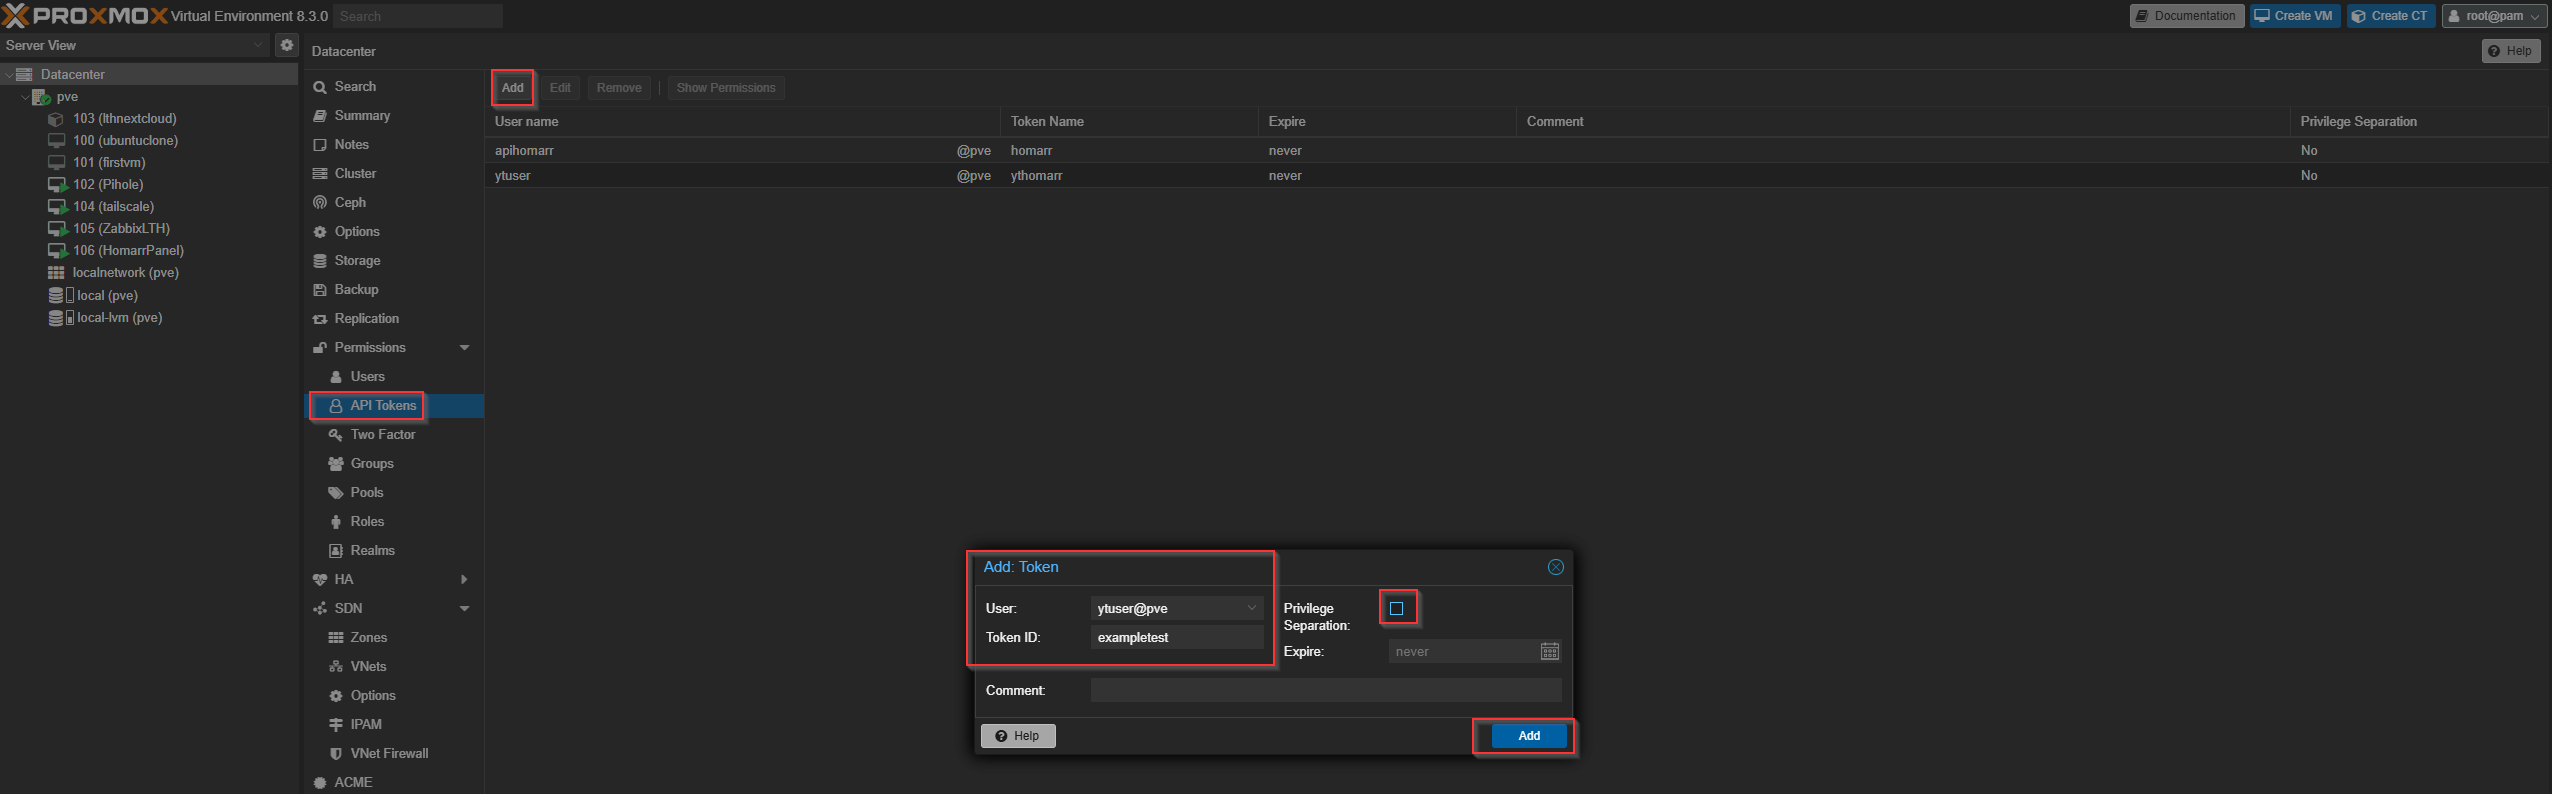
Expand Permissions, click on API Tokens
-
Click the Add button
User: user from Step 8 above
Token ID: something informative like the application or purpose like homarr
Privilege Separation: unchecked
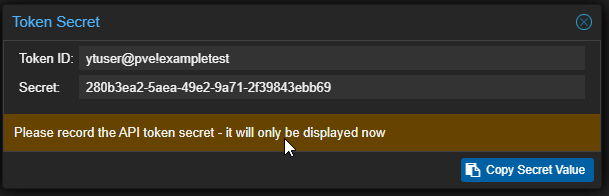
- Copy the Secret that is shown in Step 10 because it is only shown once.
NOTICE THIS IS THE STEP WHERE YOU CAN GRAB THE CORRECT INTEGRATION KEY FORMAT!
You will copy the TokenID into a notepad ADD an = sign and then paste the secret key after that.
Exmaple:
-
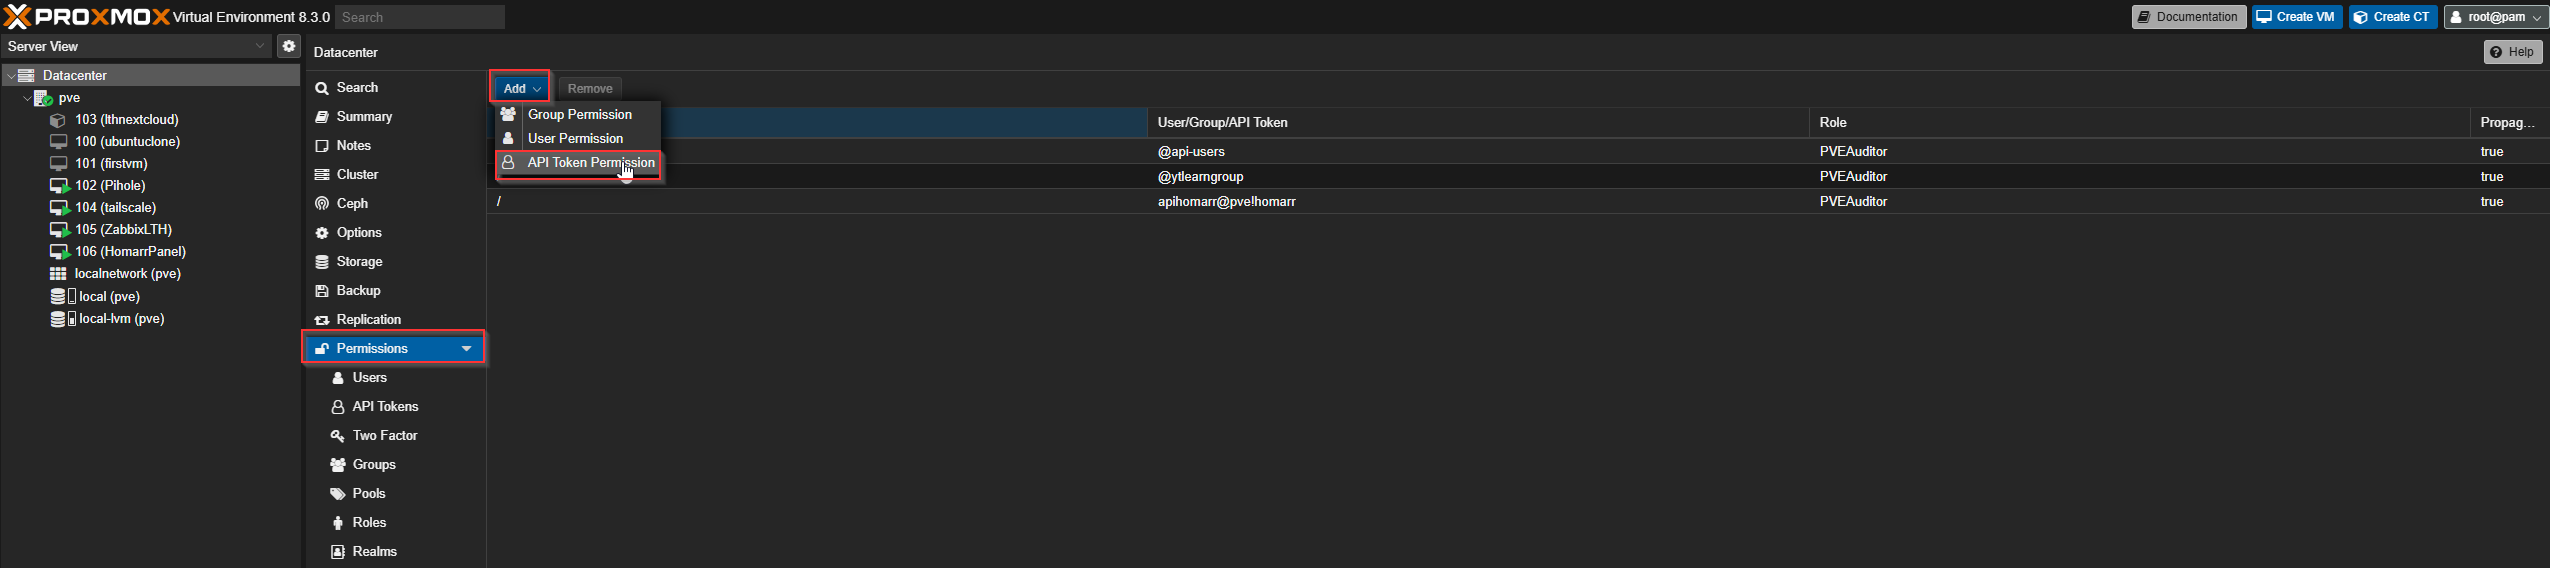
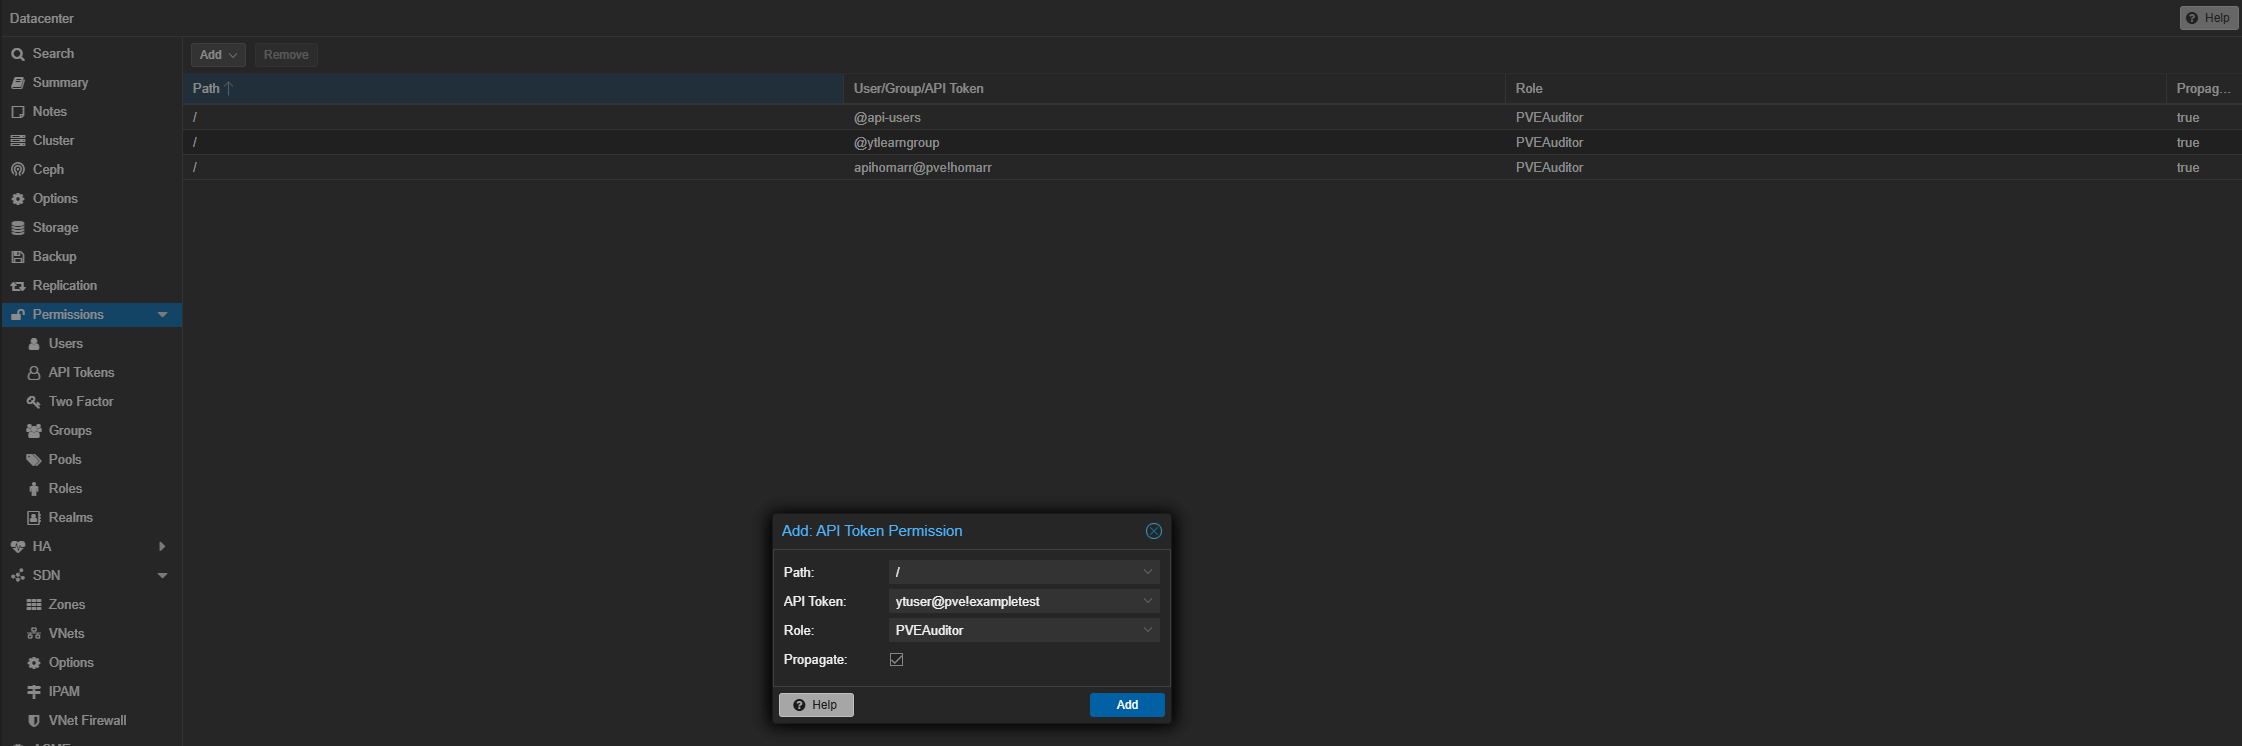
Go back to the "Permissions" menu
Click Add -> API Token Permission
-
Path: /
API Token: select the API token created in Step 10
Role: PVE Auditor
Propagate: Checked
Adding your API to Homarr's Dashboard
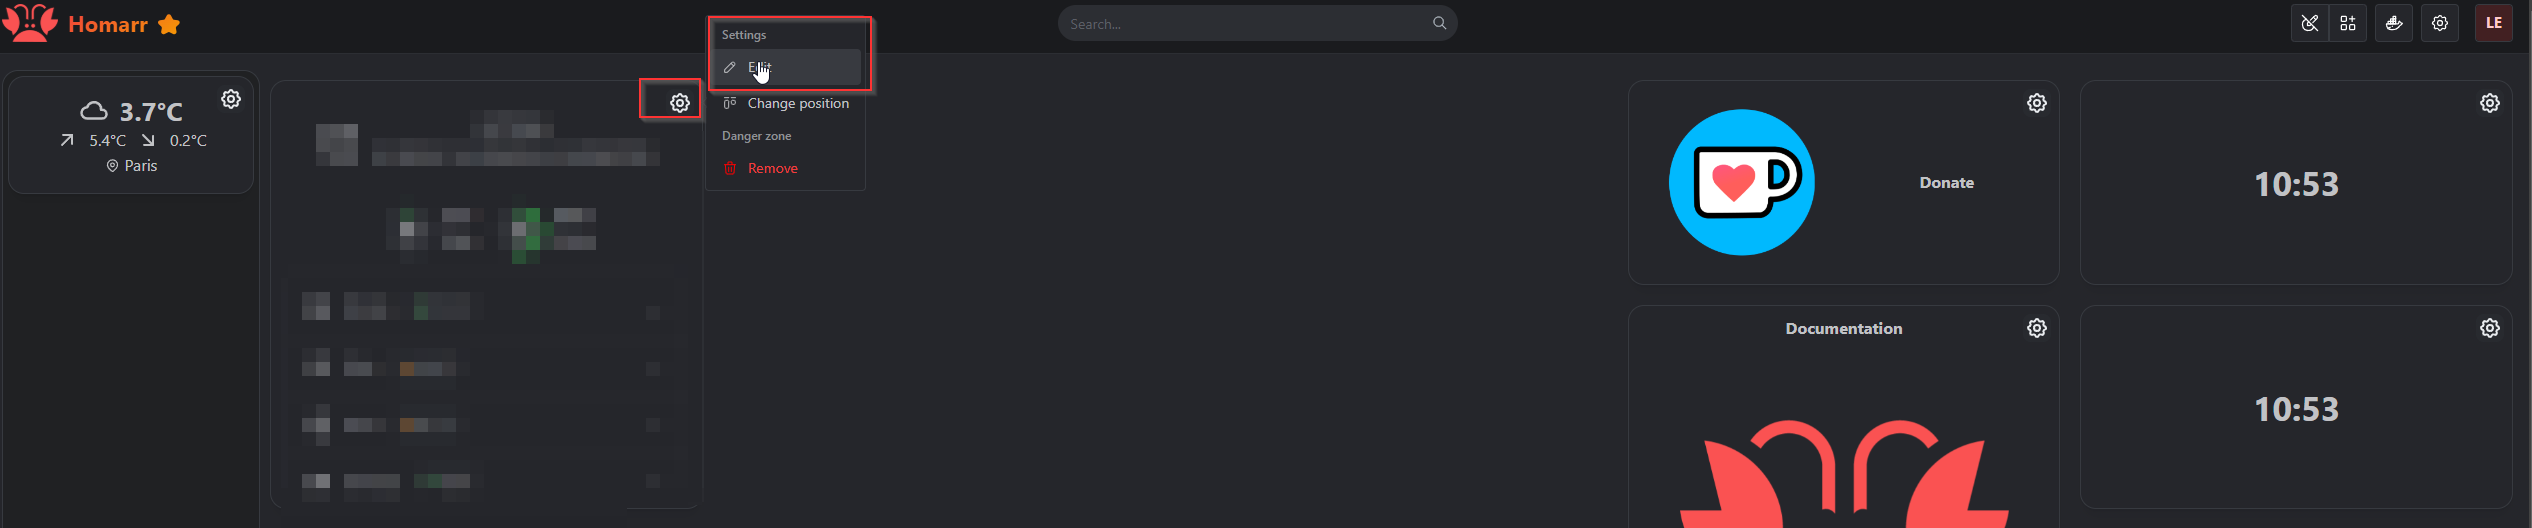
Open your Homarr Dashboard
Select the Writing / edit icon.
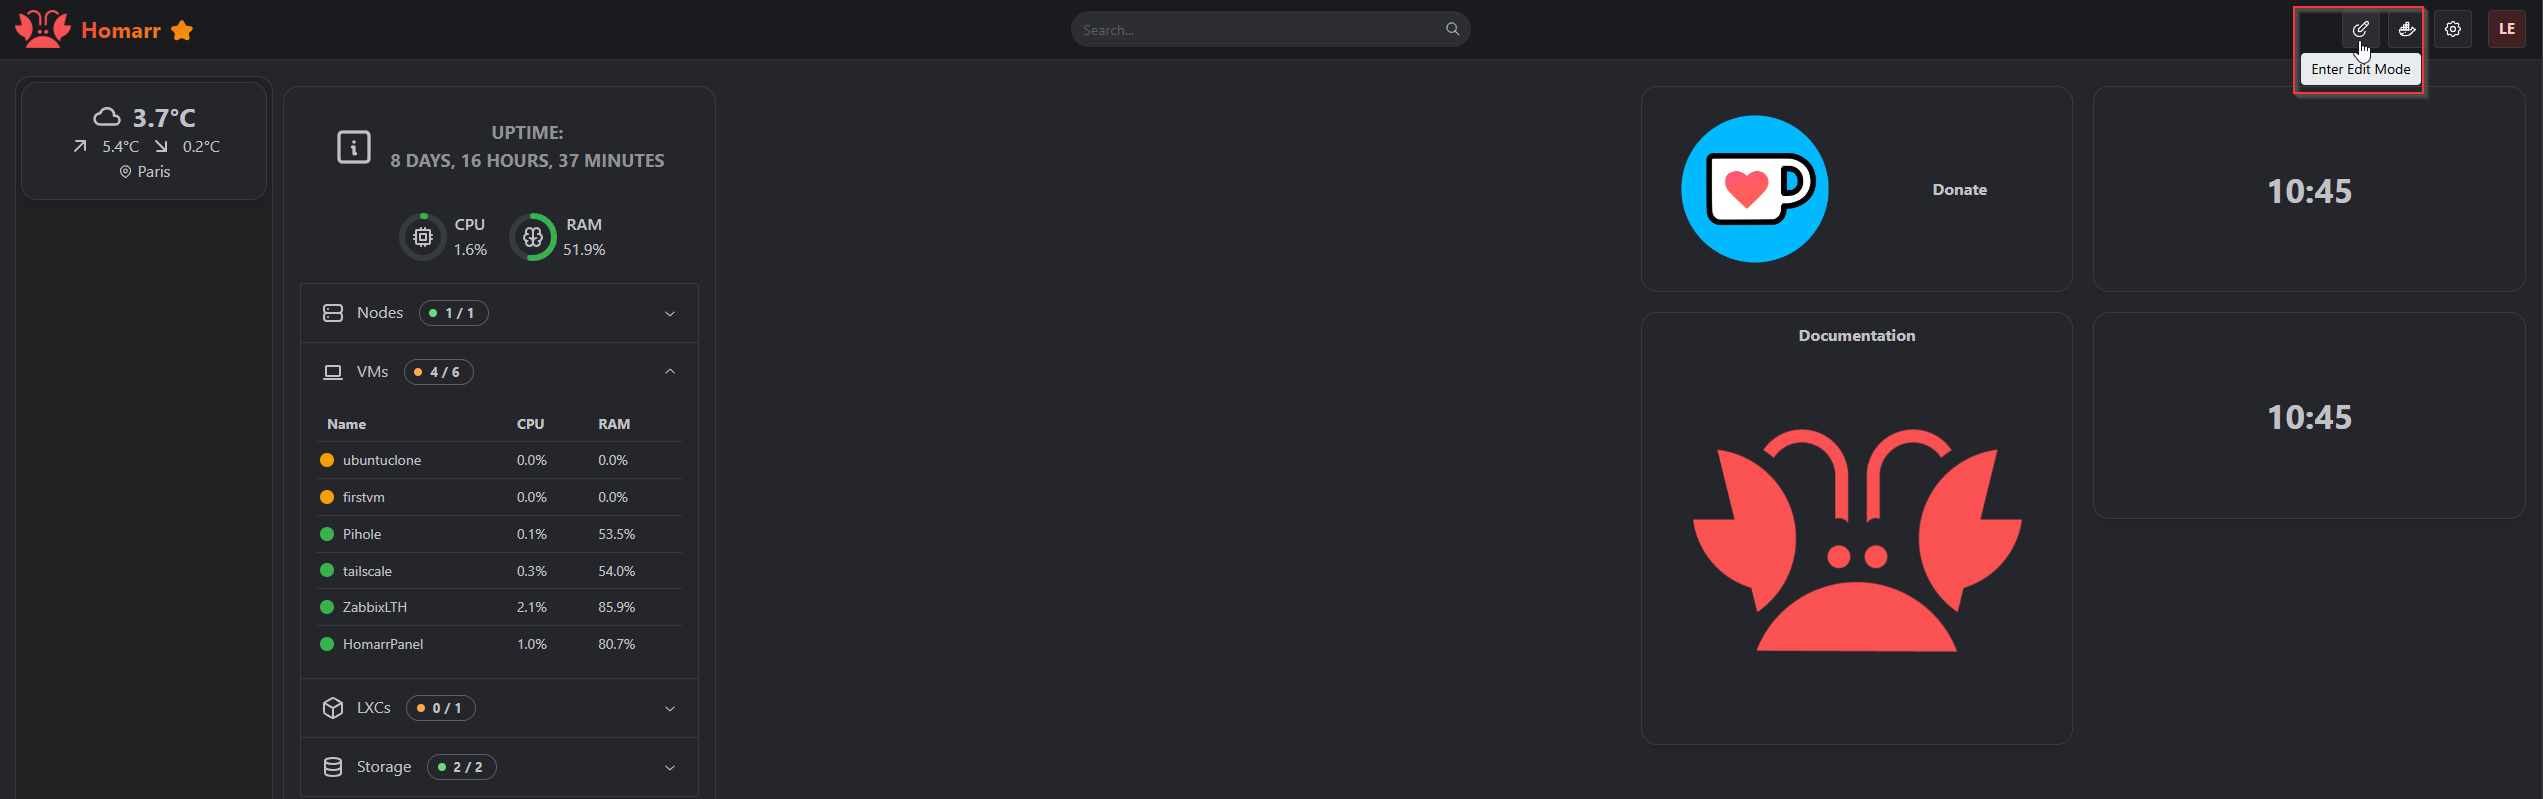
Then the Add tile button

Then select "Apps"

You will then need to grap the IP address of your server and paste it to internal and external.
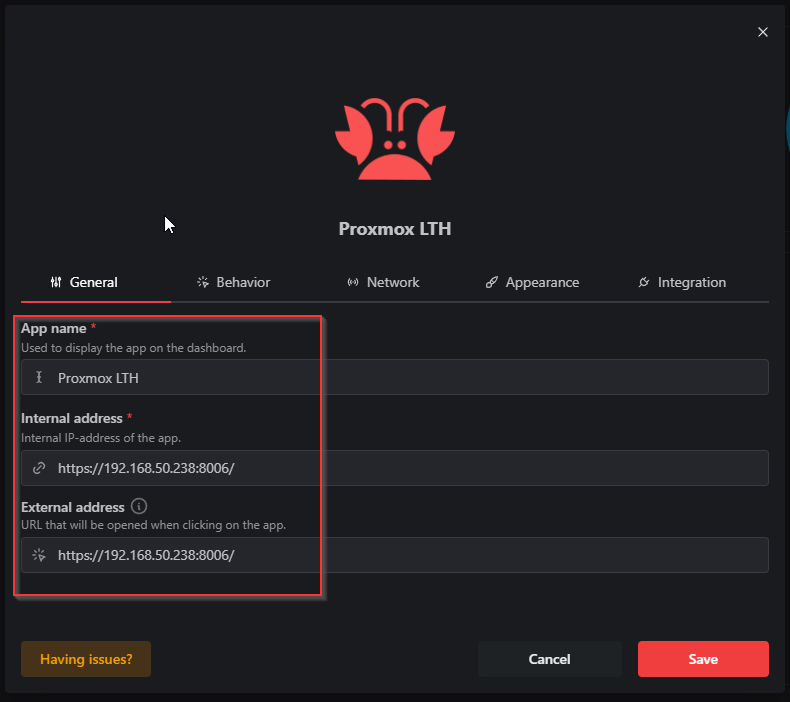
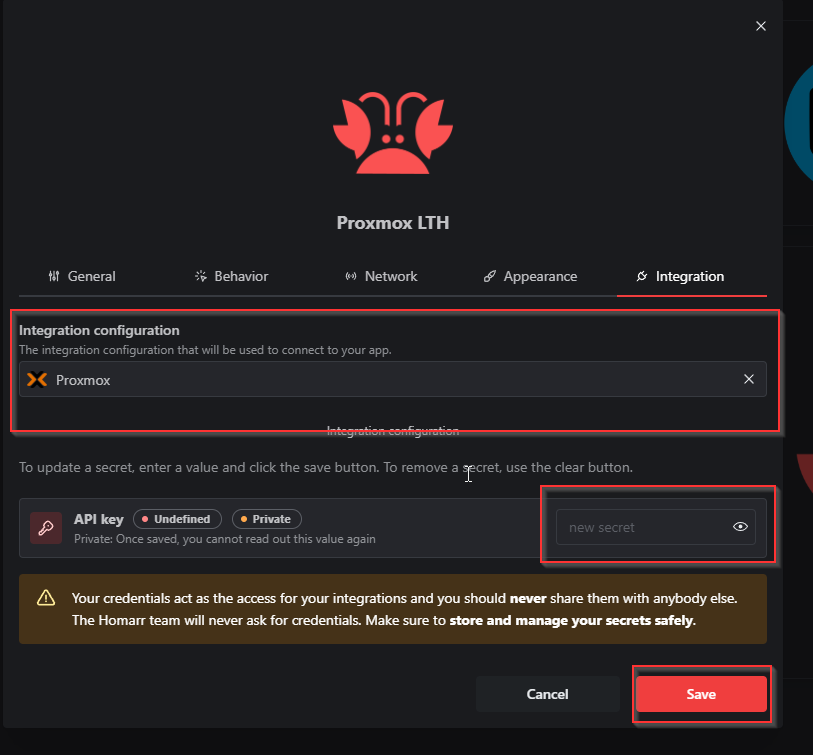
Move over to the integrations tab and this is where you will select your integration as Proxmox and paste your Proxmox API key you made a minute ago. Then select "Save".
After that you will need to add a Widget like you just added an app.

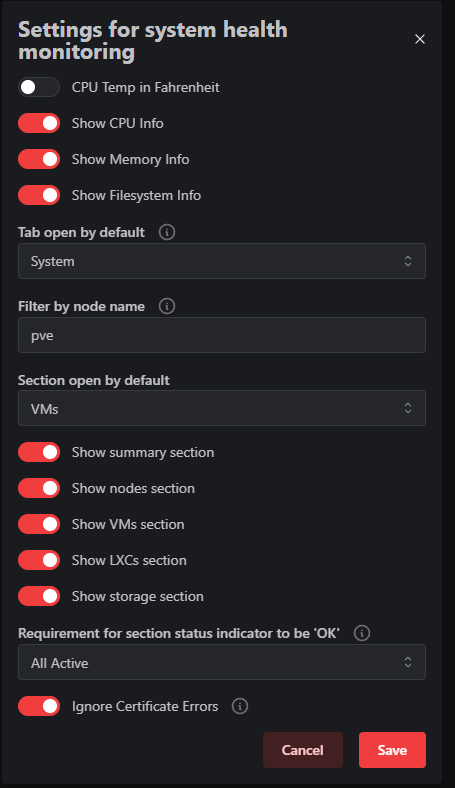
Scroll down until you find System Health Monitoring and add it.

Find the newly placed widget on your Dashboard, click the gear icon on the top right to edit it.
Lastly, change your settings to match the below screenshot, save, and wait a couple minutes for your data to appear and that is it. (9)
Closing thoughts
That is it, if you have any other questions do not forget to hop in our discord!