How to Setup Ceph on Proxmox and Perform Live VM Migration
In this video we will cover how to do live VM migration between Proxmox Nodes in a cluster using Ceph as the distributed data storage.
Setting up a Ceph Storage Pool
Here are the following steps to create a ceph cluster:
- Have dedicated storage for your ceph pool (ssd, HDD. CANNOT be the one you are already using because we are going to wipe it)
Ensure you have an extra SSD/HDD installed for your Ceph pool.
The following commands will need to be done on EVERY node (cluster size dependent)
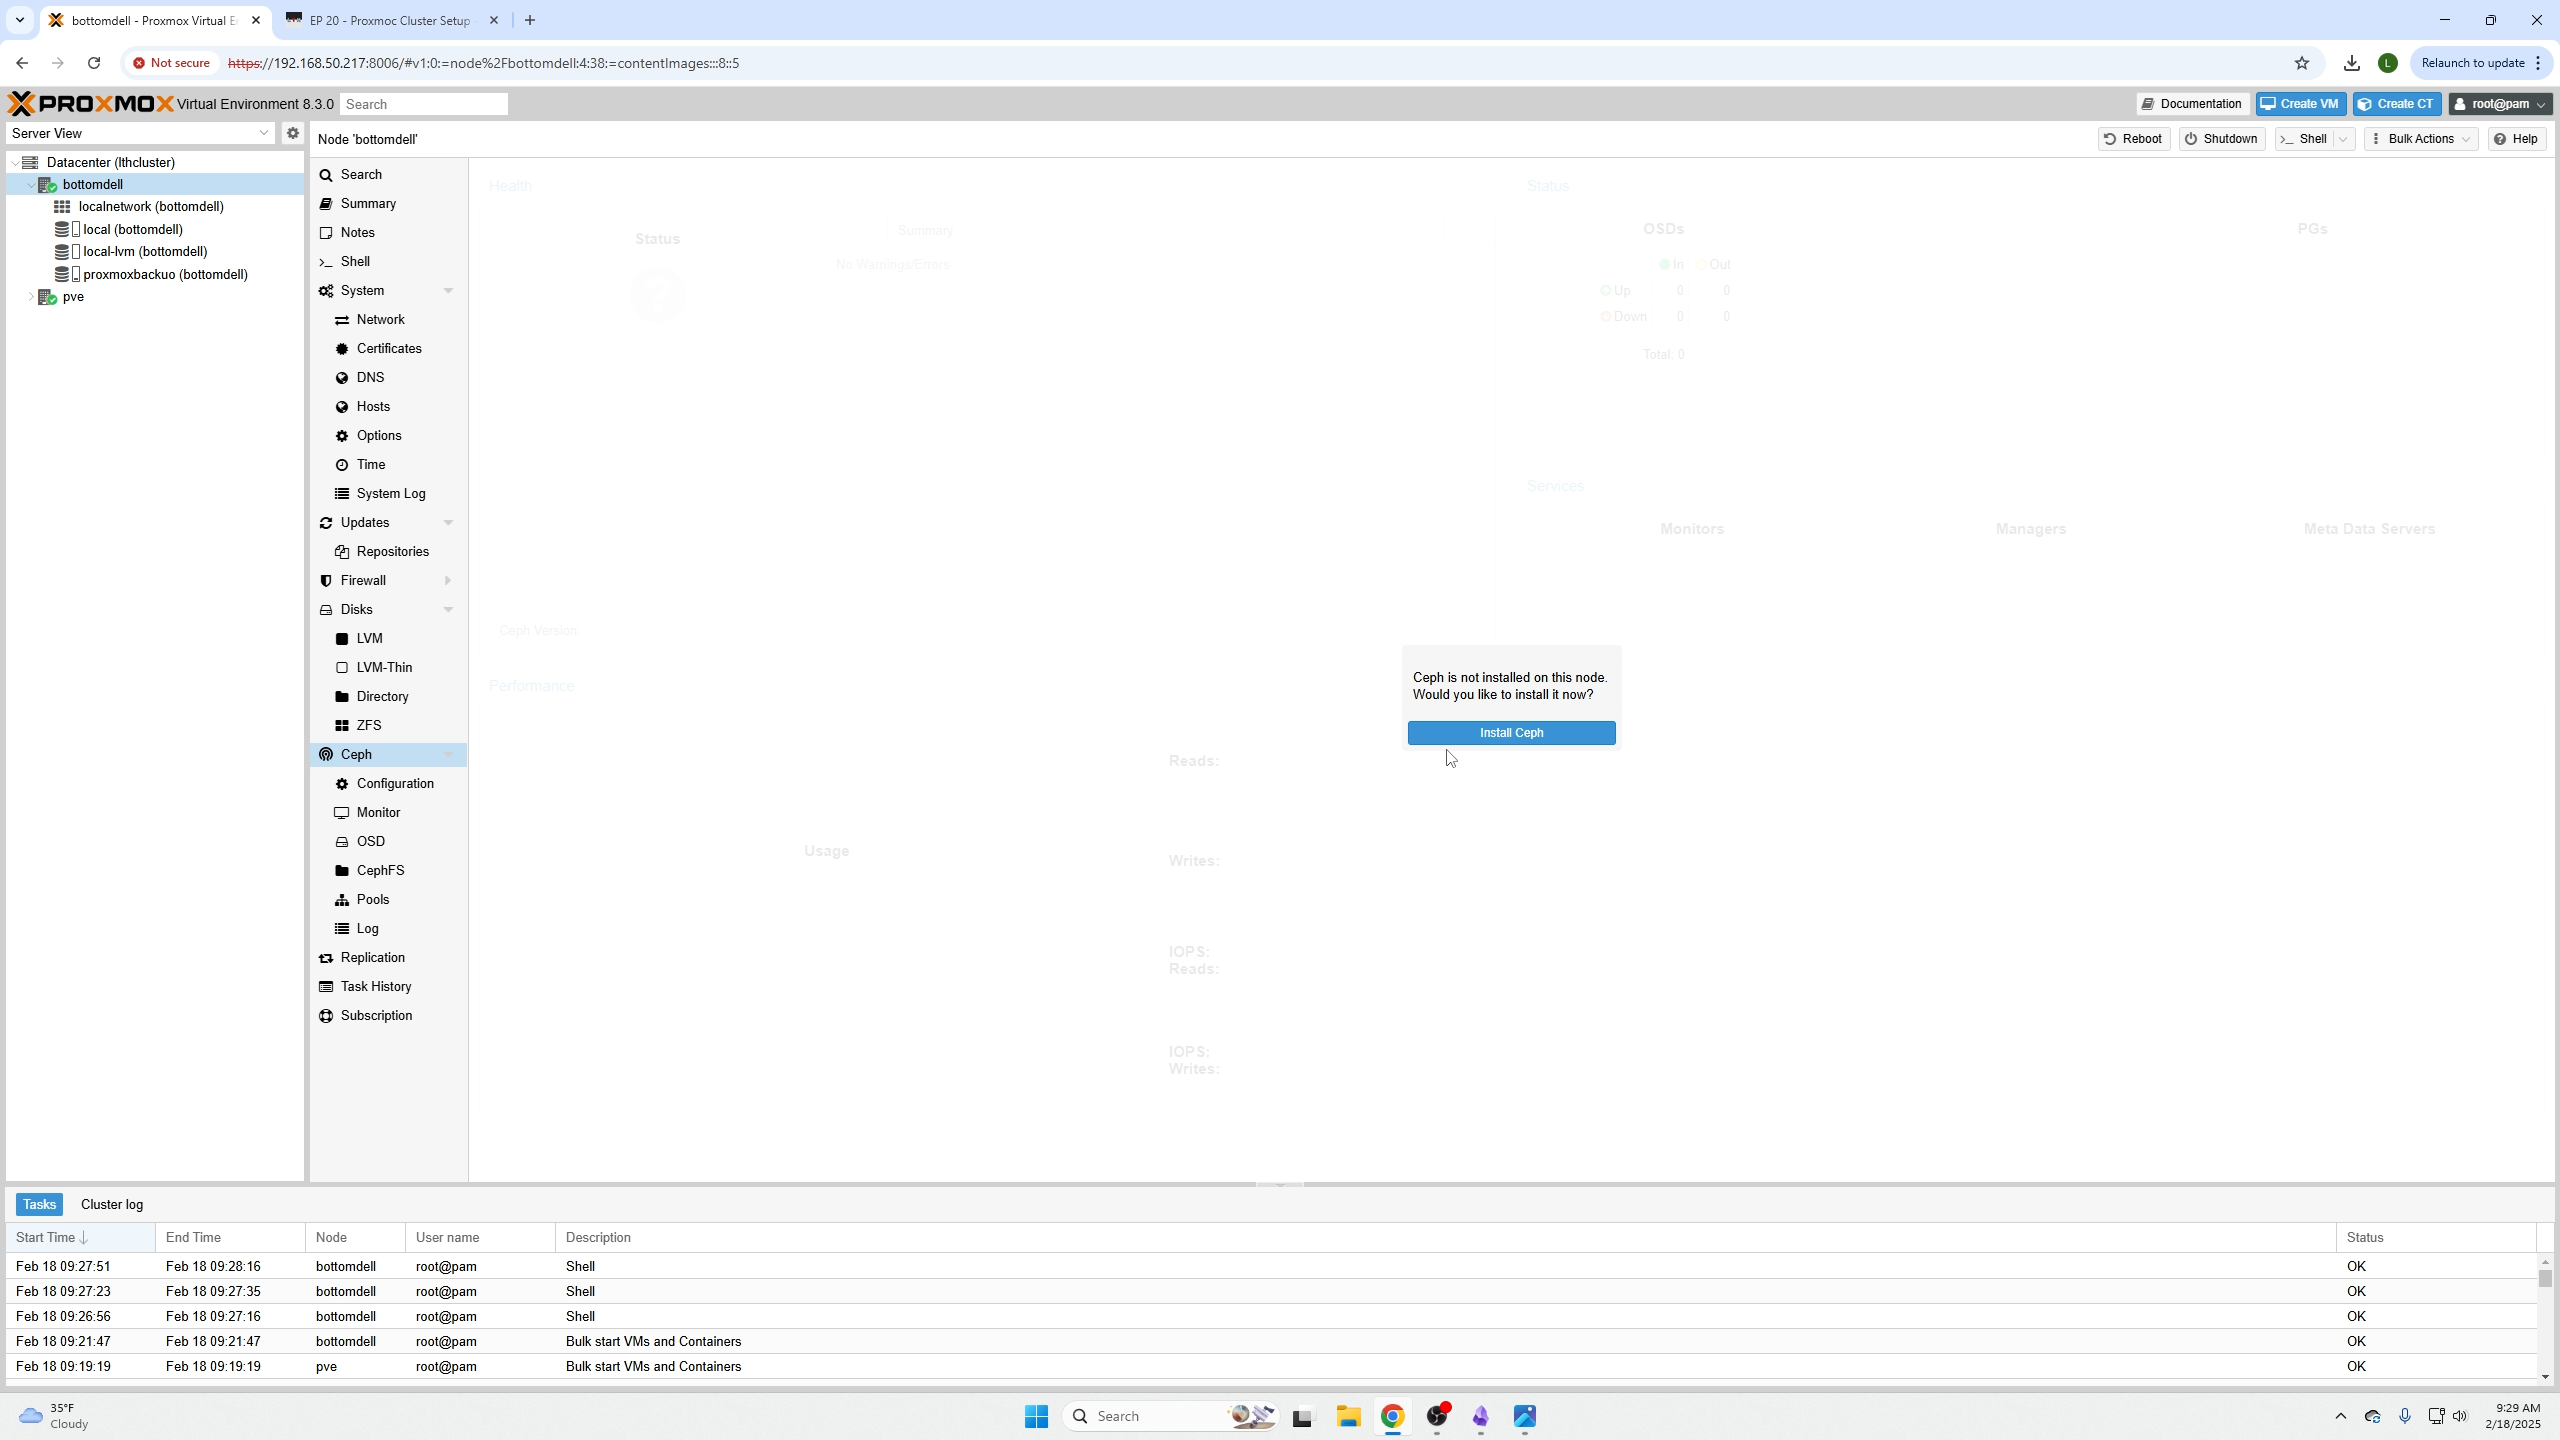
Click on your node, go to Ceph, and click install Ceph.
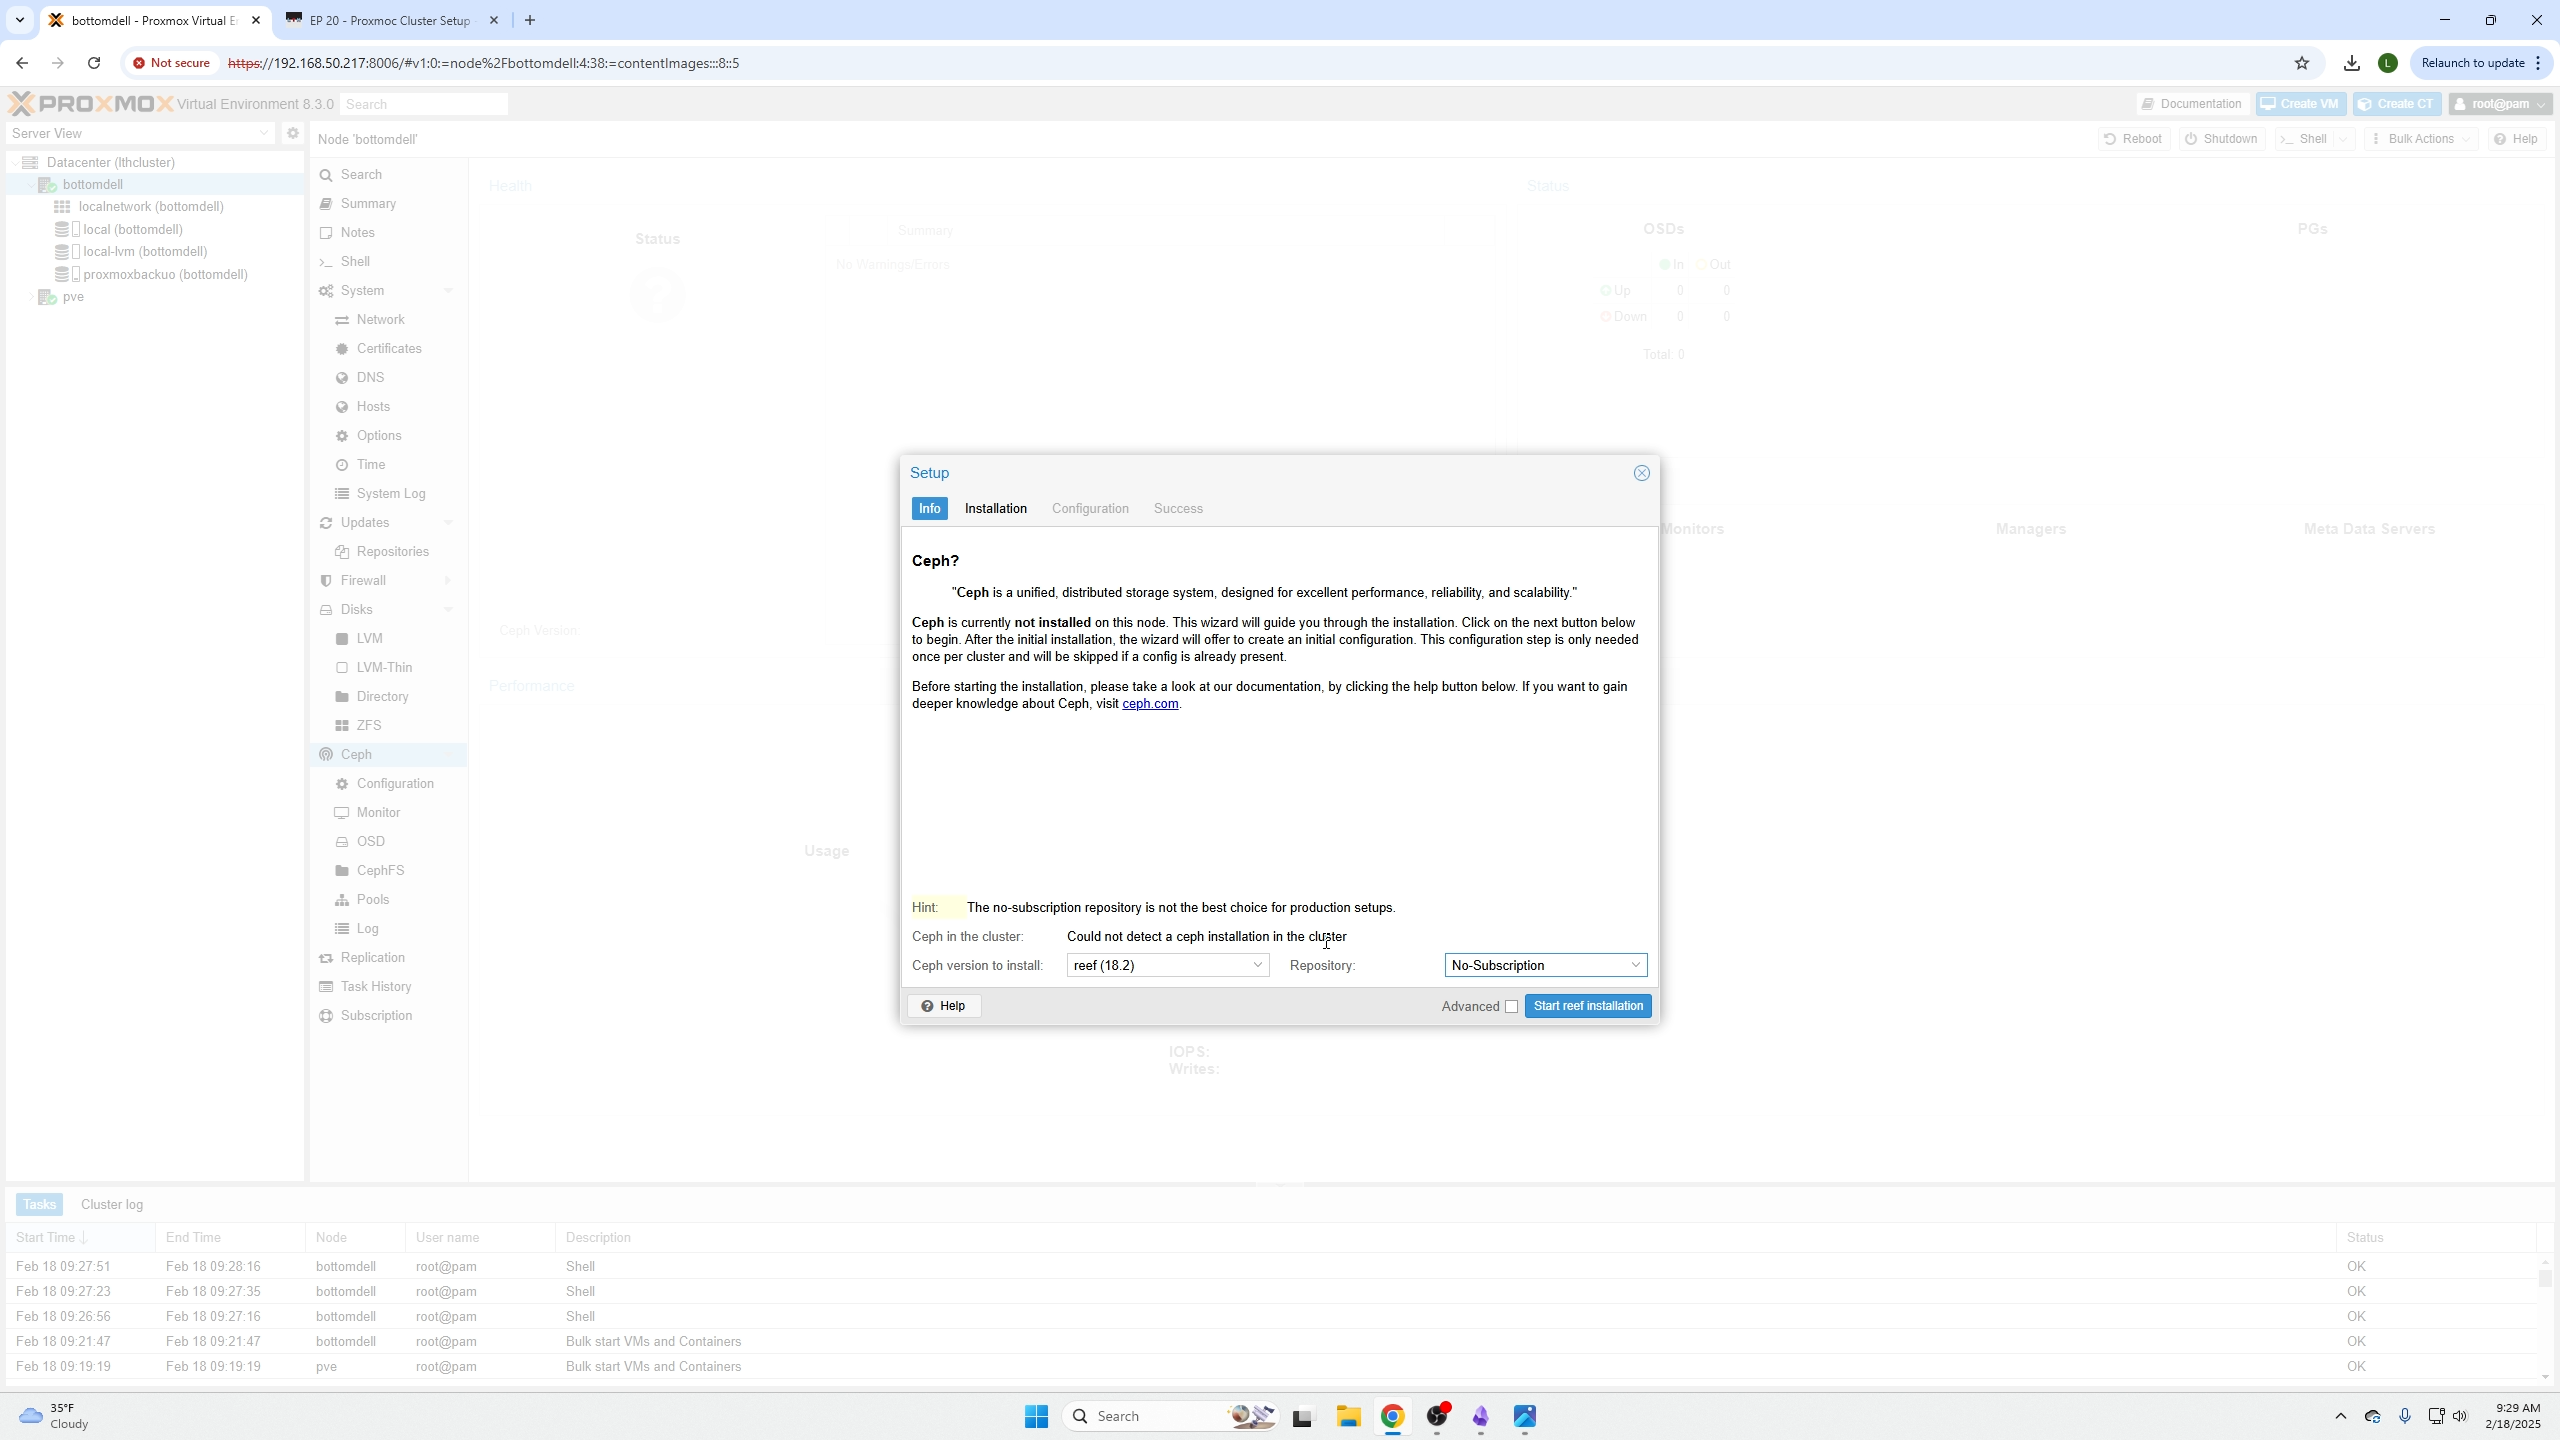
We are going to use Reef (18.2) make sure you install the latest at the time you do this install and the No-Subcription option because we do not pay for Proxmox.
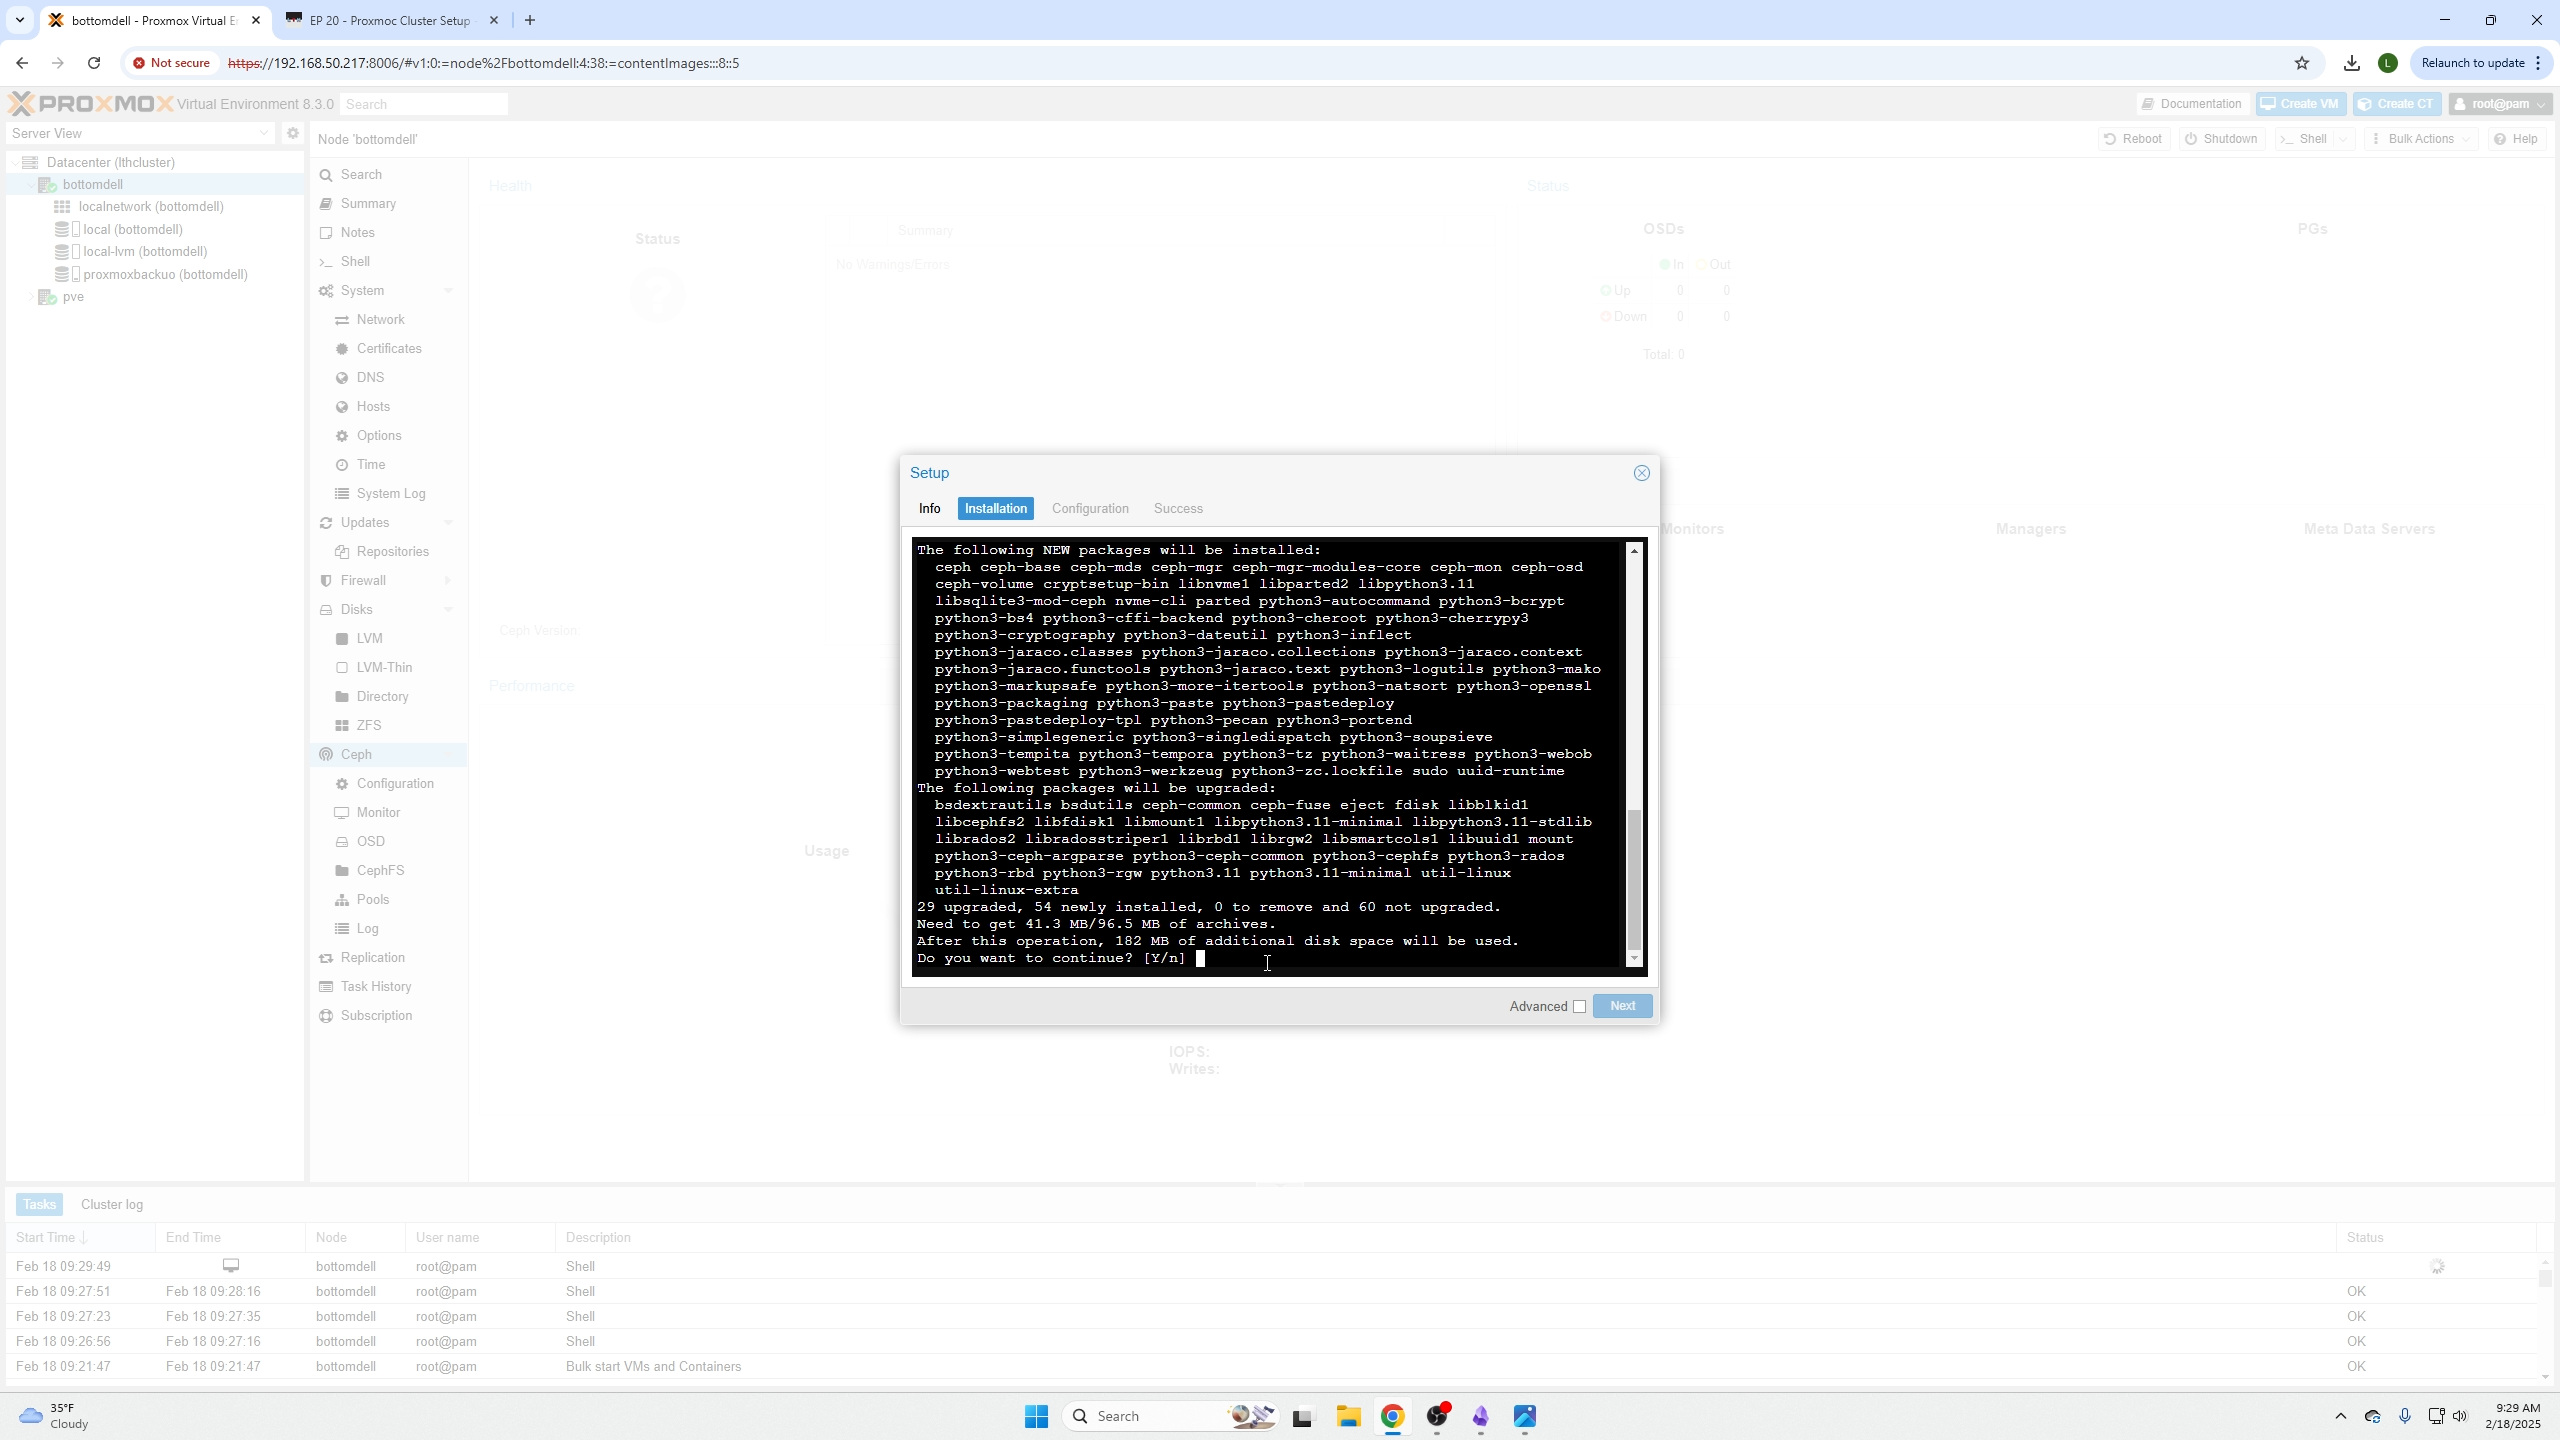
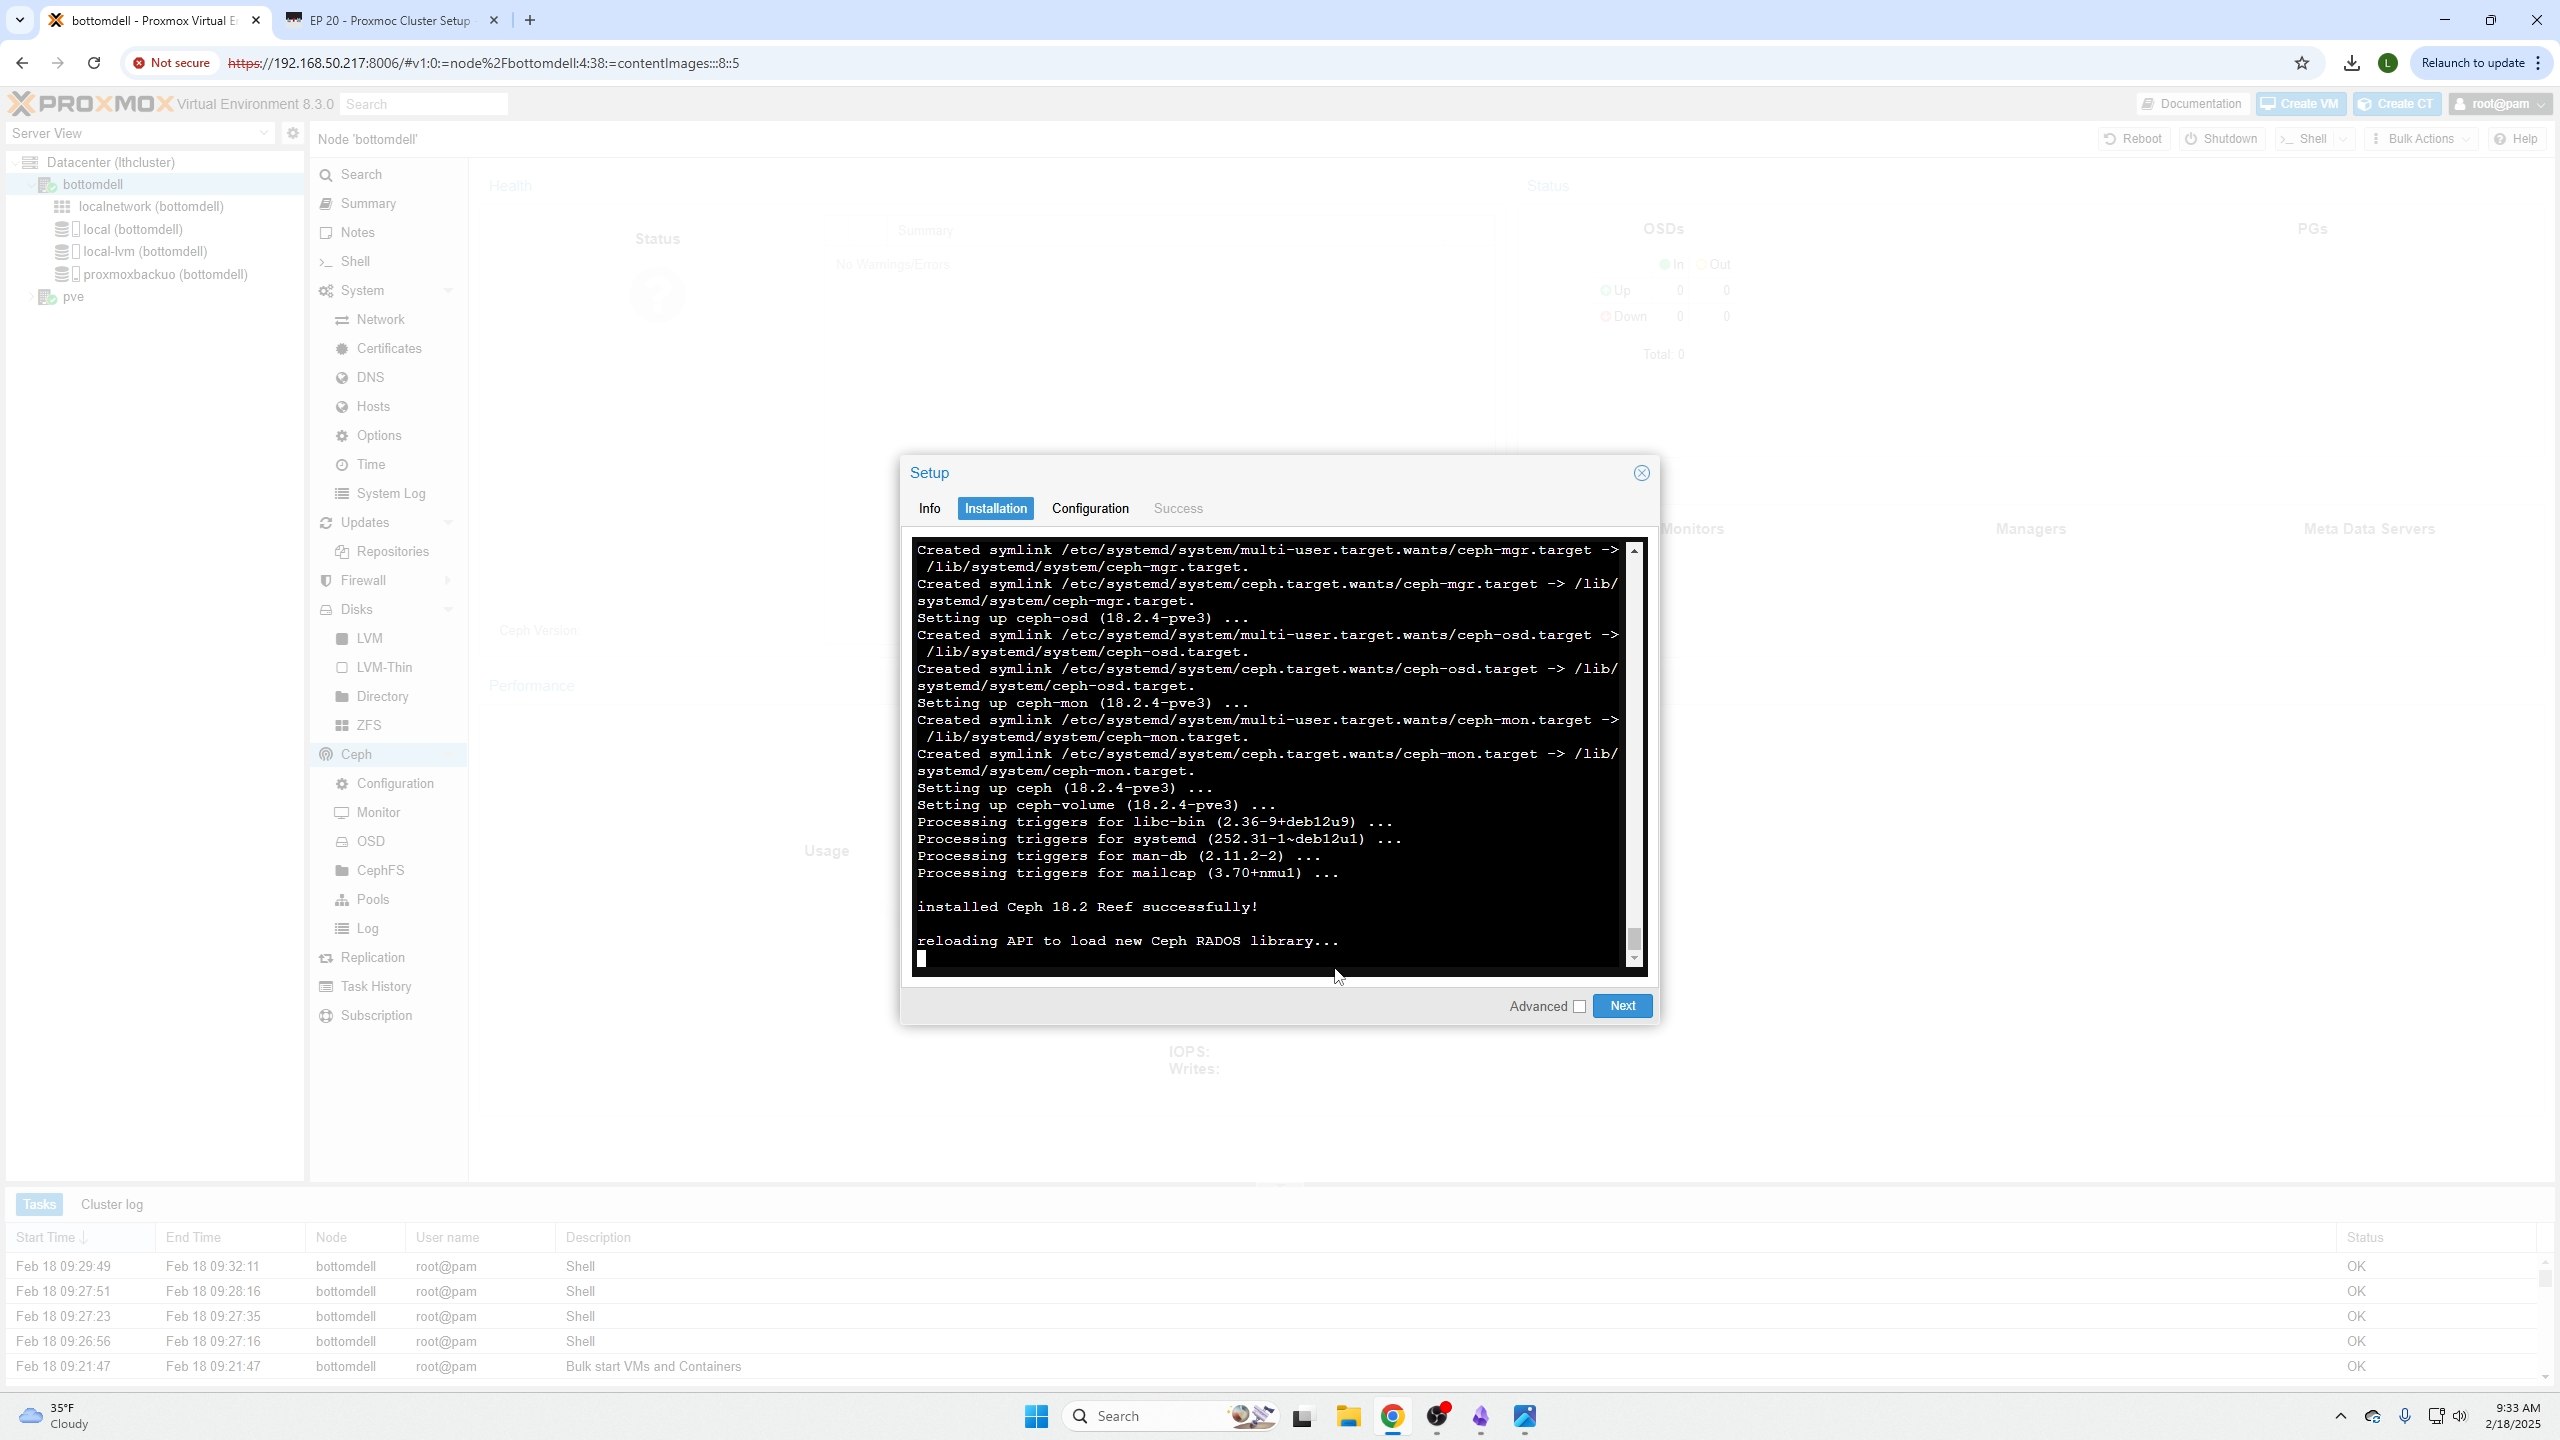
On the next screen you will see a prompt during install, click enter for yes and wait for it to finish.
When you see the following screen and the blue next button is now clickable, go to next.
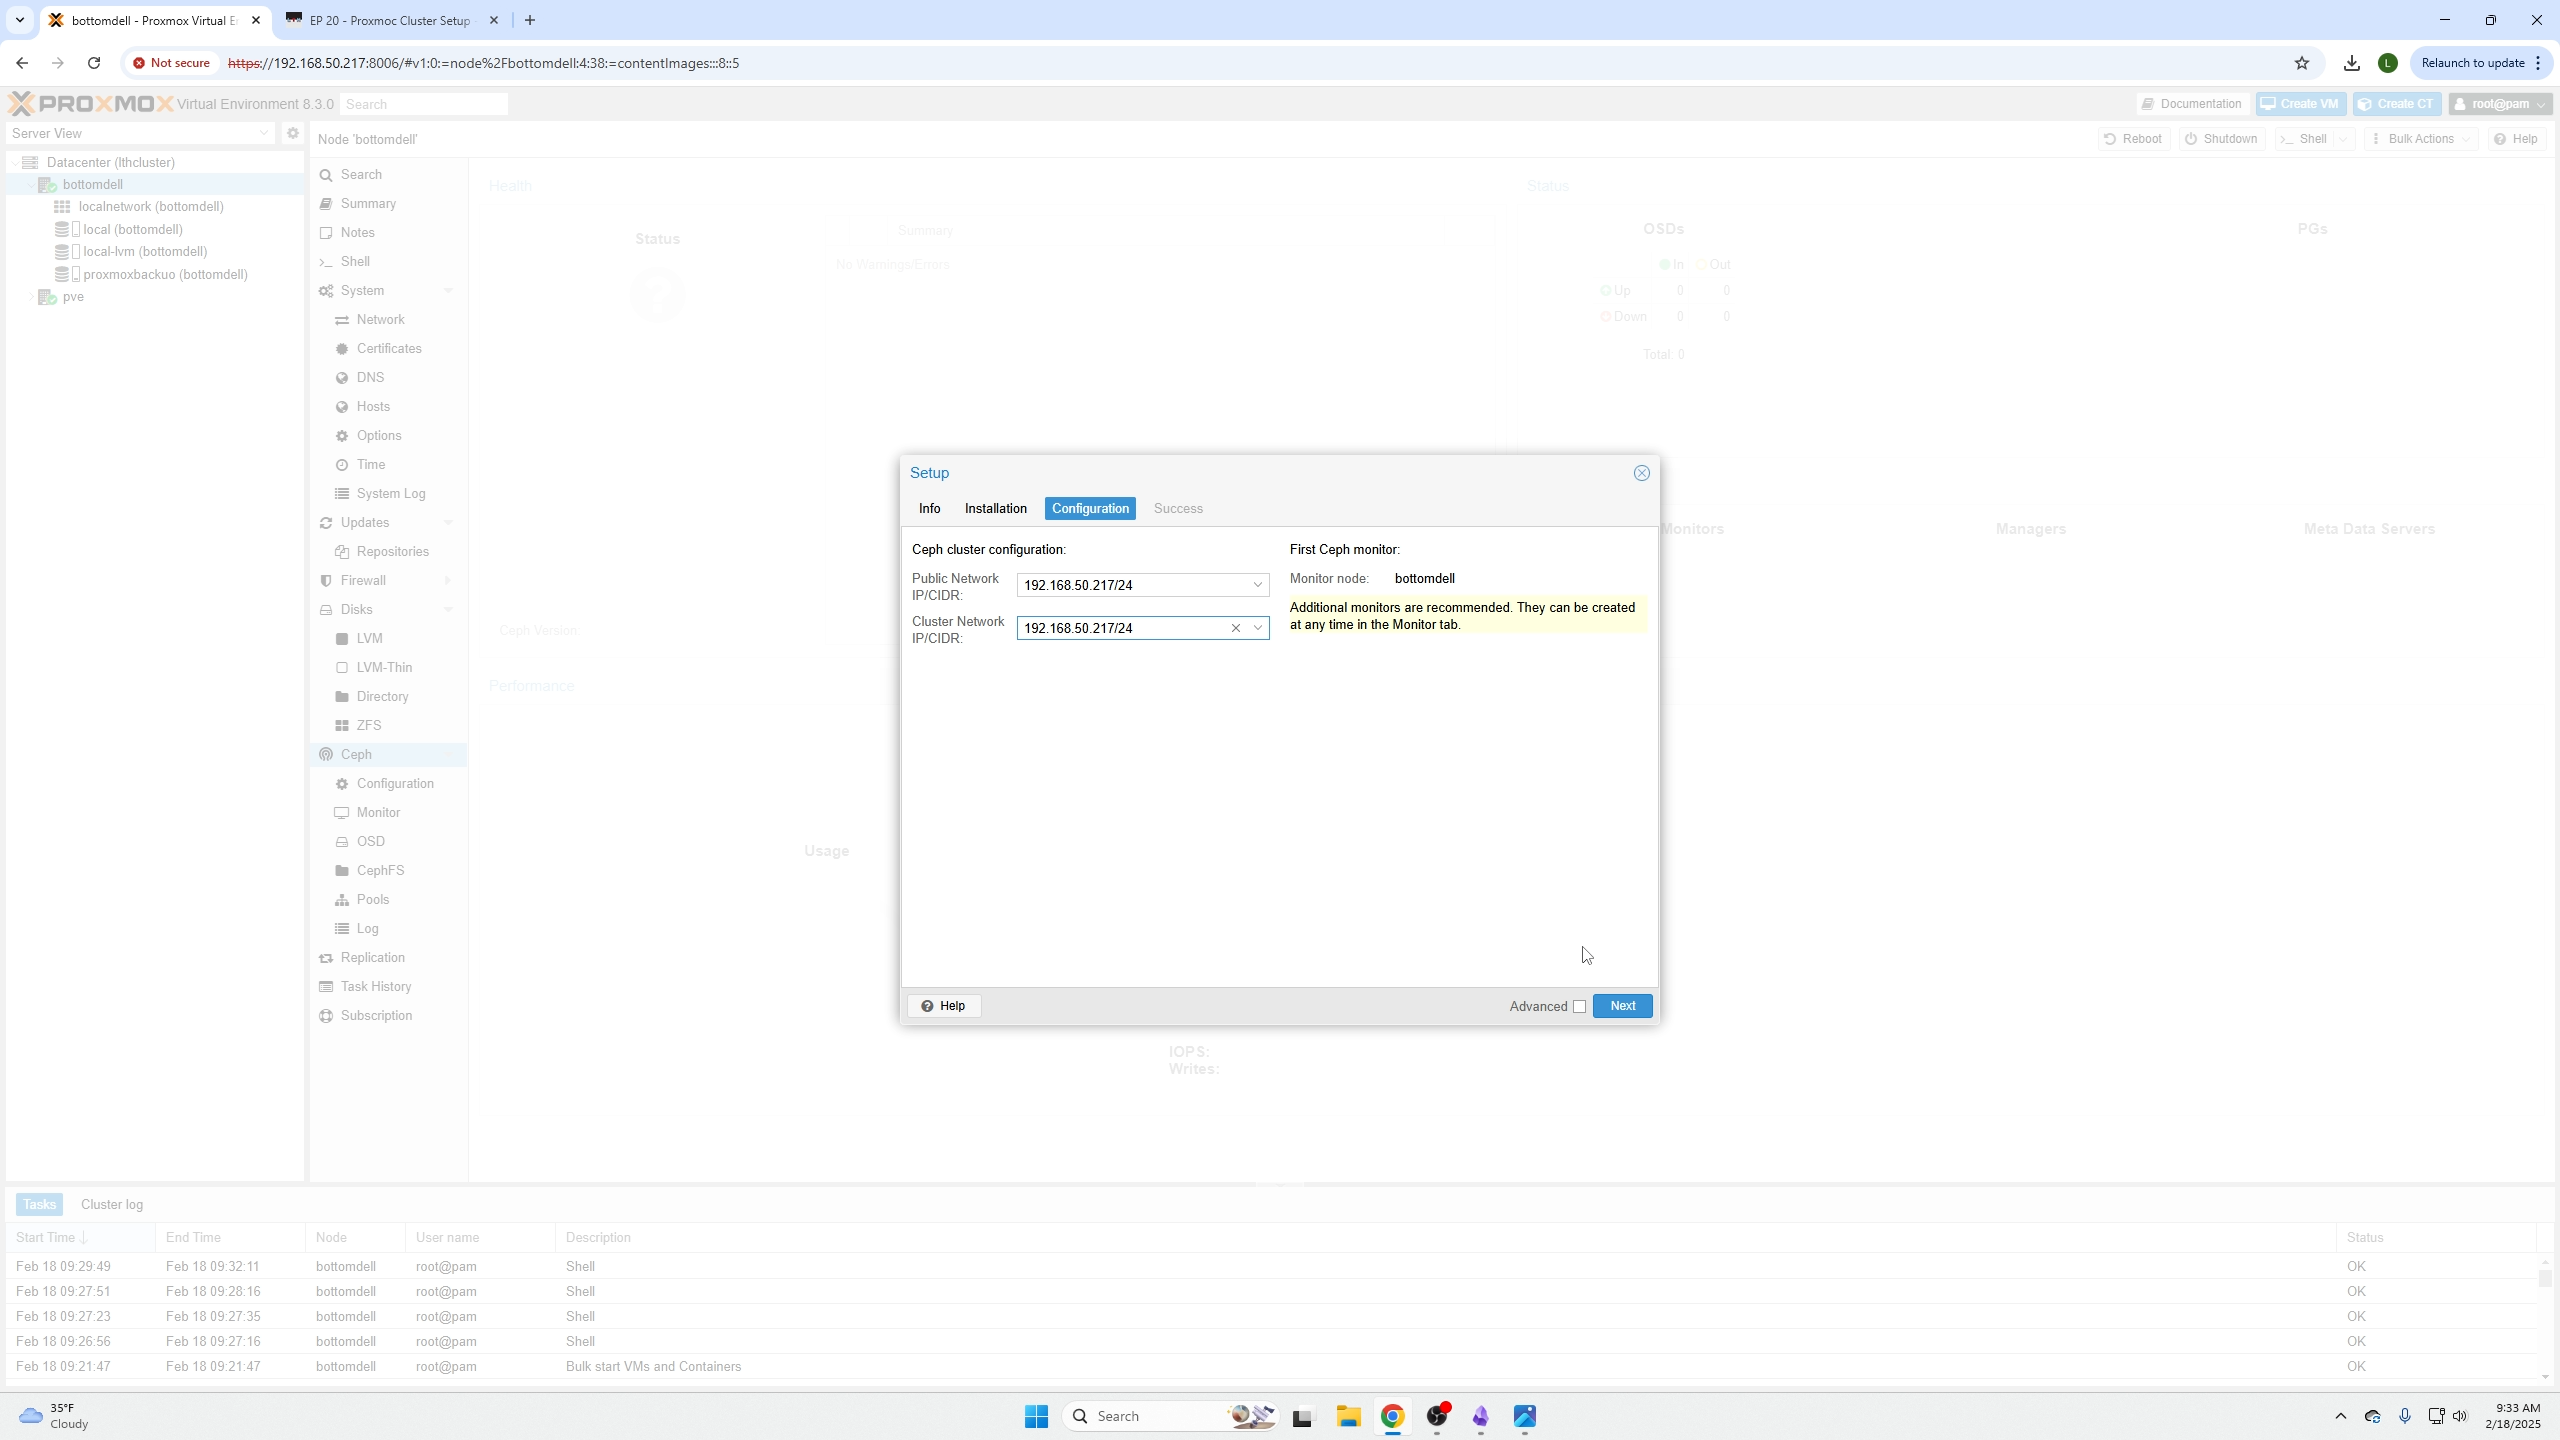
Your install should do this by default but if not make sure it has the same network selected as the node, then click next.
Now we need to create the storage pool
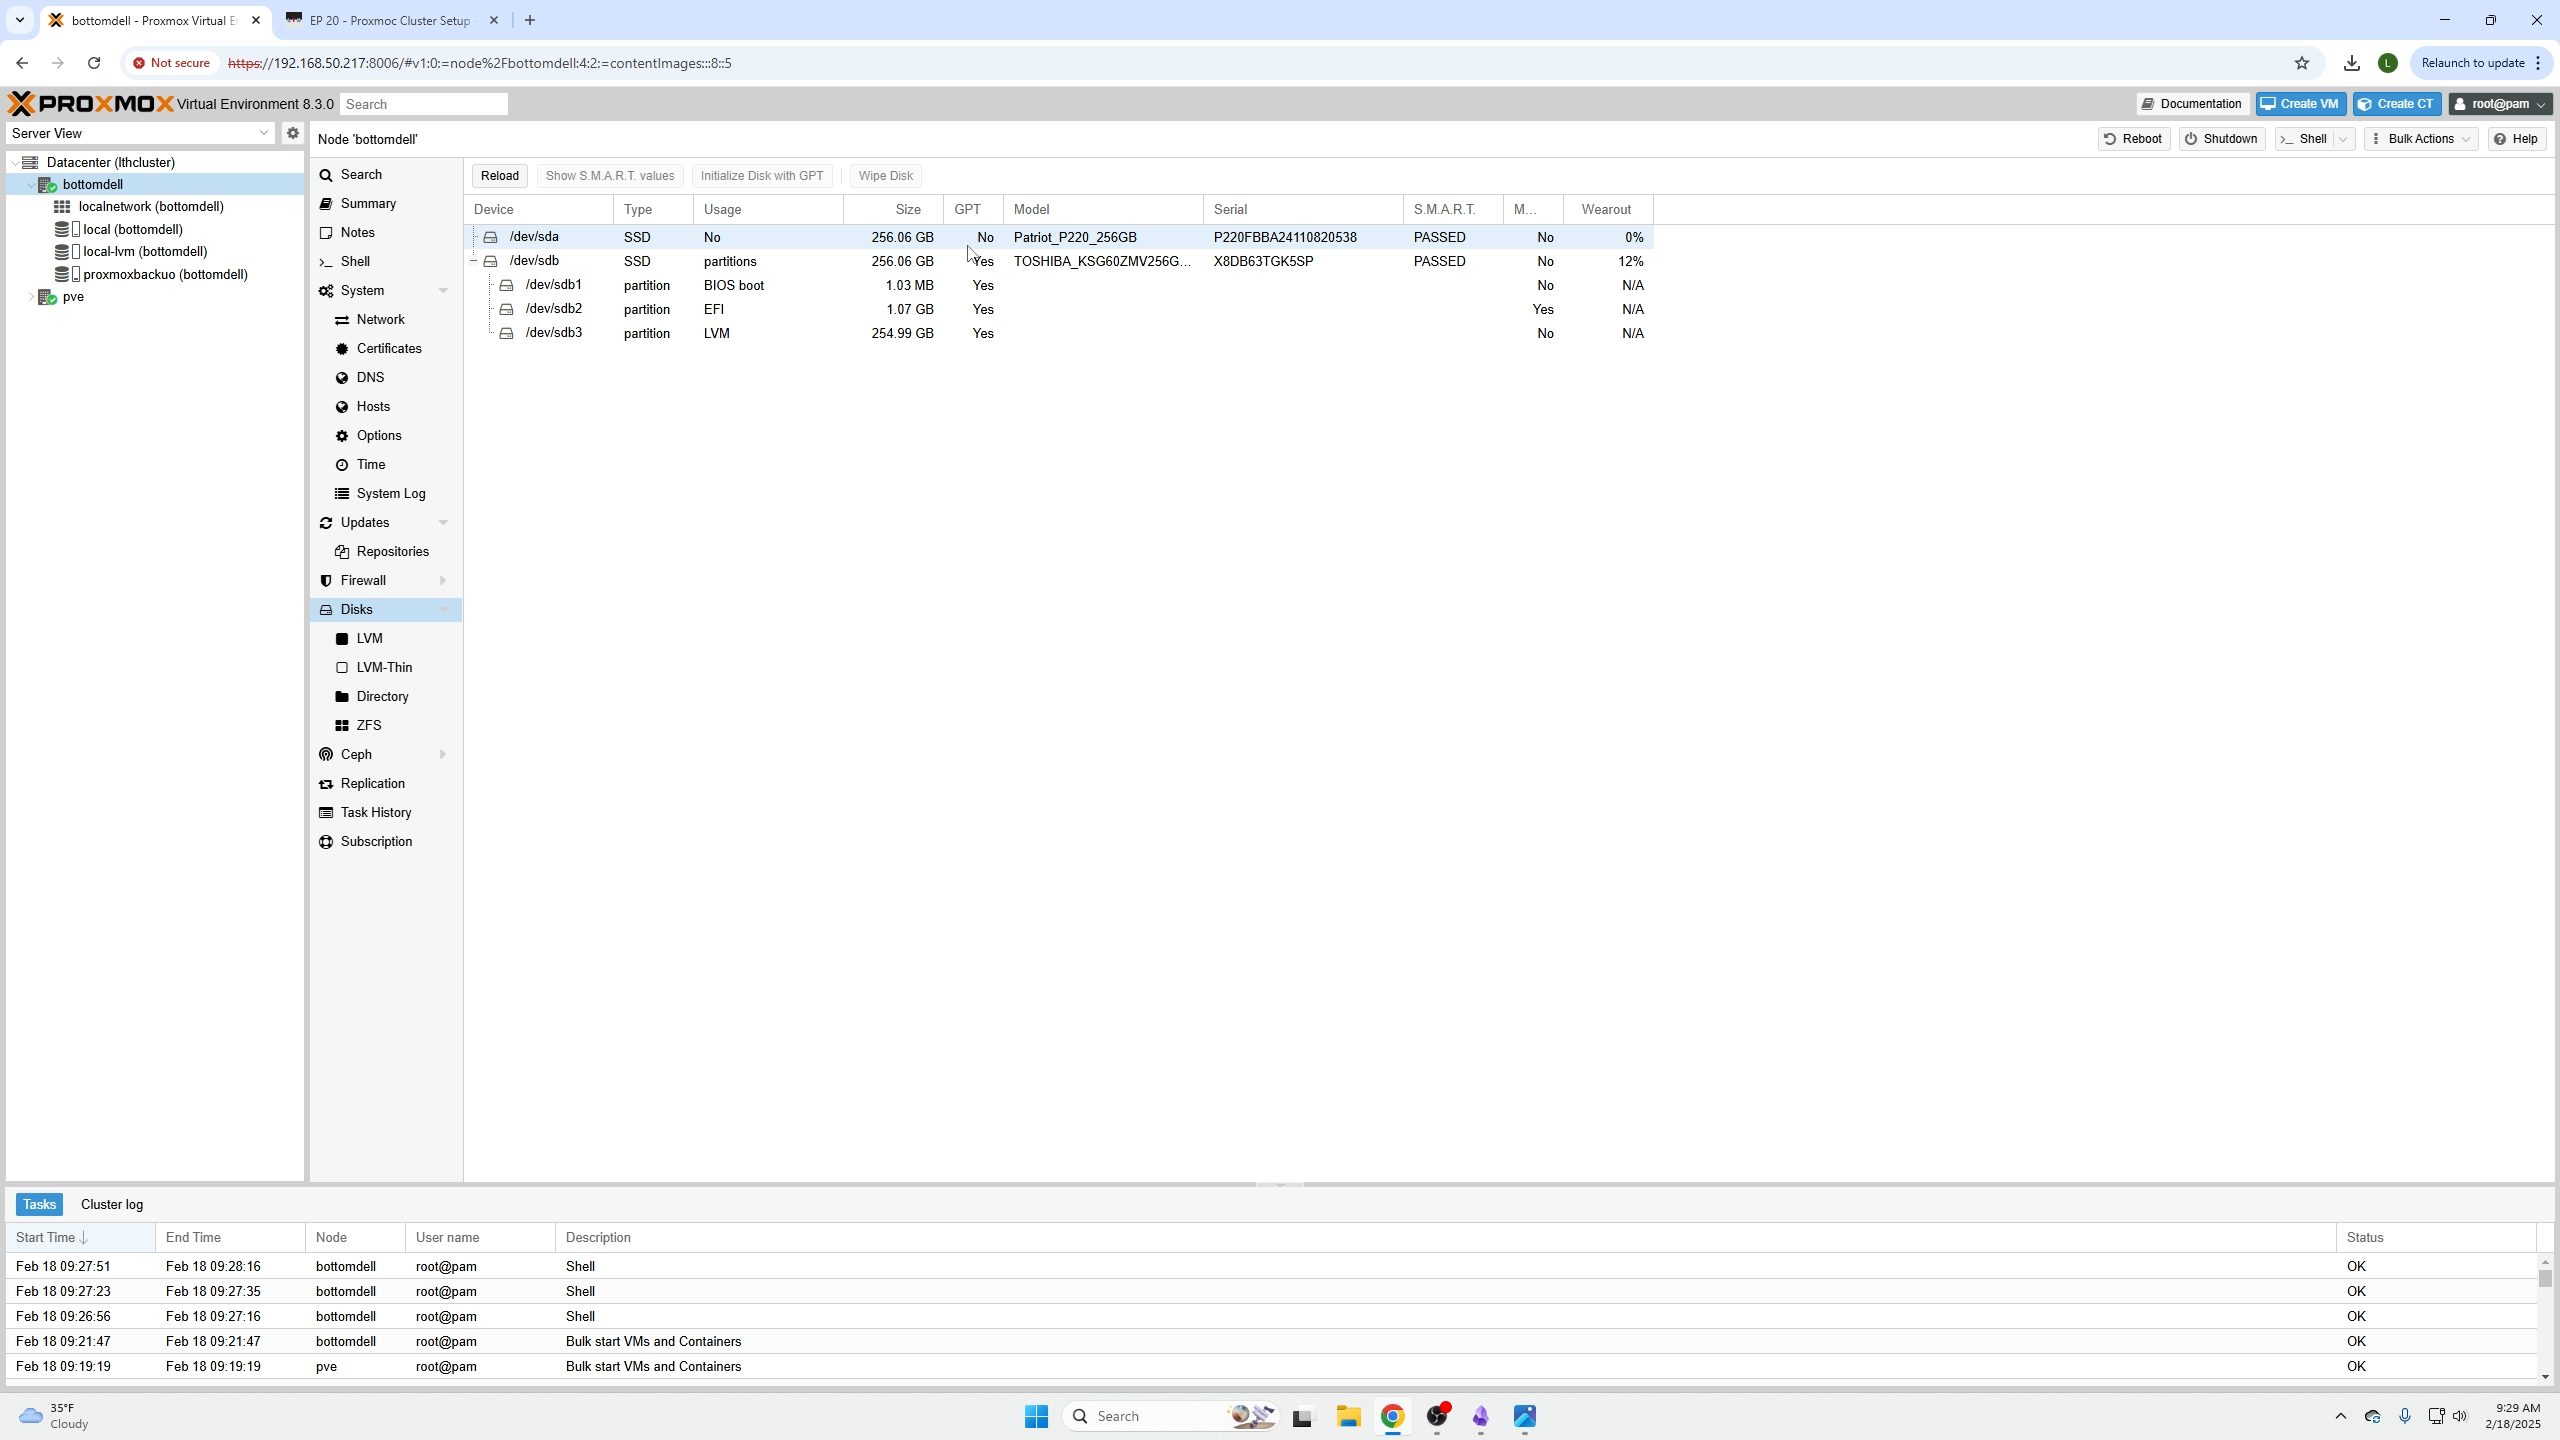
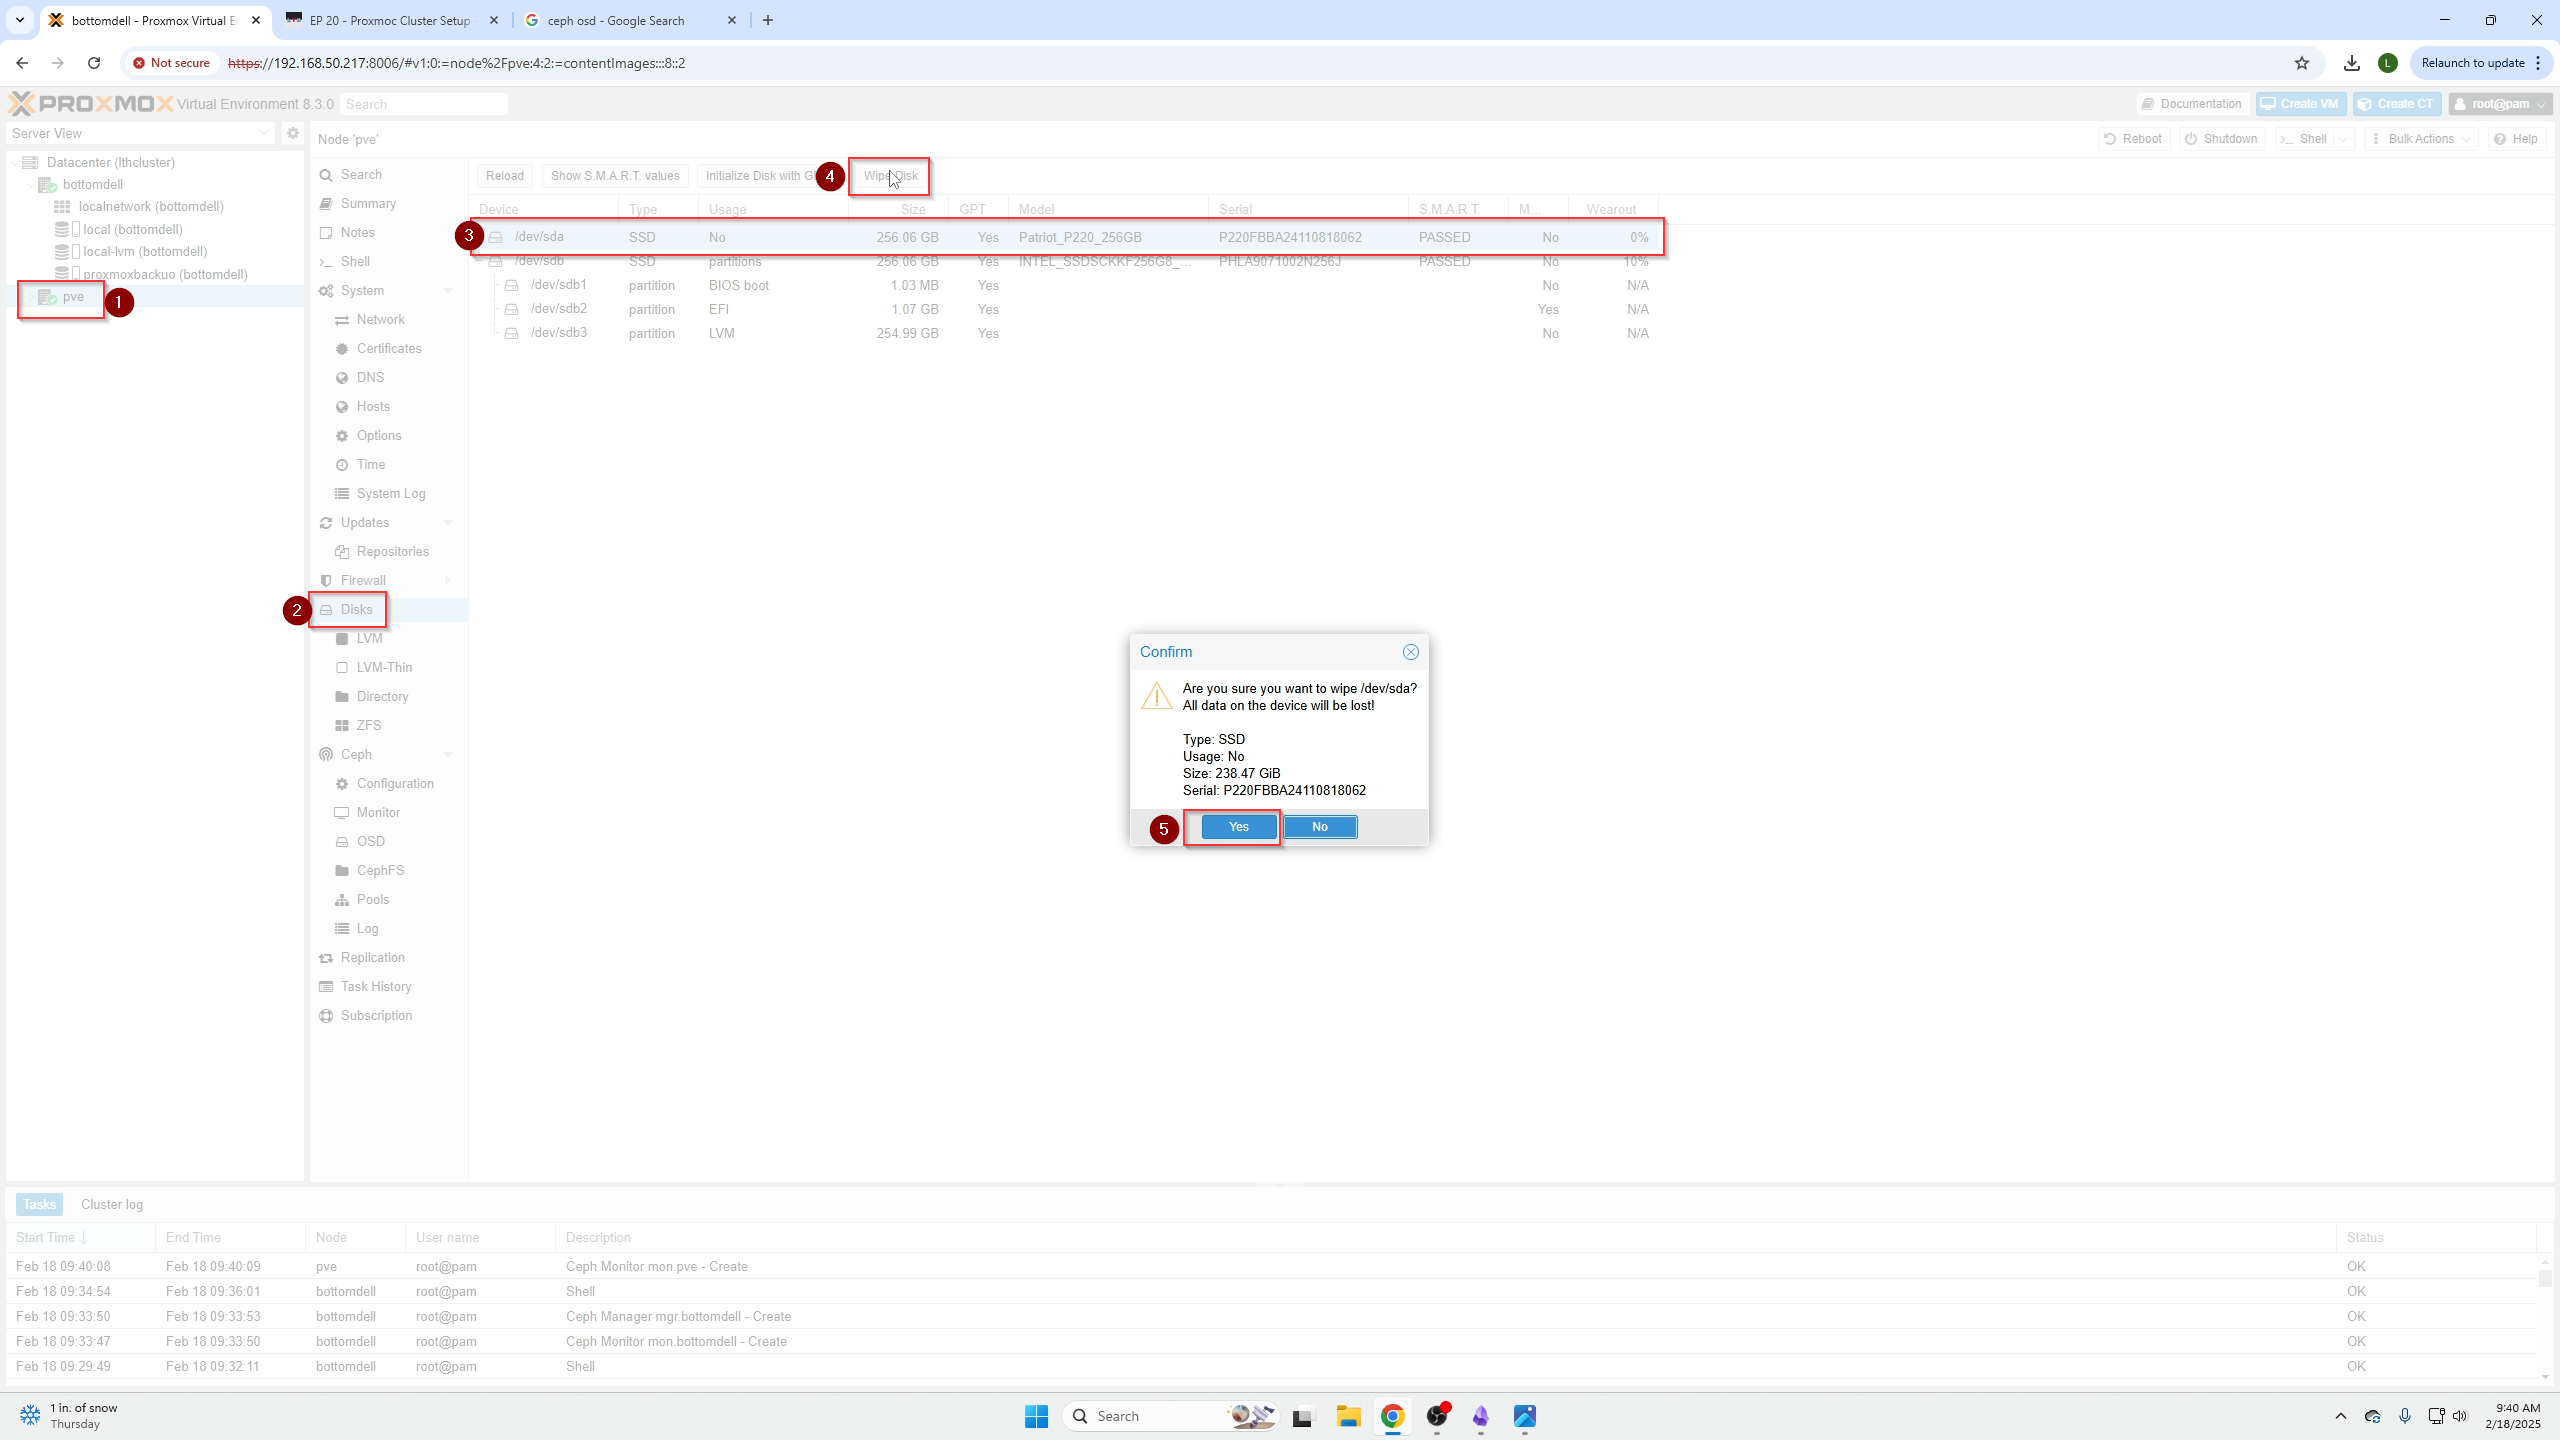
Click on the node name, go to disks, select your dedicated storage device, and click wipe disk.
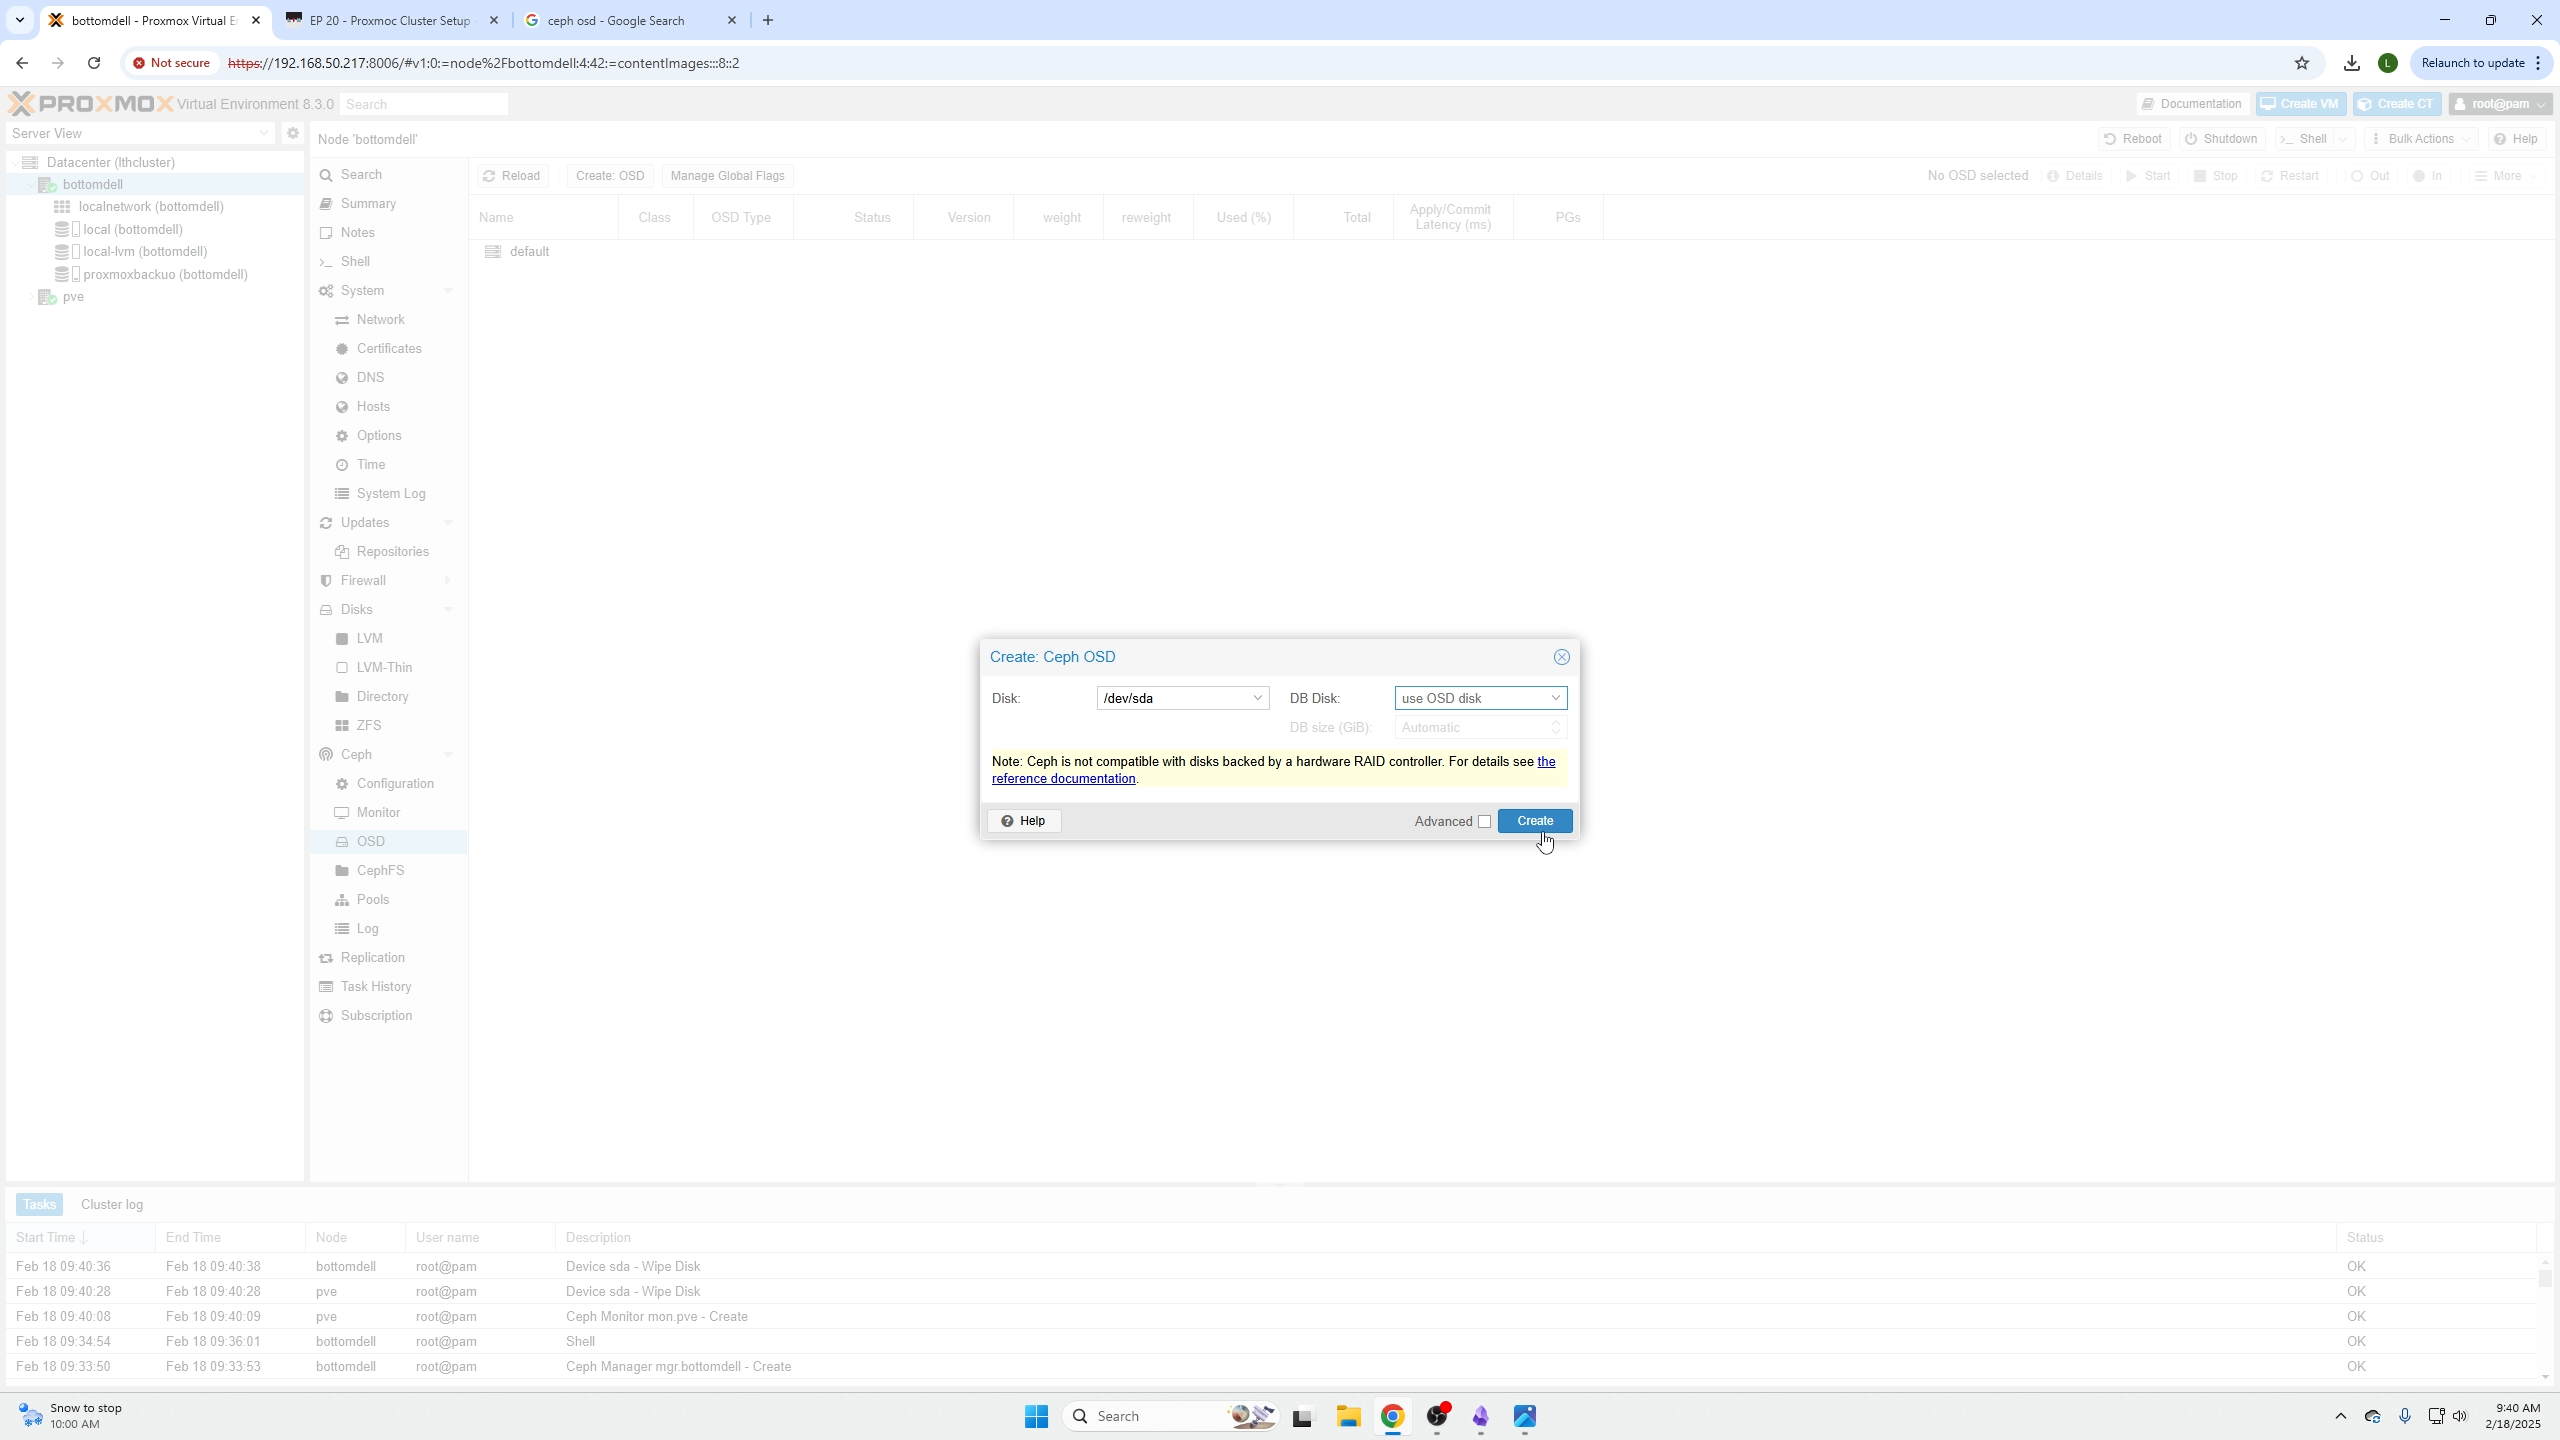
Next go back to the ceph menu (click the drop down area next to the name ceph) and select OSD. Within OSD select the device you just wiped and click create.
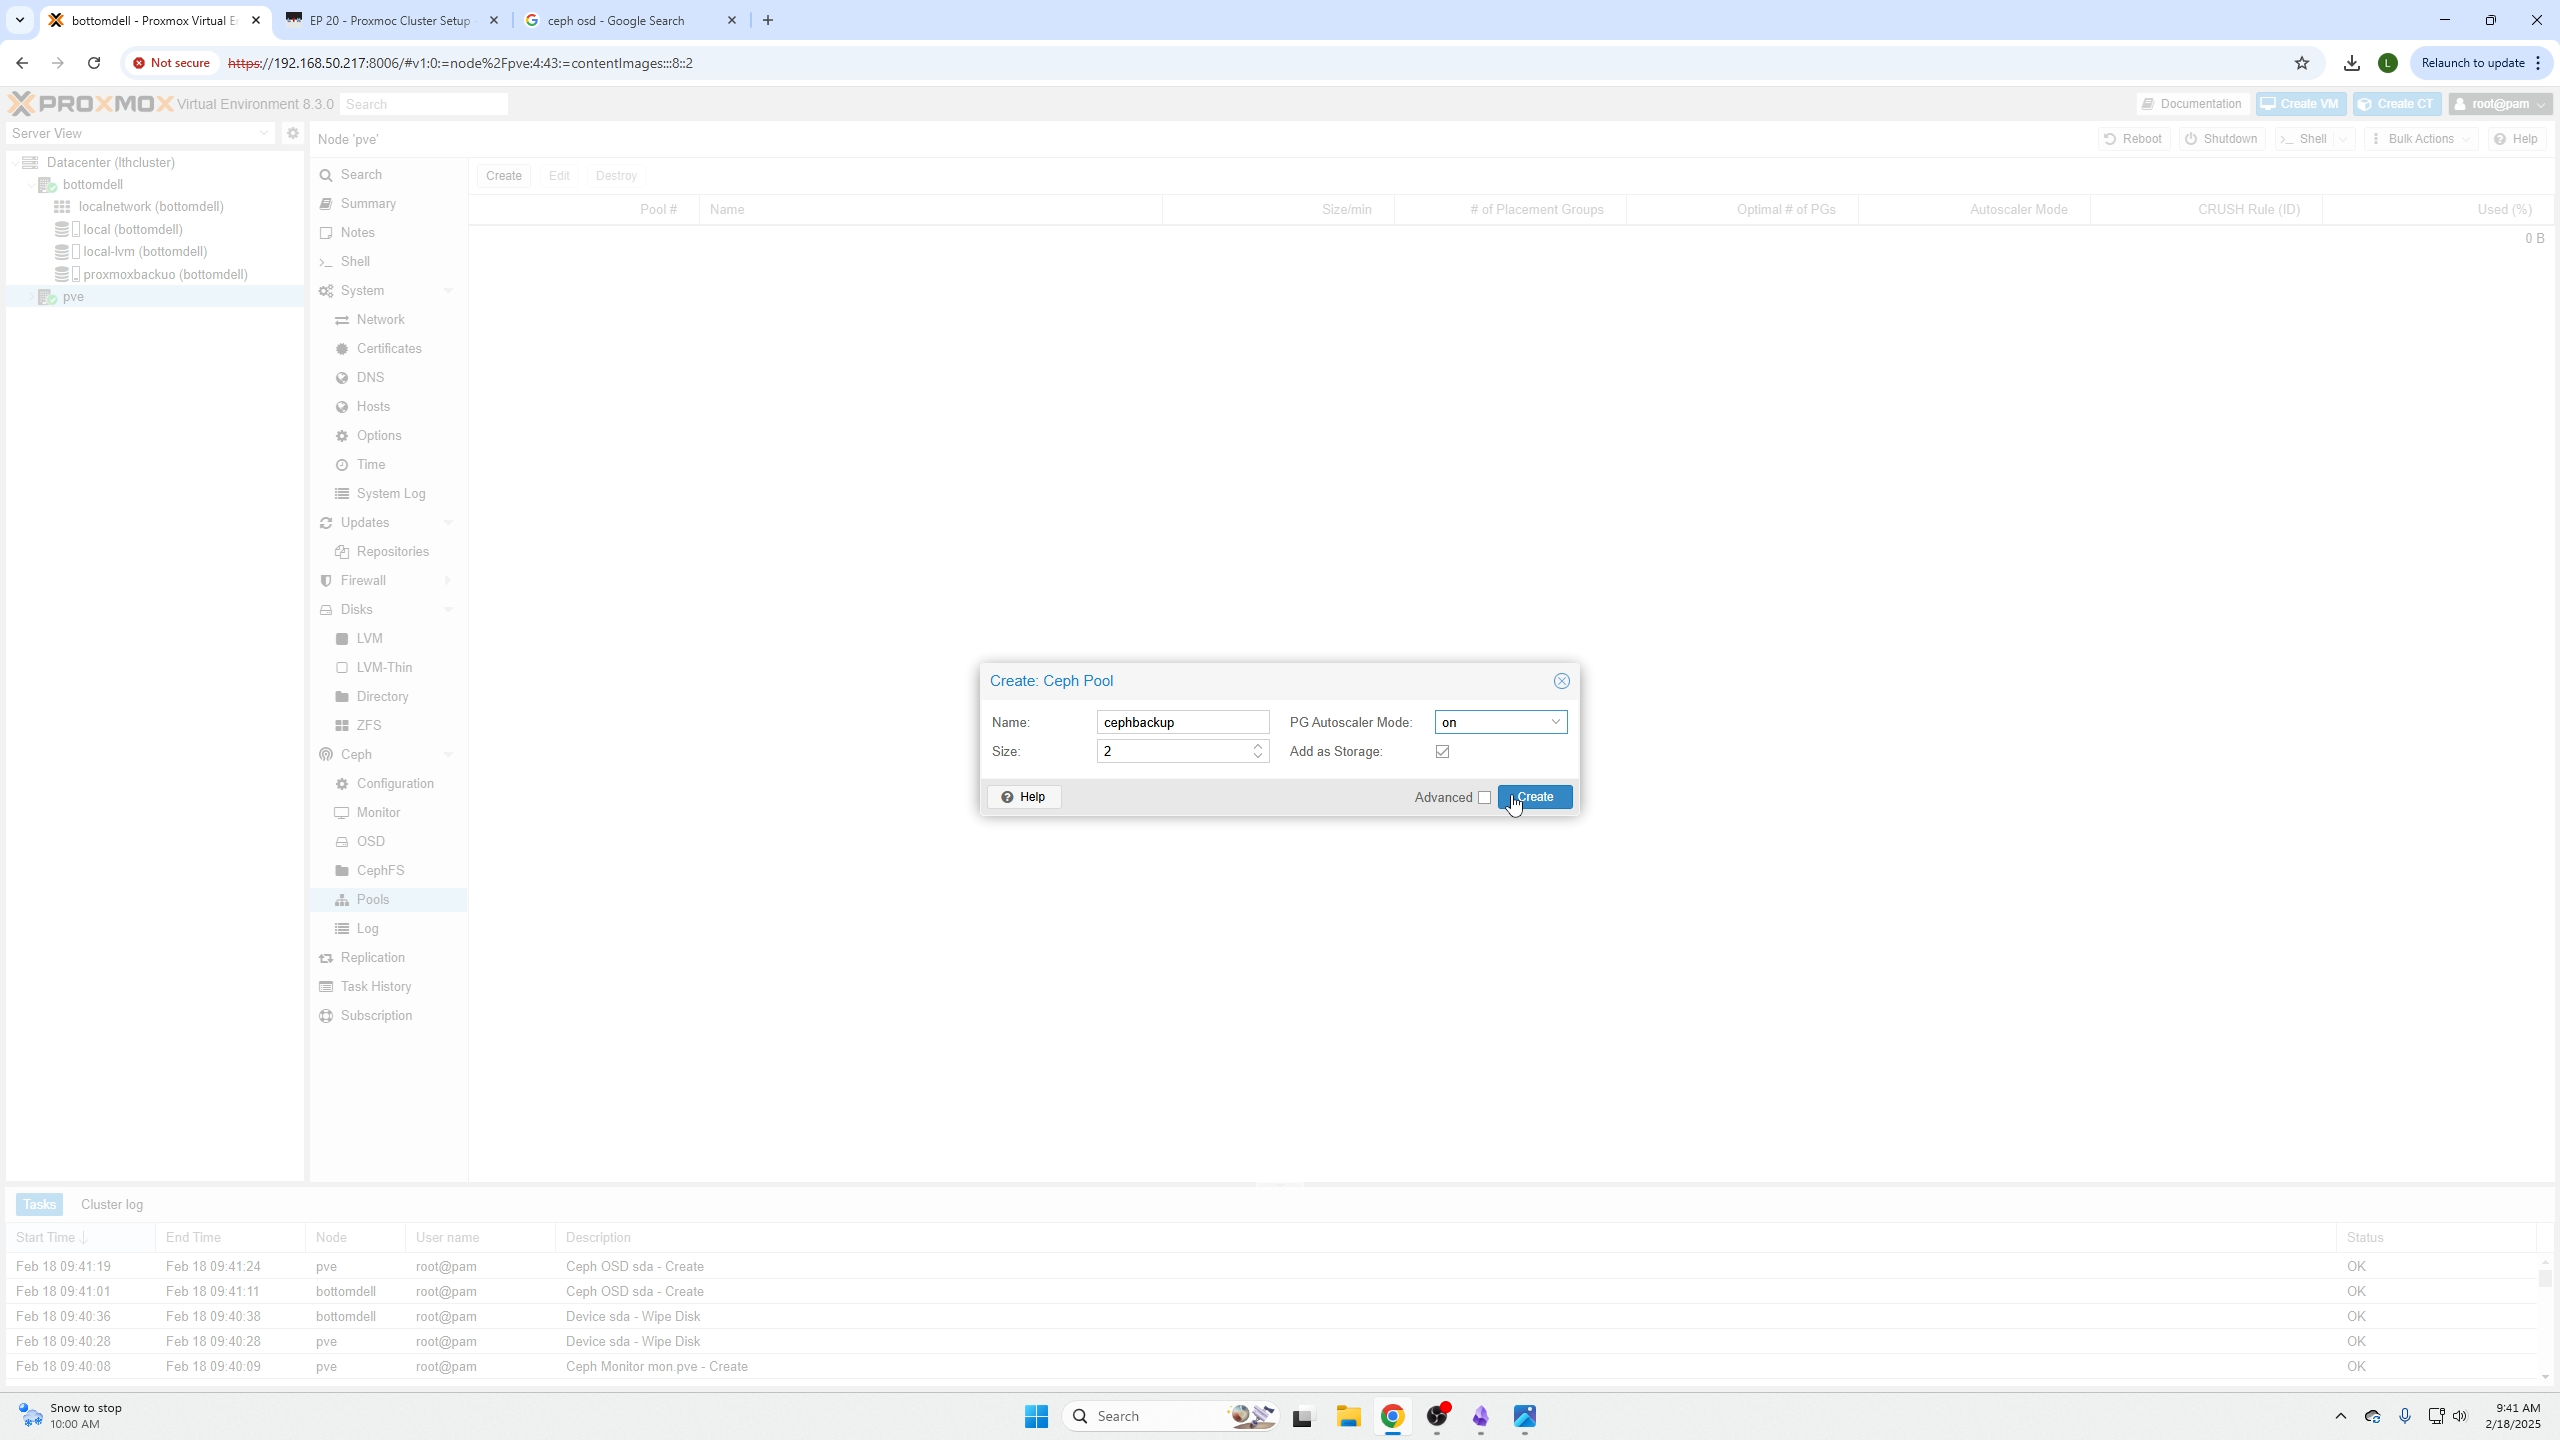
Next click the Pools menu below the OSD menu, click create on the top left, select the size of the pool based on how many nodes /OSD drives you have. We have two nodes and two drives so we are doing two. (leave PG autoscaler mode to on).
How to Perform live migrations of VMs
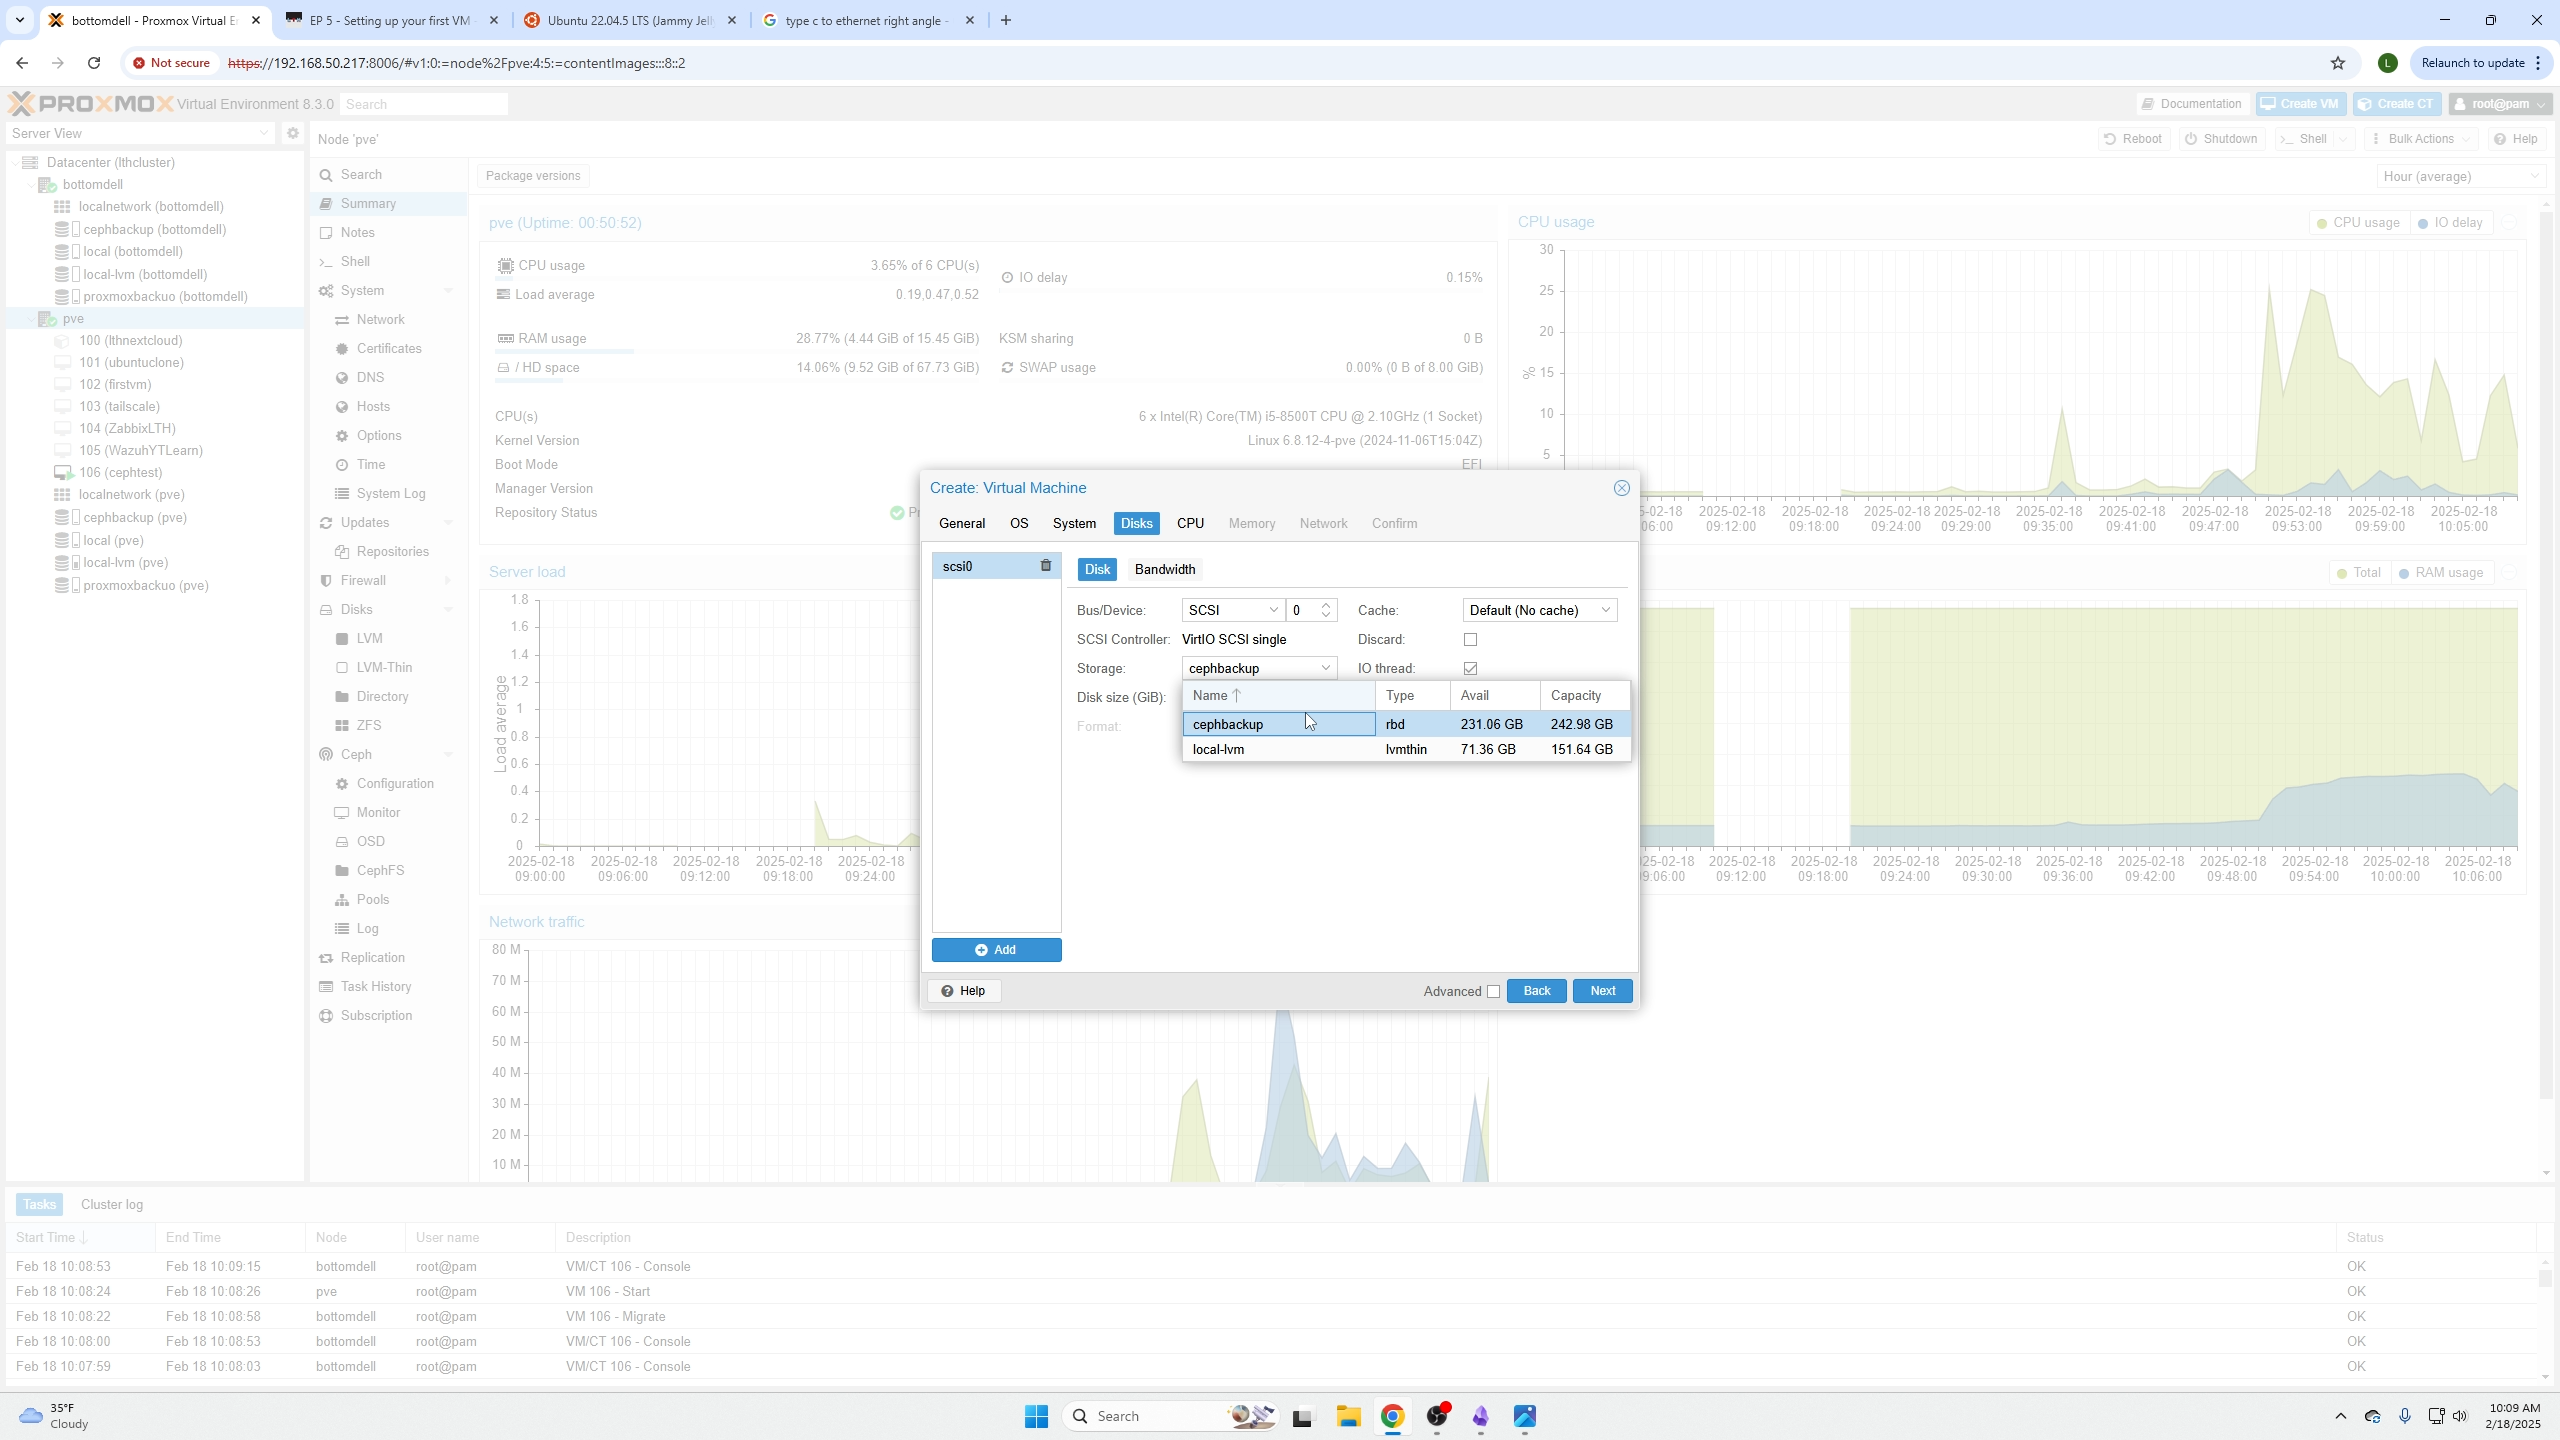
So in order to perform a live migration your VM's storage has to be set to the Ceph pool storage.
You will create a VM like any other VM BUT on the disks page you will select the storage option as your Ceph pool.
You can edit old VM's and move their storage to the Ceph Pool so they can live migrate as well.
Removing local disk for live migration
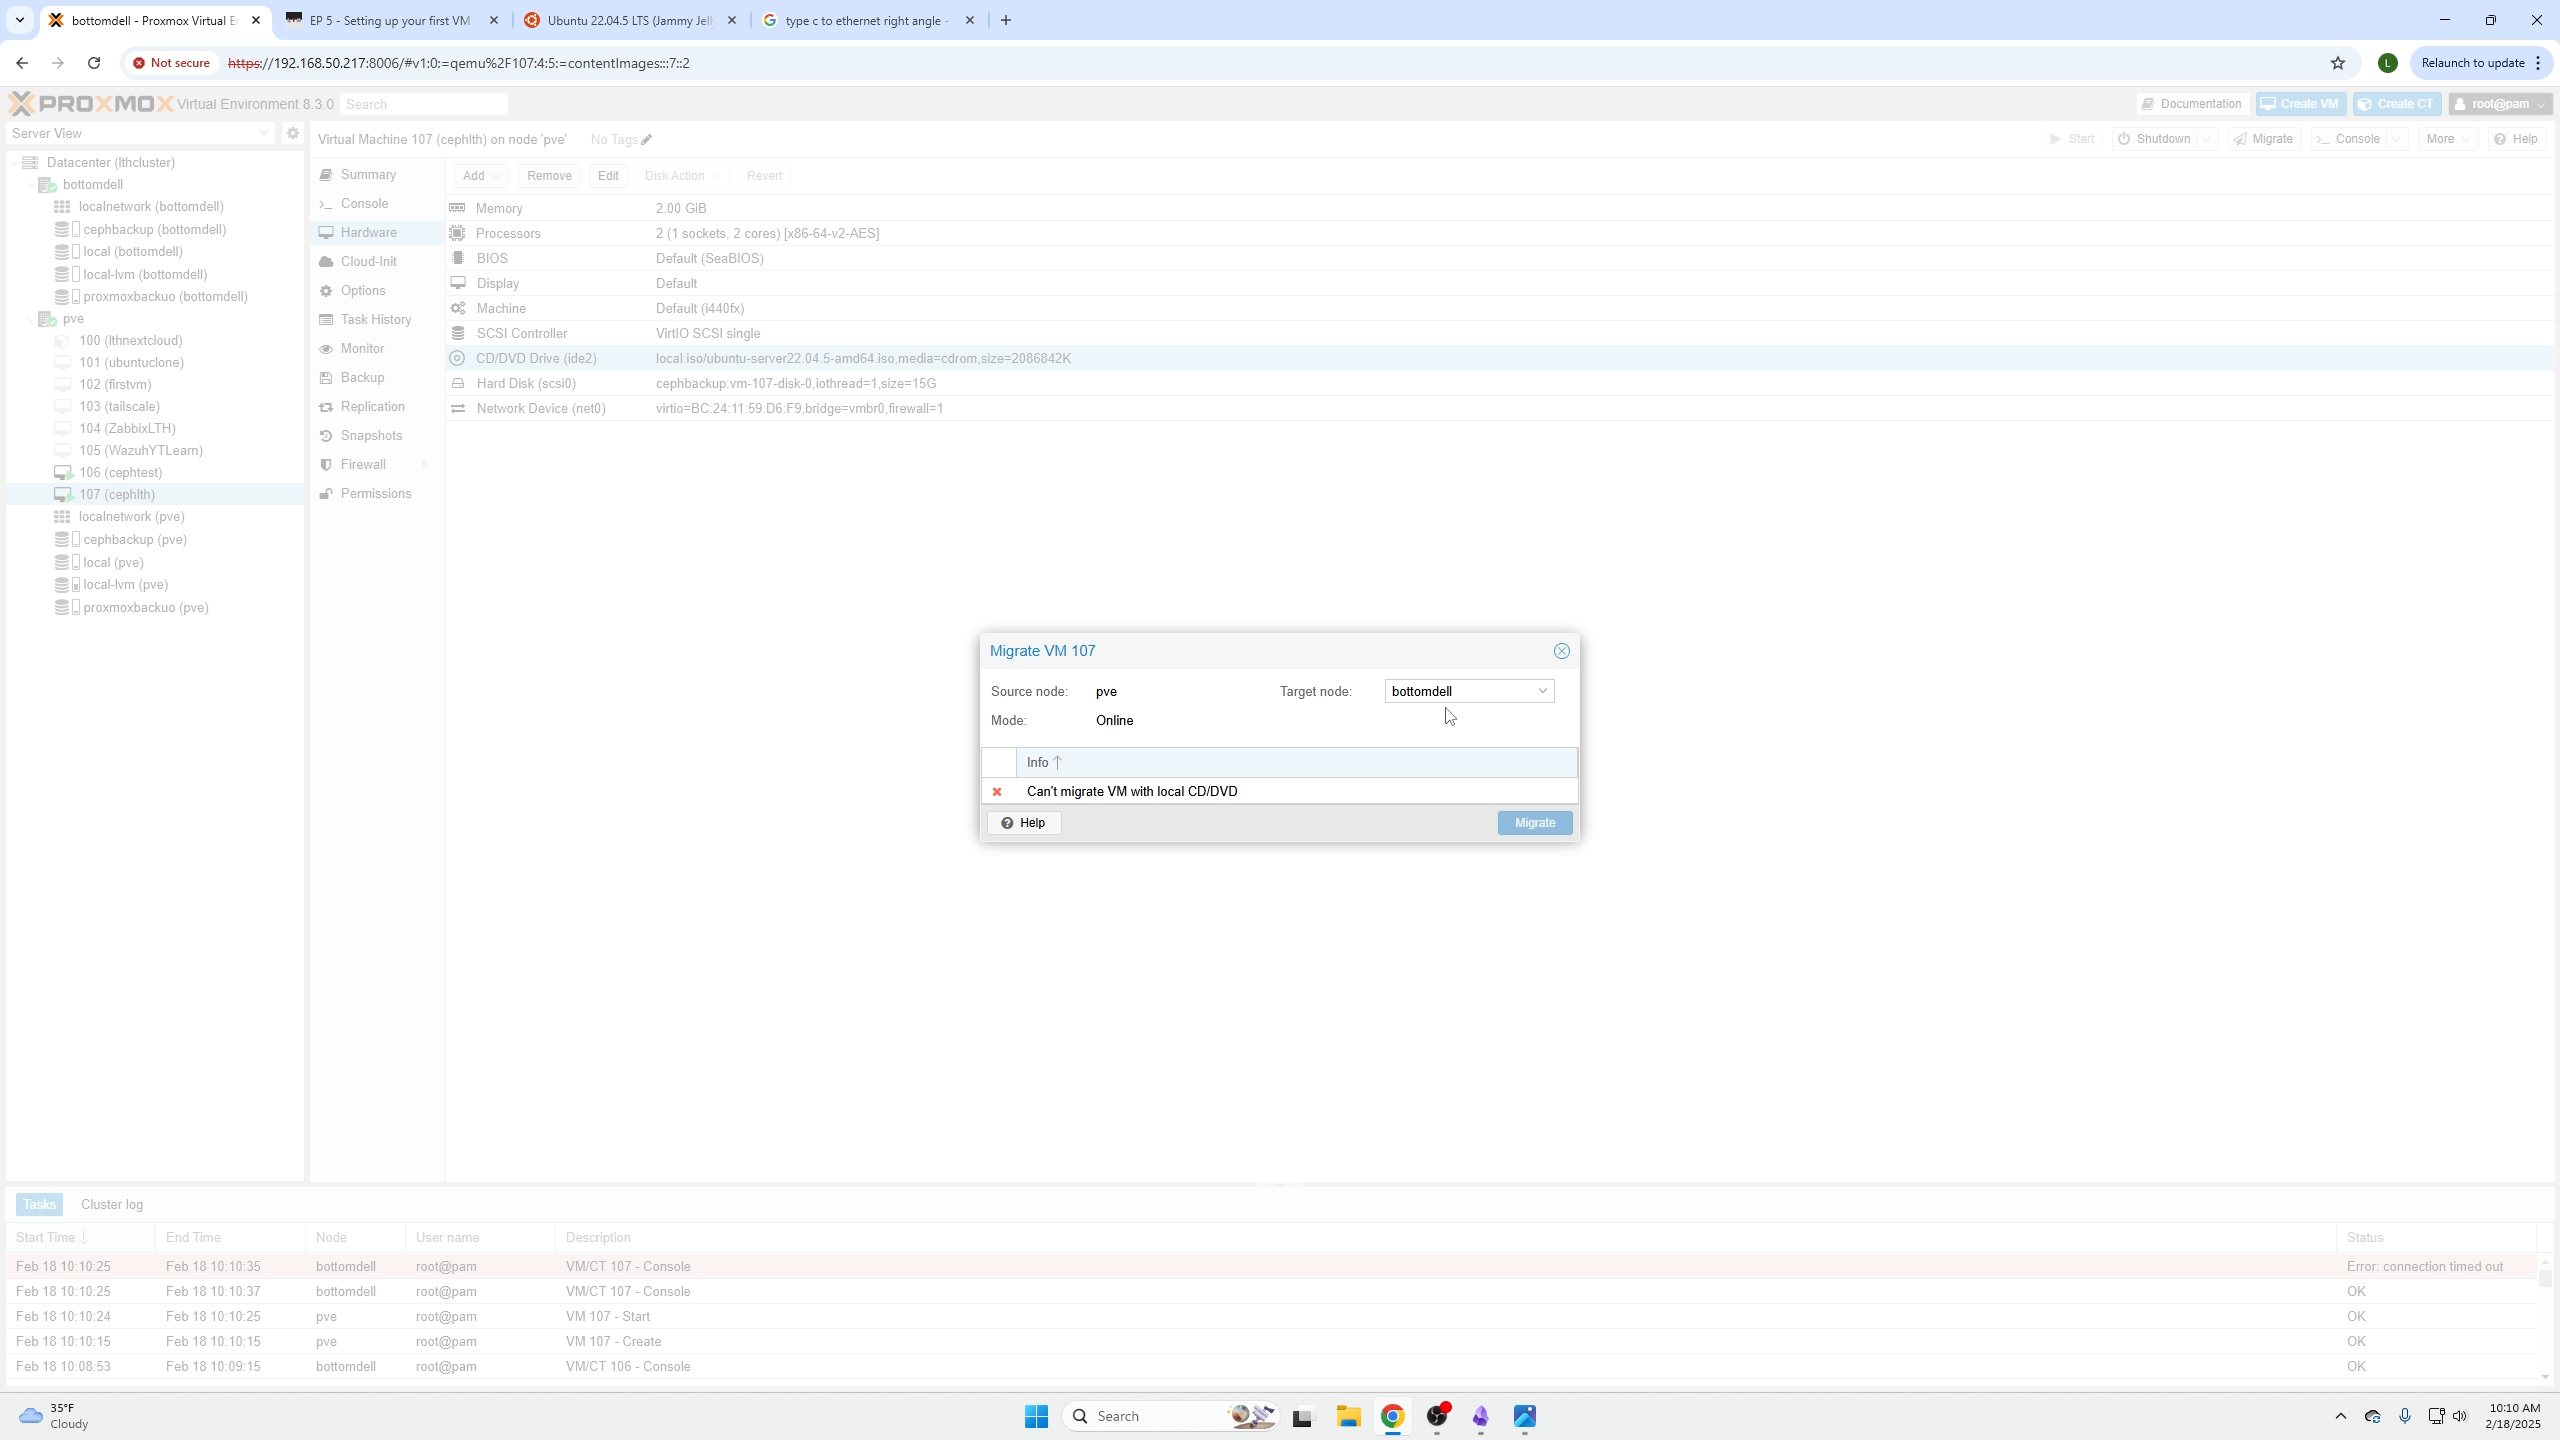
Live migration will not work with a CD/DVD attached. You only need the CD/DVD attached for the initial install operating system file.
- Turn your machine off
- Select the CD/DVD device under hardware
- Click remove
- Start your VM again.

Example of how live migration wont work with a local CD/DVD attached.
Example with the CD/DVD removed
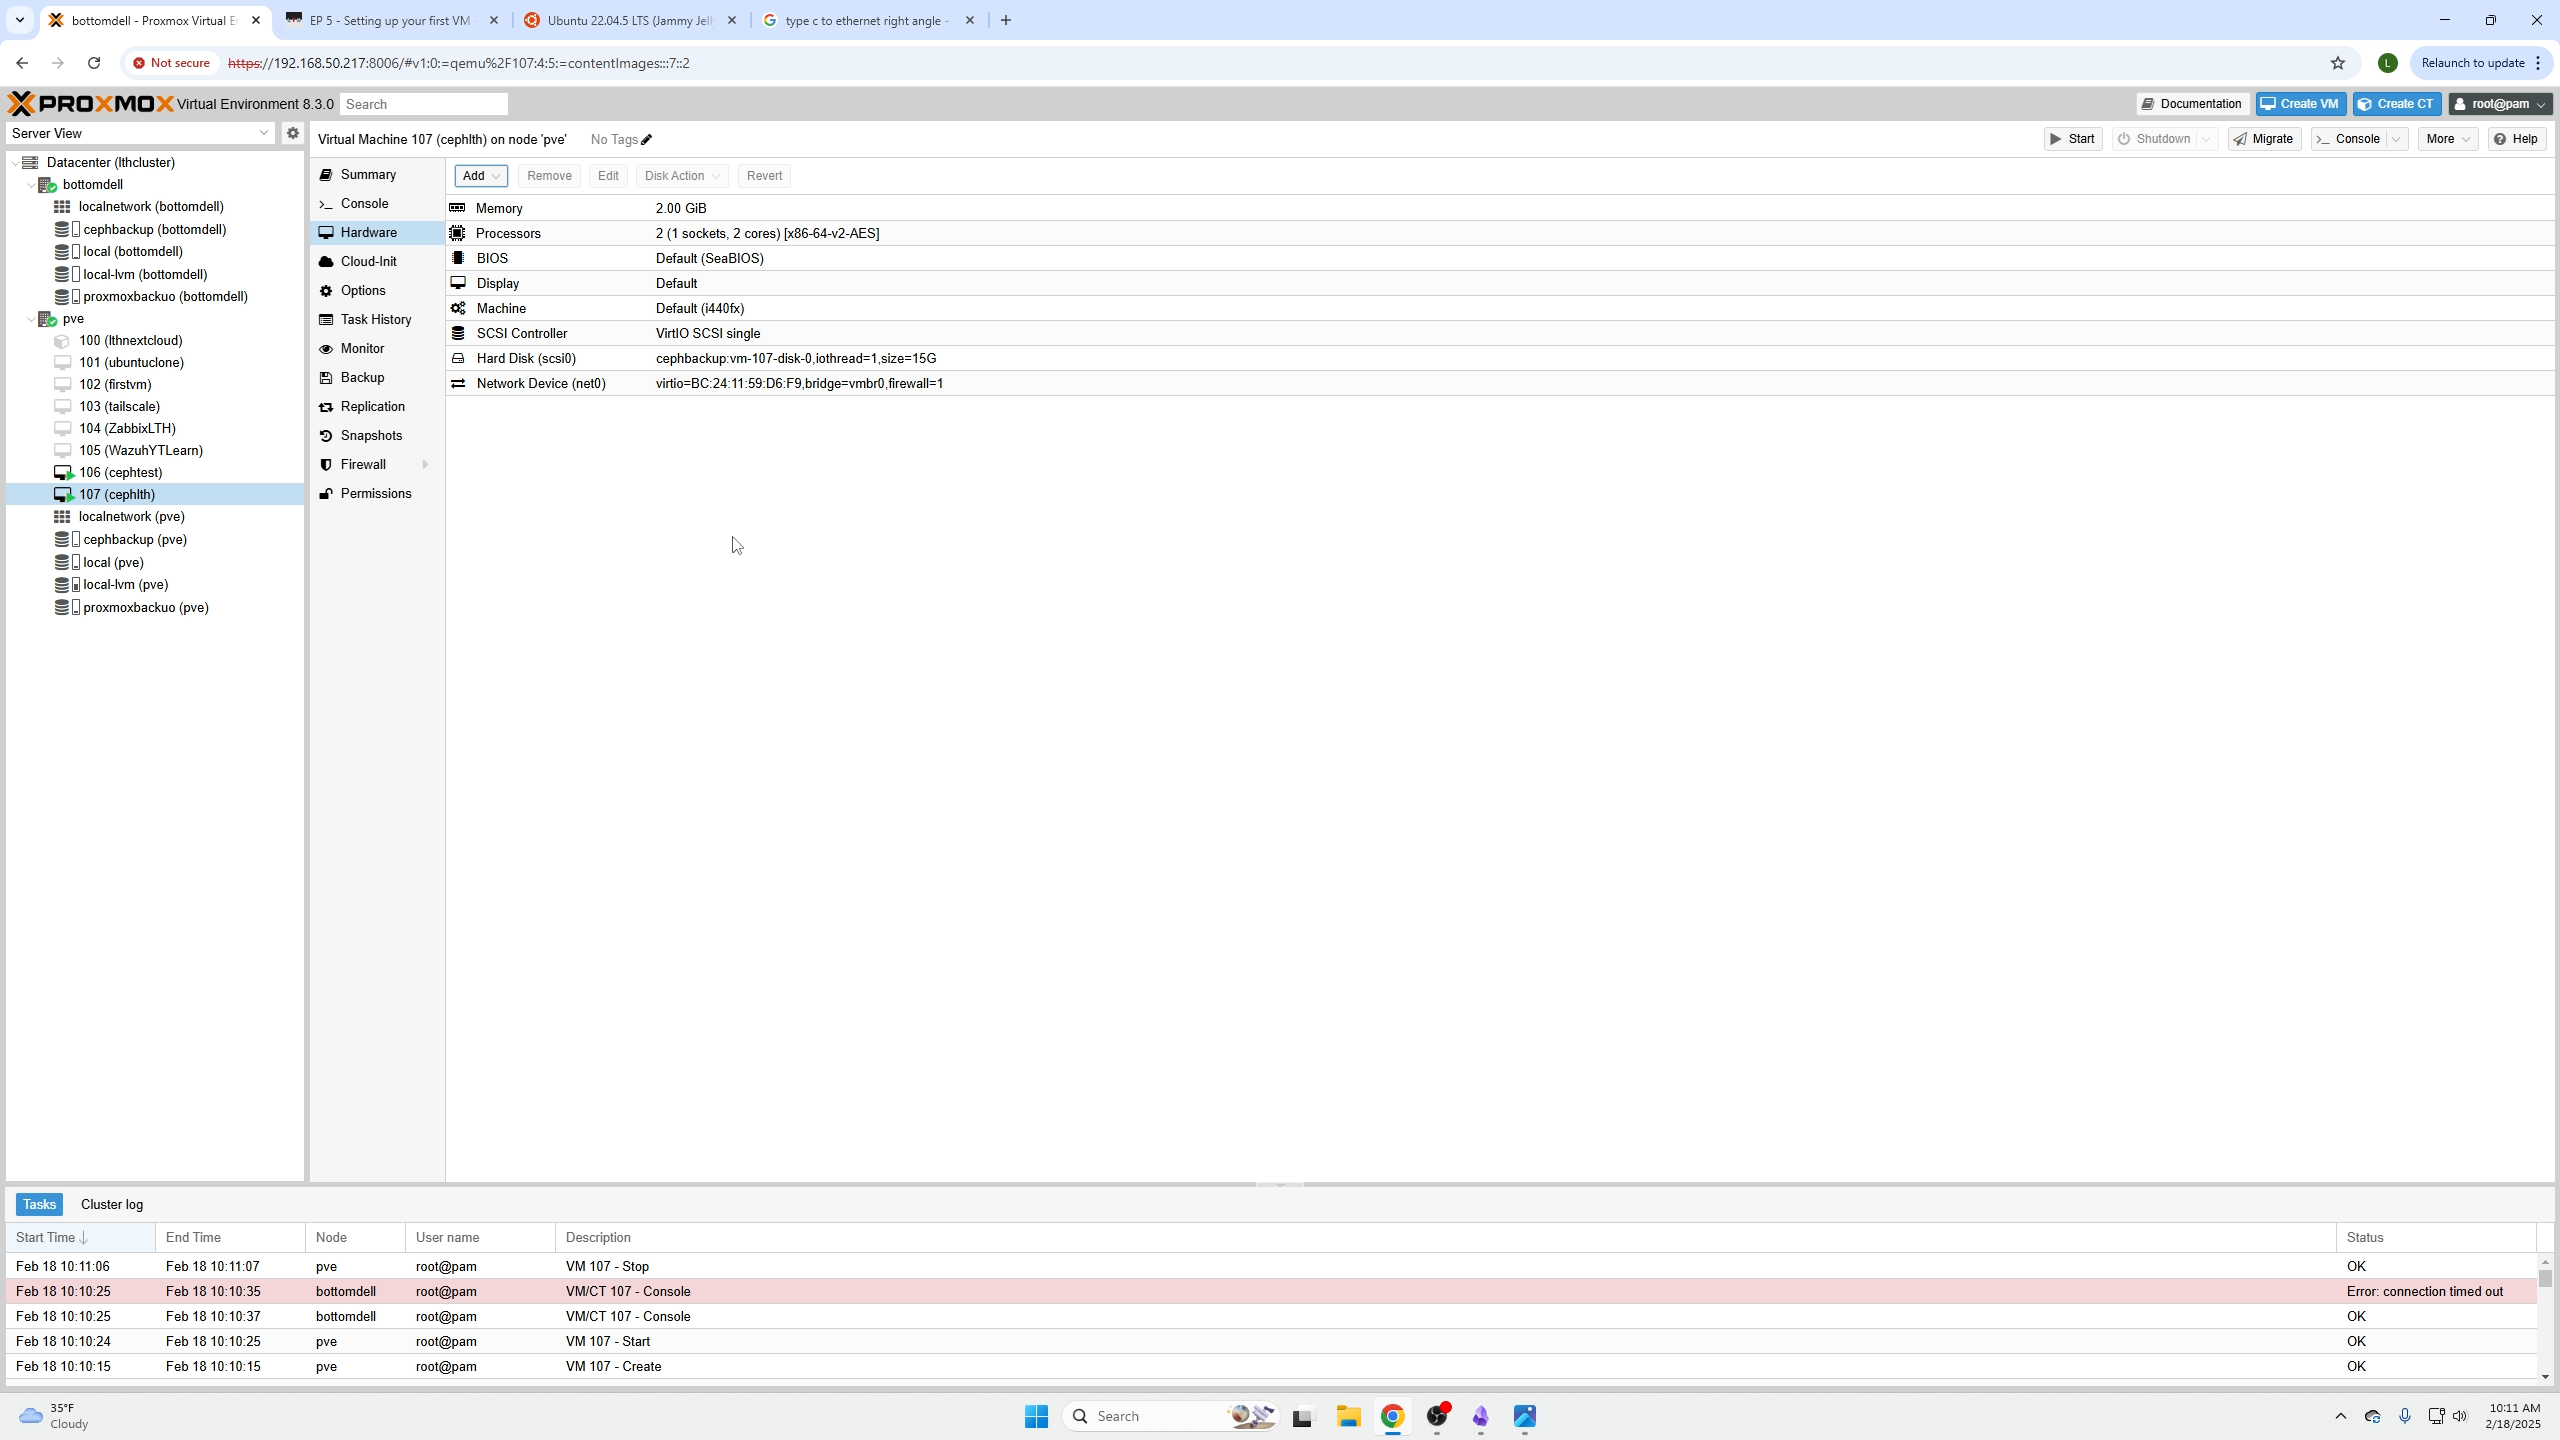
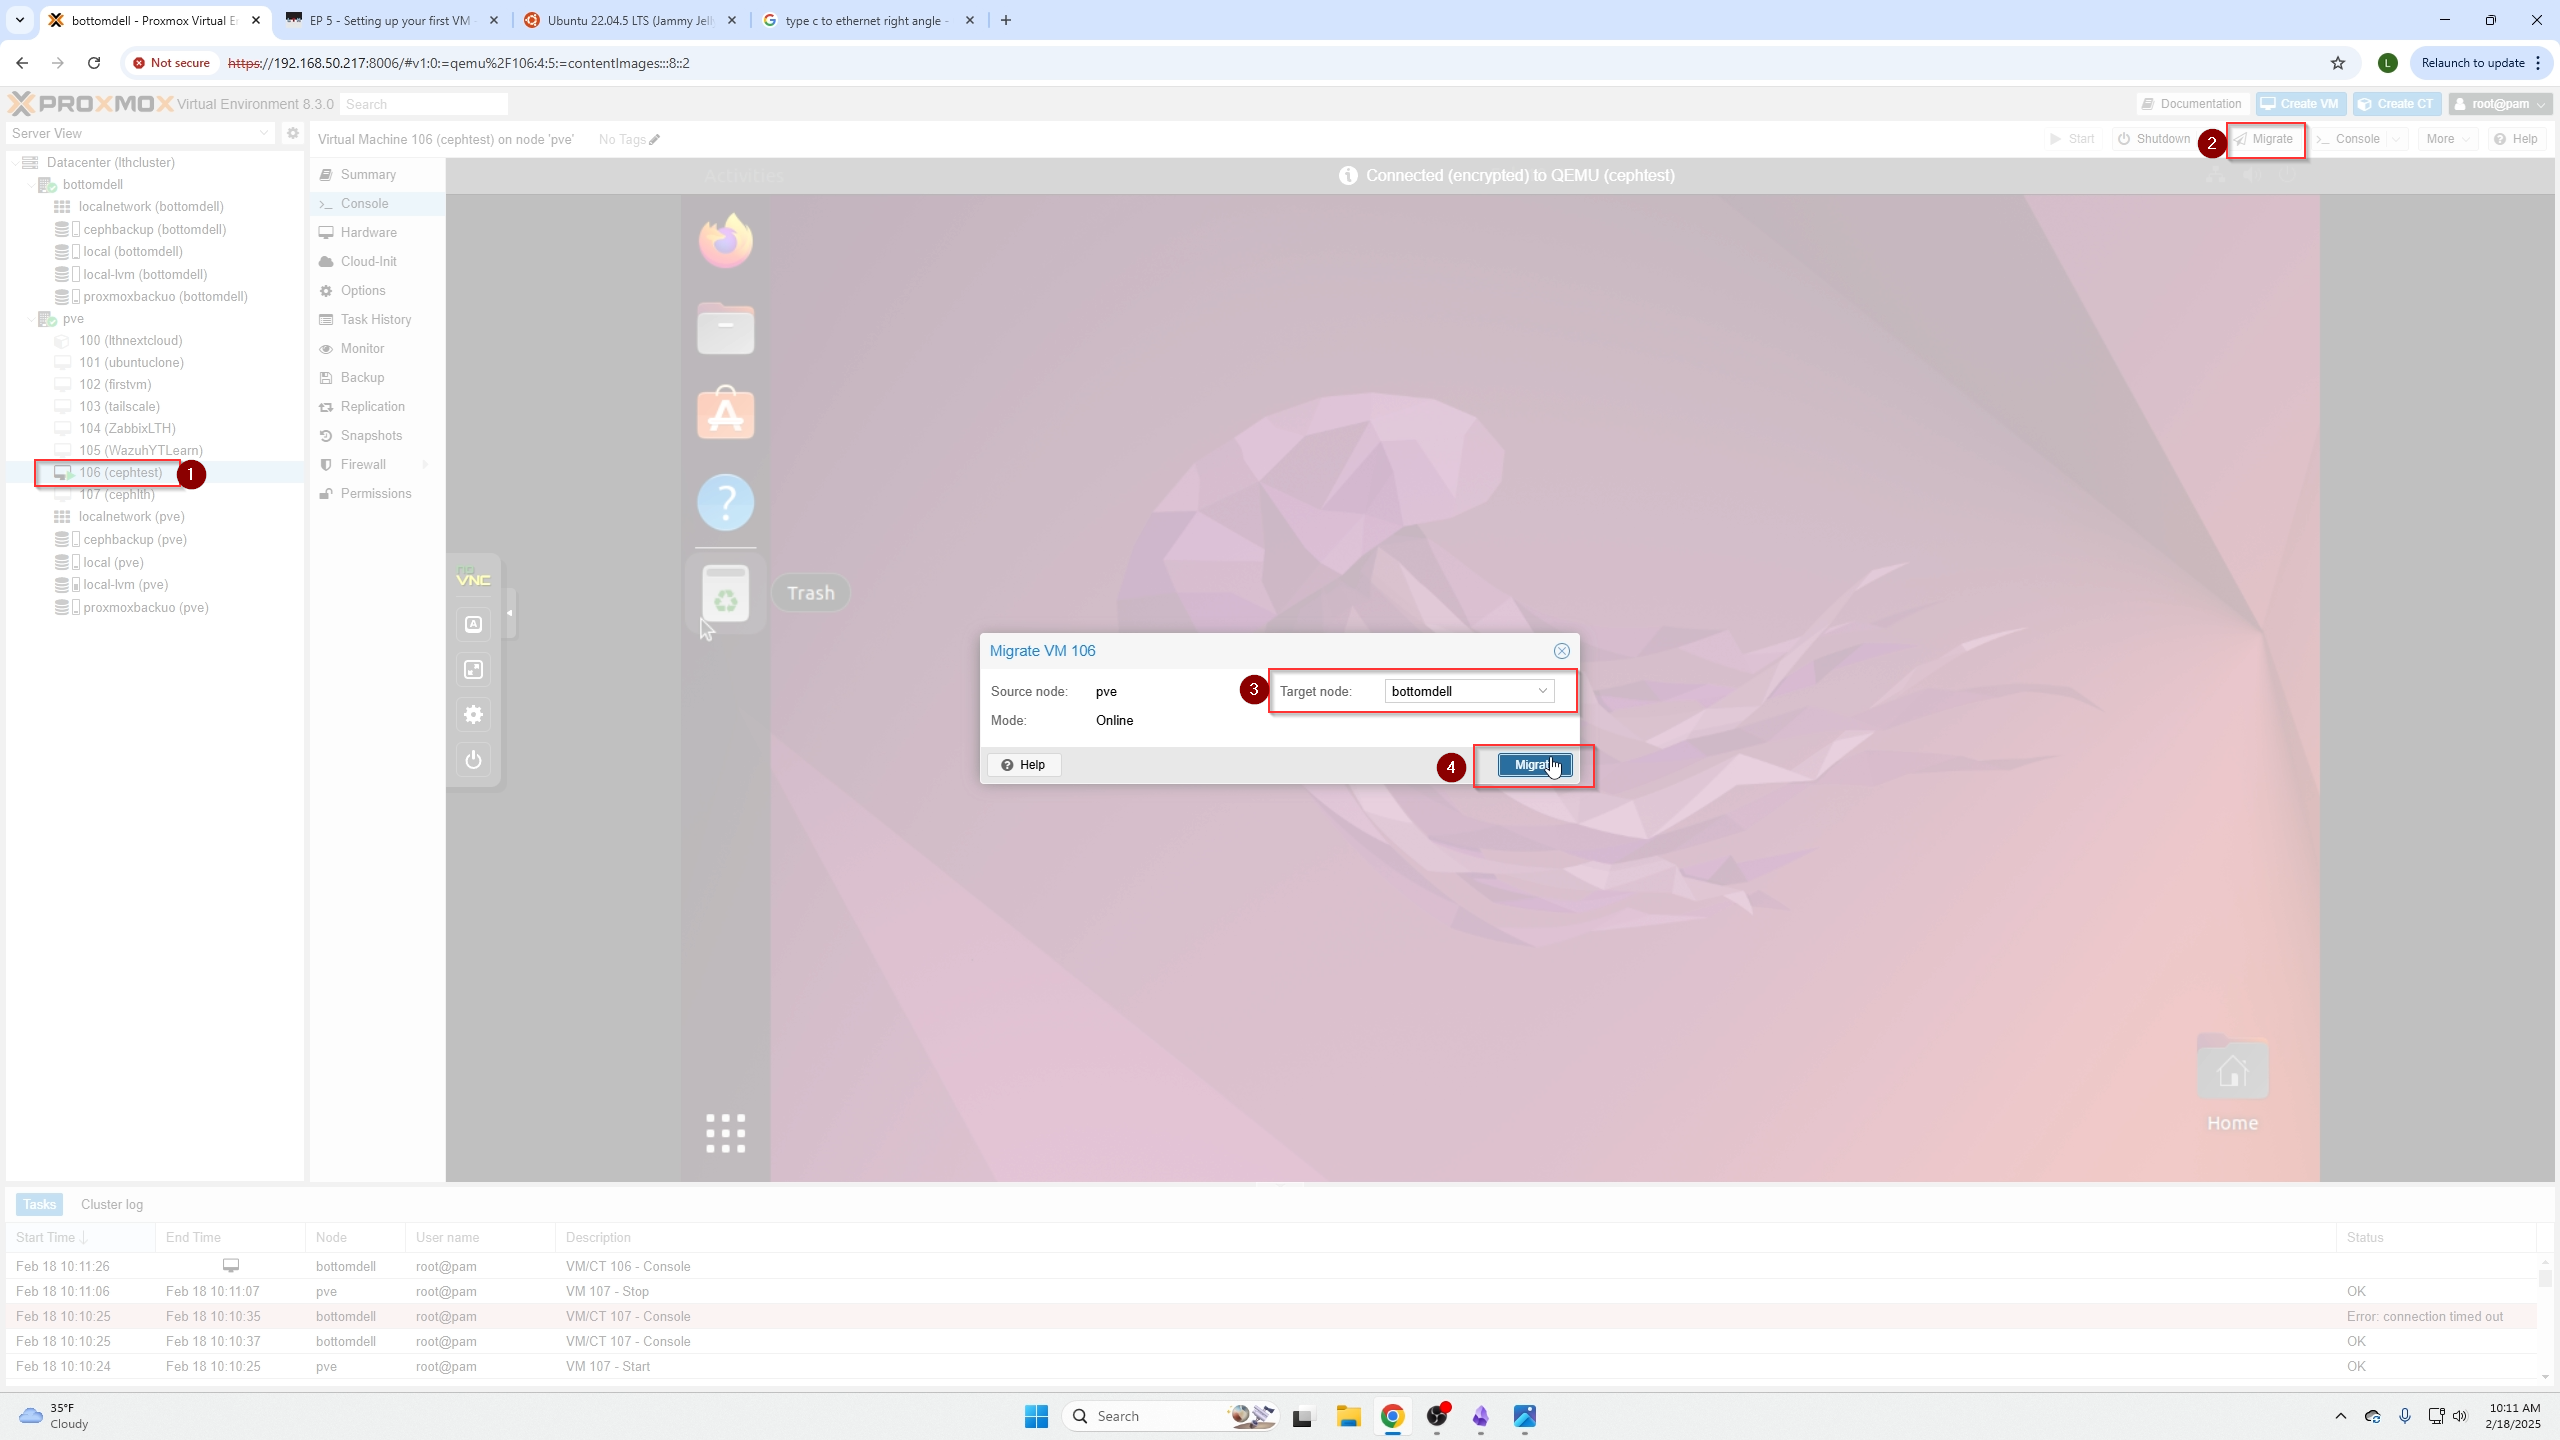
Now we can see live migraiton is possible with that CD/DVD removed and the VM running. Select the node you wish to move your VM to and click migrate.
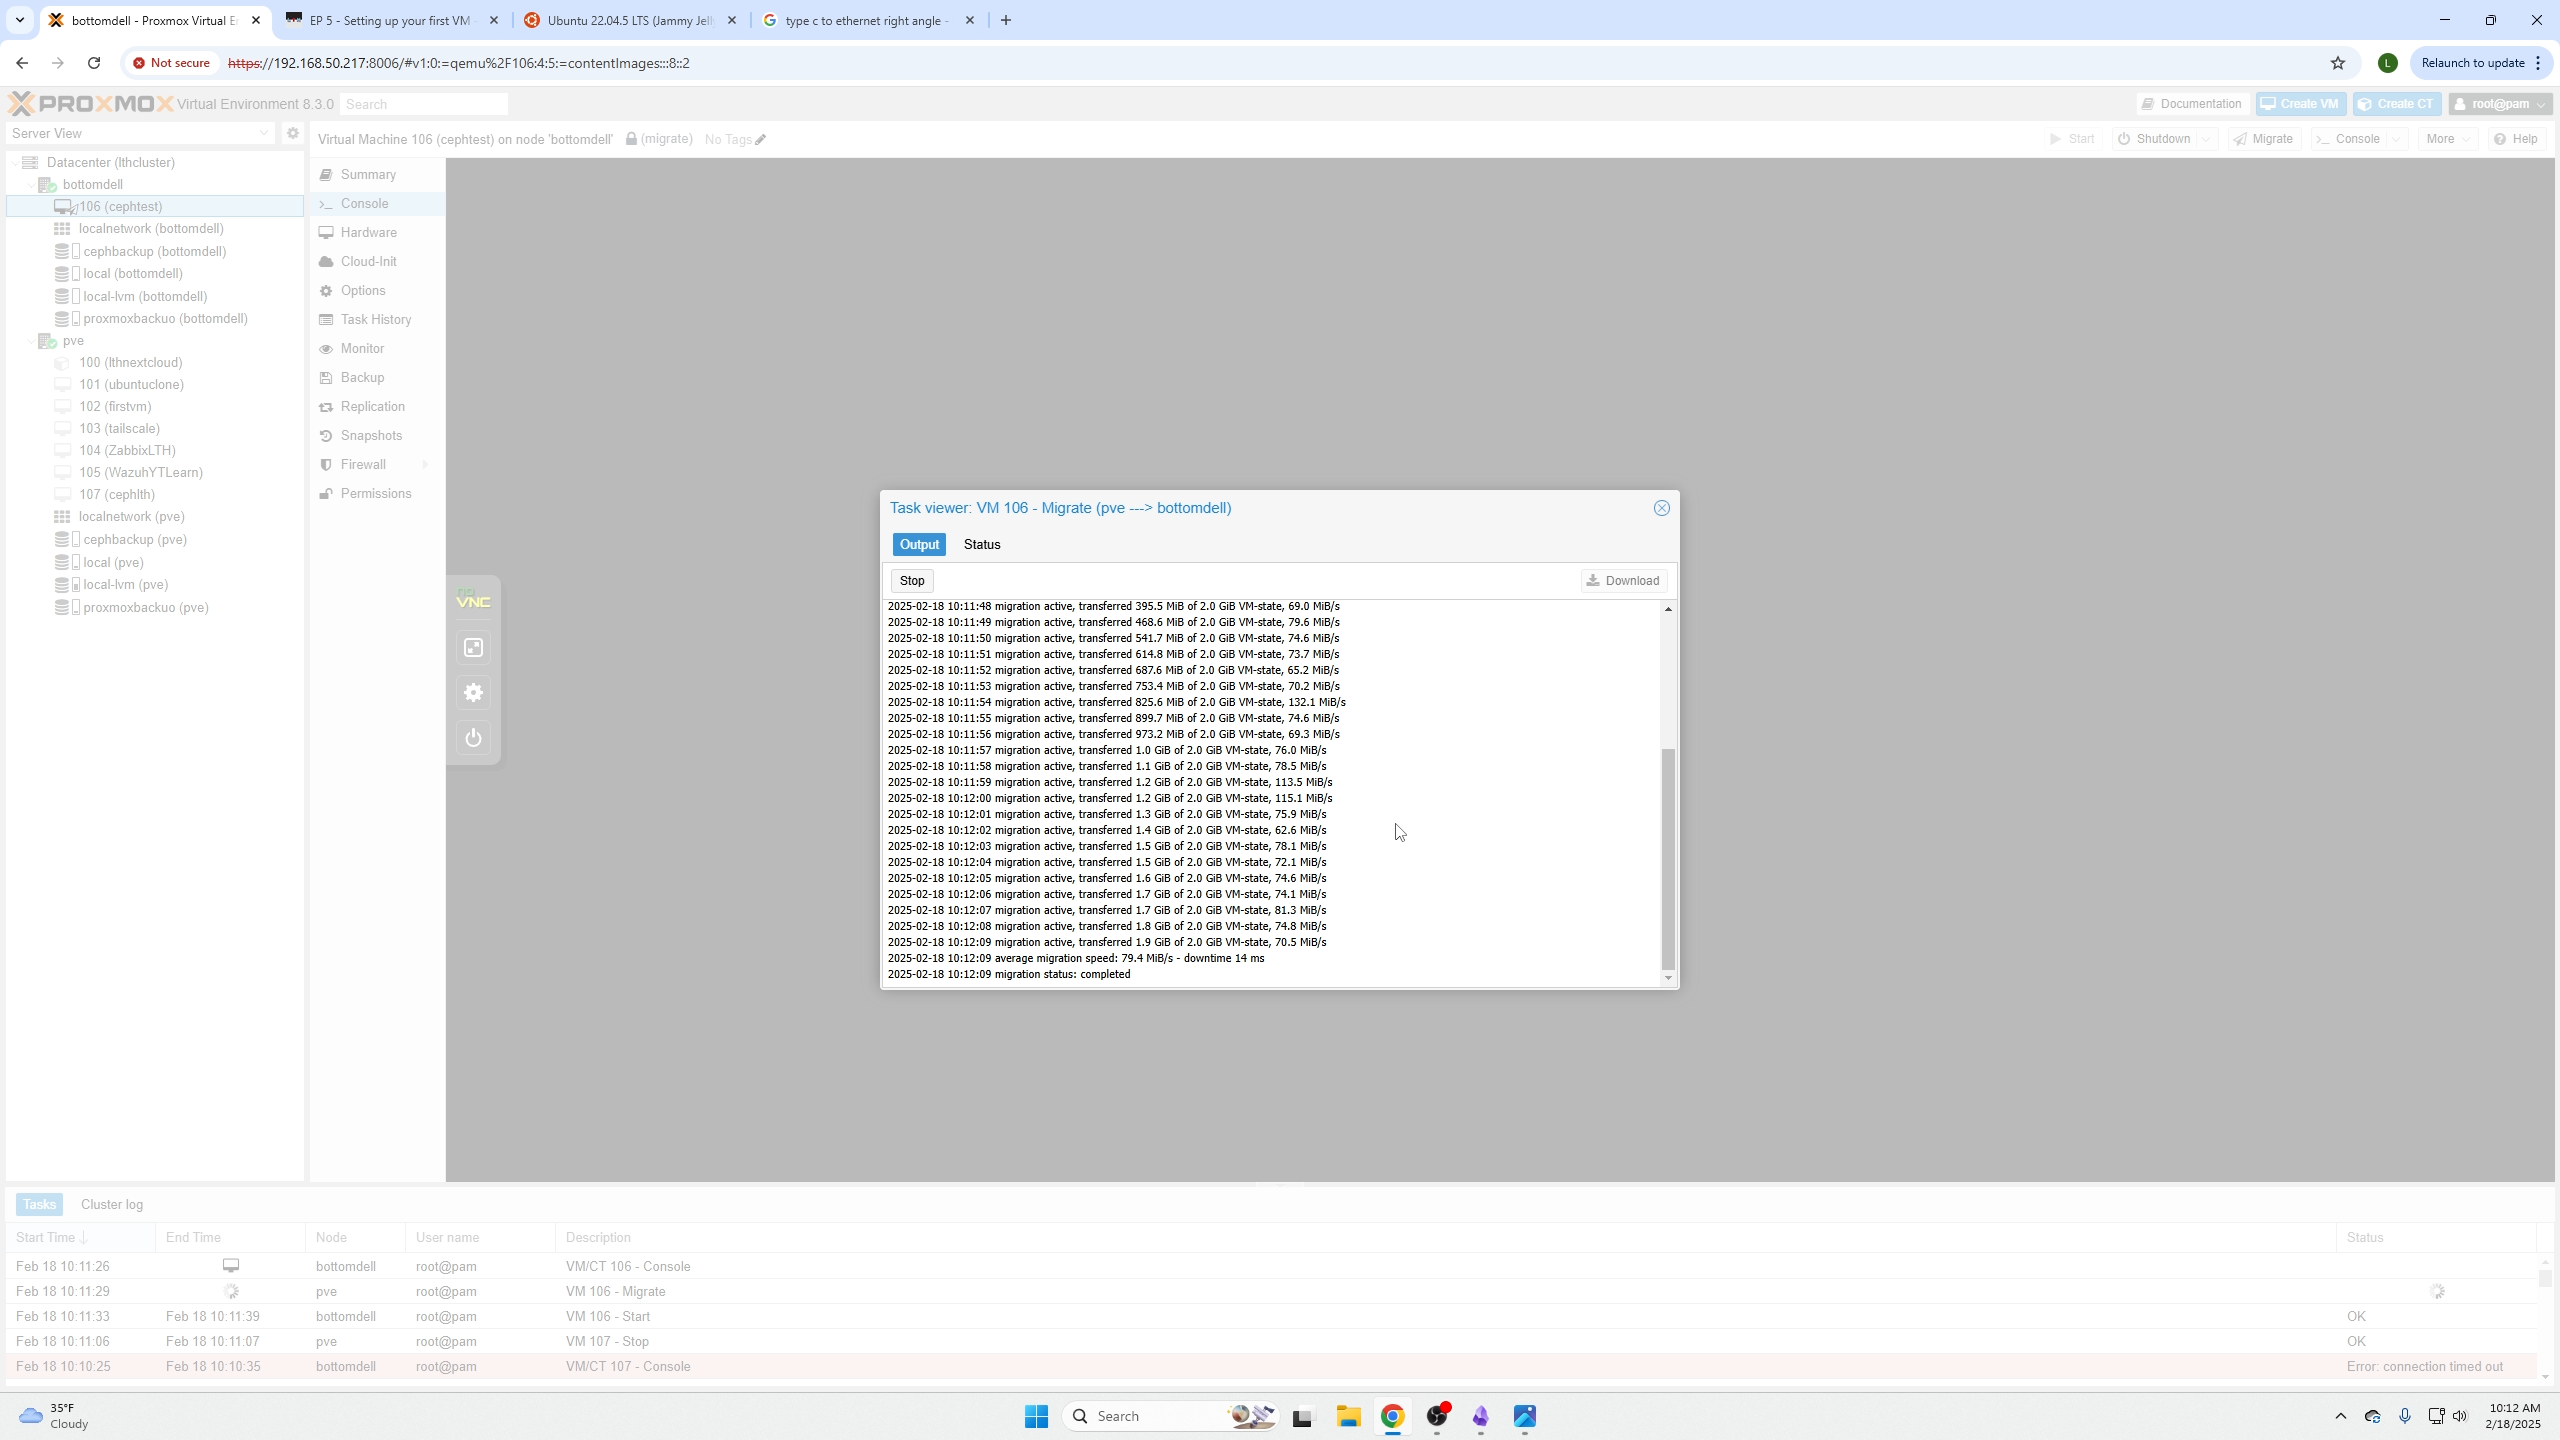
Live feed of the migration
We can now see the VM has moved to the other machine with virtually no down time.
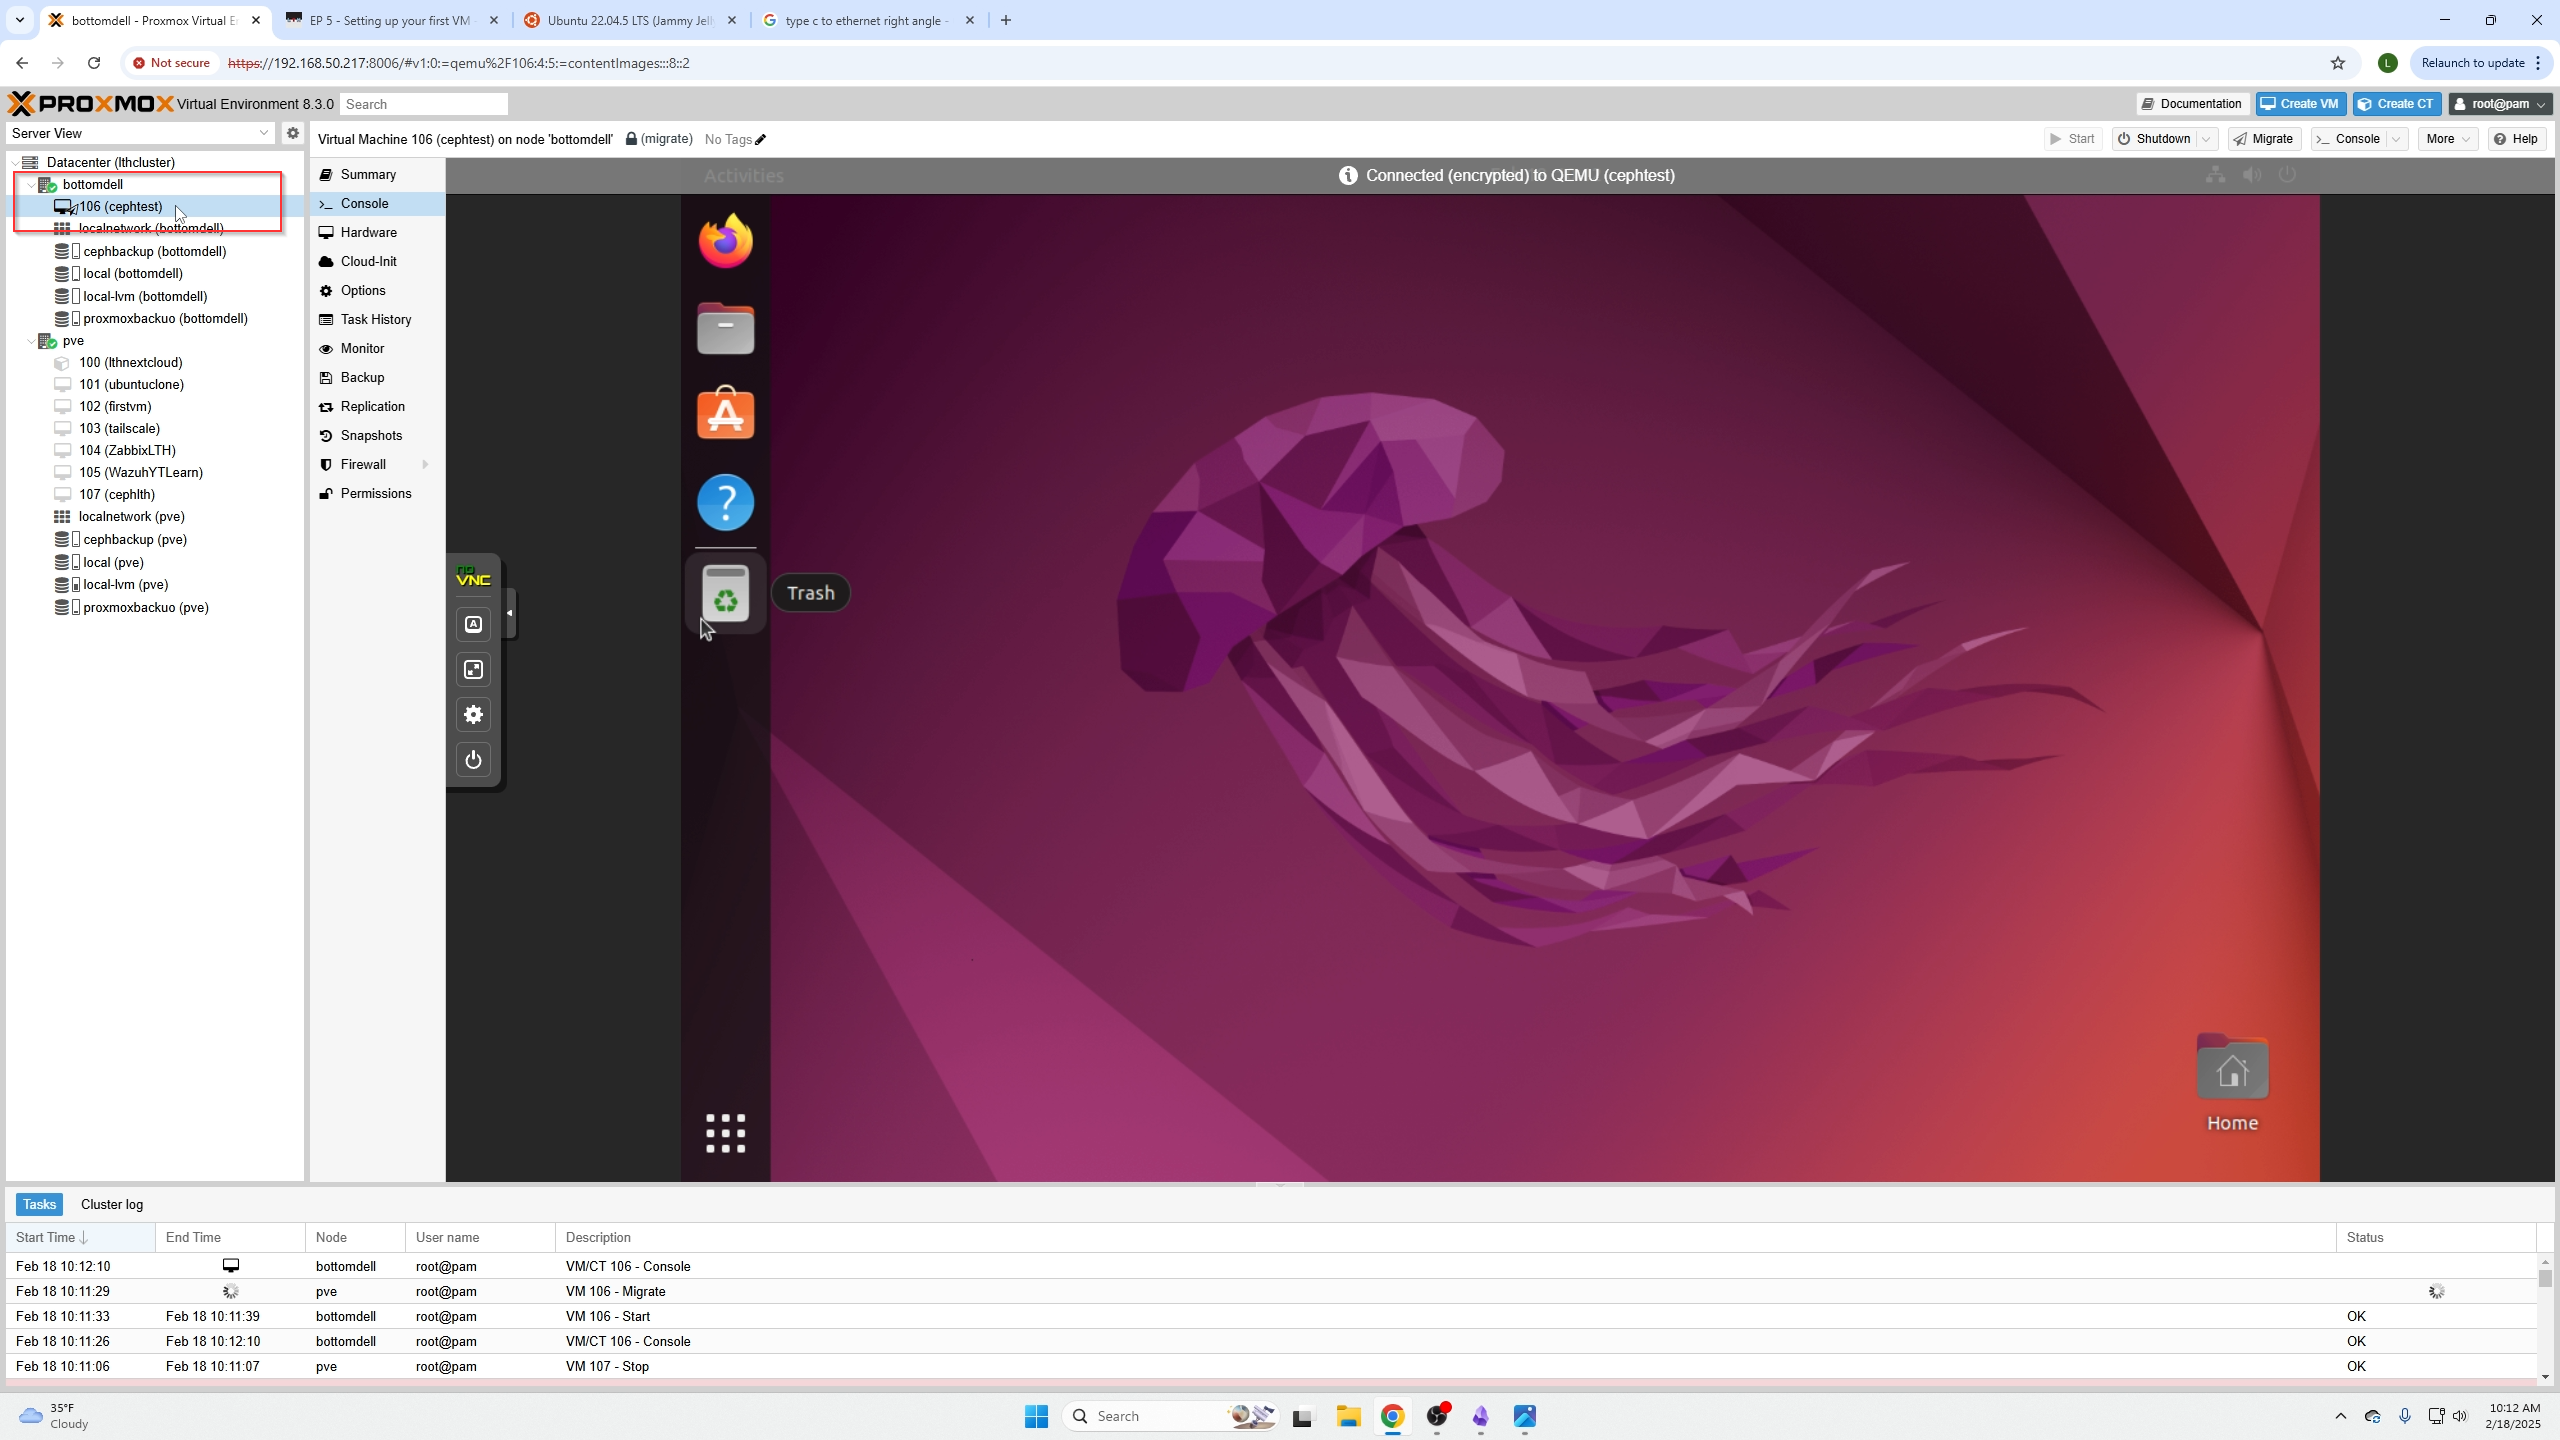
Now if you moved all your VM's to a different node you could go back and update your other node, take it off line for maintenance, fix a failing part, etc. without losing any uptime or having upset customers.

Conclusion
That is it for this video, We covered: 1. How to wipe drives 2. How to create a Ceph Pool 3. How to live migrate VM's 4. How to update other systems without disrupting the availability of our users.