Topic Proxmox Installation Guide
Introduction:
In this episode, we will cover the installation of Proxmox on your server, mini-PC, SBC, etc. (whatever you have chosen to use as your device to host your services).
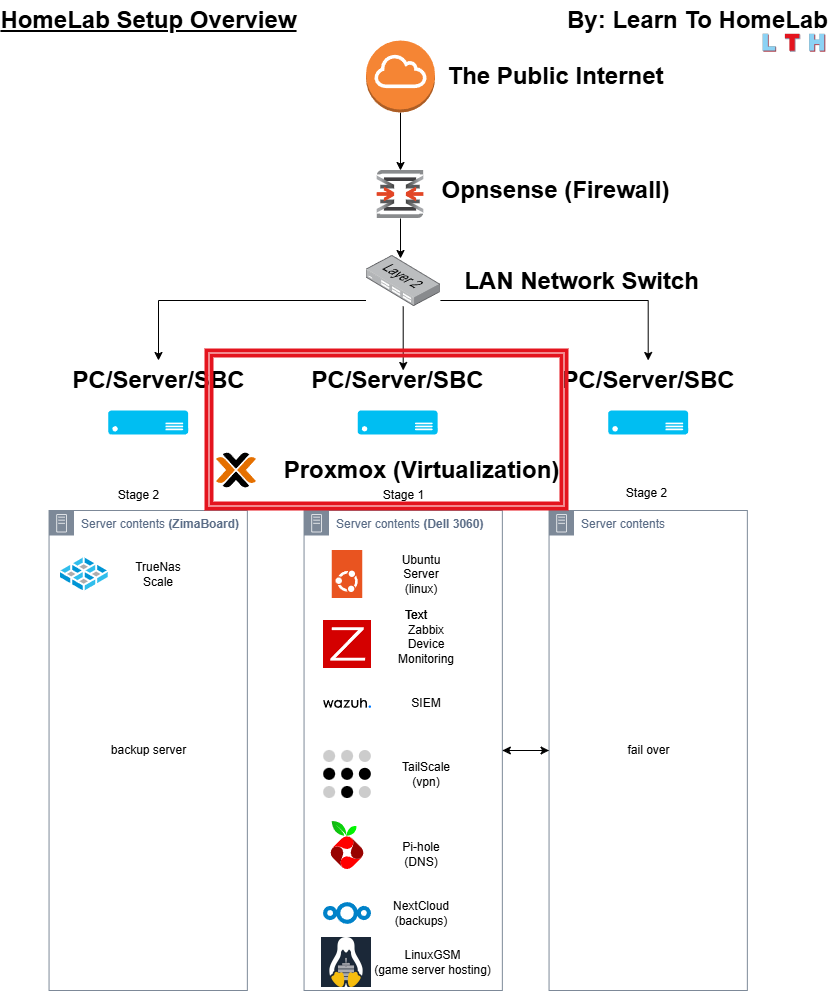
Topology
Required Items:
The Proxmox machine being used in this guide: N95 mini pc (I highly recommend you go with something that has 16gb of RAM or more) Servers are RAM heavy, the more you have the better!. Recommended: Beelink Mini PC SER5 Alternative: Beelink U59 dual ethernet
-
[x] Proxmox Appliance (some type of PC that you are okay with running 24/7)
-
[x] USB thumb Drive
Downloading Proxmox (bootable USB):
The start of the tutorial:
Go to Proxmox.com and download the latest ISO installer here.
Note: copy the SHA256SUM to a .txt file to compare against in a later step.
 Next go to where the file is downloaded right click, properties.
 Copy and paste the location of the file into the same .txt document.
 Use the following command with your respective version of Proxmox to validate the integrity of the file against their good known hash.
EXAMPLE:
 Now open etcher (was previously downloaded in EP 1 how to install OPNsense or PFsense firewall). You can also download etcher from here.
 After you clicked flash from file select your Proxmox .iso, then select open.
 Now click select target and then choose the USB drive you want to write to. !REMEMBER THIS WILL DELETE EVERYTHING ON THE USB DRIVE!
 Now click flash and wait for Etcher to finish creating the bootable USB device.

Installing Proxmox on Server/Mini PC
After that has completed, plug the USB device into your mini pc/server/SBC, whatever you are going to use to as your virtualization host WHILE IT IS TURNED OFF. Then turn the device on while continuously clicking your delete key until the BIOS appears.
 Use your arrow keys and move over to the boot tab, under boot option #1 select the USB device with Proxmox on it.
 Use the arrow keys again and go to the save and exit tab and select save changes and exit.
 Now allow for your device to boot, you will see the Proxmox graphical user interface (GUI) appear. Follow the install instructions, it is very basic, time zone, password, where you want to install to, etc. !STOP ON THE LAST PAGE WHERE IT SAYS ISNTALLATION SUCCESSFUL! read the next step.
 When you get to the last step as seen below, when you select reboot you need to remove the USB device right after or it will take you back to the installation wizard.
 Now we have successfully installed Proxmox, go to your web browser and go to the IP address listed from your Proxmox device. In our case the IP is 192.168.1.50.216:8006.
 You will use root as the username, and then you will use whatever password you created during the setup wizard.
 You have now succesfully installed Proxmox for server and container virtualization! Please move to EP 5 where we will cover setting up a your first virtual machine.

