Is AnyType the Notion Note Taking App Killer?
You can find their repo and latest commands here
What You Need First!
The following instructions are used AFTER you have setup a VM/CT for AnyType and have logged into that via SSH or some other way. You can watch the video above to get an exact flow of what we did before we do the commands below.
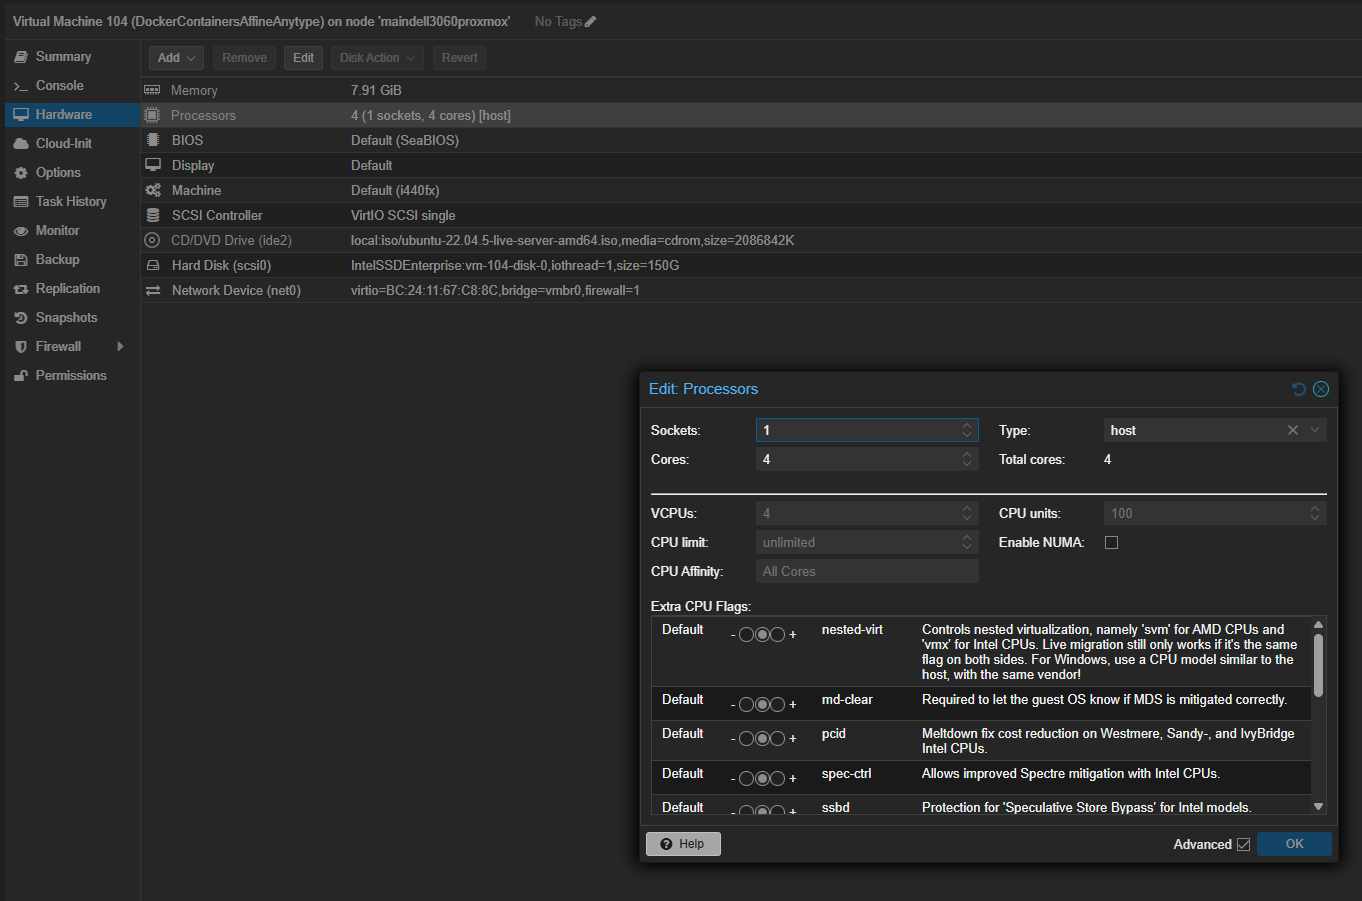
One thing to note, You need to ensure your CPU type is set to host in Proxmox or your preferred hypervisor software:
Installing Docker
- Install using the apt repo.
# Add Docker's official GPG key:
sudo apt-get update
sudo apt-get install ca-certificates curl
sudo install -m 0755 -d /etc/apt/keyrings
sudo curl -fsSL https://download.docker.com/linux/ubuntu/gpg -o /etc/apt/keyrings/docker.asc
sudo chmod a+r /etc/apt/keyrings/docker.asc

# Add the repository to Apt sources:
echo \
  "deb [arch=$(dpkg --print-architecture) signed-by=/etc/apt/keyrings/docker.asc] https://download.docker.com/linux/ubuntu \
  $(. /etc/os-release && echo "$VERSION_CODENAME") stable" | \
  sudo tee /etc/apt/sources.list.d/docker.list > /dev/null
sudo apt-get update
- Install the Docker packages.
sudo apt-get install docker-ce docker-ce-cli containerd.io docker-buildx-plugin docker-compose-plugin
Verify that the installation is successful by running the hello-world image:
sudo docker run hello-world
Verify the compose version:
docker compose version
Install Anytype
Then we need to make a directory for installing AnyType
mkdir anytype
cd anytype
Root files will be located at:
cd ~/anytype/any-sync-dockercompose
Add your current user to the Docker permissions:
sudo usermod -aG docker <username>
Install Anytype
First we need to grab the repo from Github with:
git clone https://github.com/anyproto/any-sync-dockercompose.git
Navigate to the project directory:
cd any-sync-dockercompose
Then install make (this is used to compile code into a working application):
sudo apt install make
Then we need to add our VM ip (this will be the IP of the VM/CT you are running AnyType on):
echo 'EXTERNAL_LISTEN_HOSTS="<yourExternalIp1>"' >> .env.override
We can then verify the IP by cating the content to the terminal:
cat .env.override # Verify the IP went into the file
Then to run anytype:
sudo make start
Mongo Database Error
I feel many of you may run into this issue, but if Mongo DB does not have access to the CPU, it will not run.
-
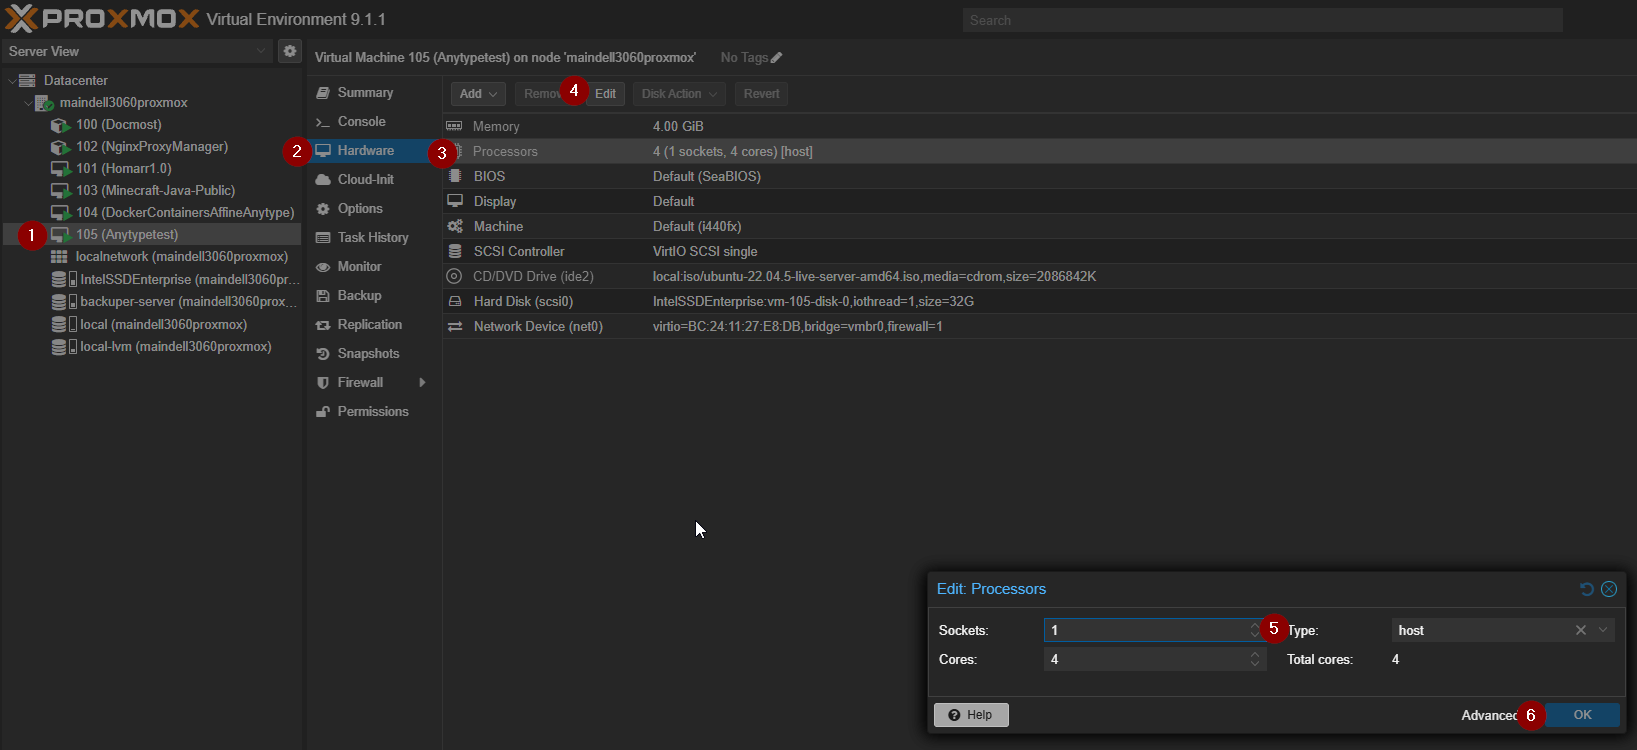
Start by turning your VM off.
-
To fix this, within Proxmox (or find the same setting within your virtual environment) go to Your VM/Hardware Tab/ CPU (click edit)/then set type: to host
-
Turn your VM back on.
-
Go back to your CLI/Terminal and SSH back into your VM with AnyType running.
-
To get back to the right location, use the following commands so we can finish the install:
Change back to the right directory:
cd ~/anytype/any-sync-dockercompose
then run the make command again:
sudo make start
Download Anytype
Alright, now go to the link found here to download your AnyType Desktop Client.
After we have downloaded that, we need to grab the config file from the server in our Windows Desktop terminal.
This means you are opening ANOTHER CLI/Terminal on your desktop, and connecting from your PC to your AnyType VM
The below commands will show you how to grab your AnyType CLIENT config file from the Anytype VM, this config file tells AnyType WHERE your server is located to it can sync the files to the server as you create them.
Ensure you change the following:
- <user> (three of them)
- <anytype_vm_ip>
scp <user>@<anytype_vm_ip>:/home/<user>/anytype/any-sync-dockercompose/etc/client.yml C:\Users\<user>\Desktop\
Example:
scp learn@192.168.50.250:/home/learn/anytype/any-sync-dockercompose/etc/client.yml C:\Users\learn\Desktop\
Connecting to your AnyType Server
Alright, now we can connect our AnyType desktop application to our Anytype Server VIA the AnyType desktop application.
- Open AnyType. and on the top right you will see a gear ICON, click that:

- Then we select selft hosted from the Network configuration:
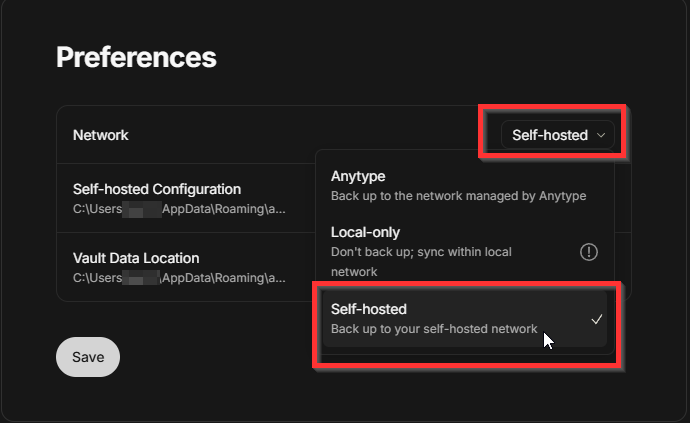
- Select Load from Self-hosted Configuration, and find your client.yml file (which we saved to our desktop by default if you copied and pasted the commands from earlier).
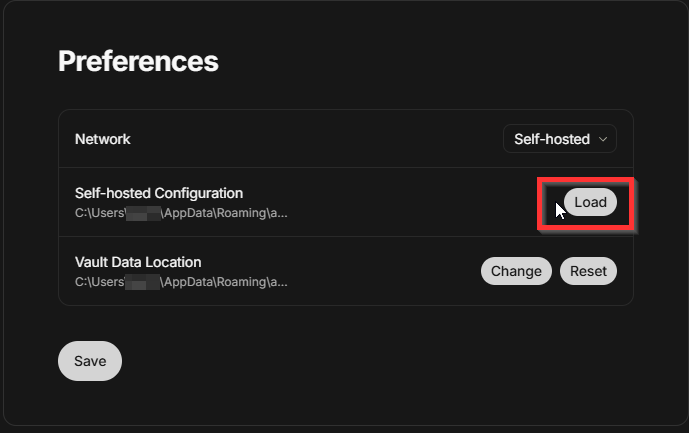
- After that, click open, and then save, and then you will be brought back to the front landing page:
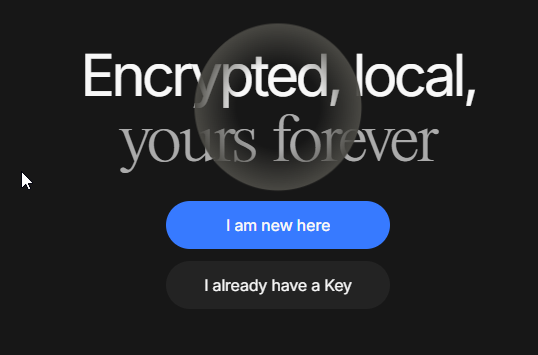
- If you are a new user, select, "I am new here"
If you are not, then select "I already have a key" and type in your key.
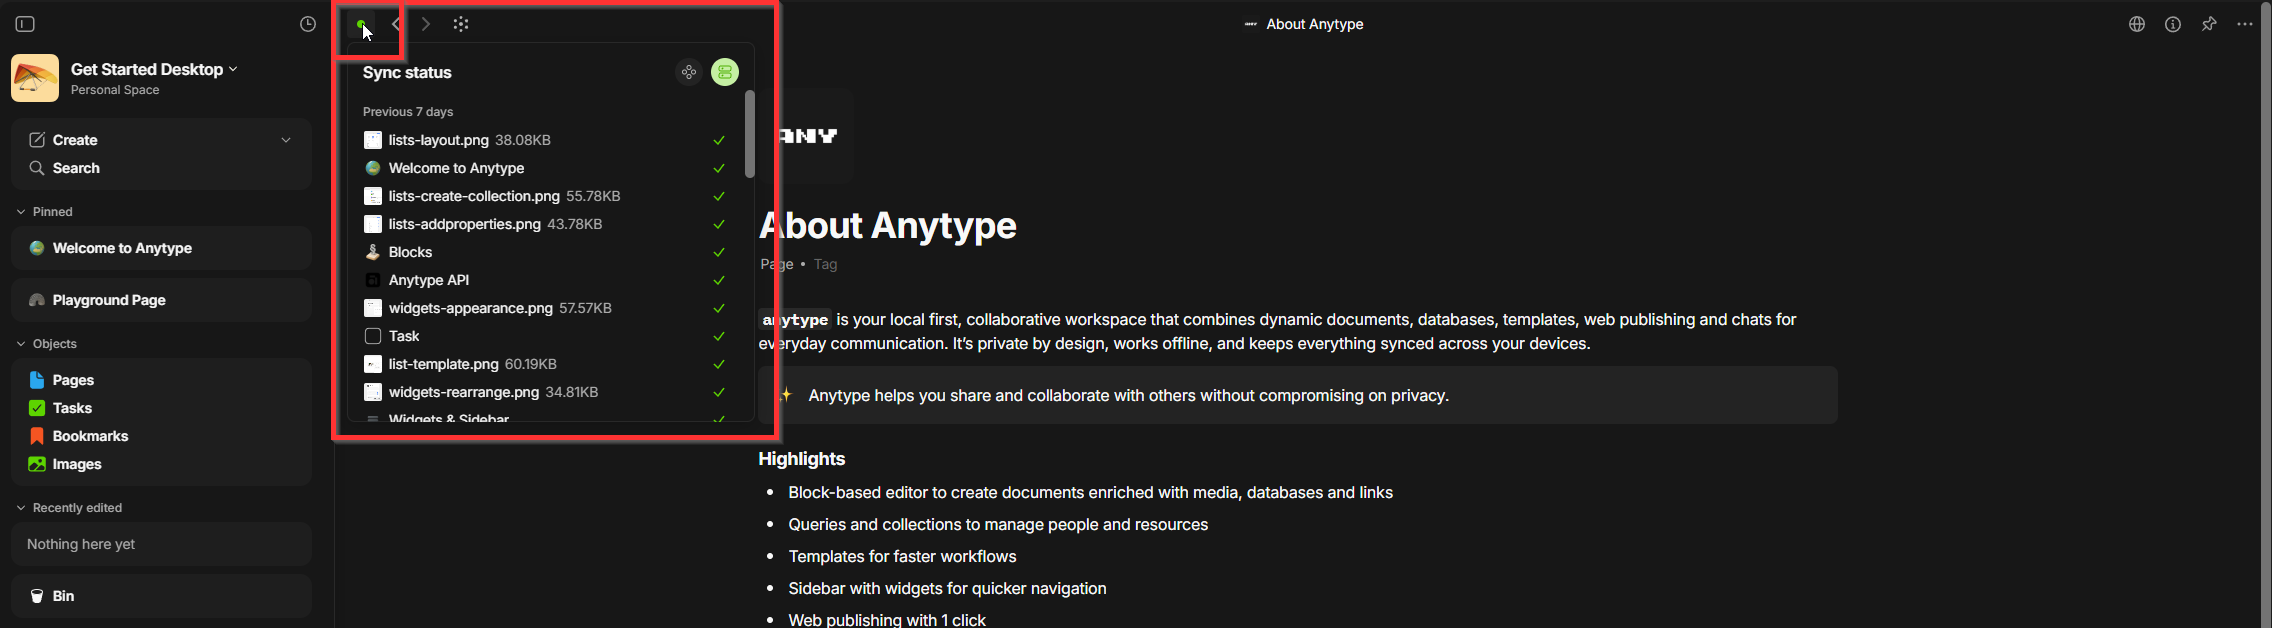
That is it, you are now inside of your AnyType Instance, with auto server syncing and backups. You can check the status of your file backups and if you are connected to your server thanks to the green dot icon after you login: