Installing Crafty4 on TrueNAS Scale in 2026
Install Crafty4 on TrueNAS 2026
In this video we will cover how to install Crafty4 on your TrueNAS Scale device.
Creating Datasets
In order for Crafty4 to run on TrueNAS, it requires datasets for the following:
- Crafty 4 Config Storage
- Crafty 4 Servers Storage
- Crafty 4 Logs Storage
- Crafty 4 Backups Storage
- Crafty 4 Import Storage
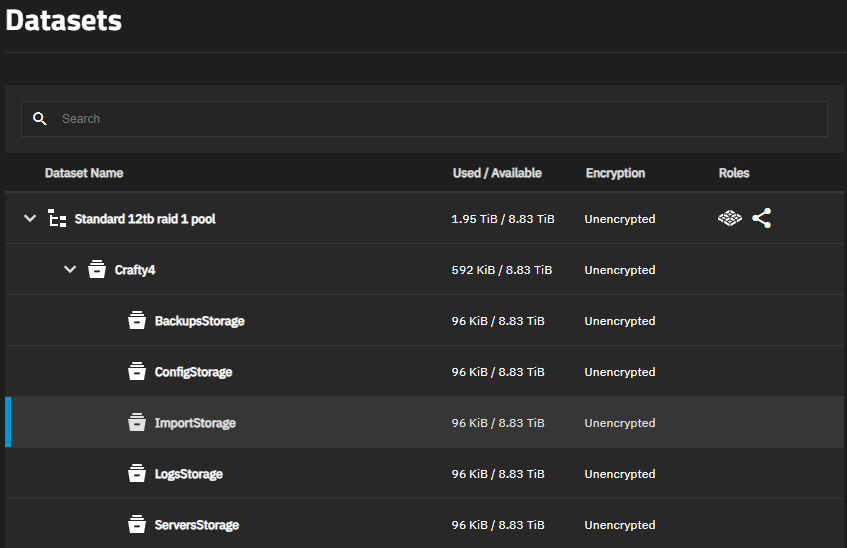
So go ahead and log into your TrueNAS machine and head over to the datasets tab on the left:
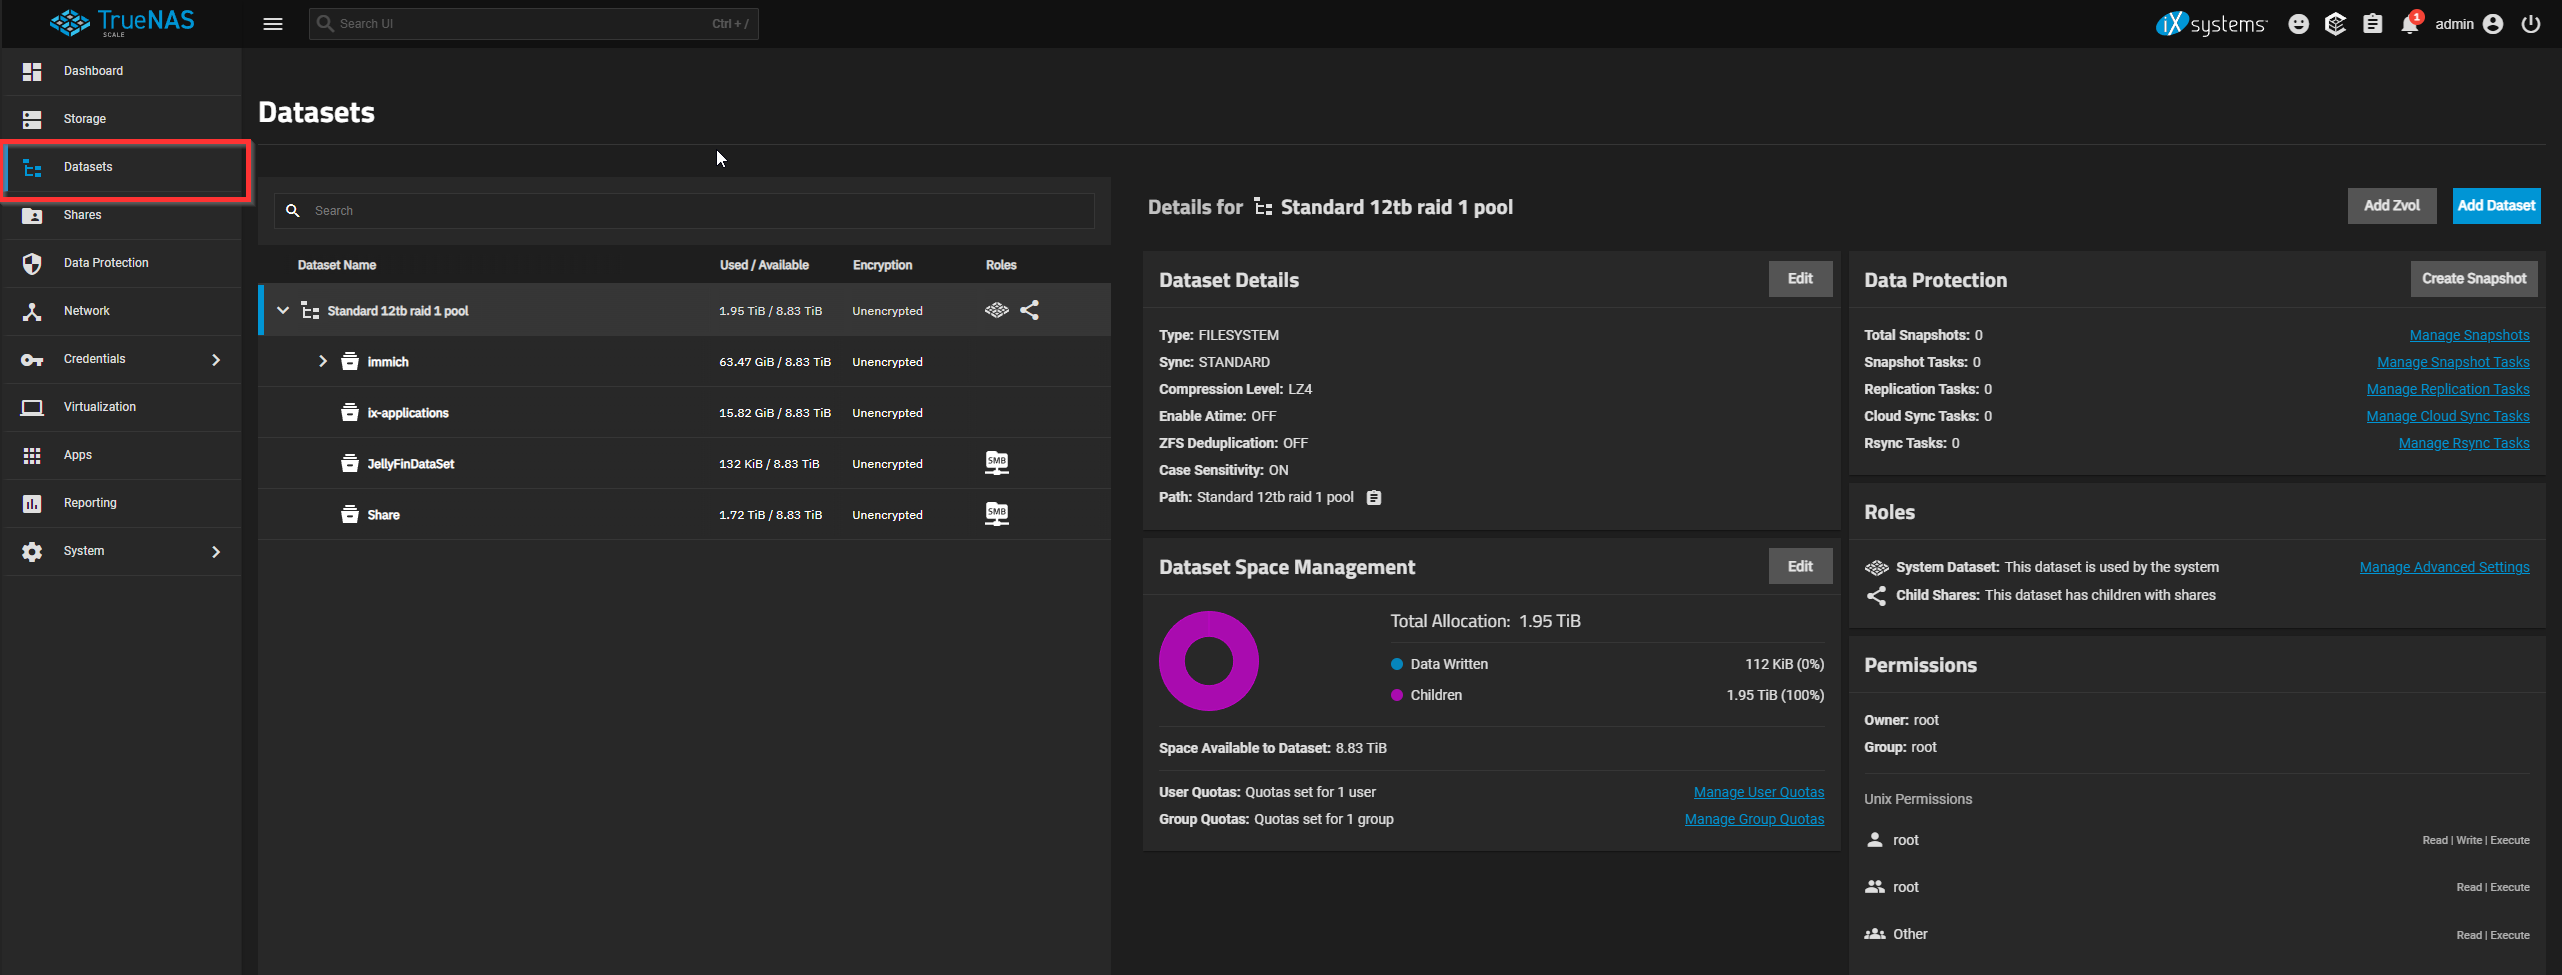
We will then create a new dataset by clicking the Add Dataset blue button on the right. You can just call this Crafty4 and leave it as generic.
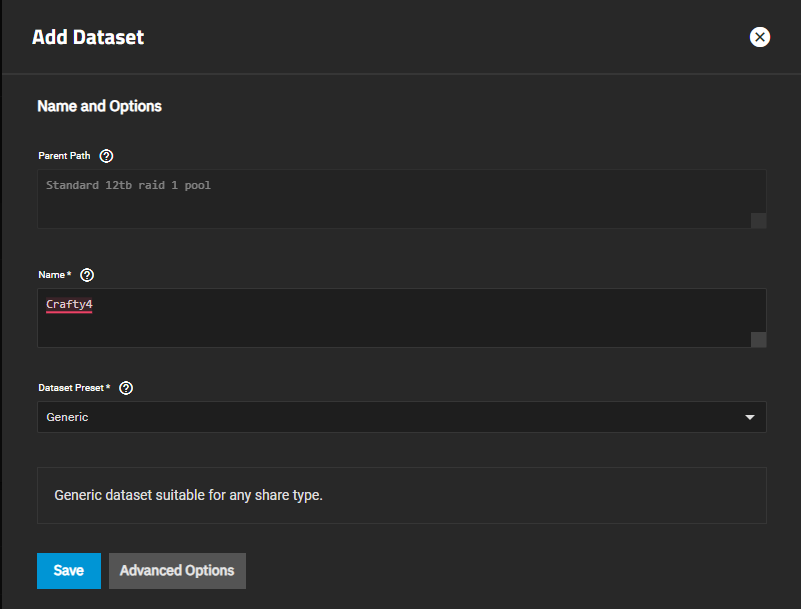
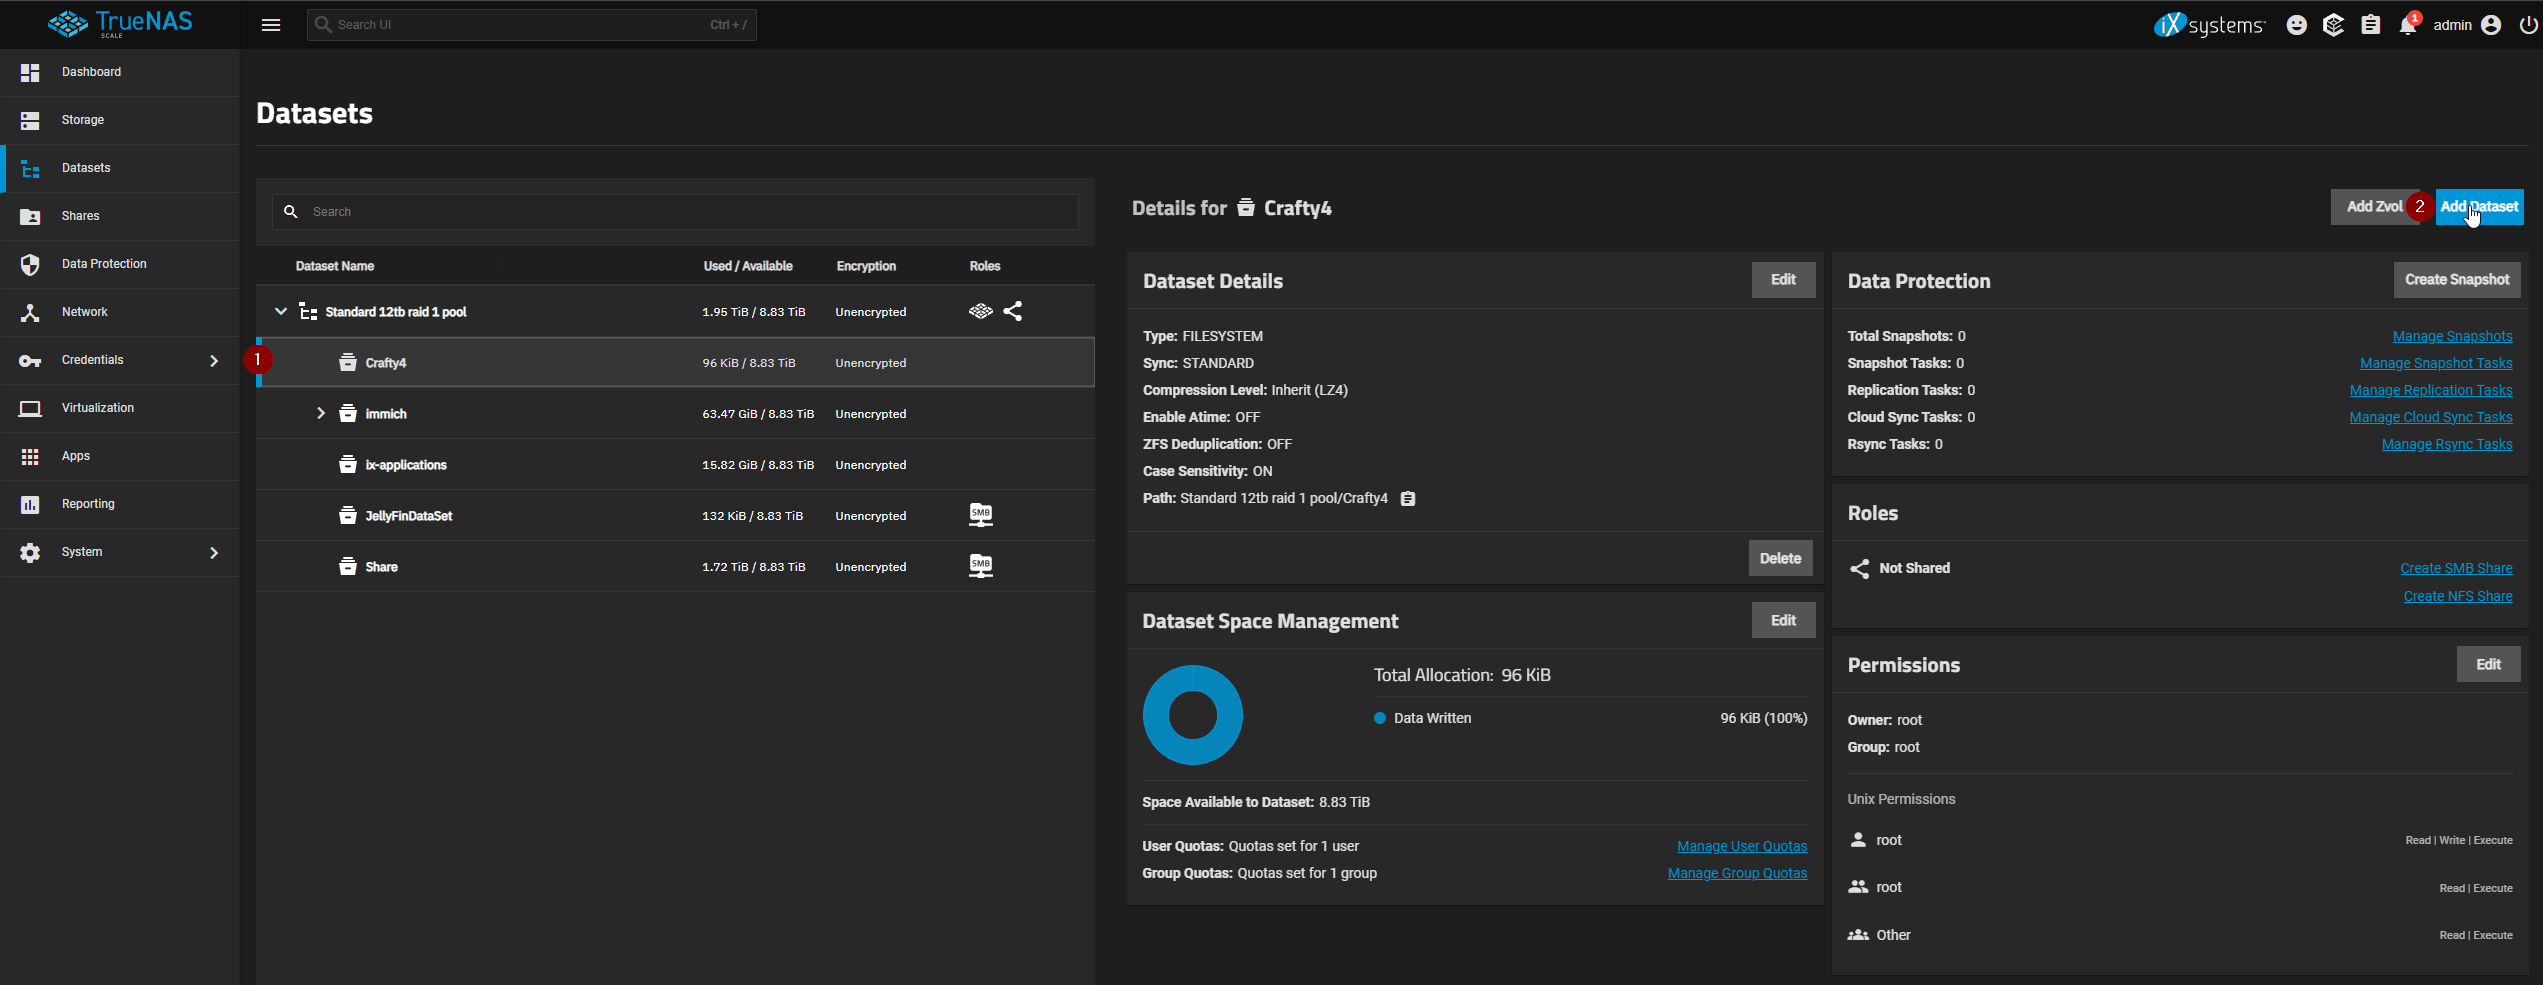
We will now create a dataset for the five mentioned datasets above in here.
Pay close attention, after you create a dataset, ensure you select the Crafty4 dataset before clicking the blue add dataset button again. This ensures all five of your datasets are contained within the main Crafty4 dataset root folder.
Every time you create the give datasets, they can all be left as generic, just ensure you name that as mentioned above (config storage, servers storage, logs storage, backups storage, import storage).
Setting Permissions for the Dataset
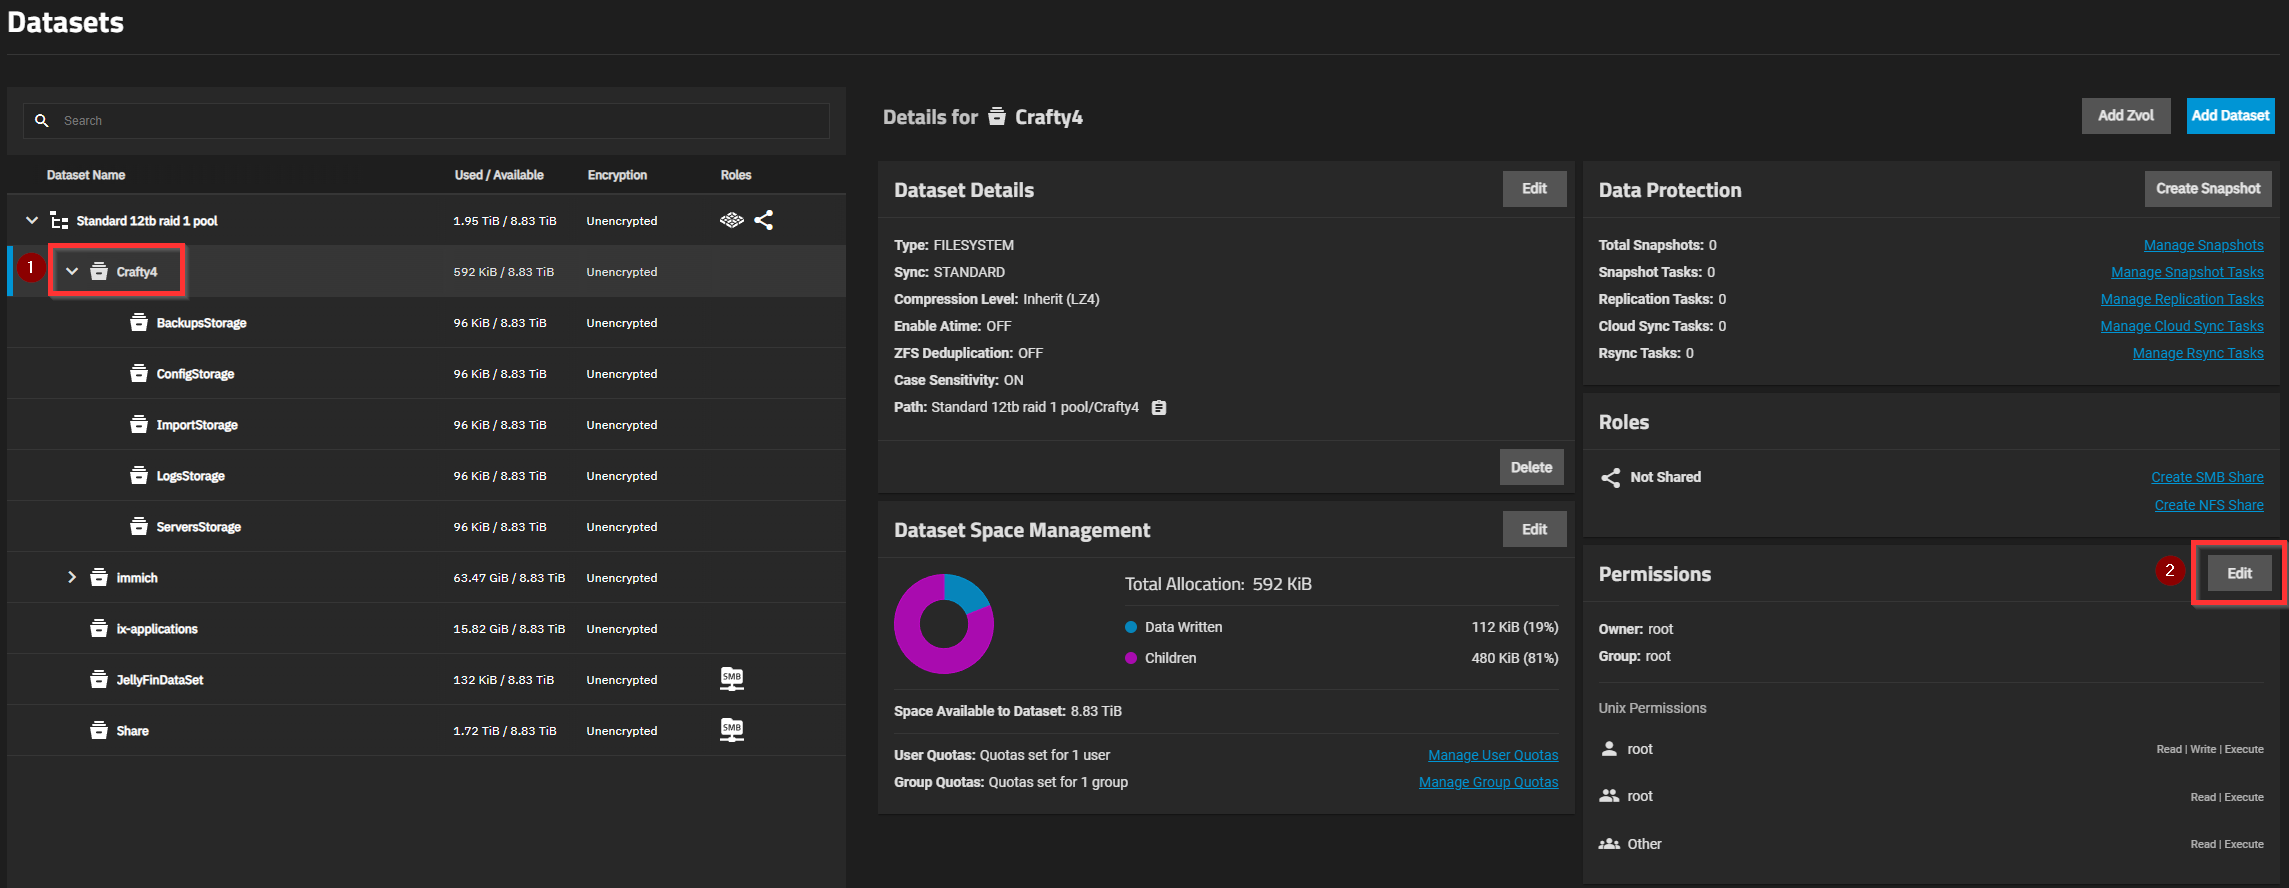
Now we need to give the proper permissions for the dataset so the app creation will work. Select the Crafty4 dataset from the top, then click edit from the permissions section:
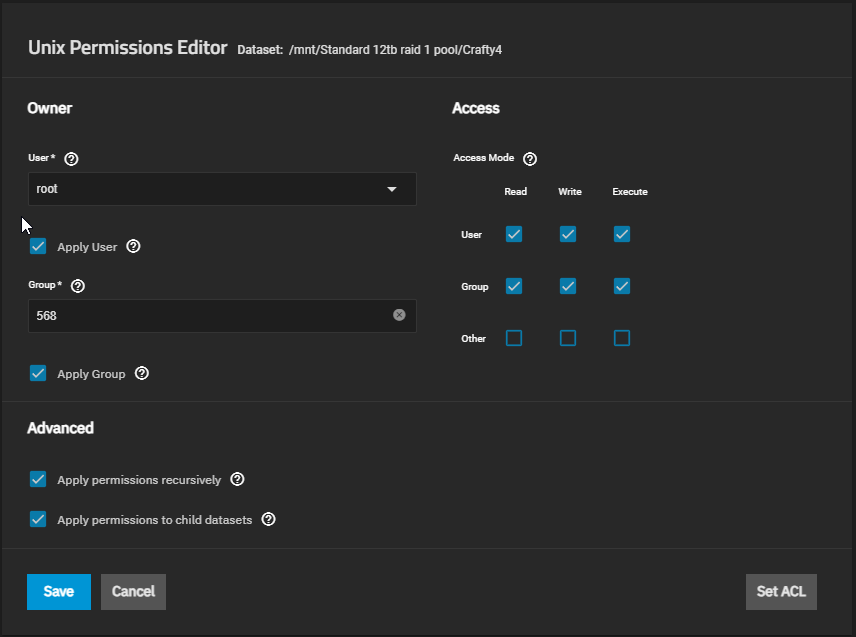
Select User and find root if not selected already, and then under Group find apps and ensure both have their Apply (apply may show up as 568 after selected) box checked right below them. Also ensure that for access mode, all three are checked for user and groups but not for other. After that, ensure you select the boxes under advanced for applying the permissions recursively and for child datasets, than click save.
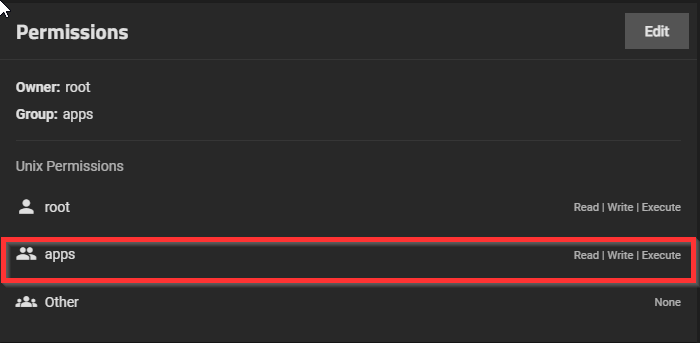
You can then check each sub-dataset, and ensure you see the permissions for apps exists with read, write, and execute.
Installing Crafty4
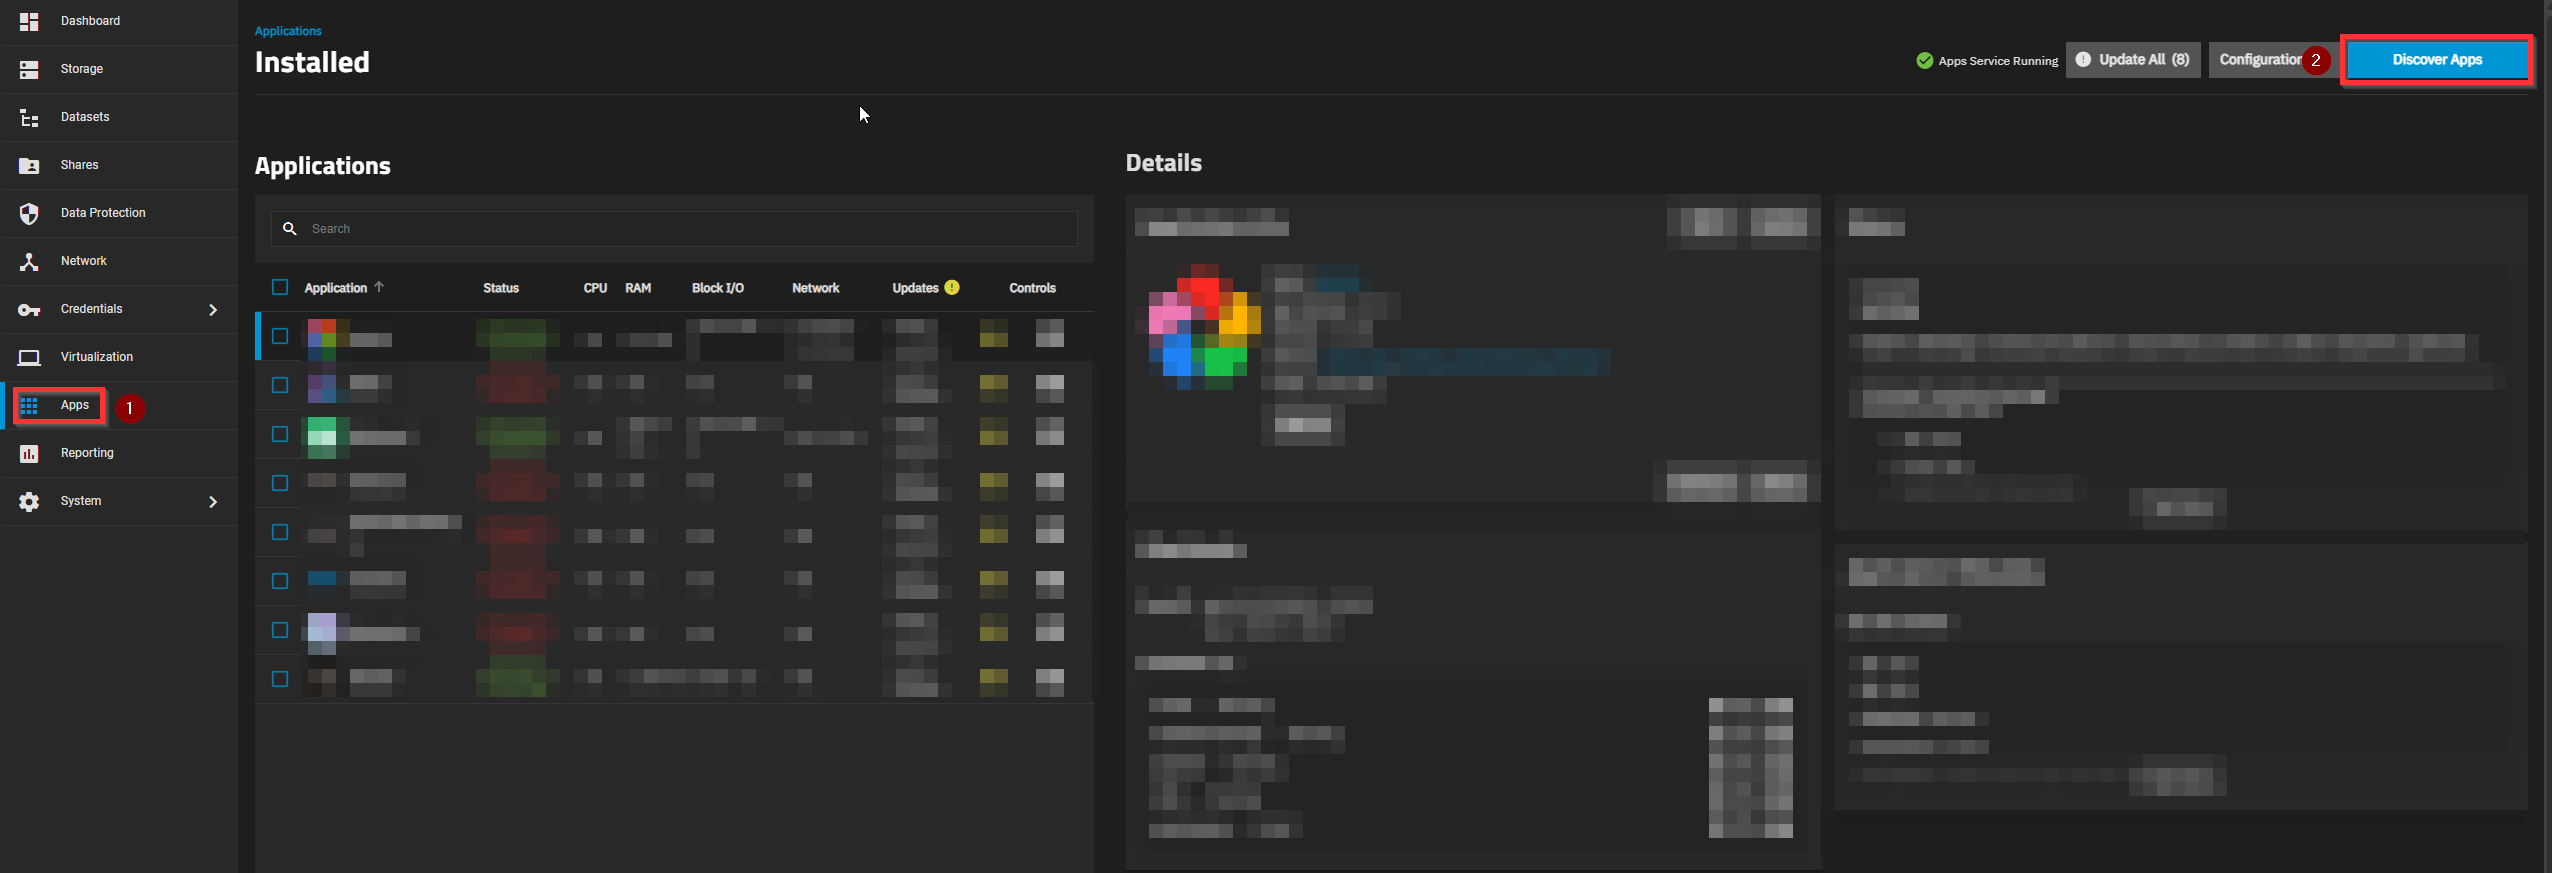
Now, select the Apps page from the left menu and then select Discover Apps from the top right:
Search for Crafty4 in the search bar and select it:
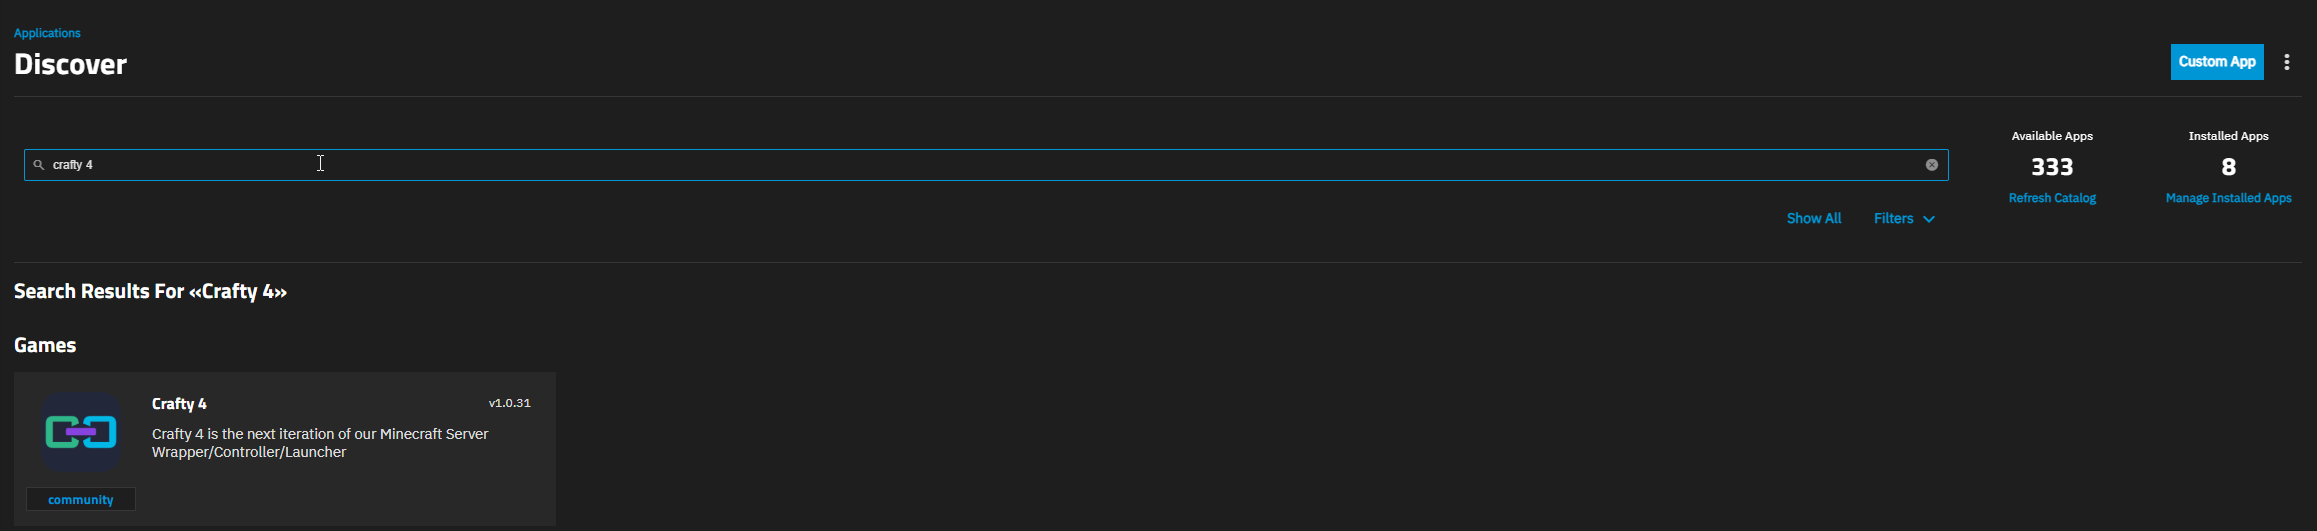
Then select Install on it:

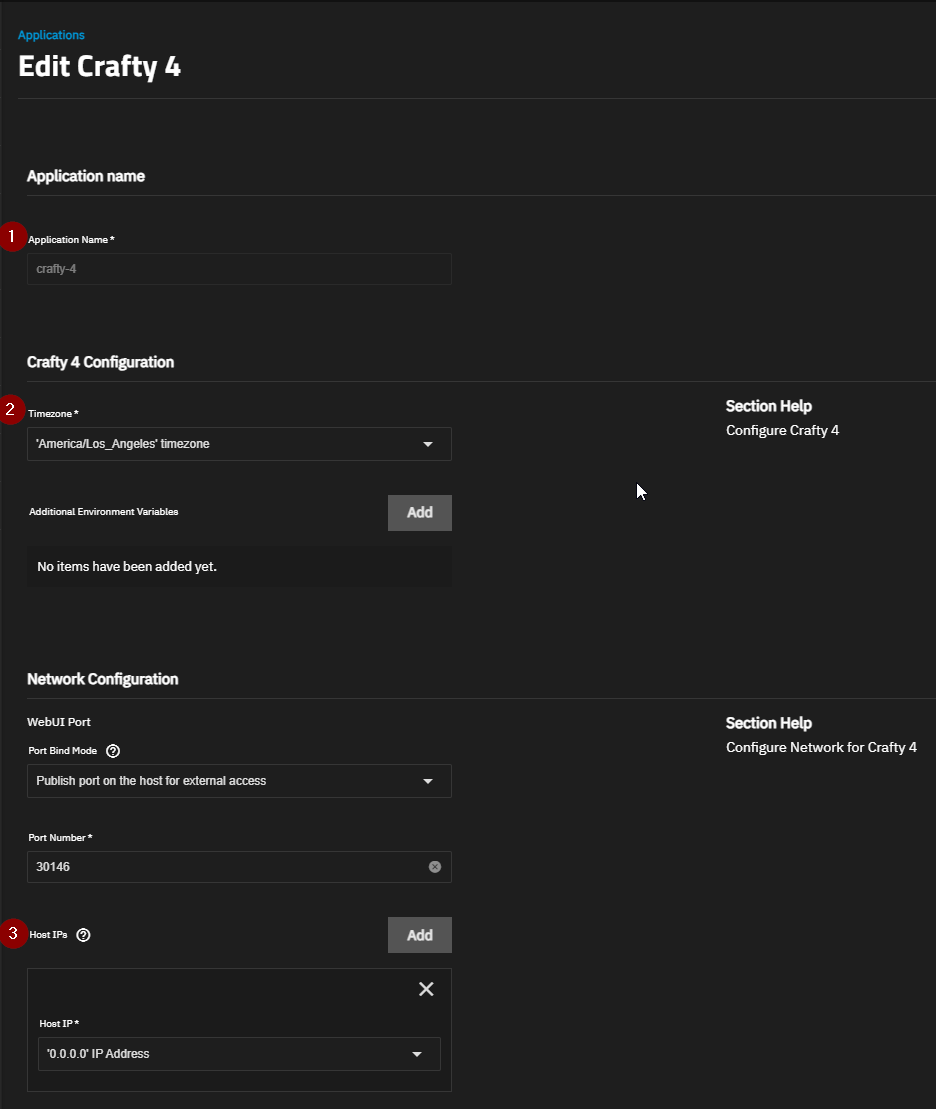
We will now need to change the following settings:
- Application: Name set to what you desire
- Timezone: set to your local timezone
- Host IP: Just select add at the top.
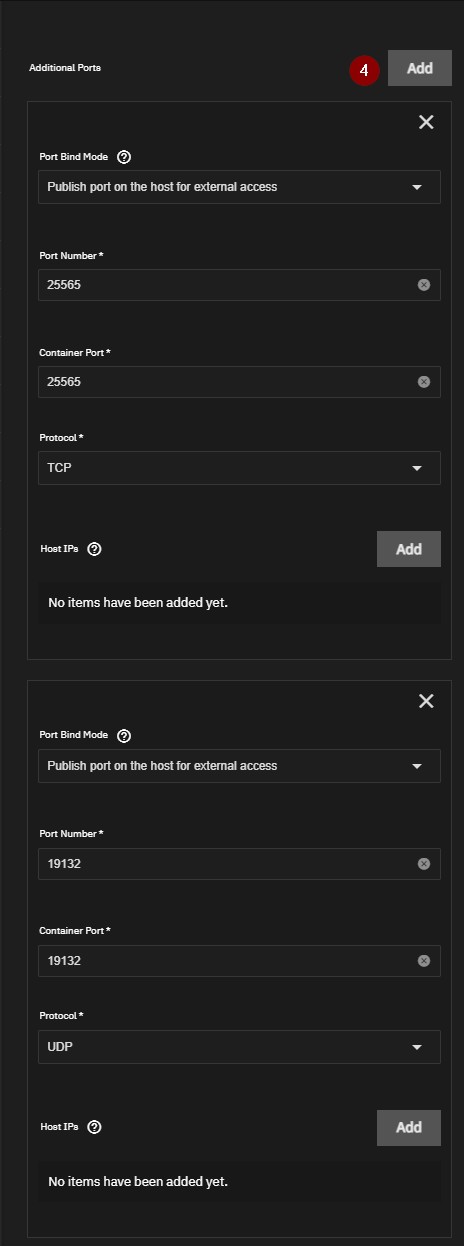
- We then need to add Additional Ports for Minecraft Java (25565 TCP) and for Bedrock (19132 UDP)
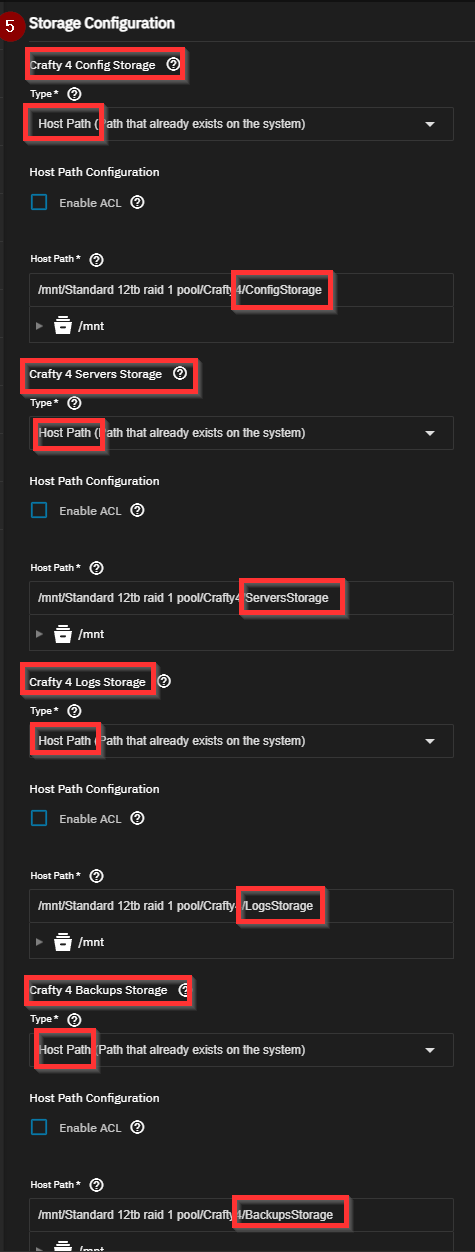
Scroll down to Storage Configuration
- Set the storage configurations to your datasets based on names we created earlier in the datasets tab.
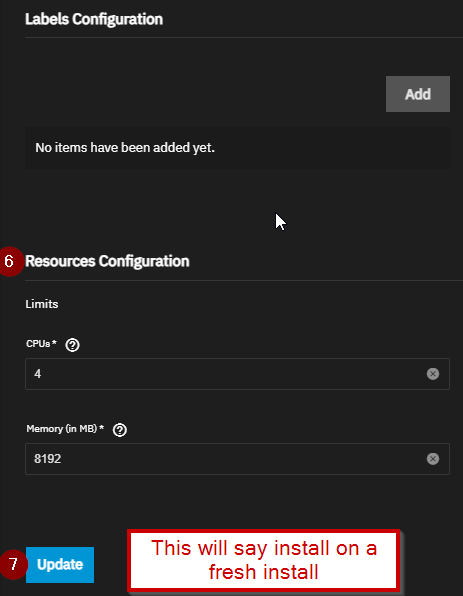
Scroll down to Resource Configuration
- Set the CPU and Memory to your desired amount. We recommend setting CPU to 4 and Memory to at least 8192.
- Then Click Install.
Access Your Crafty4 Dashboard
To access your Crafty4 Dashboard, you will type the following into your browser. If you do not know your TrueNAS devices IP, that can be found on the dashboard tabs main page:
https://<TrueNAS_IP>:30146
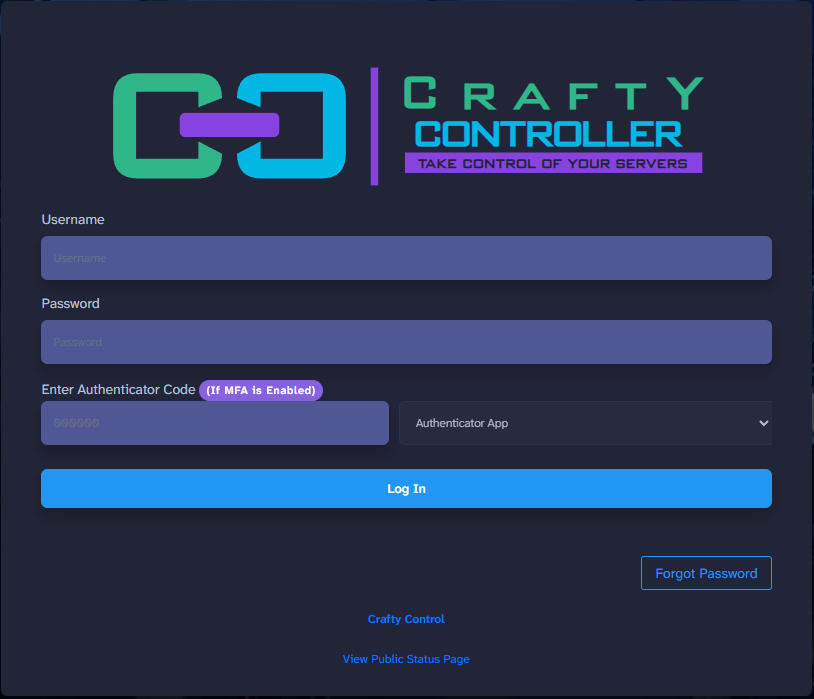
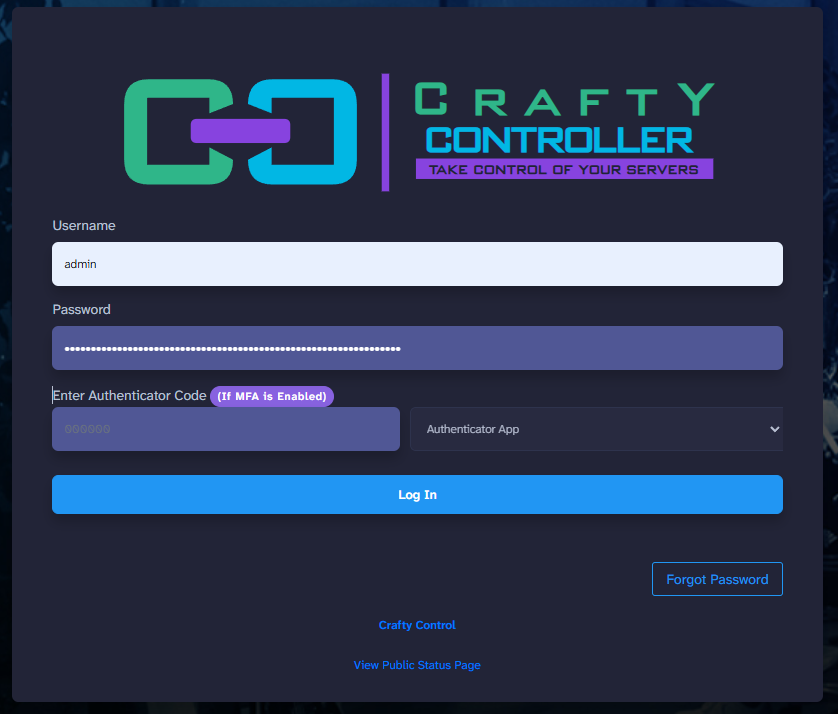
Here is the landing page for Crafty, the default username is Admin but the password is autogenerated, so let me show you how to find that:
The admin password will be saved here:
cat /crafty/app/config/default-creds.txt
Head back over to your Crafty application, and select the shell:
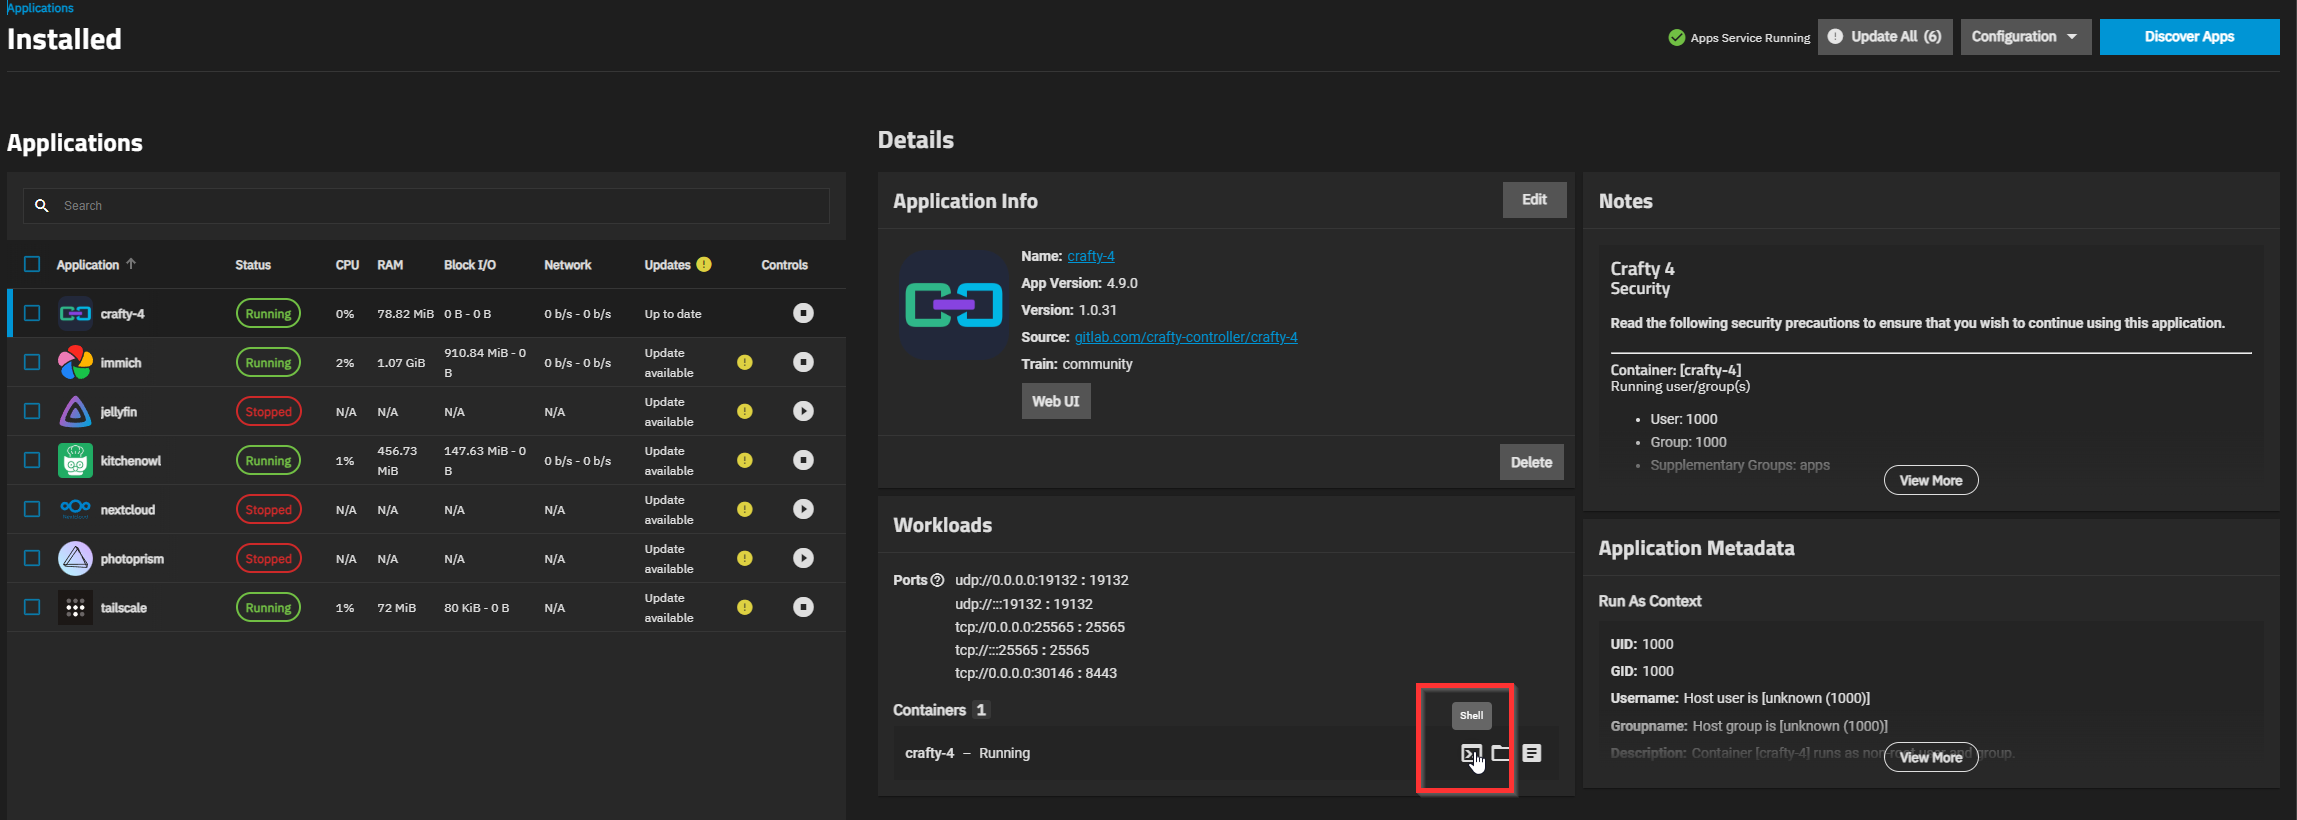
Perform the following command (you can do ctrl + shift + V to paste the command into the terminal):
cat /crafty/app/config/default-creds.txt
You will then get an output like so, ho ahead and copy this content to somewhere for safekeeping:
To copy out of the TrueNAS Scale Container Shell you will highlight the text in the CLI, then click the following two keys on your keyboard: CTRL + Ins The insert (ins) key is usually found above the arrow keys on a full sized keyboard.
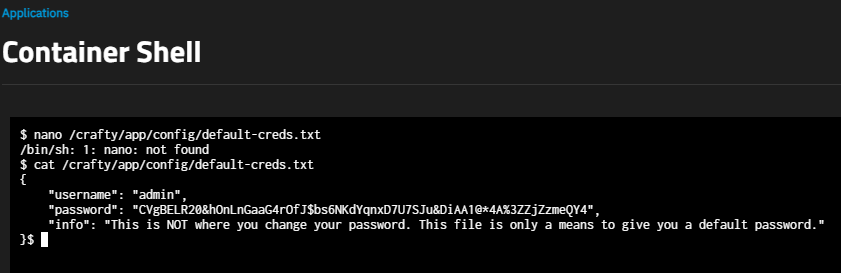
"username": "admin",
    "password": "CVgBELR20&hOnLnGaaG4rOfJ$bs6NKdYqnxD7U7SJu&DiAA1@*4A%3ZZjZzmeQY4",
    "info": "This is NOT where you change your password. This file is only a means to give you a default password."
You can then paste that content into your Crafty dashboard and login:
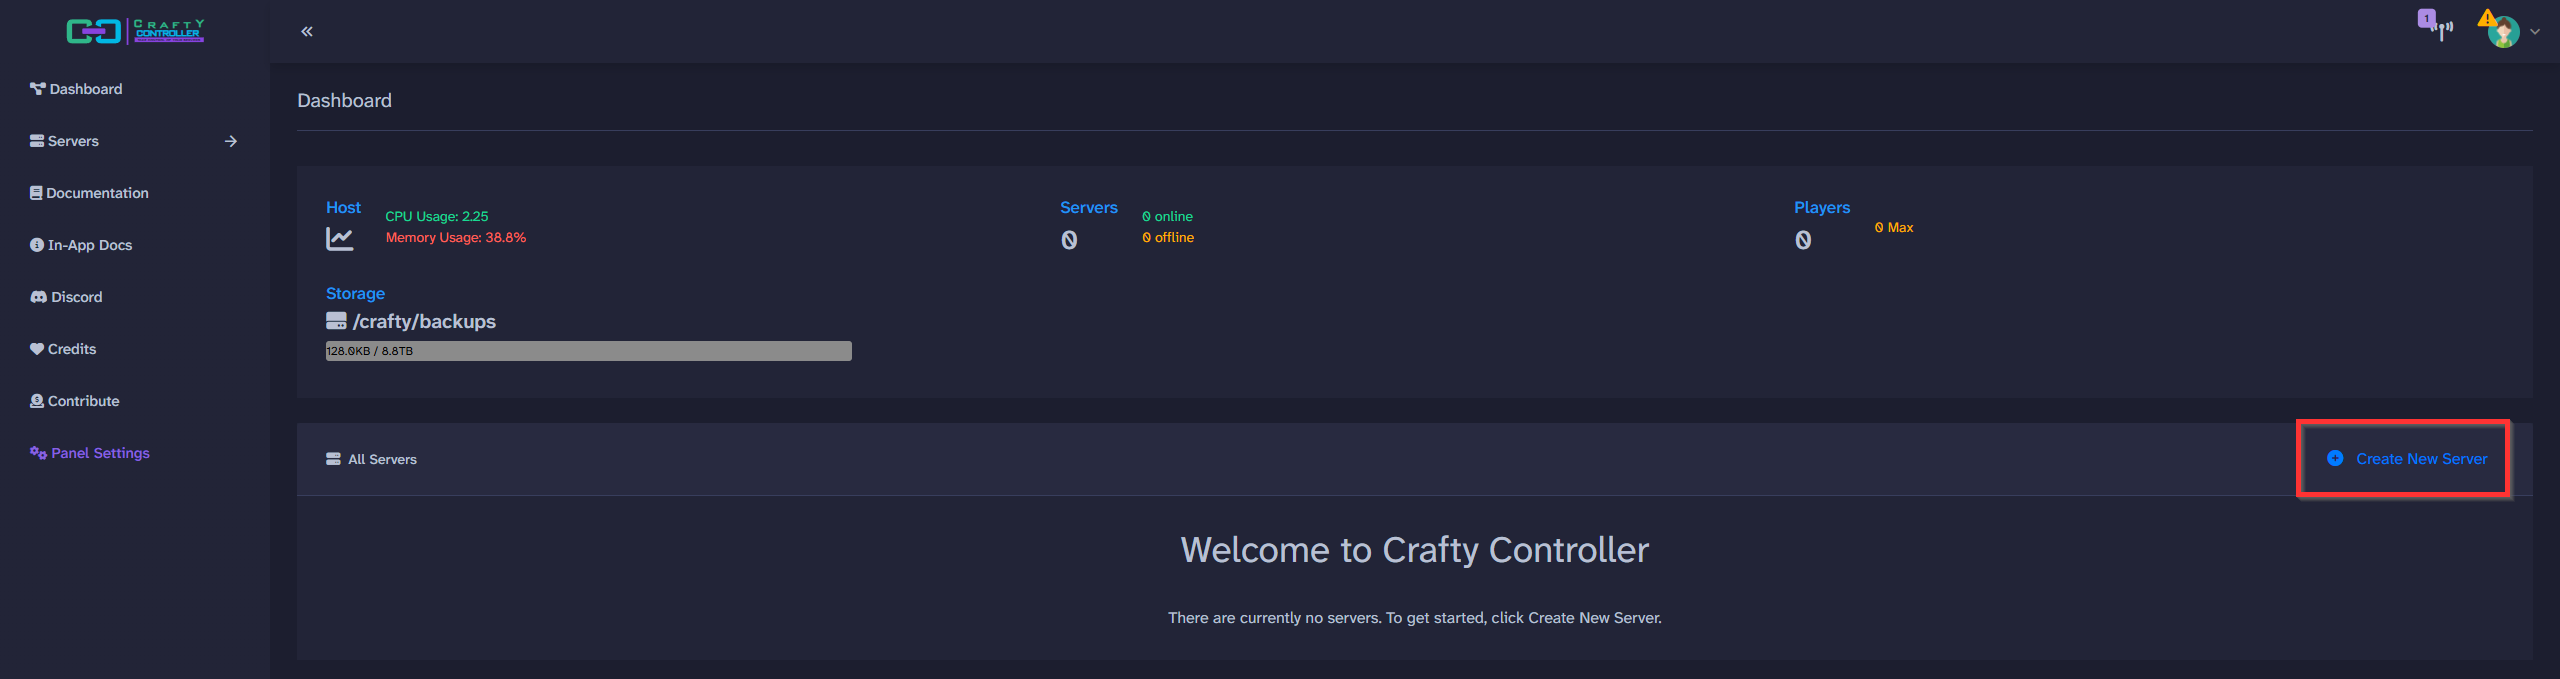
Here is the default login screen, and the red box shows where you can create a
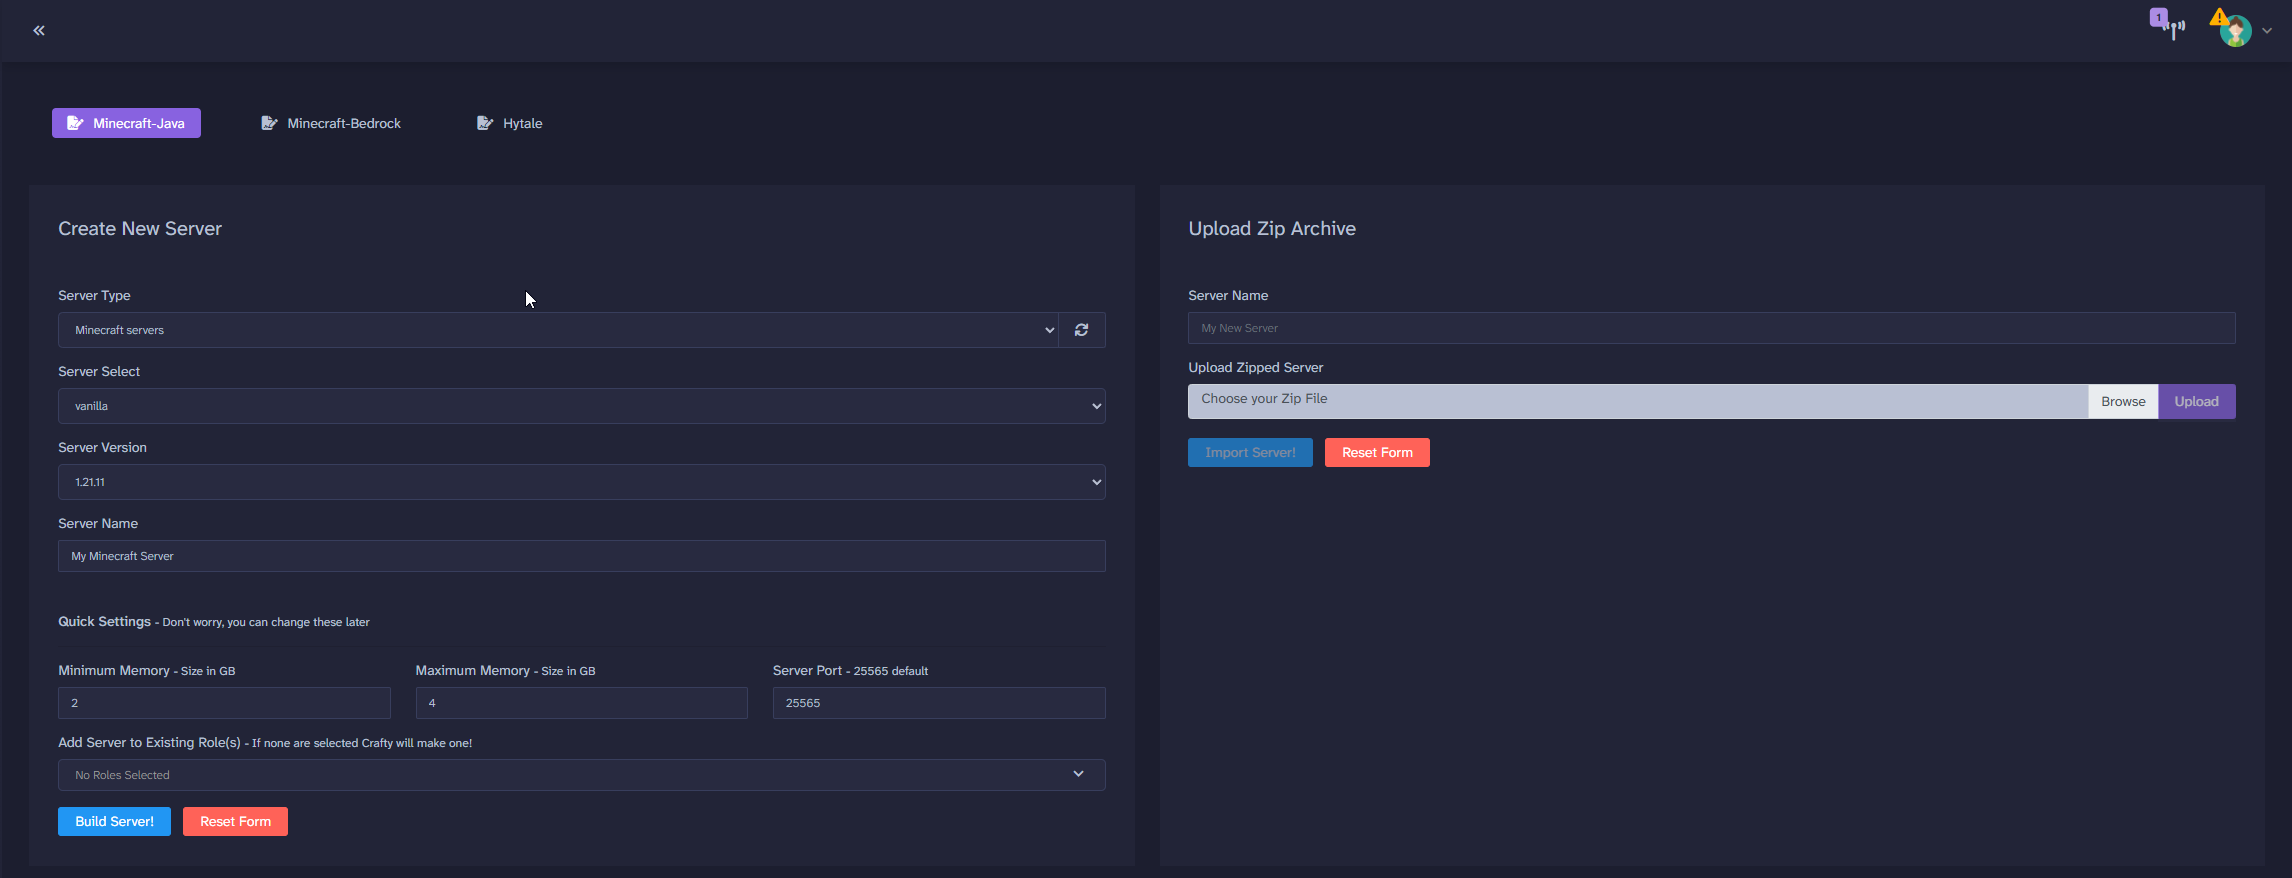
Then fill out the settings based on your preferences and select build server:
Then from this screen, under actions, click the play or start button:

To edit your Minecraft server settings, just click the name of your server:

Here you can see all the key areas you may need to access to administrate your server:
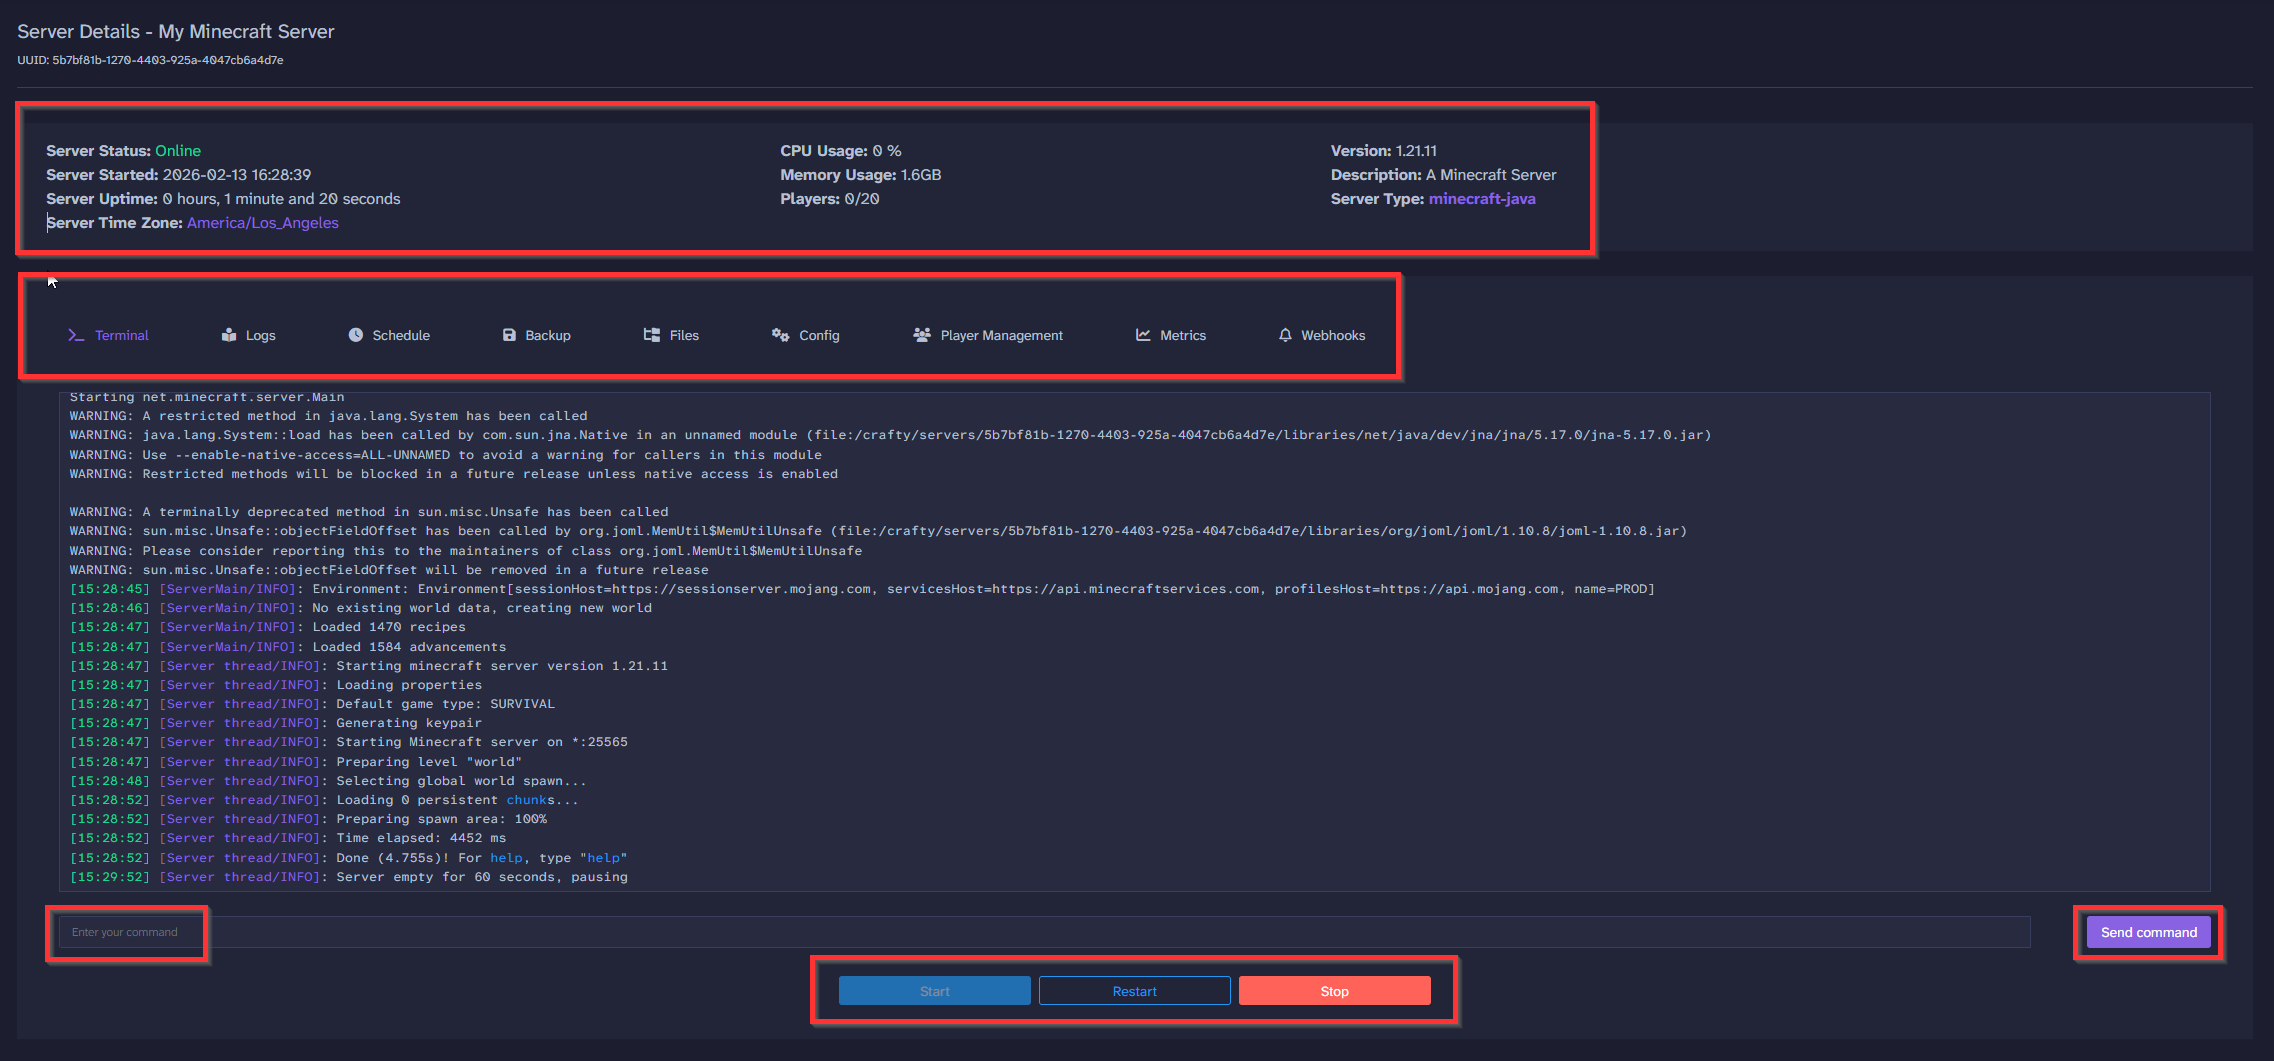
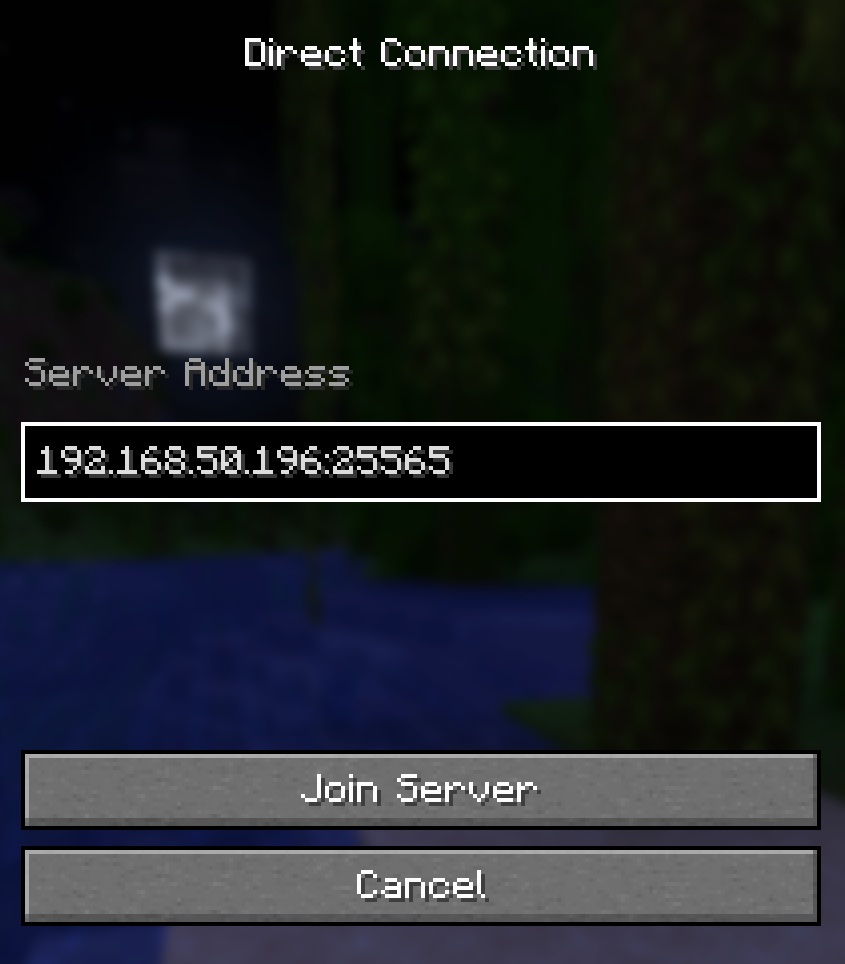
Wait a couple of minutes for your server files to download and install, then you will be presented with your server and the status column showing as online. Open Minecraft, connect to your TrueNAS Scale IP and port number depending on your Minecraft server type (25565 or 19132) and start having fun!
There you have it, we are in!