How to Create a VM In Proxmox
In this episode we will cover how to create your very first VM in Proxmox. In this case of these series, we use Ubuntu Server but if you prefer something else, this will virtually work the same. Do note, we are talking about a Linux Server NOT a Linux desktop.
How To Download Ubuntu Server to Proxmox
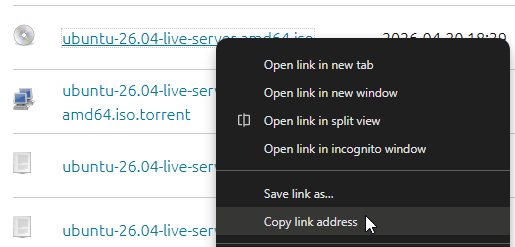
- The first thing you want to do is go to Ubuntu’s releases site, it can be found here we are going to use the latest LTS version of Linux Ubuntu Server, you will see that list right at the top of the page. Please select the latest one, in our case it will be 26.04.

- Scroll down until you find the one that says live-server-amd64-iso The beginning version will depend on when you are watching this video but it needs to be the live server with the .ISO file extension.

- Right click on it and select copy link address
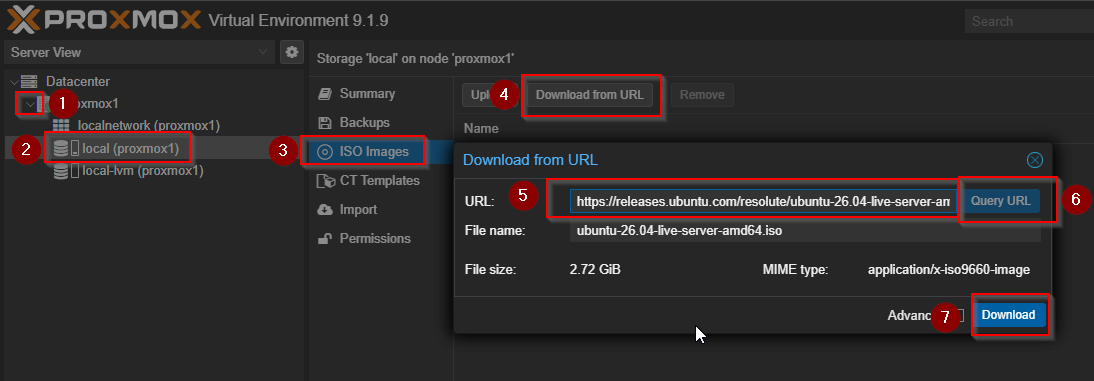
- Back in Proxmox, select the drop down arror next to your Node name:
- Then select the local storage pool.
- From the right tree menu, select ISO images.
- Select Download from URL
- Paste the URL then click query URL
- Then click Download
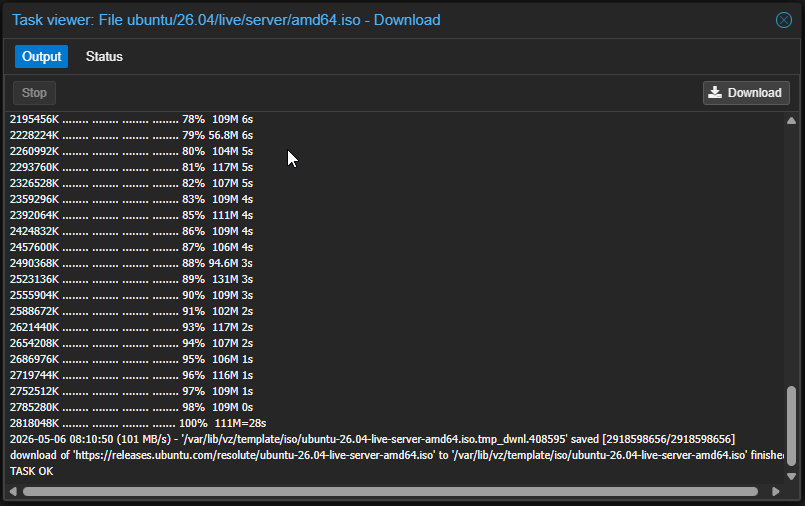
After that is done, you should see a TASK OK at the very bottom
Setting Up Your First VM in Proxmox
After that is done, you can click the X icon on the top right to leave the output task feed. At the very top right you will see a button that says Create VM go ahead and click that.
General Tab
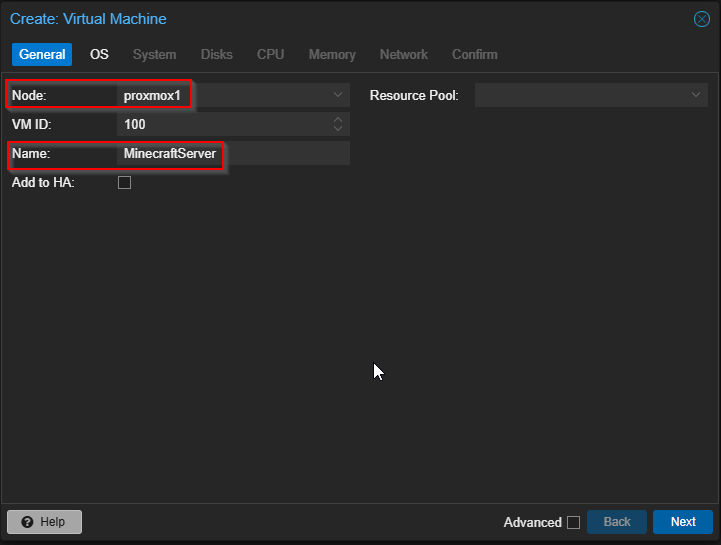
- On the first screen you need to select the node you want to install the VM on (there will only be multiple options if you have a cluster setup).
- You will need to name your VM, it is best practice to do something memorable like the service name. If I am installing a GSM Video game Server like Minecraft, I will want to name my VM Minecraft Server
- Then click next
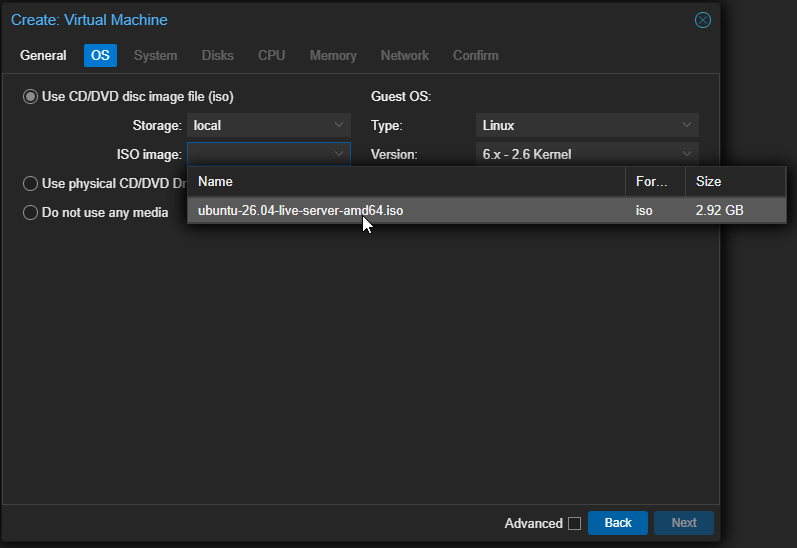
OS Tab
- On the next screen, select the ISO image: section and select your Ubuntu Server ISO we installed earlier
- Then click next
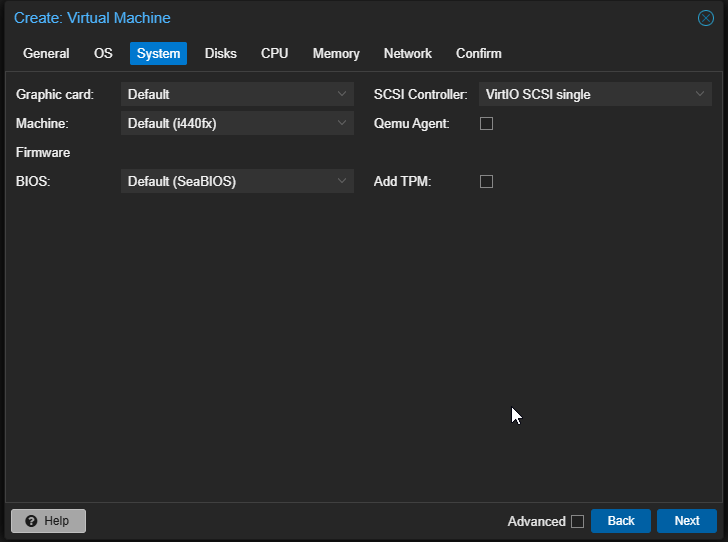
System Tab
You can skip the system TAB, we will not be making any changes here.
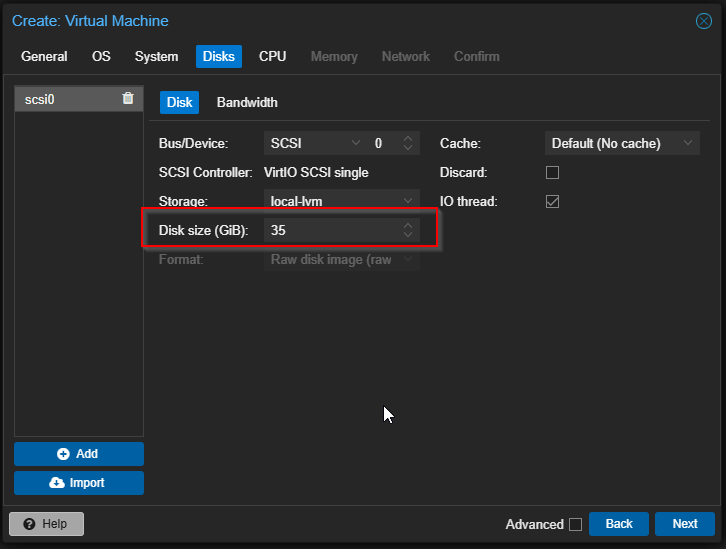
Disks Tab
This tab is very important, you need to set your Disk size (GiB): to the appropriate amount. Based on Ubuntu’s documentation, Ubuntu Server itself needs 25 GBs. So you will then need to add however much on top of that for your services. For example, GSM Server for Minecraft recommends at least 10 GBs, so you will need to assign at least 35 GBs of storage to this VM!
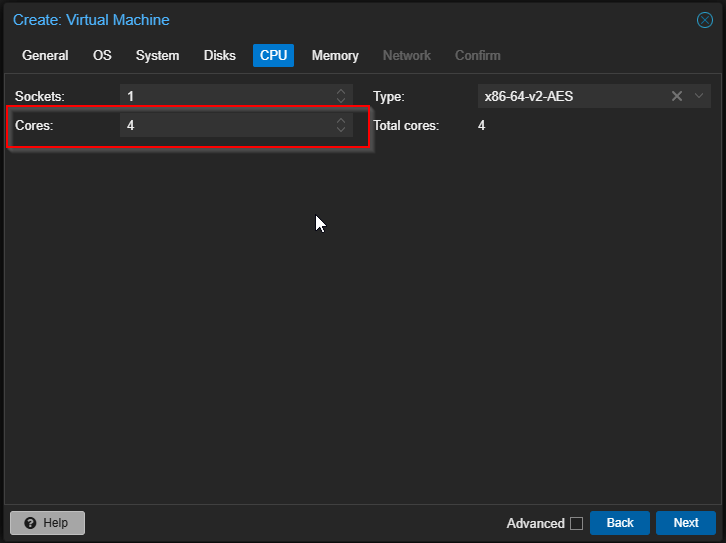
CPU Tab
This tab works just like the Disks Tab, you need to look into your services you are trying to host, and then set their recommended CPU core count. Most services use 2-4 cores.
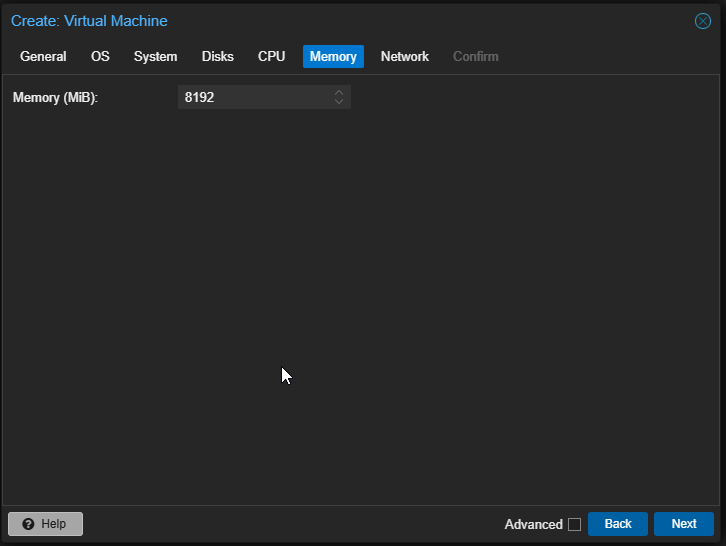
Memory Tab
You guessed it, research the services you are trying to host and how much Ubuntu Server recommends and add those two numbers together.
Proxmox shows memory in MiB, which is a binary unit. When setting VM RAM, convert your target amount into MiB so the number matches what Proxmox expects. For example, 1 GiB equals 1024 MiB, and 1 GB equals about 953.674 MiB. For most cases, it is fine to round up slightly for safety. In most cases like buying ram, you will see it advertised as GB but in reality it is actually GiB (Gigabyte and Gibibyte respectively). also seen as 1,000 vs 1,024 respectively.
The equation: <GB of Ram Required> X 1024 that is what you will input into the box.

So for 8 GB of ram required, we will input 8192
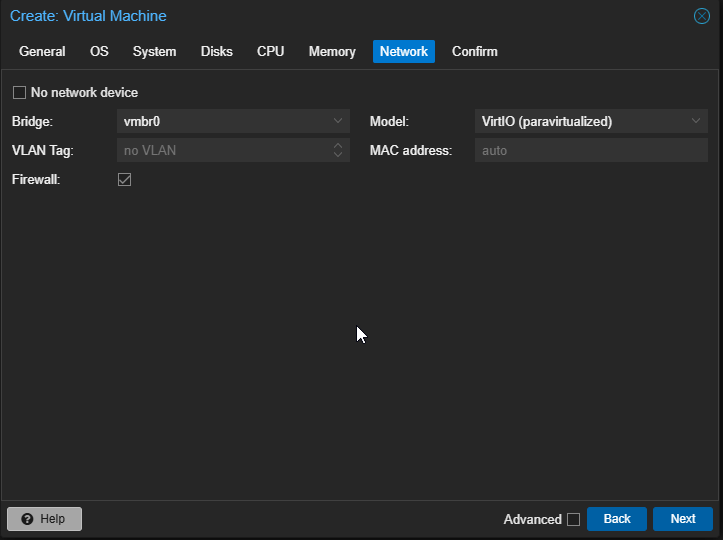
Network Tab
We will skip this tab, leave everything as is.
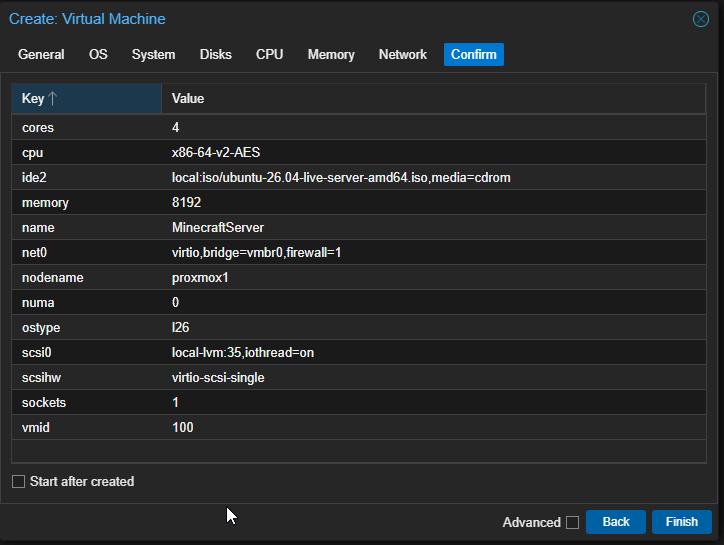
Confirm Tab
This tab is used to check all your settings before clicking Finish
Logging Into Your VM
You will notice your VM pops up on the far right below your node name.
- Select your VM
- Then from the VM settings tree select console
- Select Start Now
- Click enter

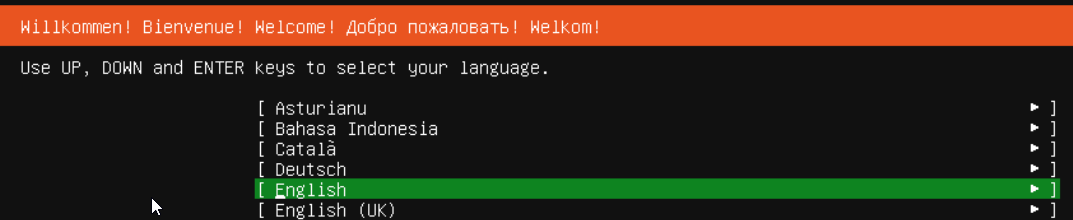
- Select your Language
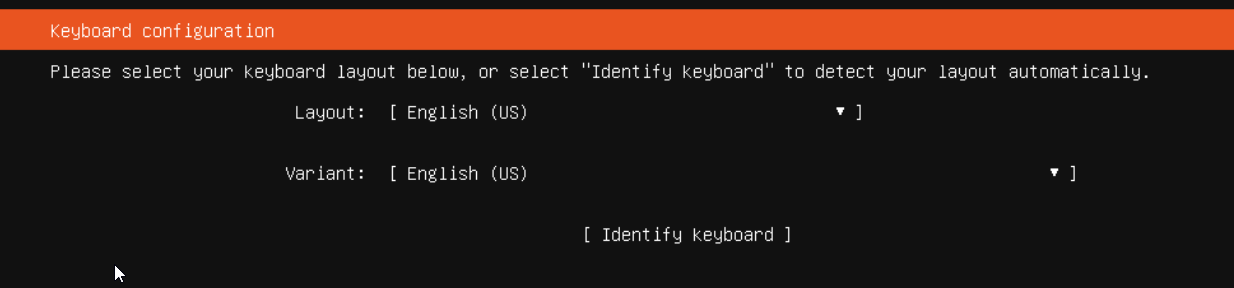
- Select your Keyboard
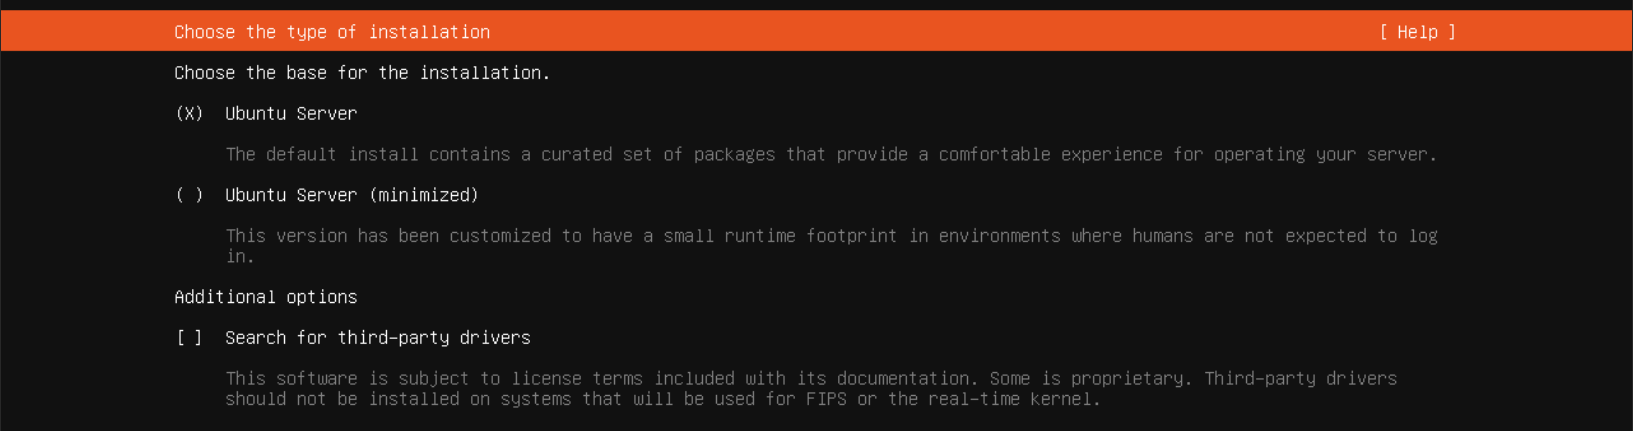
- Select Enter on the Choose the type of installation page, no changes here.
- On the Network configuration page, note down the IP address of your VM.

- On the Proxy Configuration you can input one if you need to, but we will leave this blank and just click enter.

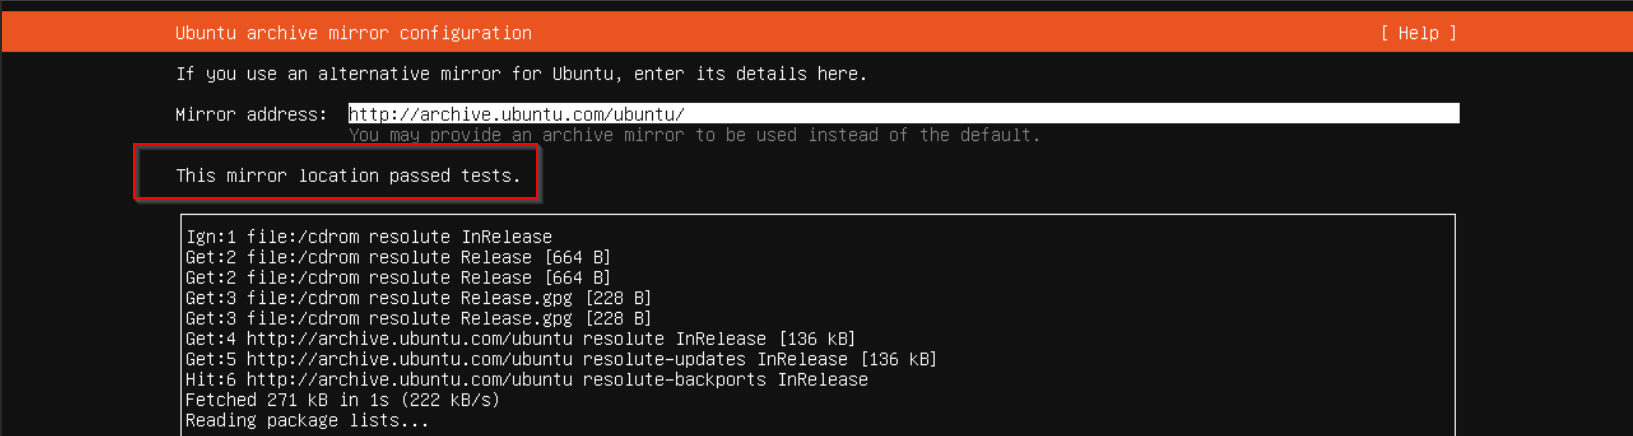
- On the Ubuntu archive mirror configuration wait until you see This mirror location passed tests then click enter.
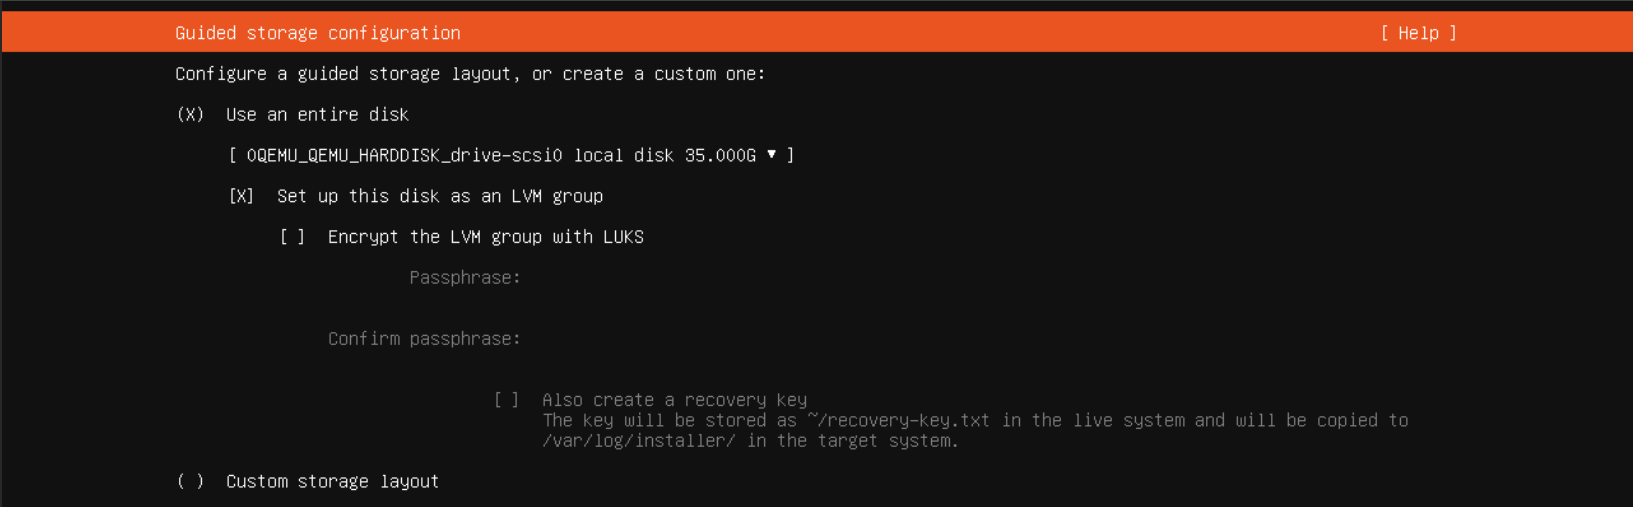
- On the Guided storage configuration page, click tab until you get down to the done button being highlighted, then press enter. we are not going to change anything here.
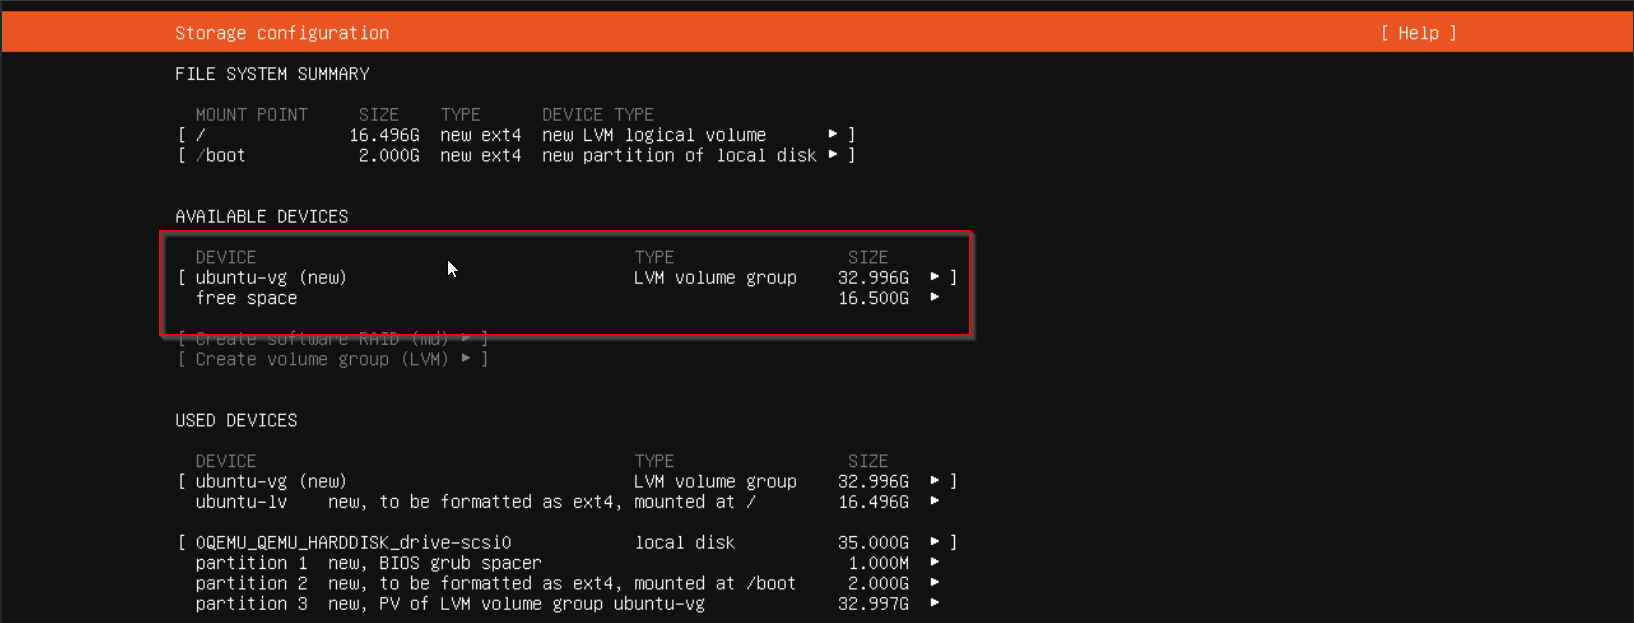
- On the Storage configuration we are going to leave this as is, click tab on your keyboard until the done button is highlighted and click enter.
Under this area, do notice the red box. You can tab over these, click the drop down menu and edit them. For example, maybe Ubuntu-VG is trying to use the full 35 GiB of storage, but you need 10 GiB for your Minecraft storage, you can edit these now to ensure there is enough free space for your services.
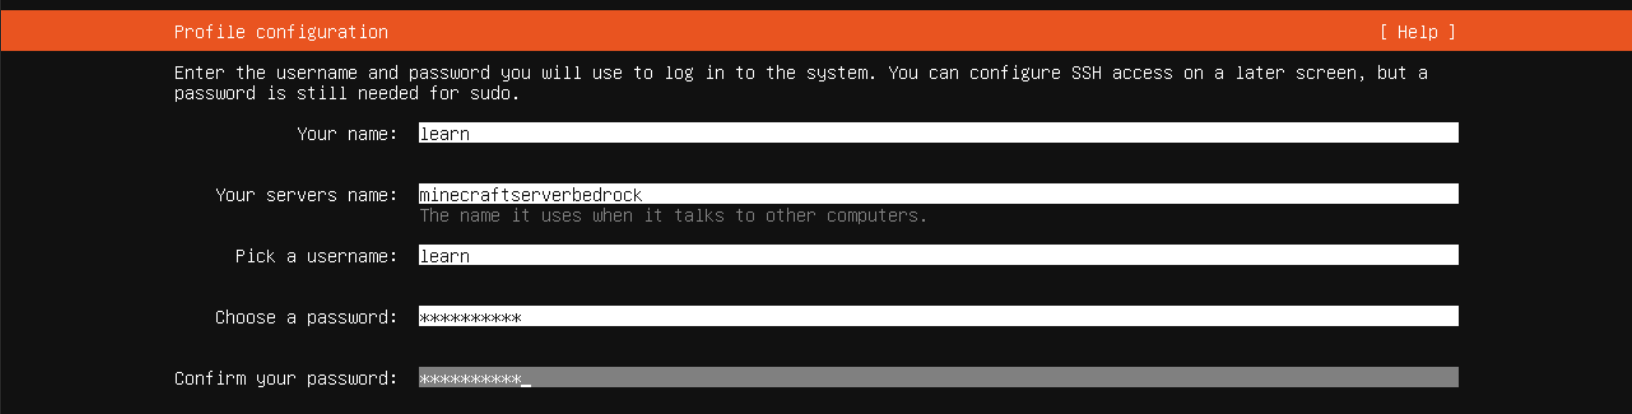
- Set your Profile configuraiton settings now. Your name will be either the same login name or real name if you prefer. Server name is what will show up in DNS records. I recommend your server name match your VM name (it cannot have spaces). username and password is what you will use to login.
- On the Upgrade to Ubuntu Pro screen, just click continue at the bottom by pressing enter.

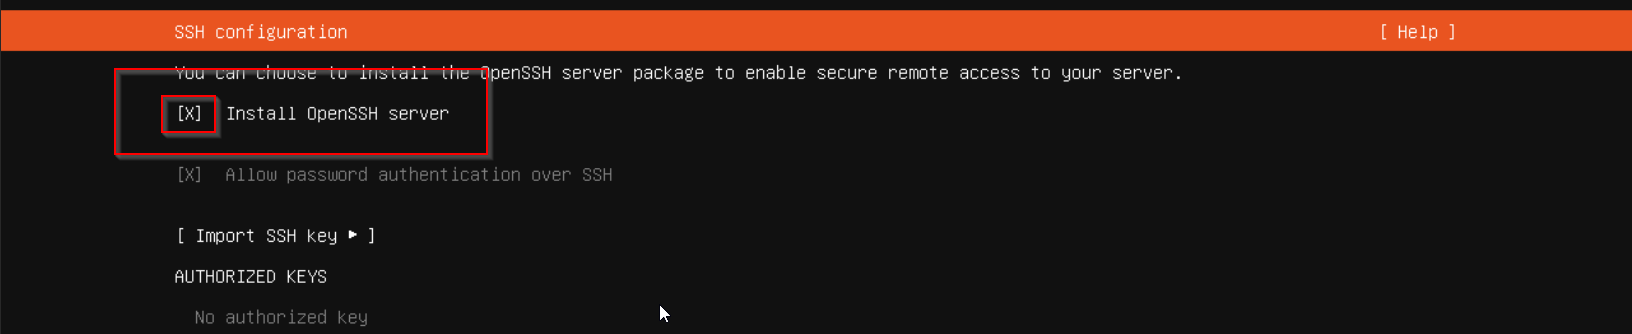
- This step is very important, ensure you click enter when hovering over the Install OpenSSH Server box, this will allow you to SSH into your machine. You can also import an SSH key if you would like. You can read about adding a GitHub SSH key here
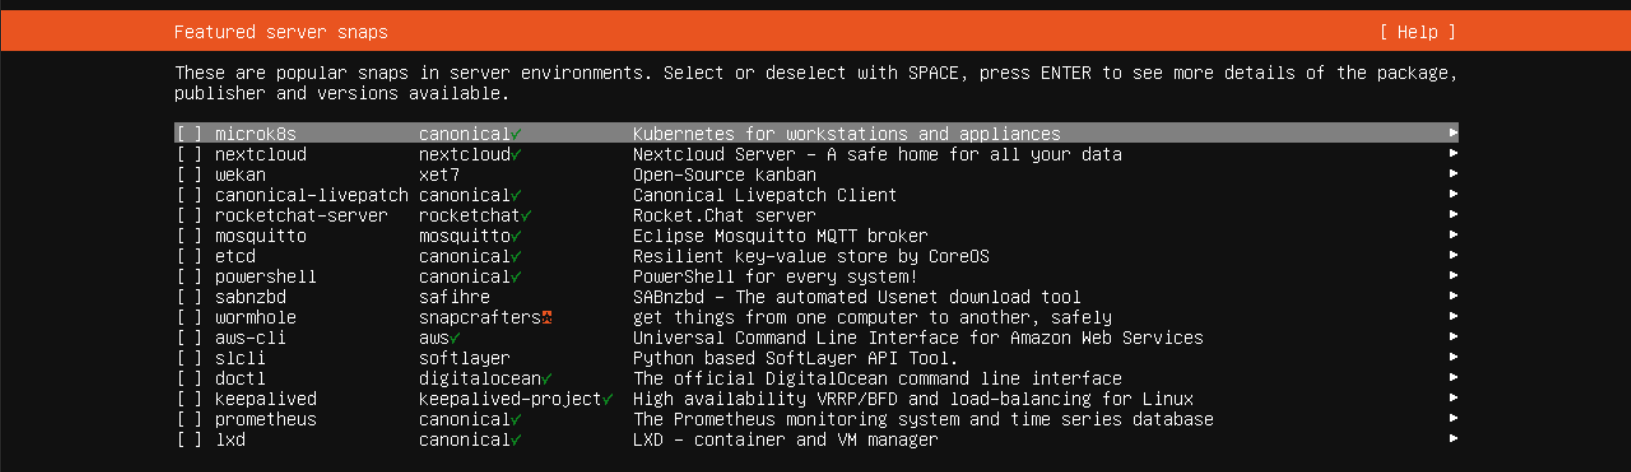
- On the Featured Server Snaps screen, you can skip it and click done at the bottom.
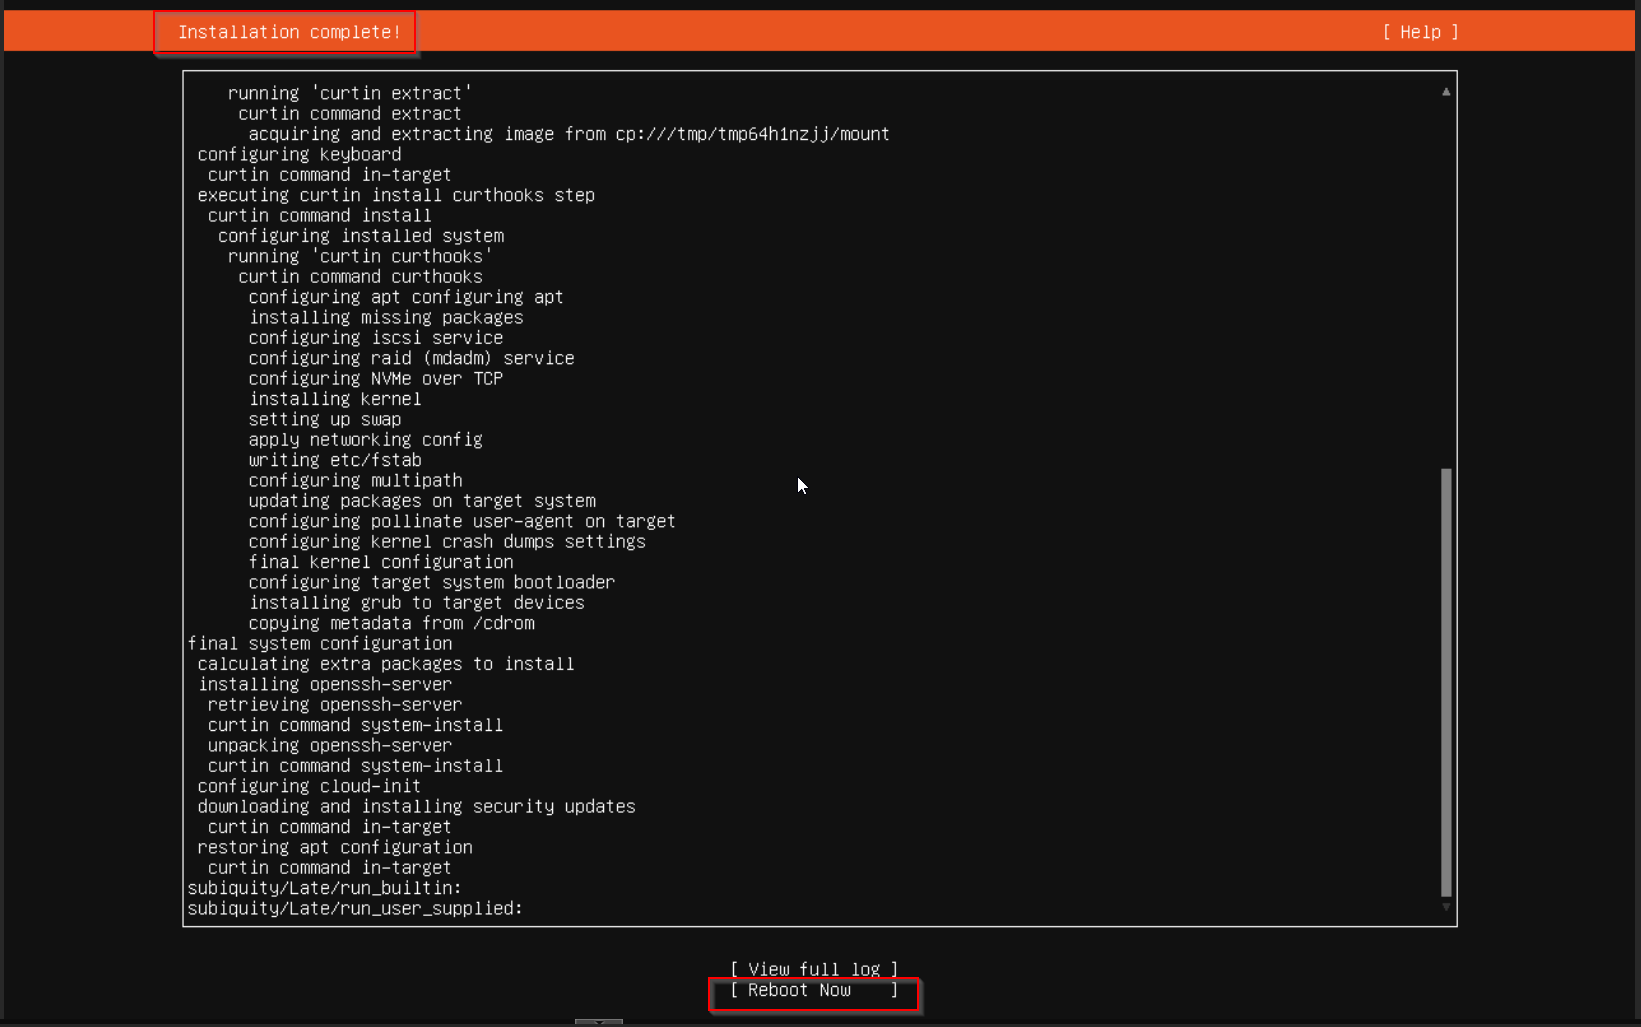
- On the Installing System screen, you just need to wait until the updates are done

When they are done, you should see something like
During reboot, you will see remove install media then press enter, we virtually mounted the installer so all we need to do is click enter

There you have it, you can no login with the credentials you made in step 13.

I would go into more detail after logging in, in this tutorial but that is totally dependent on what services you plan to install. You can check our channel out on hundreds of services and how to install them within a VM after you have a VM setup like we just did.