I Made My Mikrotik AP Fully Managed by OPNsense – No More DHCP Chaos
WinBox Mikrotik AP Overview
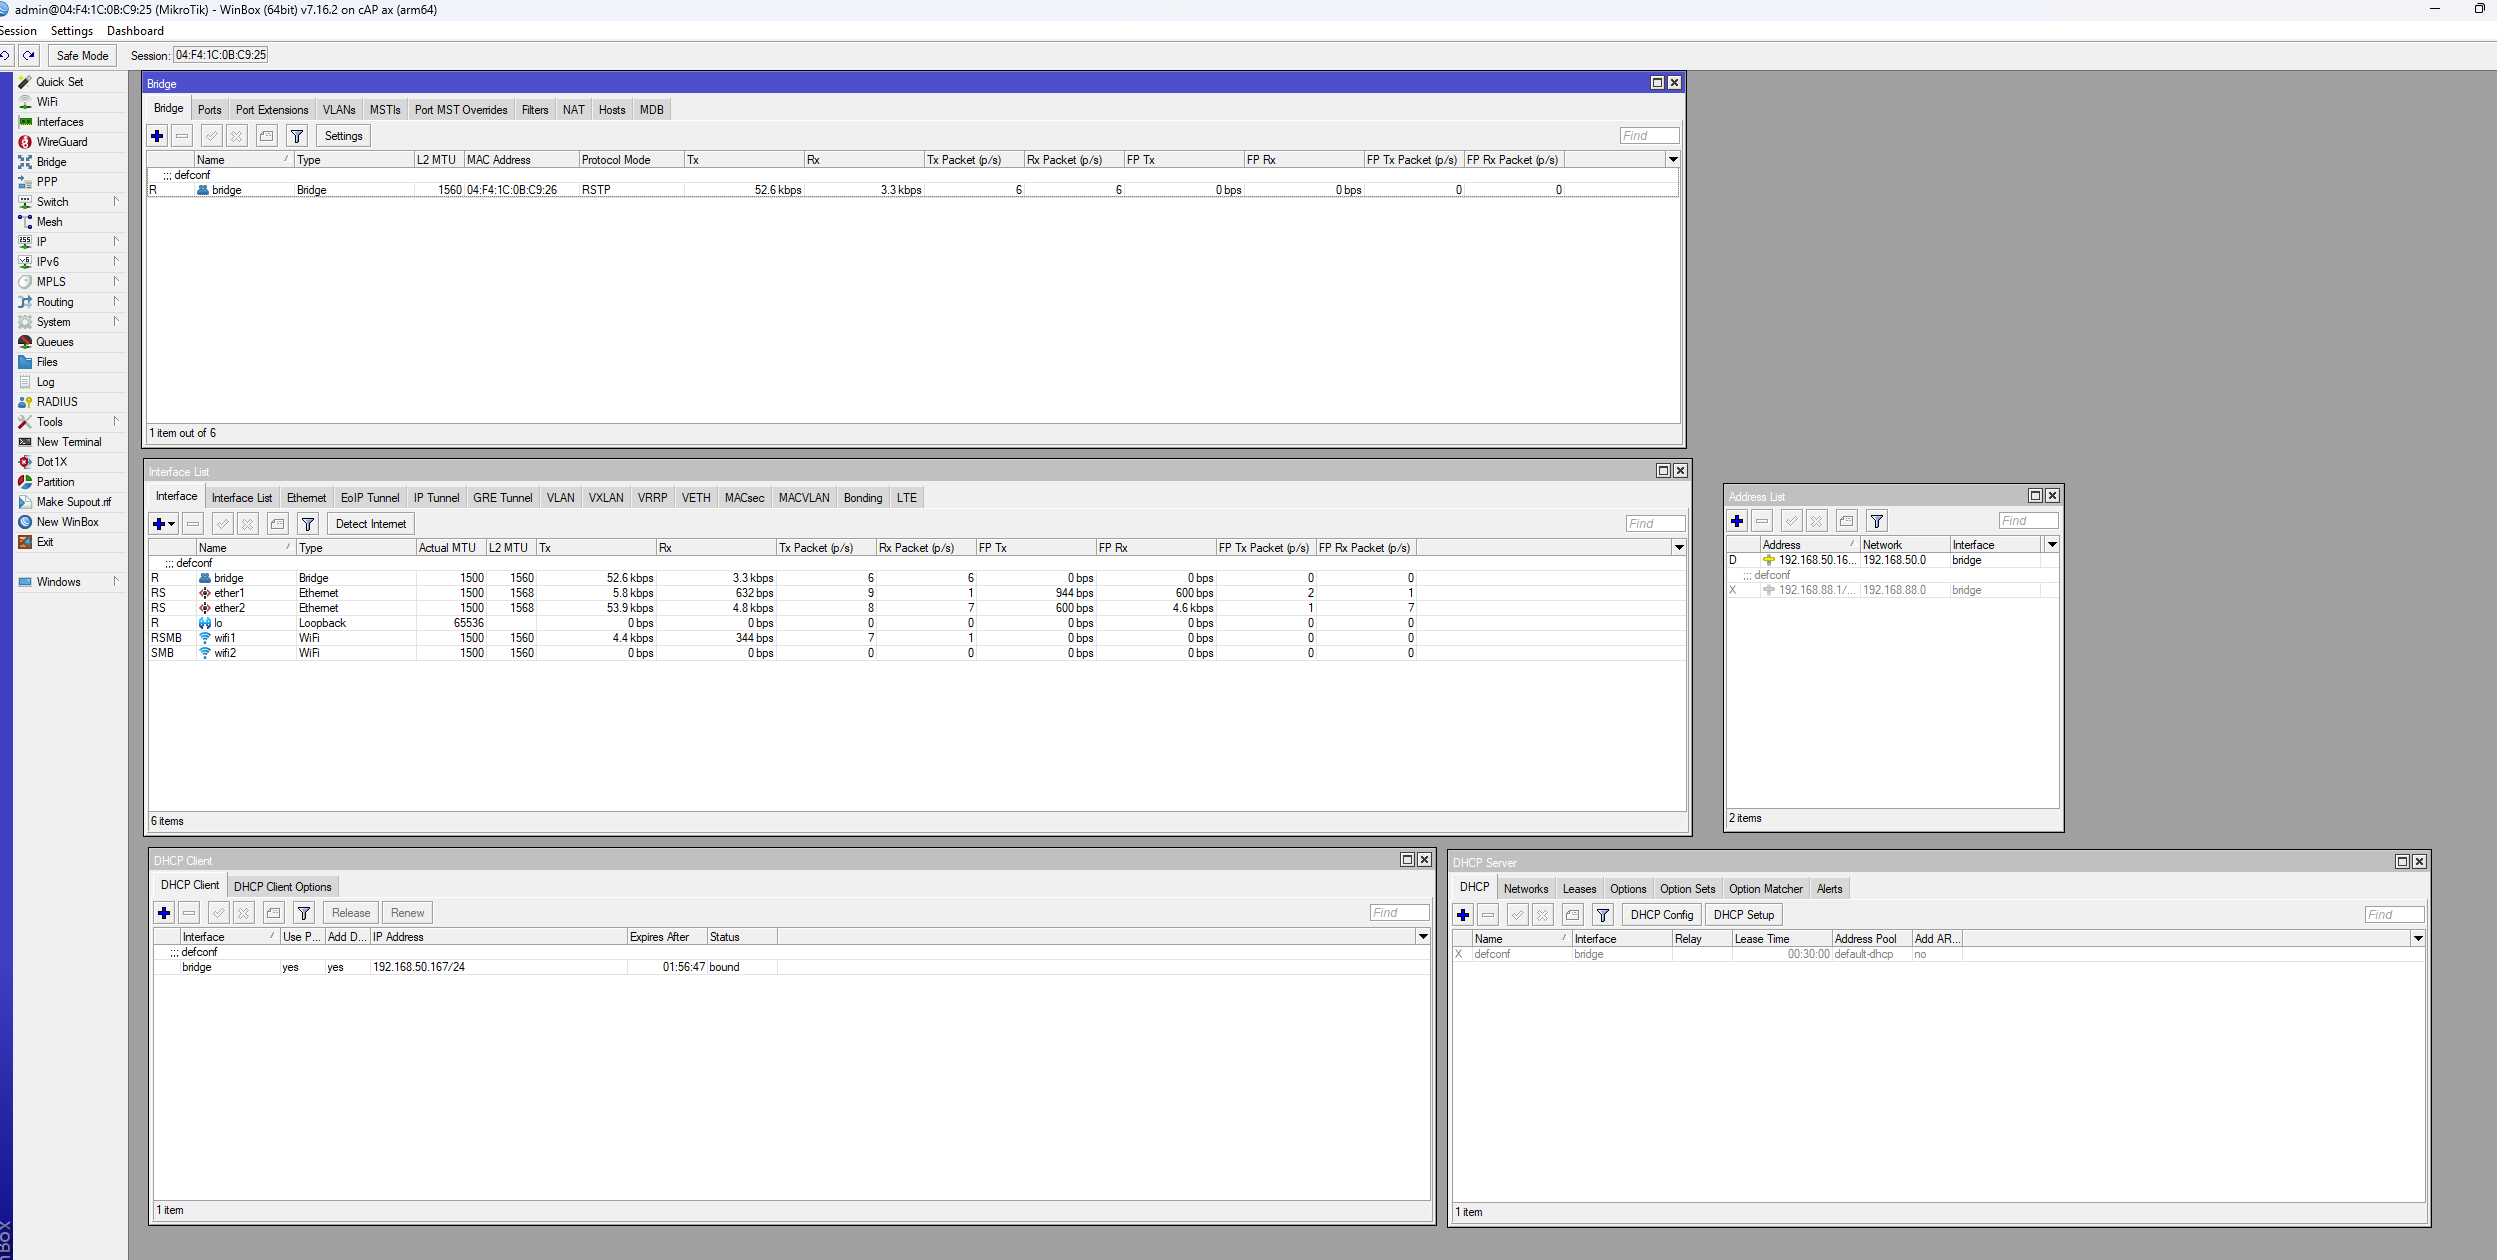
Below is an overview image showing all tabs needed for configuration in this video:
Configuring Mikrotik Wireless AP to Get DHCP Leases from OPNsense
- Login to your Mikrotik AP using Ethernet connection to your PC using MAC address and login credentials from the device sticker.
- Open the Bridge tab.
- In Bridge, go to the Ports tab.
- Add all interfaces; typically add
ether1tobridgeif default config. - In the Interfaces list, ensure:
LANis set to bridge.WANis set toether1(connected to internet).
- Open DHCP Client under IP → DHCP Client.
- Set the DHCP client on the
bridgeinterface. - Open DHCP Server under IP → DHCP Server.
- Disable the DHCP Server.
- Disable networks under the Networks tab in DHCP Server.
- Check Address List under IP → Addresses to verify your network settings are correct.
- Configure Wi-Fi settings under the Wi-Fi tab:
- Set SSID, band, channel width, passphrase, authentication type under Configuration, Channel, and Security tabs.