Local AI in VSCode with Ollama and the Olares One
Welcome to today’s video guys! I am really excited to show you how to use Cline and Continue locally in VSCode! Took a little work to get setup, but I think it is worth it, it can help speed up your development process in many ways. However, be careful relying on the code it produces. You really should know how to code first before using too much AI. Even high end models are really good at outputting a lot of crap! You can also spend a lot of time re-engineering code that it outputs than actually coding.
Advantages of Using Cline or Continue AI
First, I want to say that these agents make it really nice to learn how to code. Instead of going to google as you work on a project, you can ask the chatbot within VSCode for help, or even when learning from a tutorial on YouTube. You can even ask it to explain code blocks as you see them or try to write them. Coding is also not all about reinventing the wheel, if you need a button somewhere or forgot how to write a block of code for a table, you can ask AI to help create you a table really fast. However, please refrain from using the AI agents to give you whole sites or hundreds of lines of code. You will spend an insane amount of hours reworking code if you do it this way.
Cline Advantages
Cline excels in agentic, autonomous tasks with "Plan and Act" modes, making it ideal for multistep operations like generating entire projects across multiple files or running terminal commands. It offers proactive enhancements, such as customizable temperature for local models and seamless model switching per task, providing flexibility for complex, creative coding sessions.
Continue Advantages
Continue prioritizes precise context control, letting you select specific code snippets for chats to minimize AI processing time and improve efficiency with the same models.
It supports broader IDE compatibility (VS Code, JetBrains, CLI) and enterprise features like centralized config, better for teams or varied workflows.
| Comparison Dimension | Cline | Continue | When to Choose |
| Core Philosophy | Autonomous AI agent that plans, executes, and iterates | Context-aware inline assistant & chat for real-time coding | Cline for task automation; Continue for daily coding |
| Execution & Autonomy | Runs terminal commands, edits files, installs deps, controls external tools | Read-only by default; focuses on suggestions, chat, and inline completions | Want AI to act → Cline. Want AI to assist → Continue |
| Context & Project Awareness | Lightweight by default; relies on explicit prompts & tool outputs | Deep project indexing (RAG), semantic search, full-repo awareness | Need fast, accurate context across large codebases → Continue |
| Transparency & Control | Step-by-step reasoning, tool calls, diffs, and terminal output visible & interruptible | Predictable, deterministic behavior; minimal hidden execution | Need auditability & supervision → Cline. Prefer stability → Continue |
| Resource | Higher CPU/RAM/consumption due to agent loops, tool calls, and multi-step planning | Lightweight, low overhead | Resource-constrained → Continue |
| Extensibility & Custom Tools | Built on MCP protocol; easily add custom tools, APIs, databases, or agents | Plugin ecosystem focused on prompts, models, and context sources | Need custom tool/API integration → Cline. Prefer model/provider flexibility → Continue |
| Ideal Workflow | Project scaffolding, cross-file refactoring, debugging, CI prep, automation | Real-time completion, quick fixes, documentation lookup, pair programming | Run both side-by-side: Continue for daily dev, Cline for heavy tasks |
Download VScode
The first think you need to do is download VScode from here
This video will use the Olares One Hardware Device and Software. The concepts of this tutorial will all still apply regardless of where you are running your Ollama models. You can check the Olares One out here
Download Continue . Dev Extension
The next thing you need to do is download the Continue .dev extension within VScode.
Olares Continue .Dev Documentation
If you want to read Olares documentation on how to connect Continue directly, check it out here
Olares .Local Domains
You can read their documentation here to better understand how local domains work. If you notice we will use the - method in our case, like so:
(do not forget to remove the < > but leave the - ‘s.
http://a5be22681-<olares_id_goes_here>-olares.local
The above URL format is specifically used to connect to the Olares One Ollama API. It is the default URL used by Ollama inside the Olares Software
Get Your AI Hardware Ready
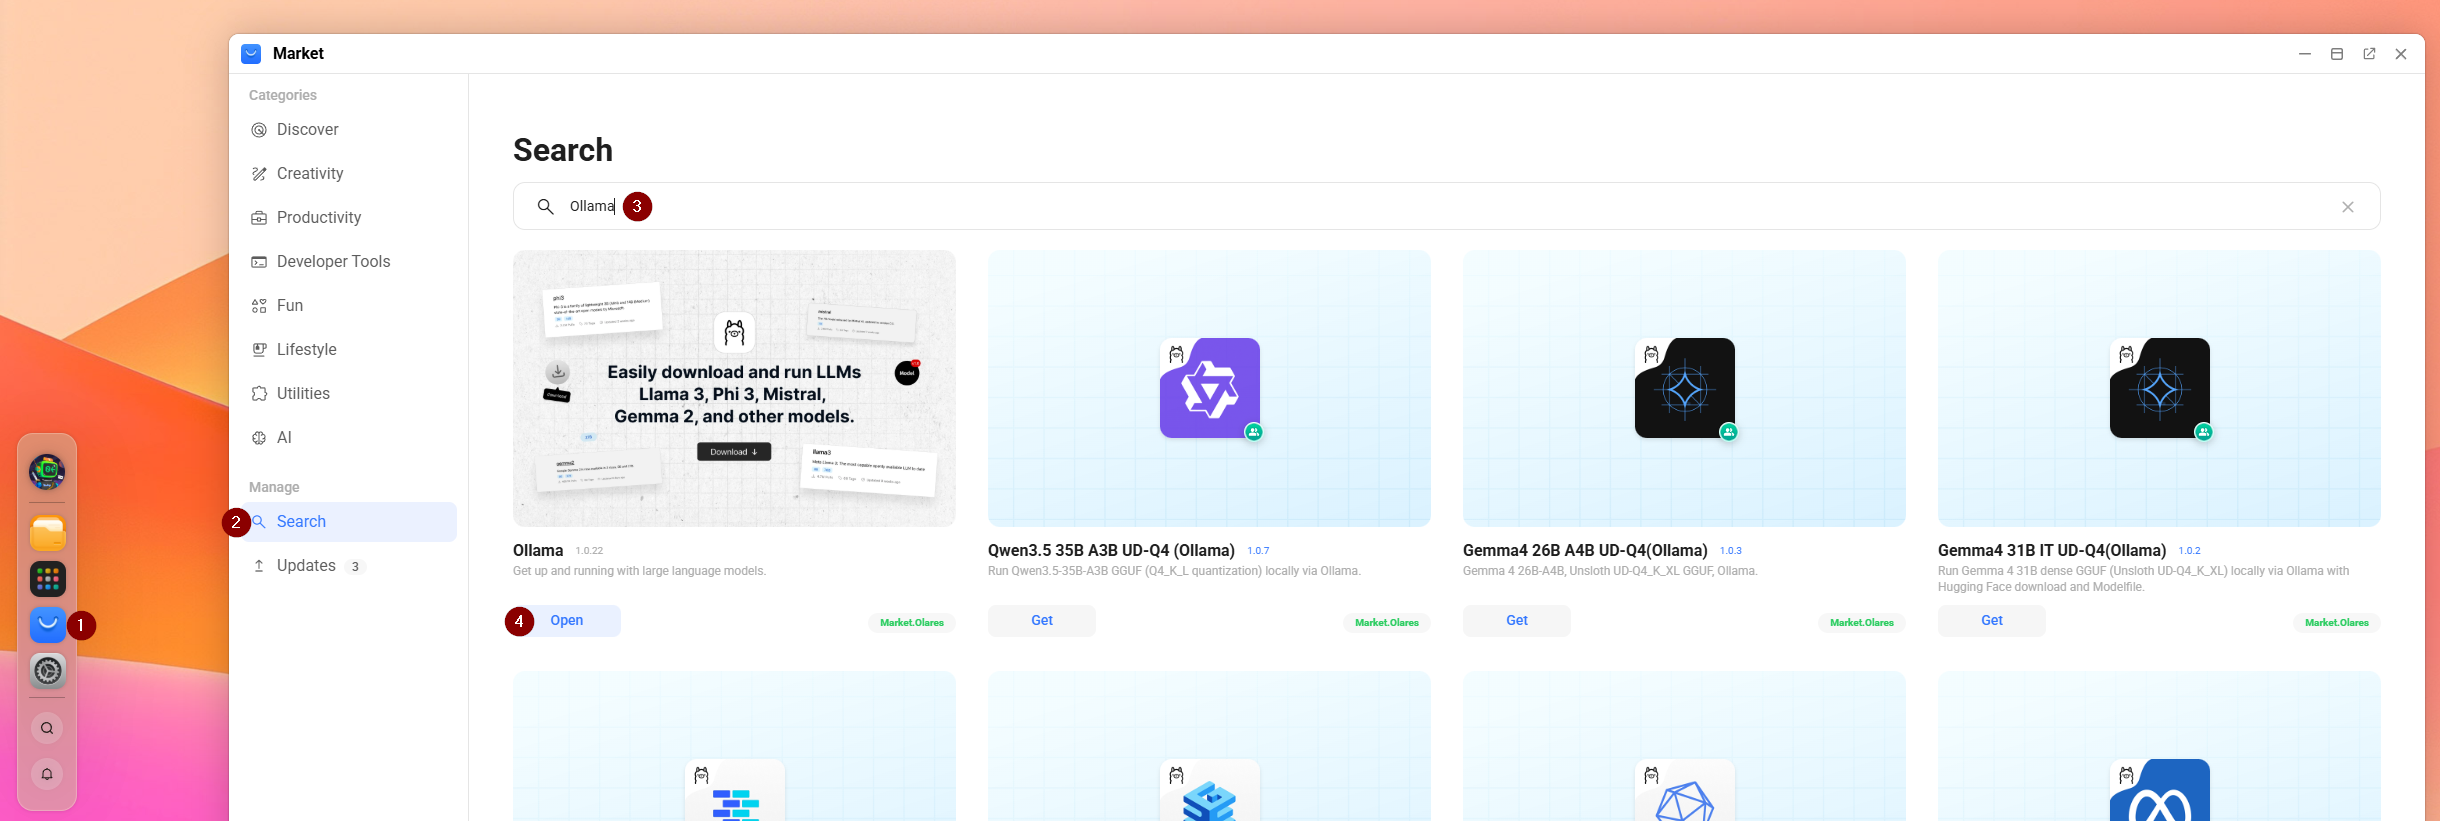
After that, if you do not have Ollama downloaded or installed on a device with GPU access, please do that now. In our case, we are using an Olares One Device with 96 gigabytes of ram and a 24 gigabyte 5090. We will install the Ollama app from their play store. You can do the same with other virtualization platforms like TrueNAS, CasaOS, and or a Proxmox VM.
Login to your Olares/Ollama VM Software Interface
In our case, we are using the Olares Software, so we are going to go ahead and login to our Dashboard right now and install Ollama. You can login to whatever interface you need to install Ollama.
Default url will look like http://desktop.Your_Olares_Id_Goes_here.olares.local/
After that, we are going to open the Ollama CLI and install our Ollama Models using the below commands:

Download AI Models for Ollama
After you have Ollama Installed, you need to download a model to use well coding. Most use cases show that anything past “qwen2.5-coder:1.5b” do not show a significant improvement in responses and query time. So in our case we will use the 1.5b model.
Unless you want to use the Agent feature. They recommend you use Qwen3 Coder (30B).
if you want a list of recommended models, look here
You can download it in your Ollama CLI with the following command:
ollama run qwen2.5-coder:1.5b
AI Model for the Continue Agent Feature
Continue recommends you install the following model to use their Agent Features:
ollama run qwen3-coder:30b
Install Continue and Cline VSCode extensions
After you have VSCode Installed, please install the following Plugins:
- Continue
- Cline
- Live Preview
- Prettier (optional)
Continue . Dev Config File
If you want to read up on what each role does with examples, you can read Continues documentation on it here
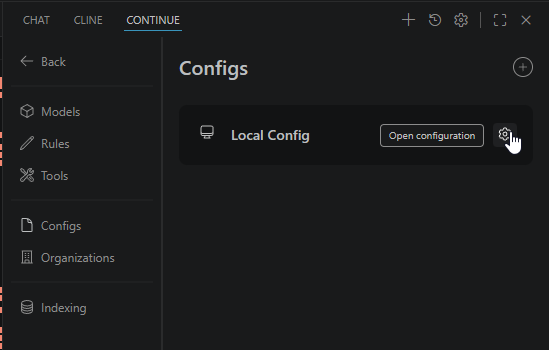
You can Open the Continue Config File by opening the Chat Box with ctrl + L

Then select Configs on the far left, and the gear icon under Local Config:
Example Config File for Continue
For using a local AI server/machine that is not the same machine as the one you are using VScode on, you can configure it with the following template:
name: Local Config
version: 1.0.0
schema: v1
models:
  - name: llama3.3:latest # Whatever you want to name it
    provider: ollama
    model: llama3.3:latest #actual model name found in the CLI
    apiBase: http://<Address/URL to point your Continue to>
    roles:
      - chat #this makes it so you can only chat with the model
  - name: qwen2.5-coder:latest
    provider: ollama
    model: qwen2.5-coder:latest
    apiBase: http://<Address/URL to point your Continue to>
    roles:
      - edit
      - embed
      - rerank
      - chat
# Repeat this template for as many models as you want to add
Continue Roles
You may have noticed in the above config, under Roles: we have things like - chat . So what do they do?
- Agent mode equips the Chat model with the tools needed to handle a wide range of coding tasks, allowing the model to make decisions and save you the work of manually finding context and performing actions.
- Chat makes it easy to ask for help from an AI without leaving your IDE. Get explanations, generate code, and iterate on solutions conversationally.
- Plan mode is a restricted environment that provides read-only access to your codebase. It's designed for safe exploration, understanding code, and planning changes without making any modifications.
- Edit is a convenient way to make quick changes to specific code and files. Select code, describe your code changes, and a diff will be streamed inline to your file which you can accept or reject.
AutoComplete in Continue
Autocomplete provides inline code suggestions as you type. To enable it, simply click the "Continue" button in the status bar at the bottom right of your IDE, then search for “open settings” and scroll down to “autcomplete” and ensure it is set to auto or always.

Installing Cline
Cline is really easy to install and use, and ultimately will play off the steps we did before. Within VSCode, go to extensions, and search for “Continue - open-source AI code agent” or you can find it here
How to Open AI Chat Agents in VScode
After installing, you may not see the chat agent or extension anywhere, you can open it by using “CTRL + L” on your keyboard.
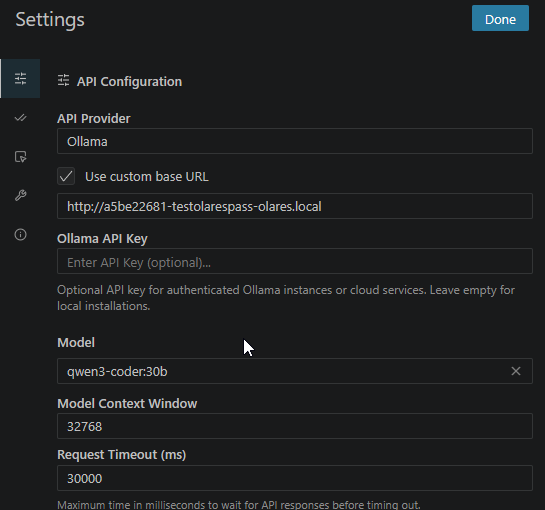
Configuring Cline AI Models
When you have Cline Selected, please select the gear icon on the top right:

By default, you will be presented with the API Configuration, in this case we will put the URL link to our Ollama server/API URL.
After that, a drop down menu of models it has found on the server will be presented, you can select which one you want to use with Cline.