How to Setup a Proxmox Cluster
In this episode, we will cover how to setup a Proxmox Cluster, and in the next video, I will cover setting up Ceph pool storage for live migrations of VMs.
What is Clustering?
- Allows you to manage multiple Proxmox nodes from a single interface
- Enables manual migration of VMs and containers between nodes
- Does not automatically provide failover or resource management
Setting up your Proxmox Cluster
- First, ensure you have TWO Proxmox Nodes set up.
- The original node CAN have VMs on it but the SECOND node CANNOT!
- If you need to learn how to install Proxmox on a machine, please check out our 4th episode in this series here.
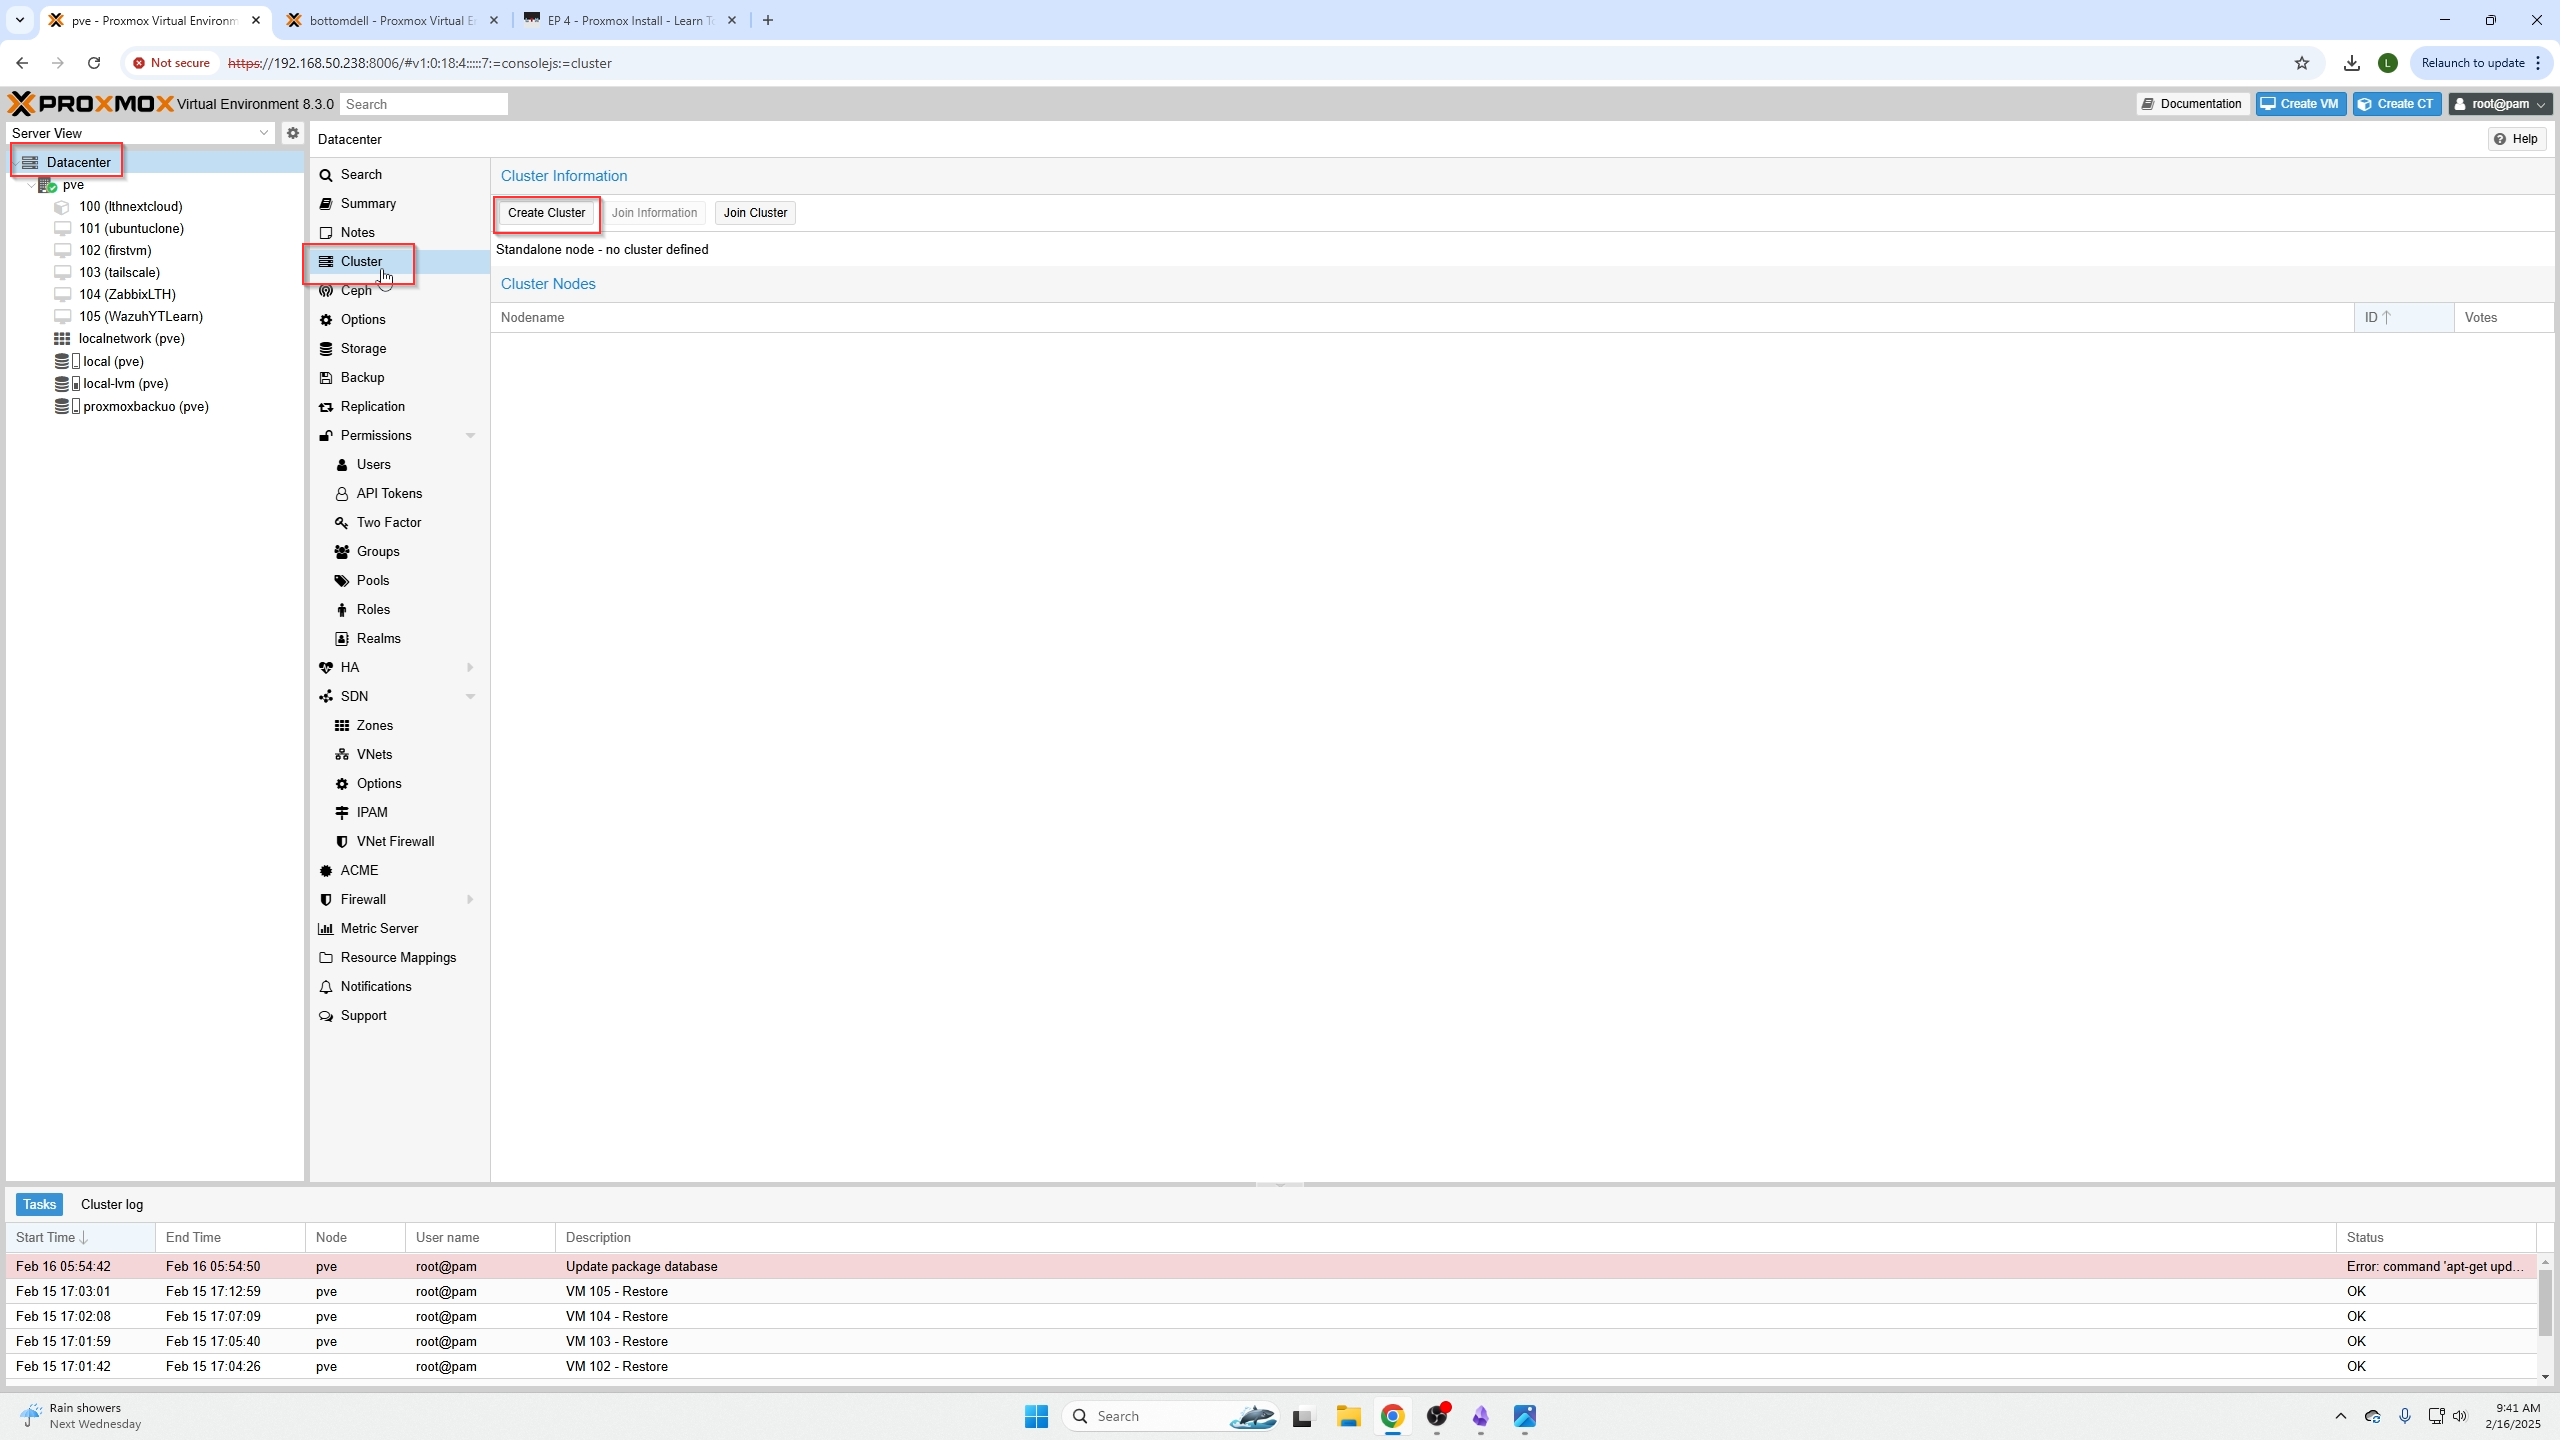
We will start with your first machine (or the one that already has VMs).
Go to Datacenter, Cluster, and click "Create Cluster."
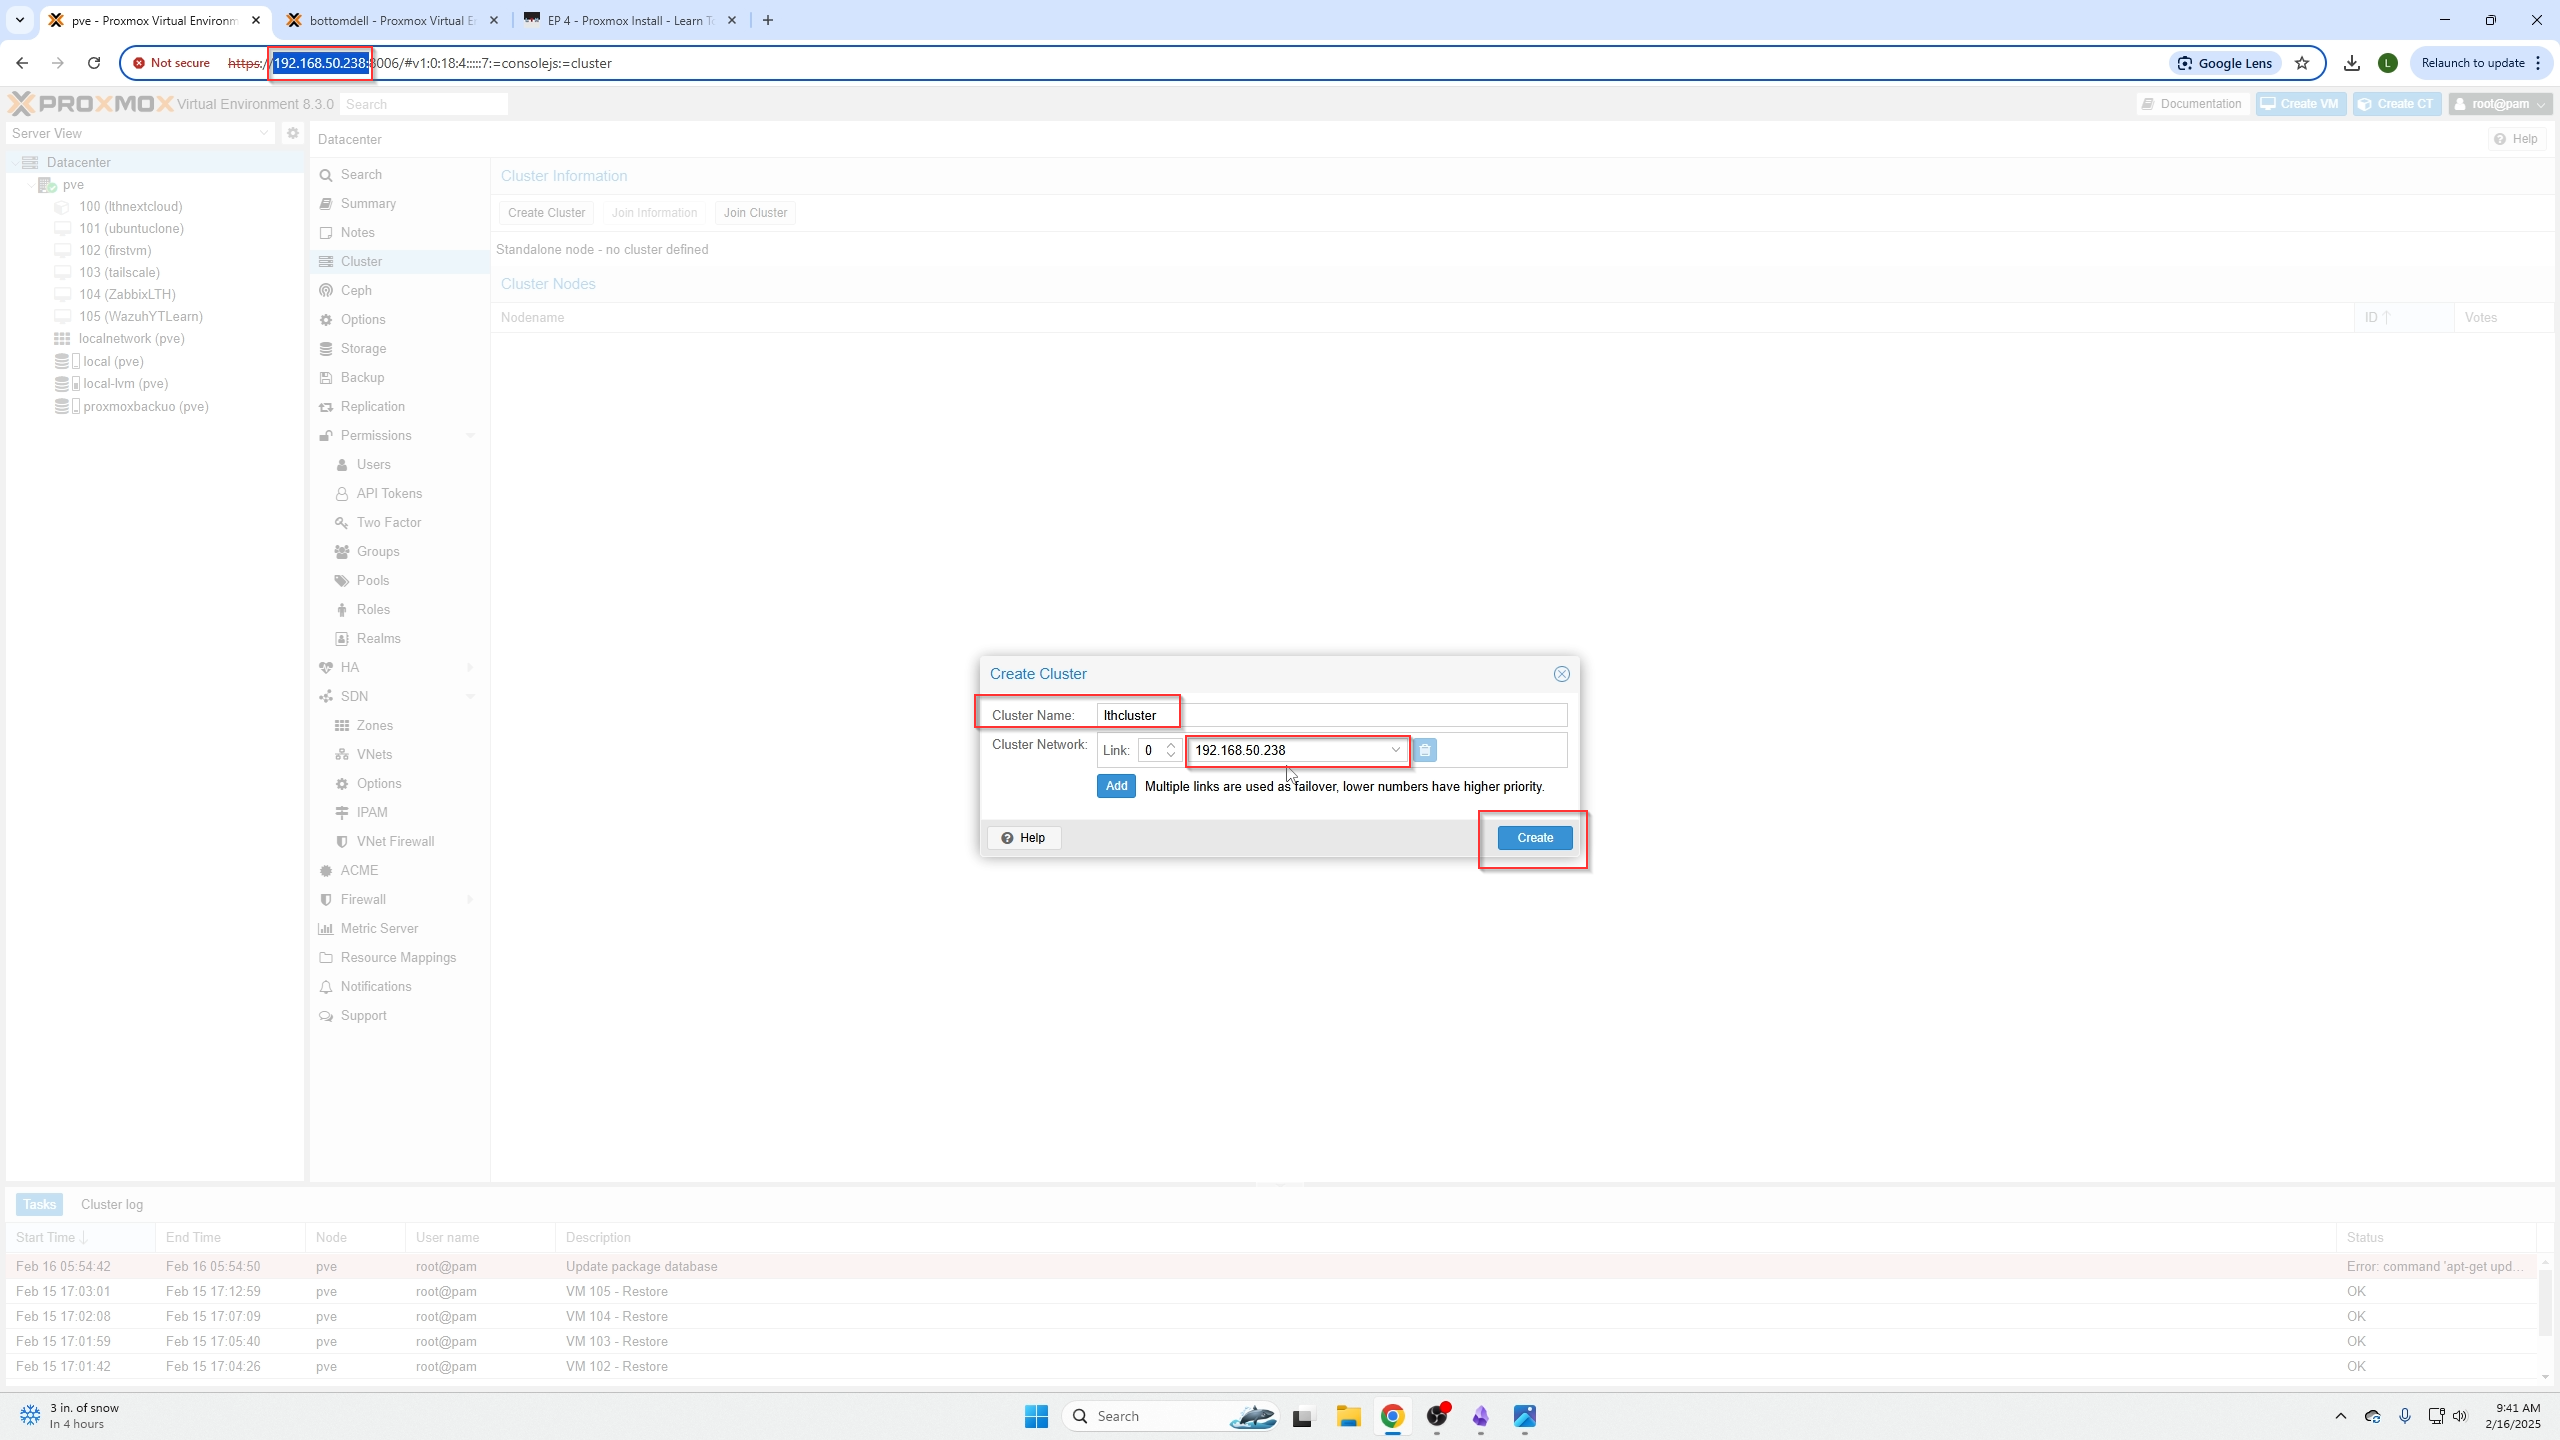
Name your cluster and ensure the IP matches your current node’s IP (found in your URL bar), then click Create.
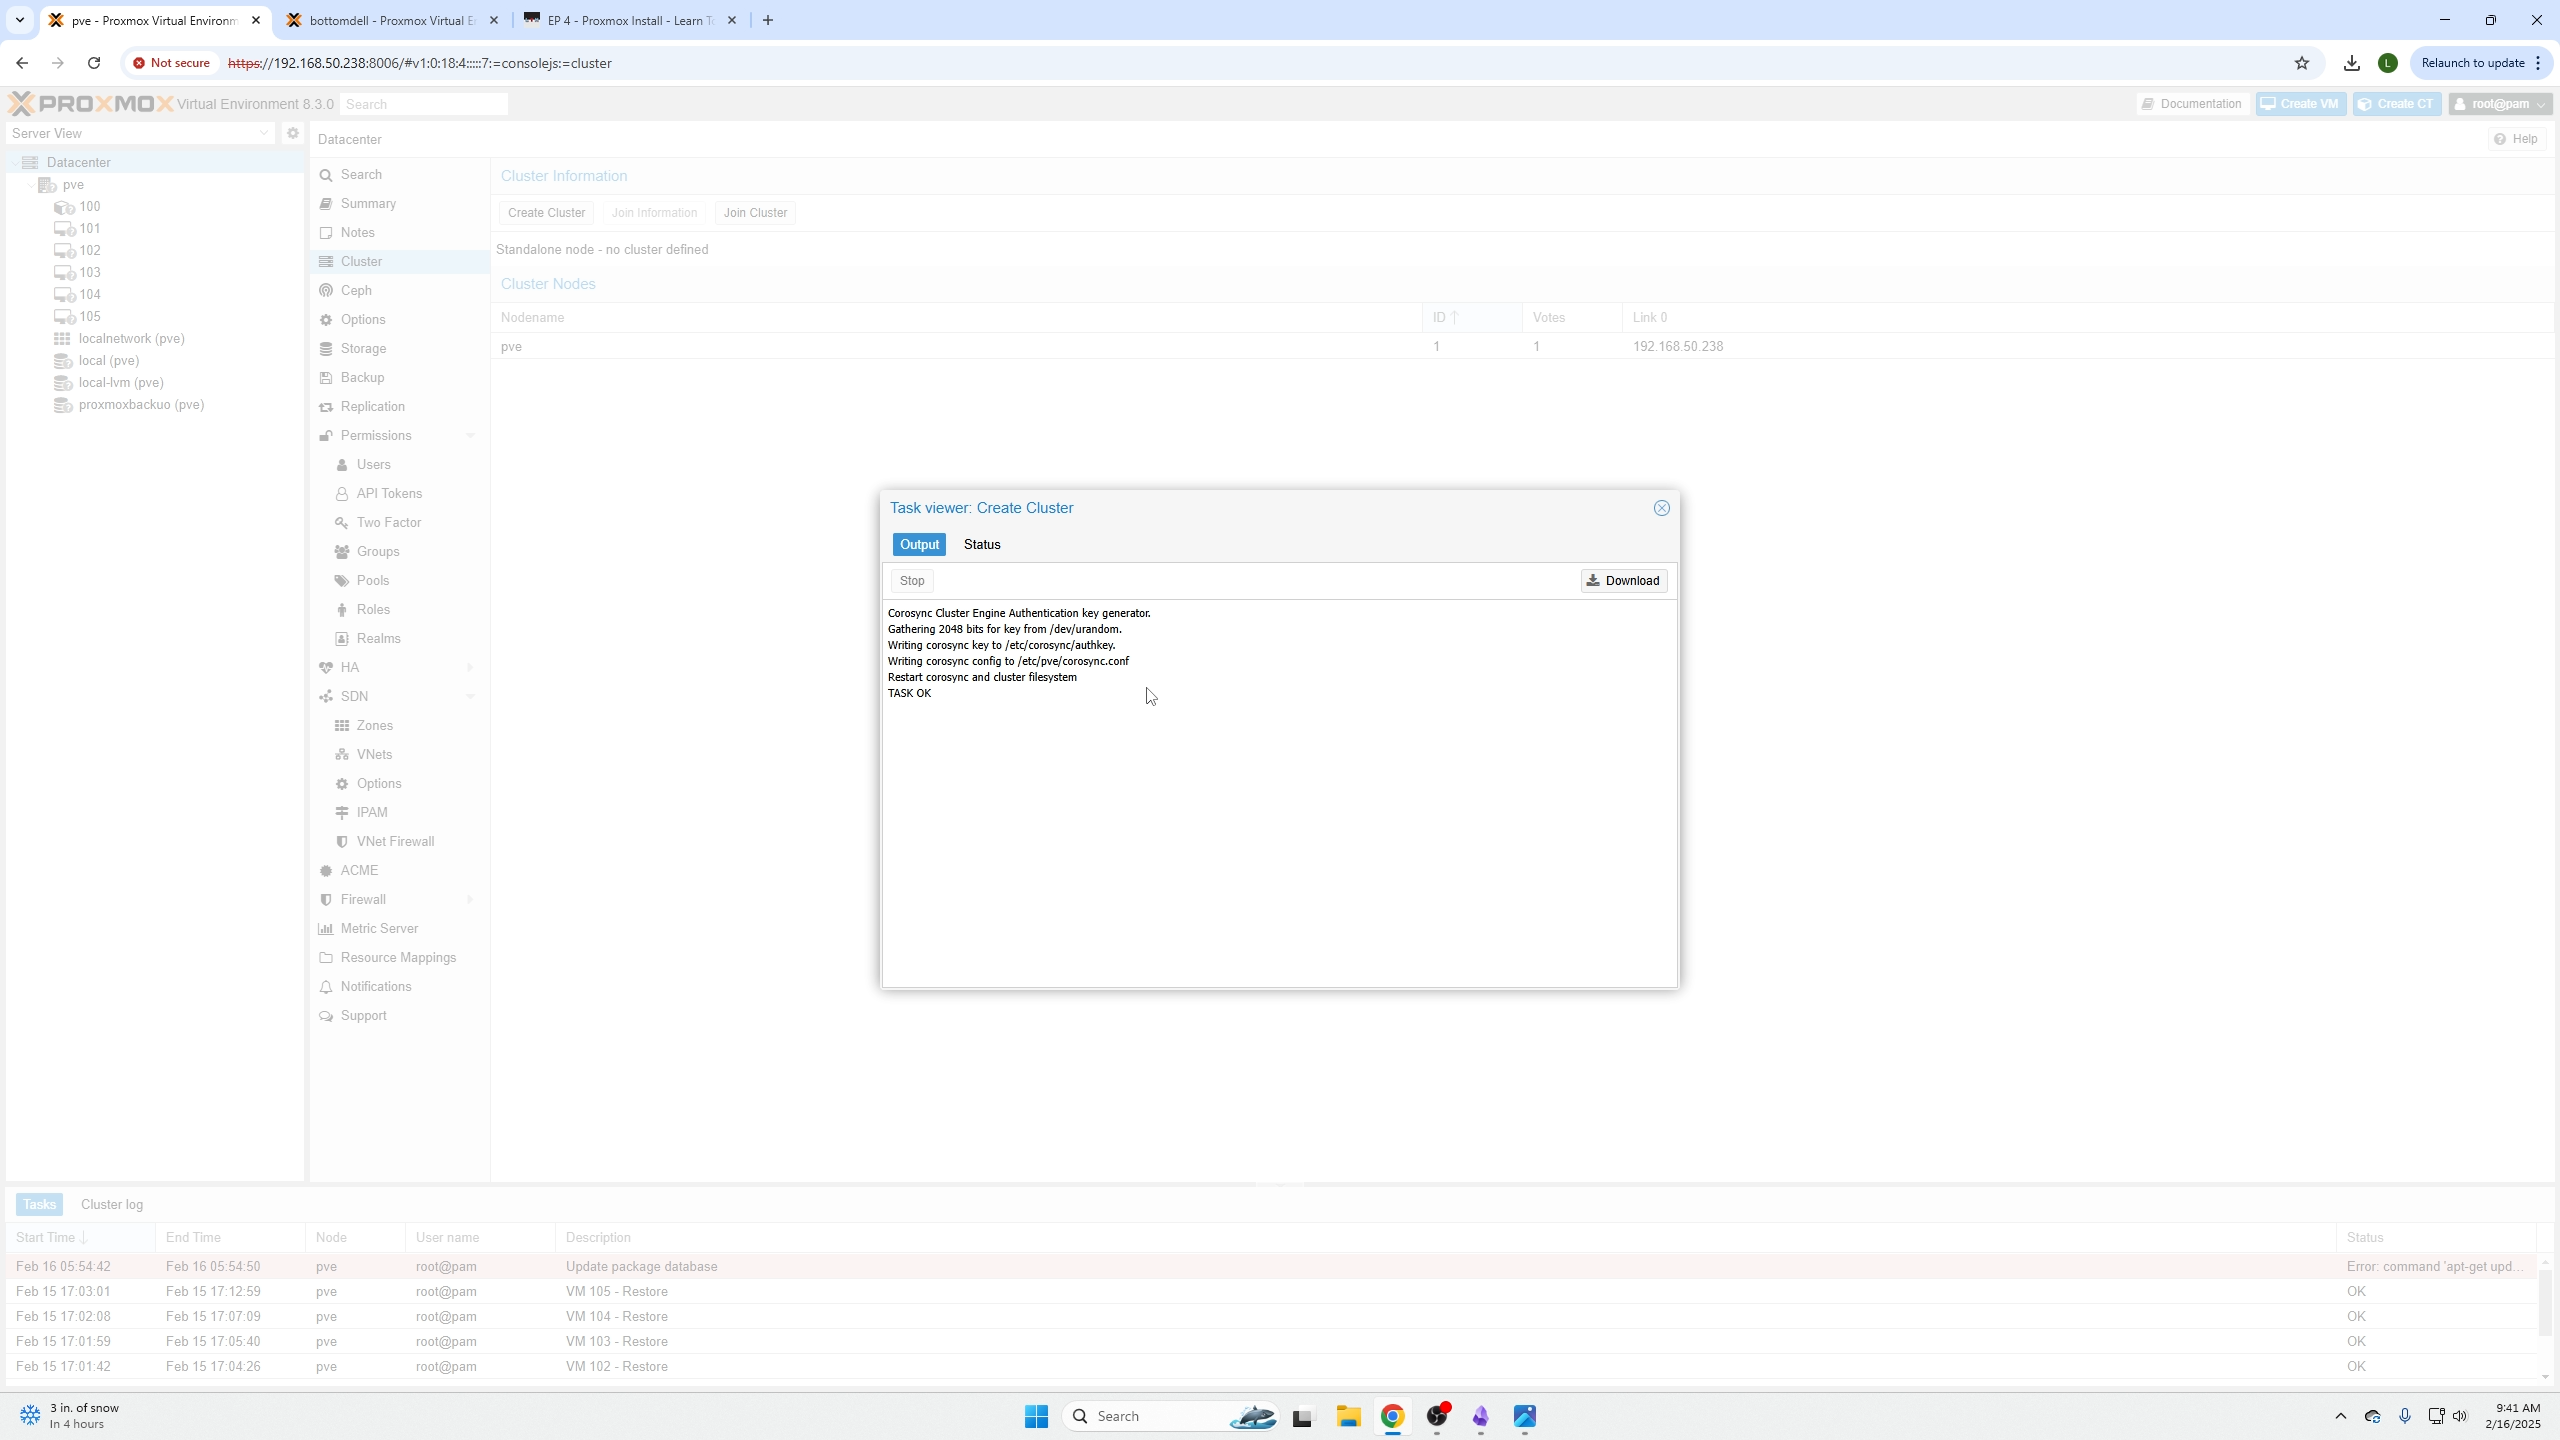
Wait for TASK OK then click Exit on the top right.
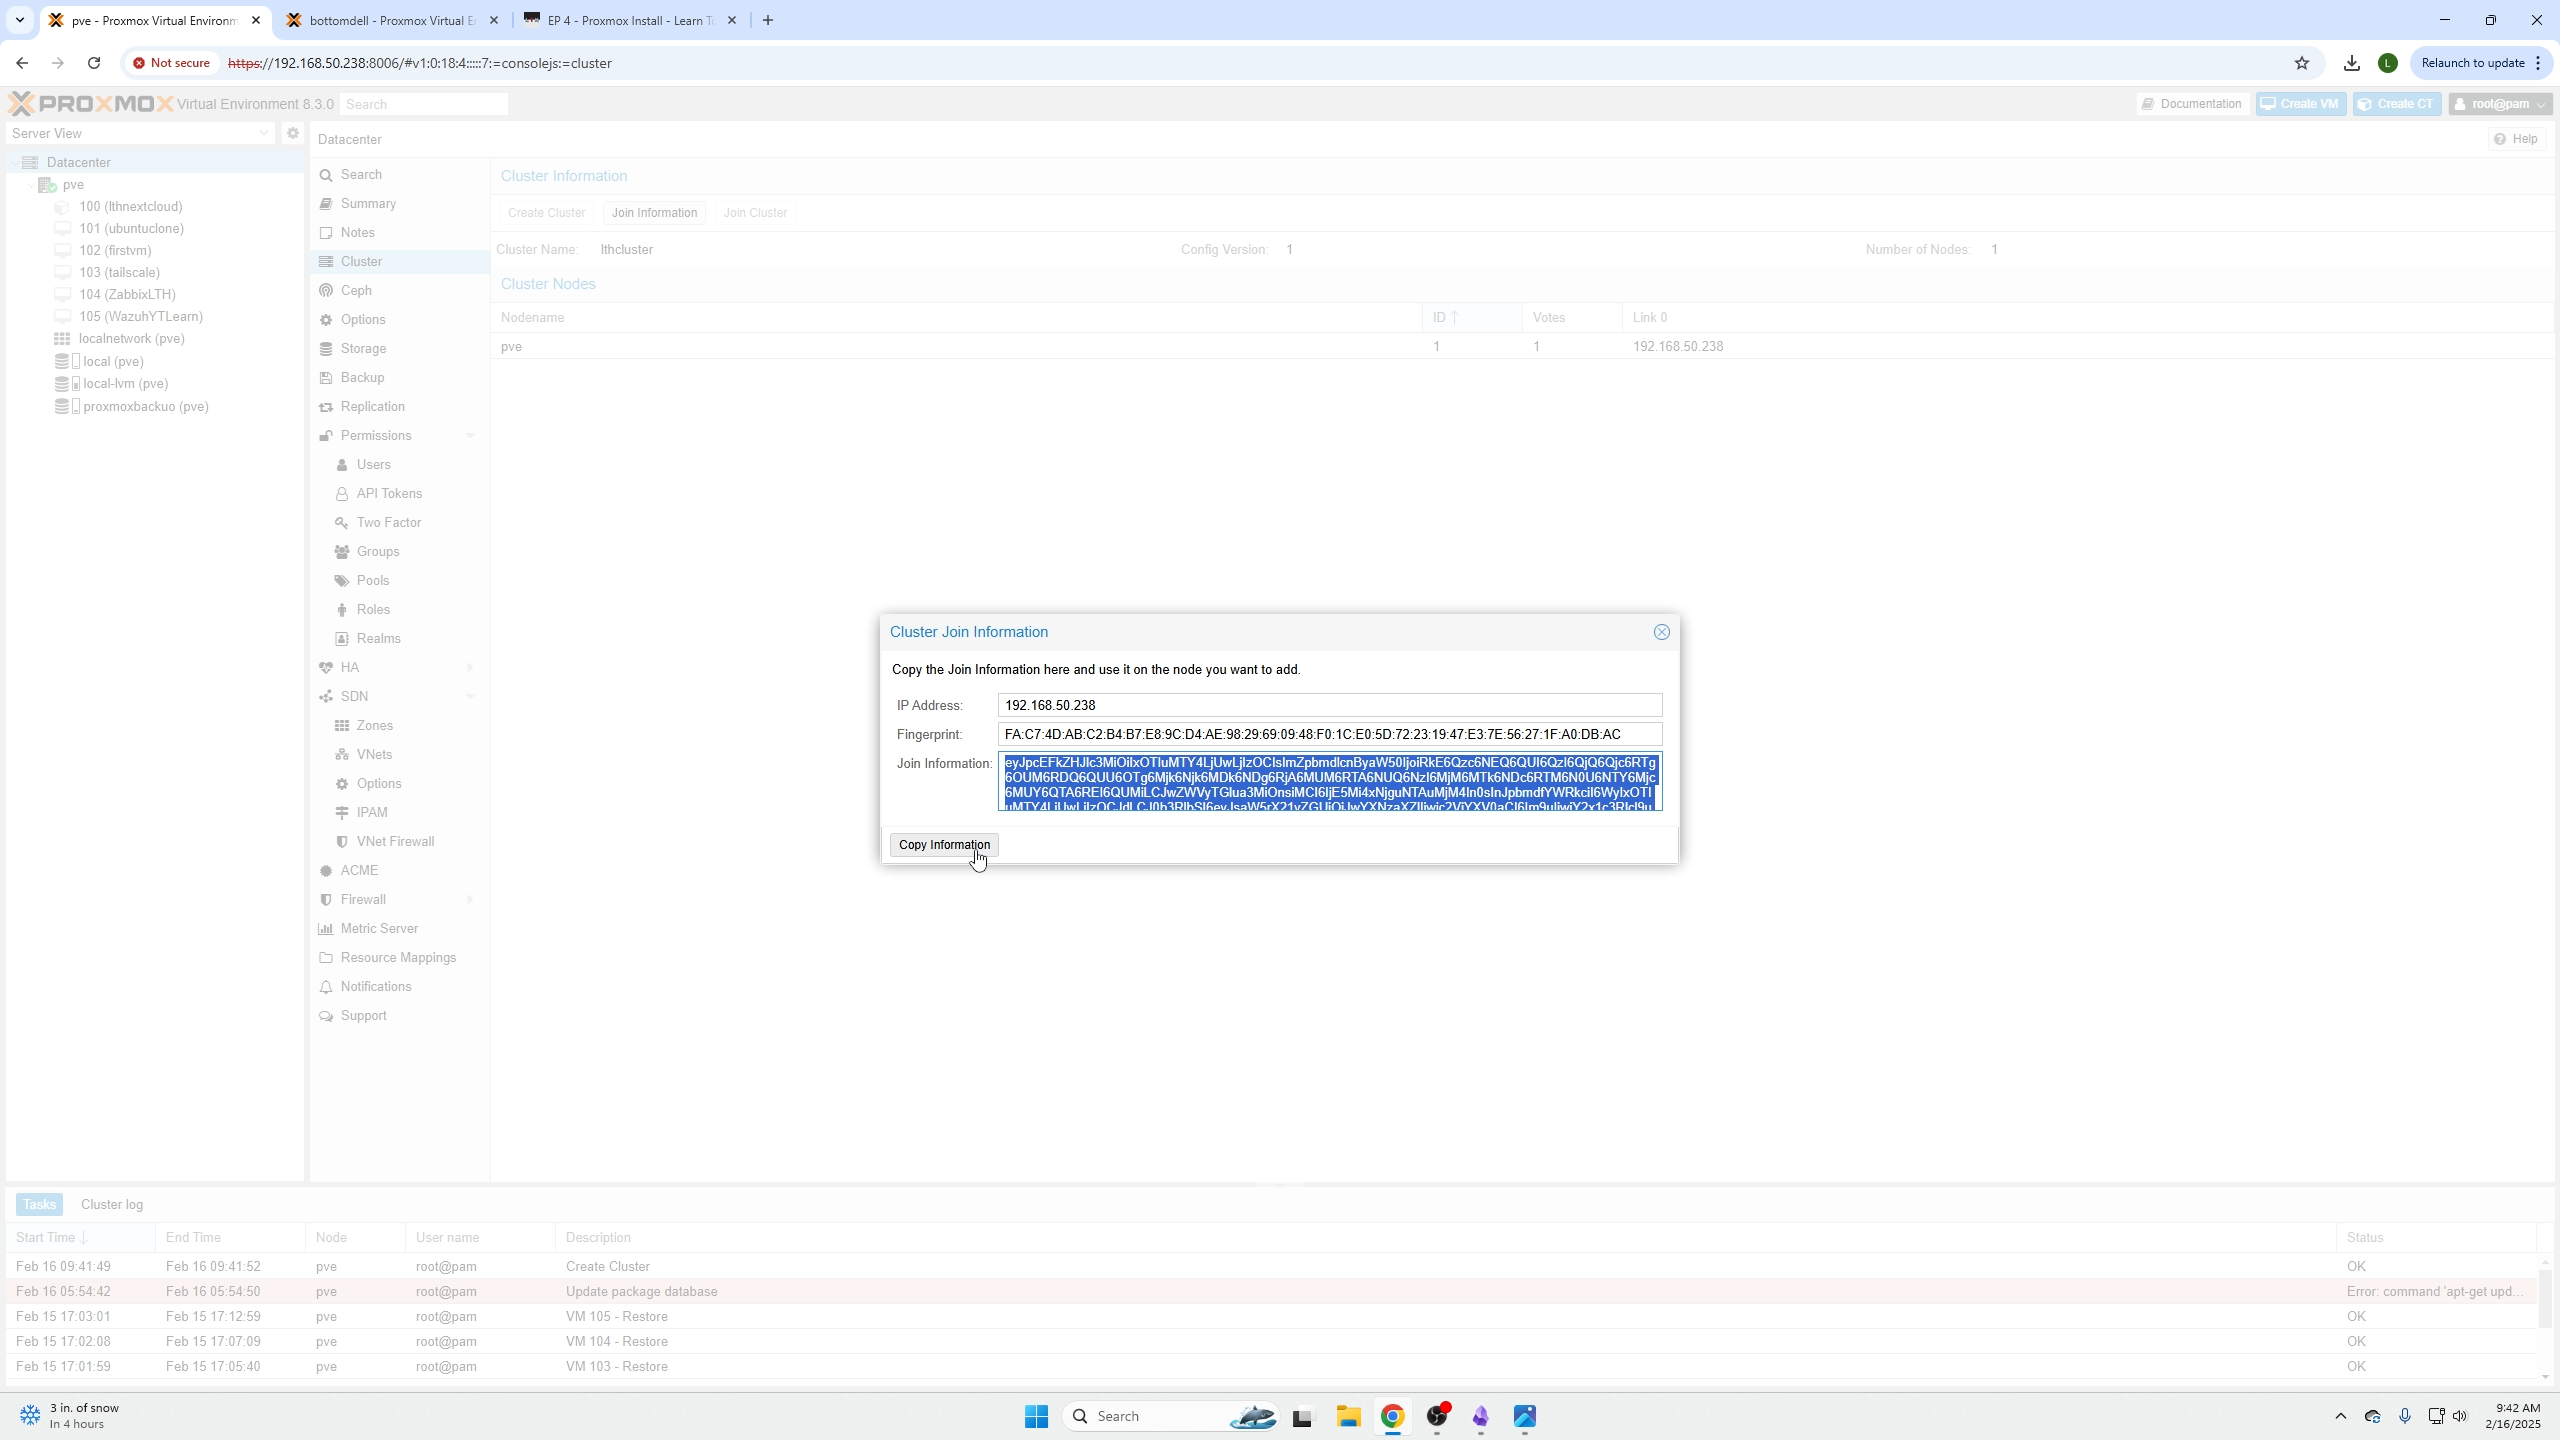
Select "Join Information" at the top.
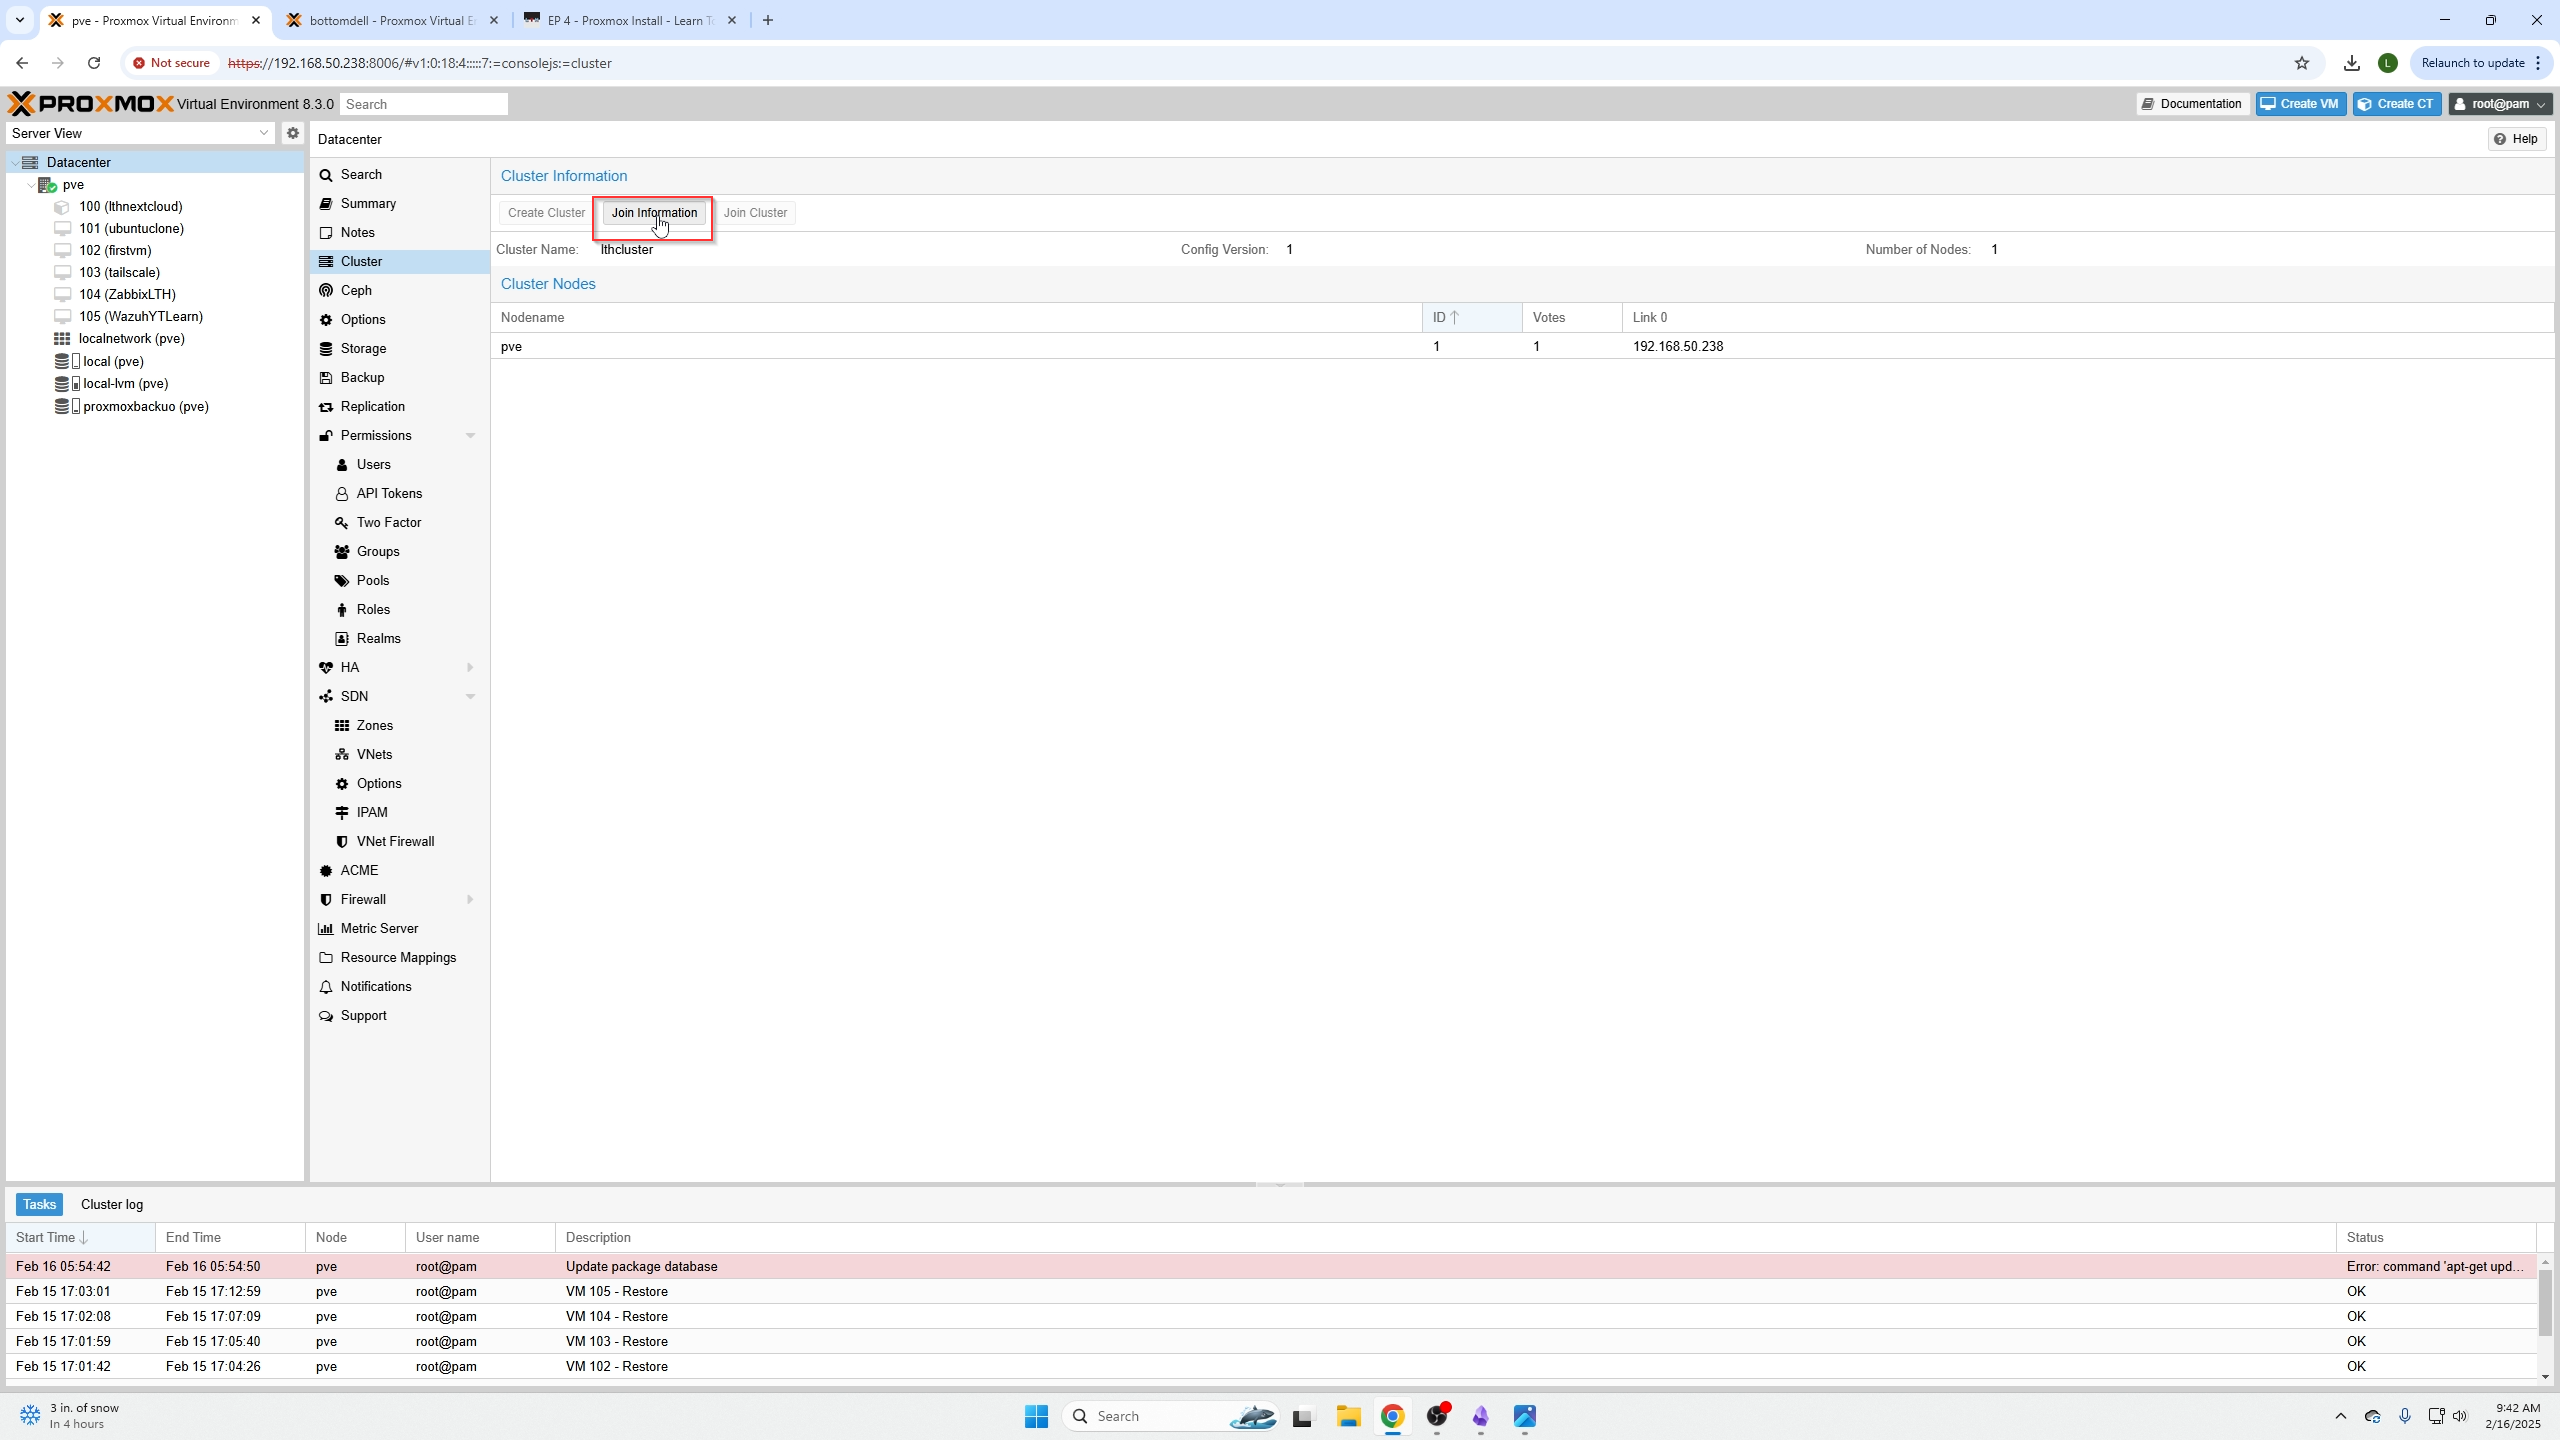
Copy the join information, then login to your SECOND node.
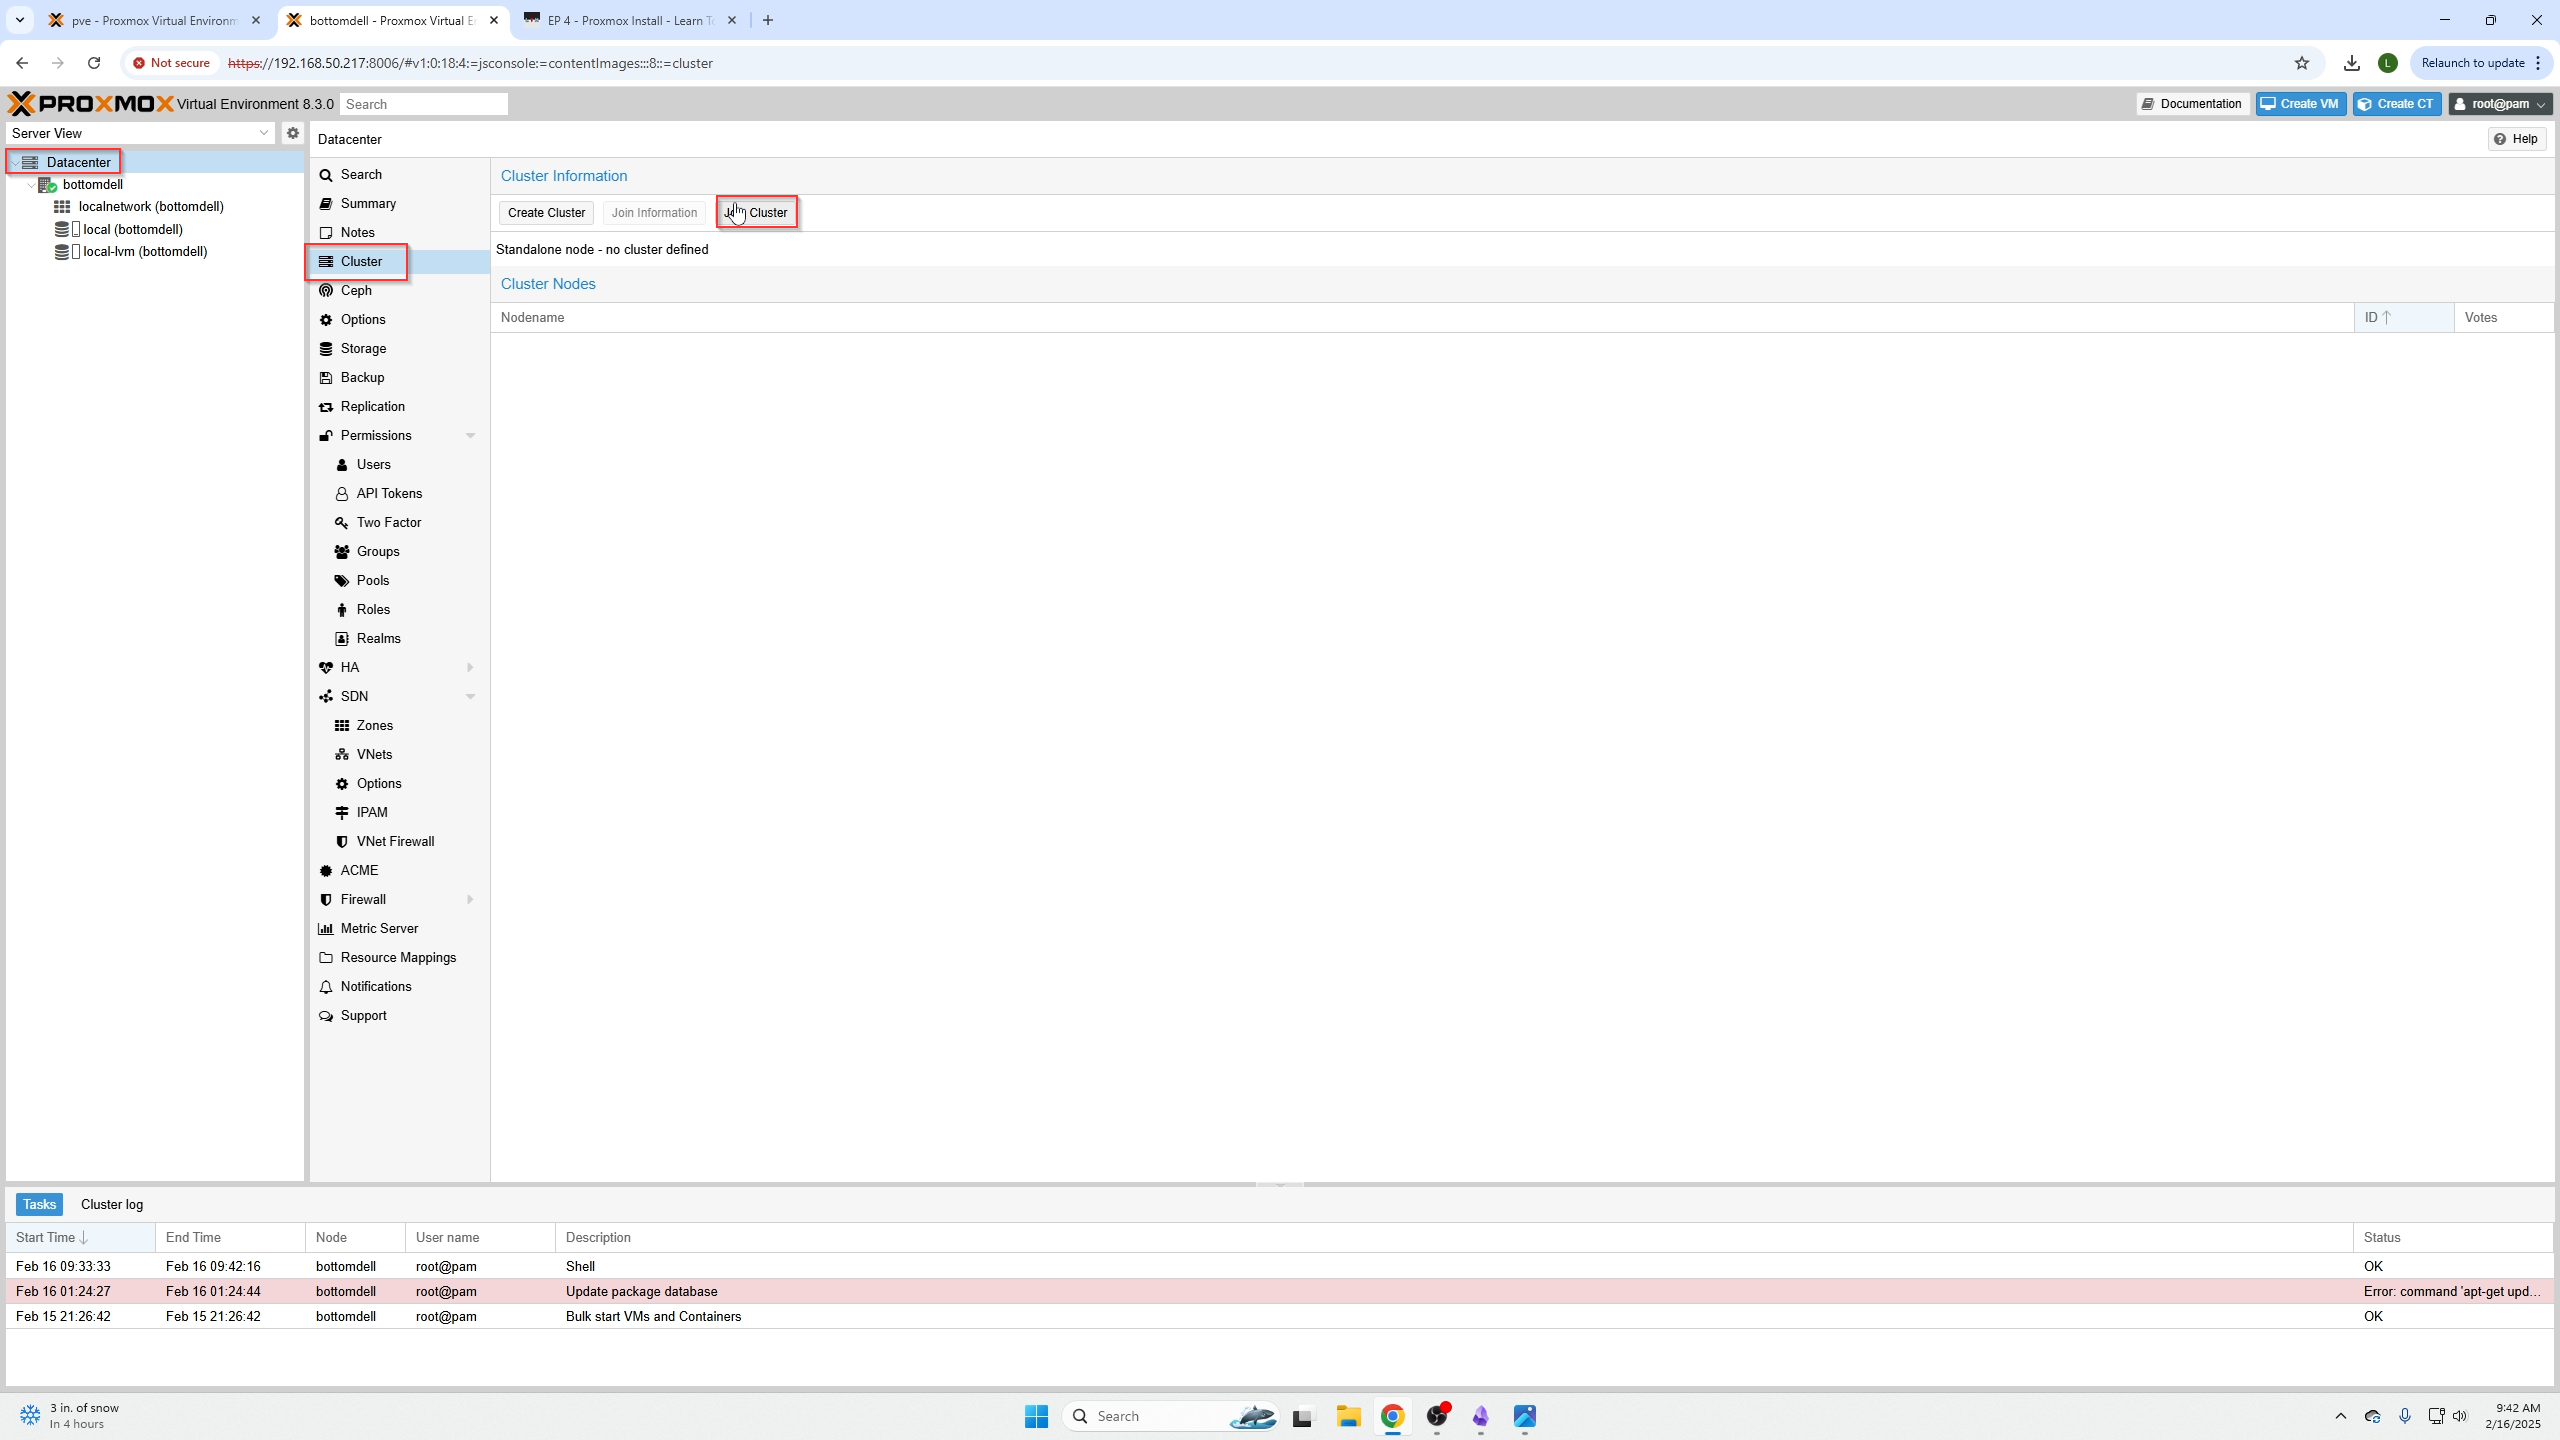
On your second node, go to Datacenter, Cluster, and click "Join Cluster."
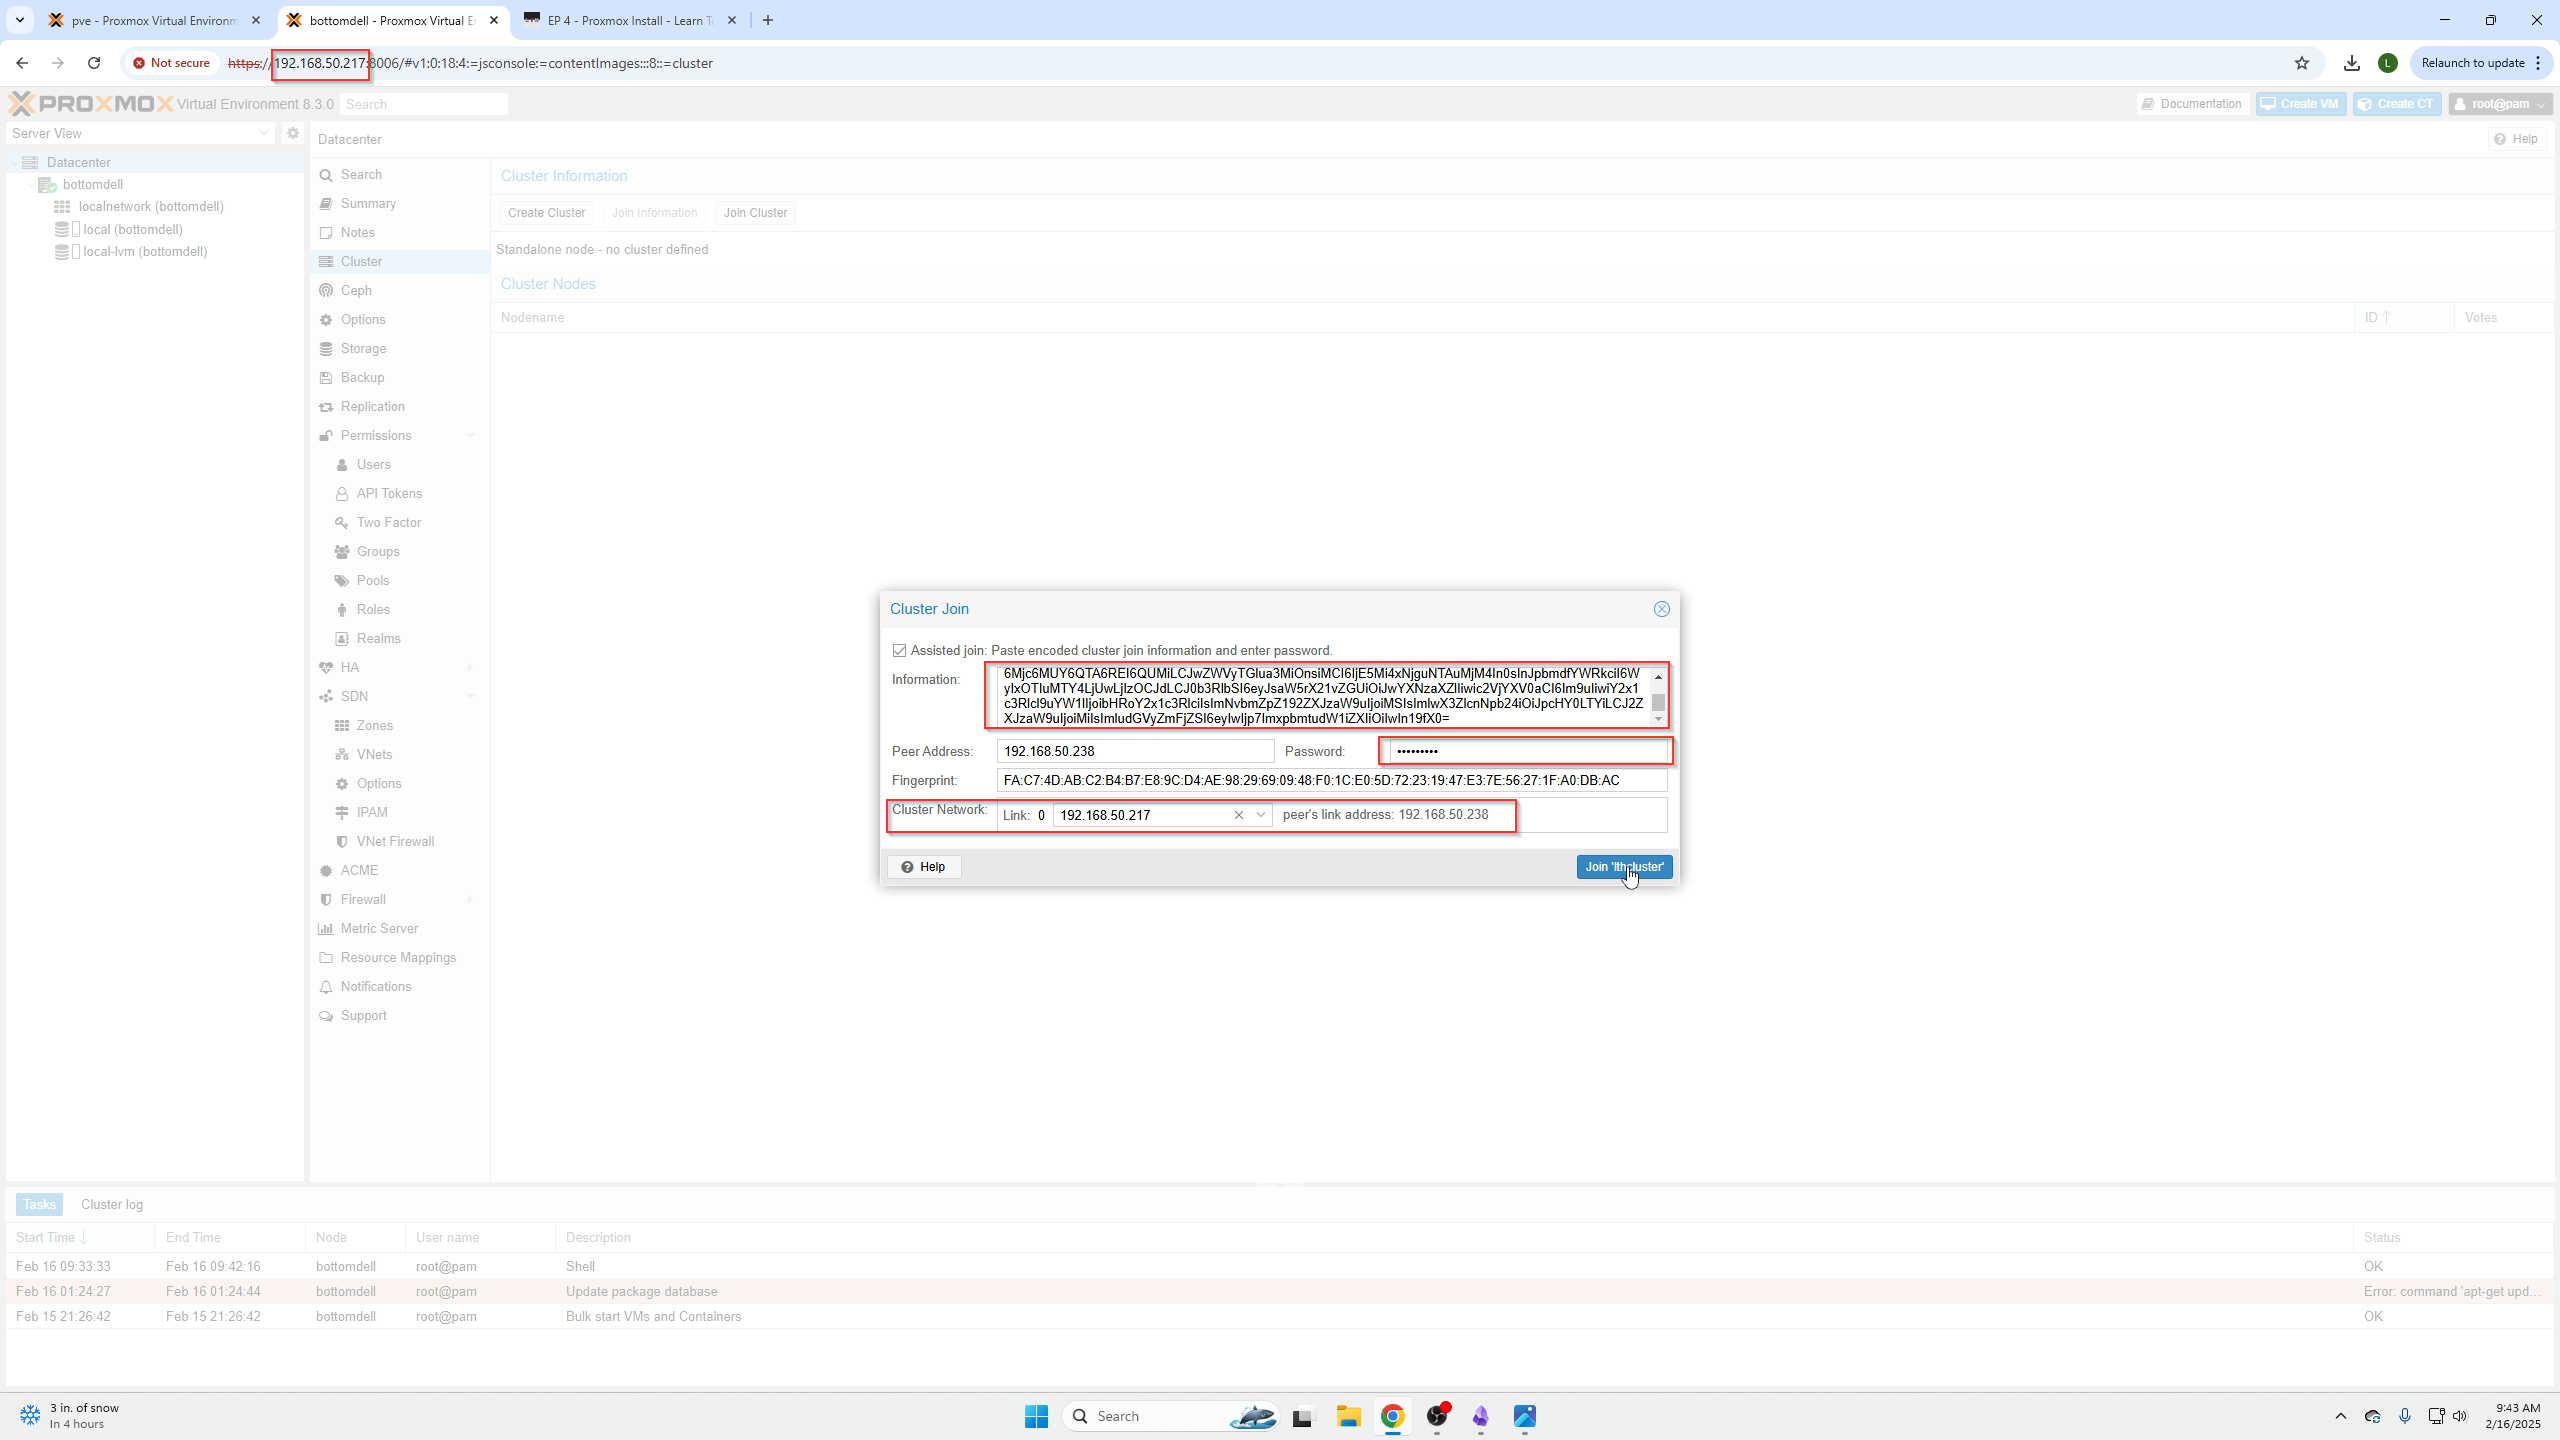
Paste the join information, enter the FIRST NODE's root password, ensure the cluster network IP matches your node’s URL, and confirm the peer IP is correct for your FIRST NODE.
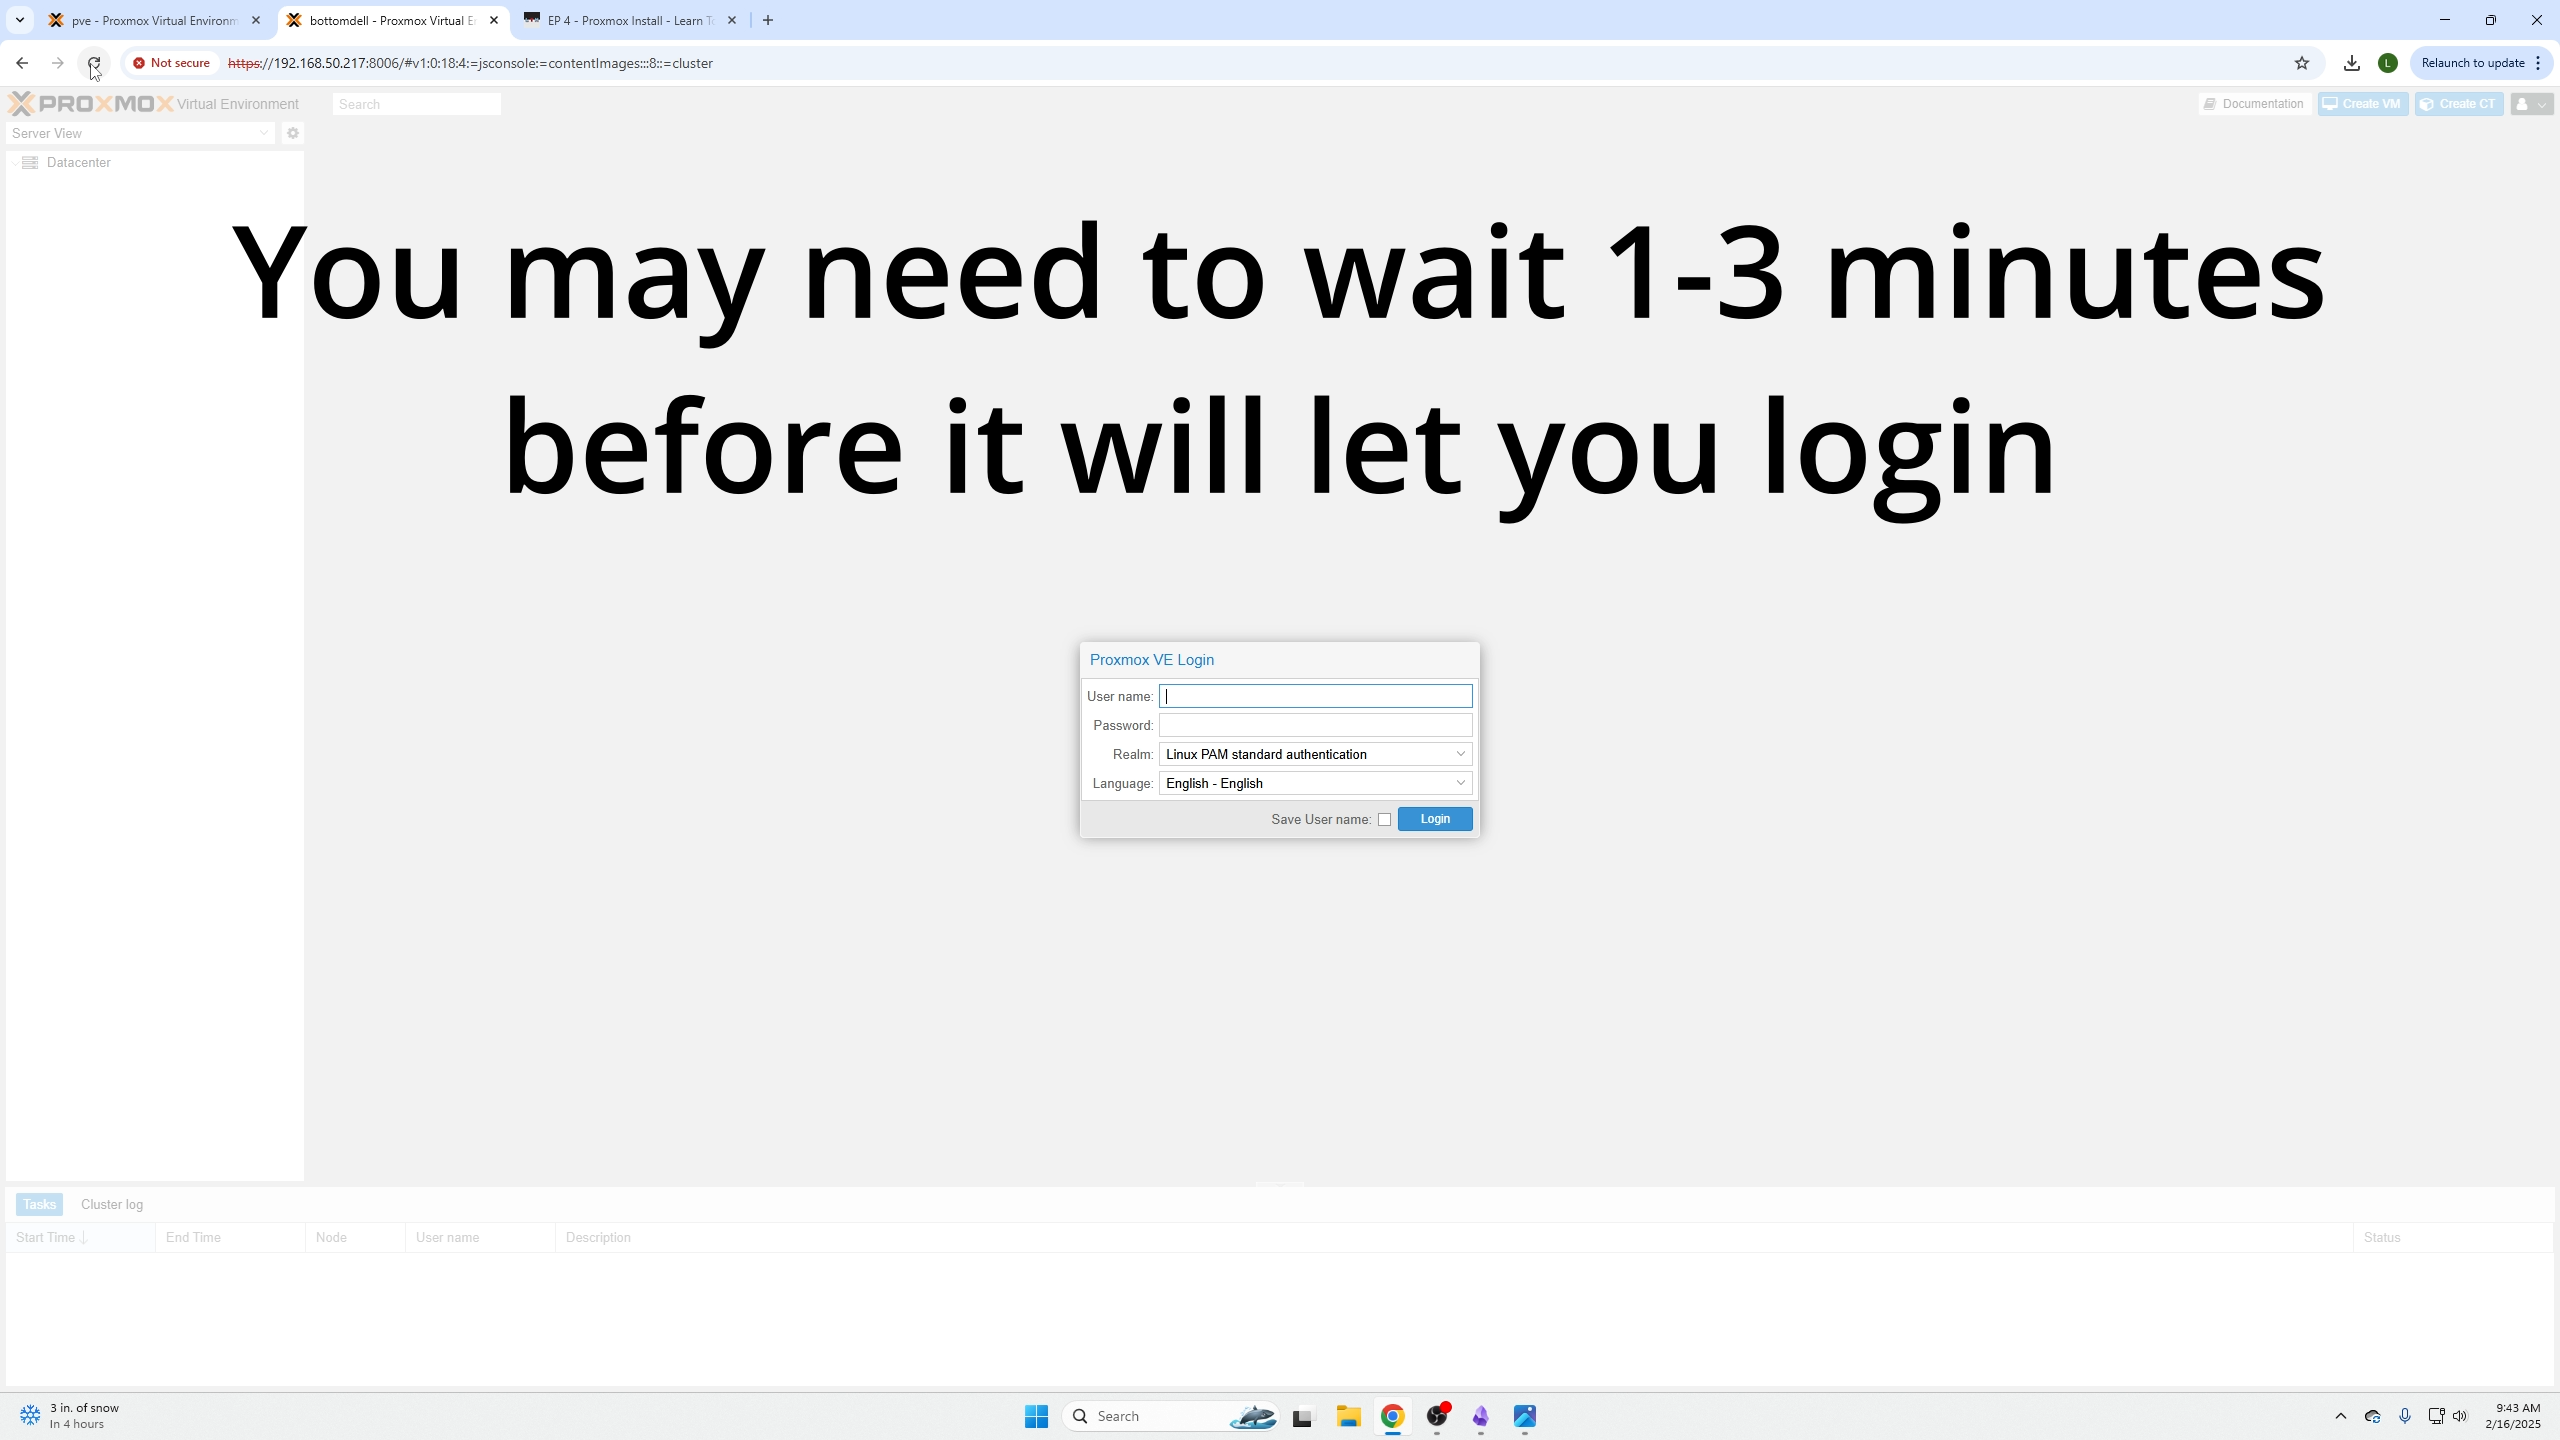
After clicking "Join Cluster", wait 1-3 minutes for the nodes to communicate before logging in. Refresh your browser, then log in.
Now you have a Proxmox Cluster allowing you to manage your machines from a single interface.

Conclusion
In the next episode, we will cover creating a Ceph Pool and preparing our cluster for live migrations.