Installing JellyFin on TrueNAS
Introduction
In this video we will cover:
- How to set up an SMB share on TrueNAS
- How to install JellyFin on your TrueNAS machine
- How to connect JellyFin to your SMB share
Creating an SMB Share on TrueNAS
If you have not set up TrueNAS before, please see our previous video here which also covers setting up a storage pool required for this tutorial.
Login to TrueNAS and perform the following:
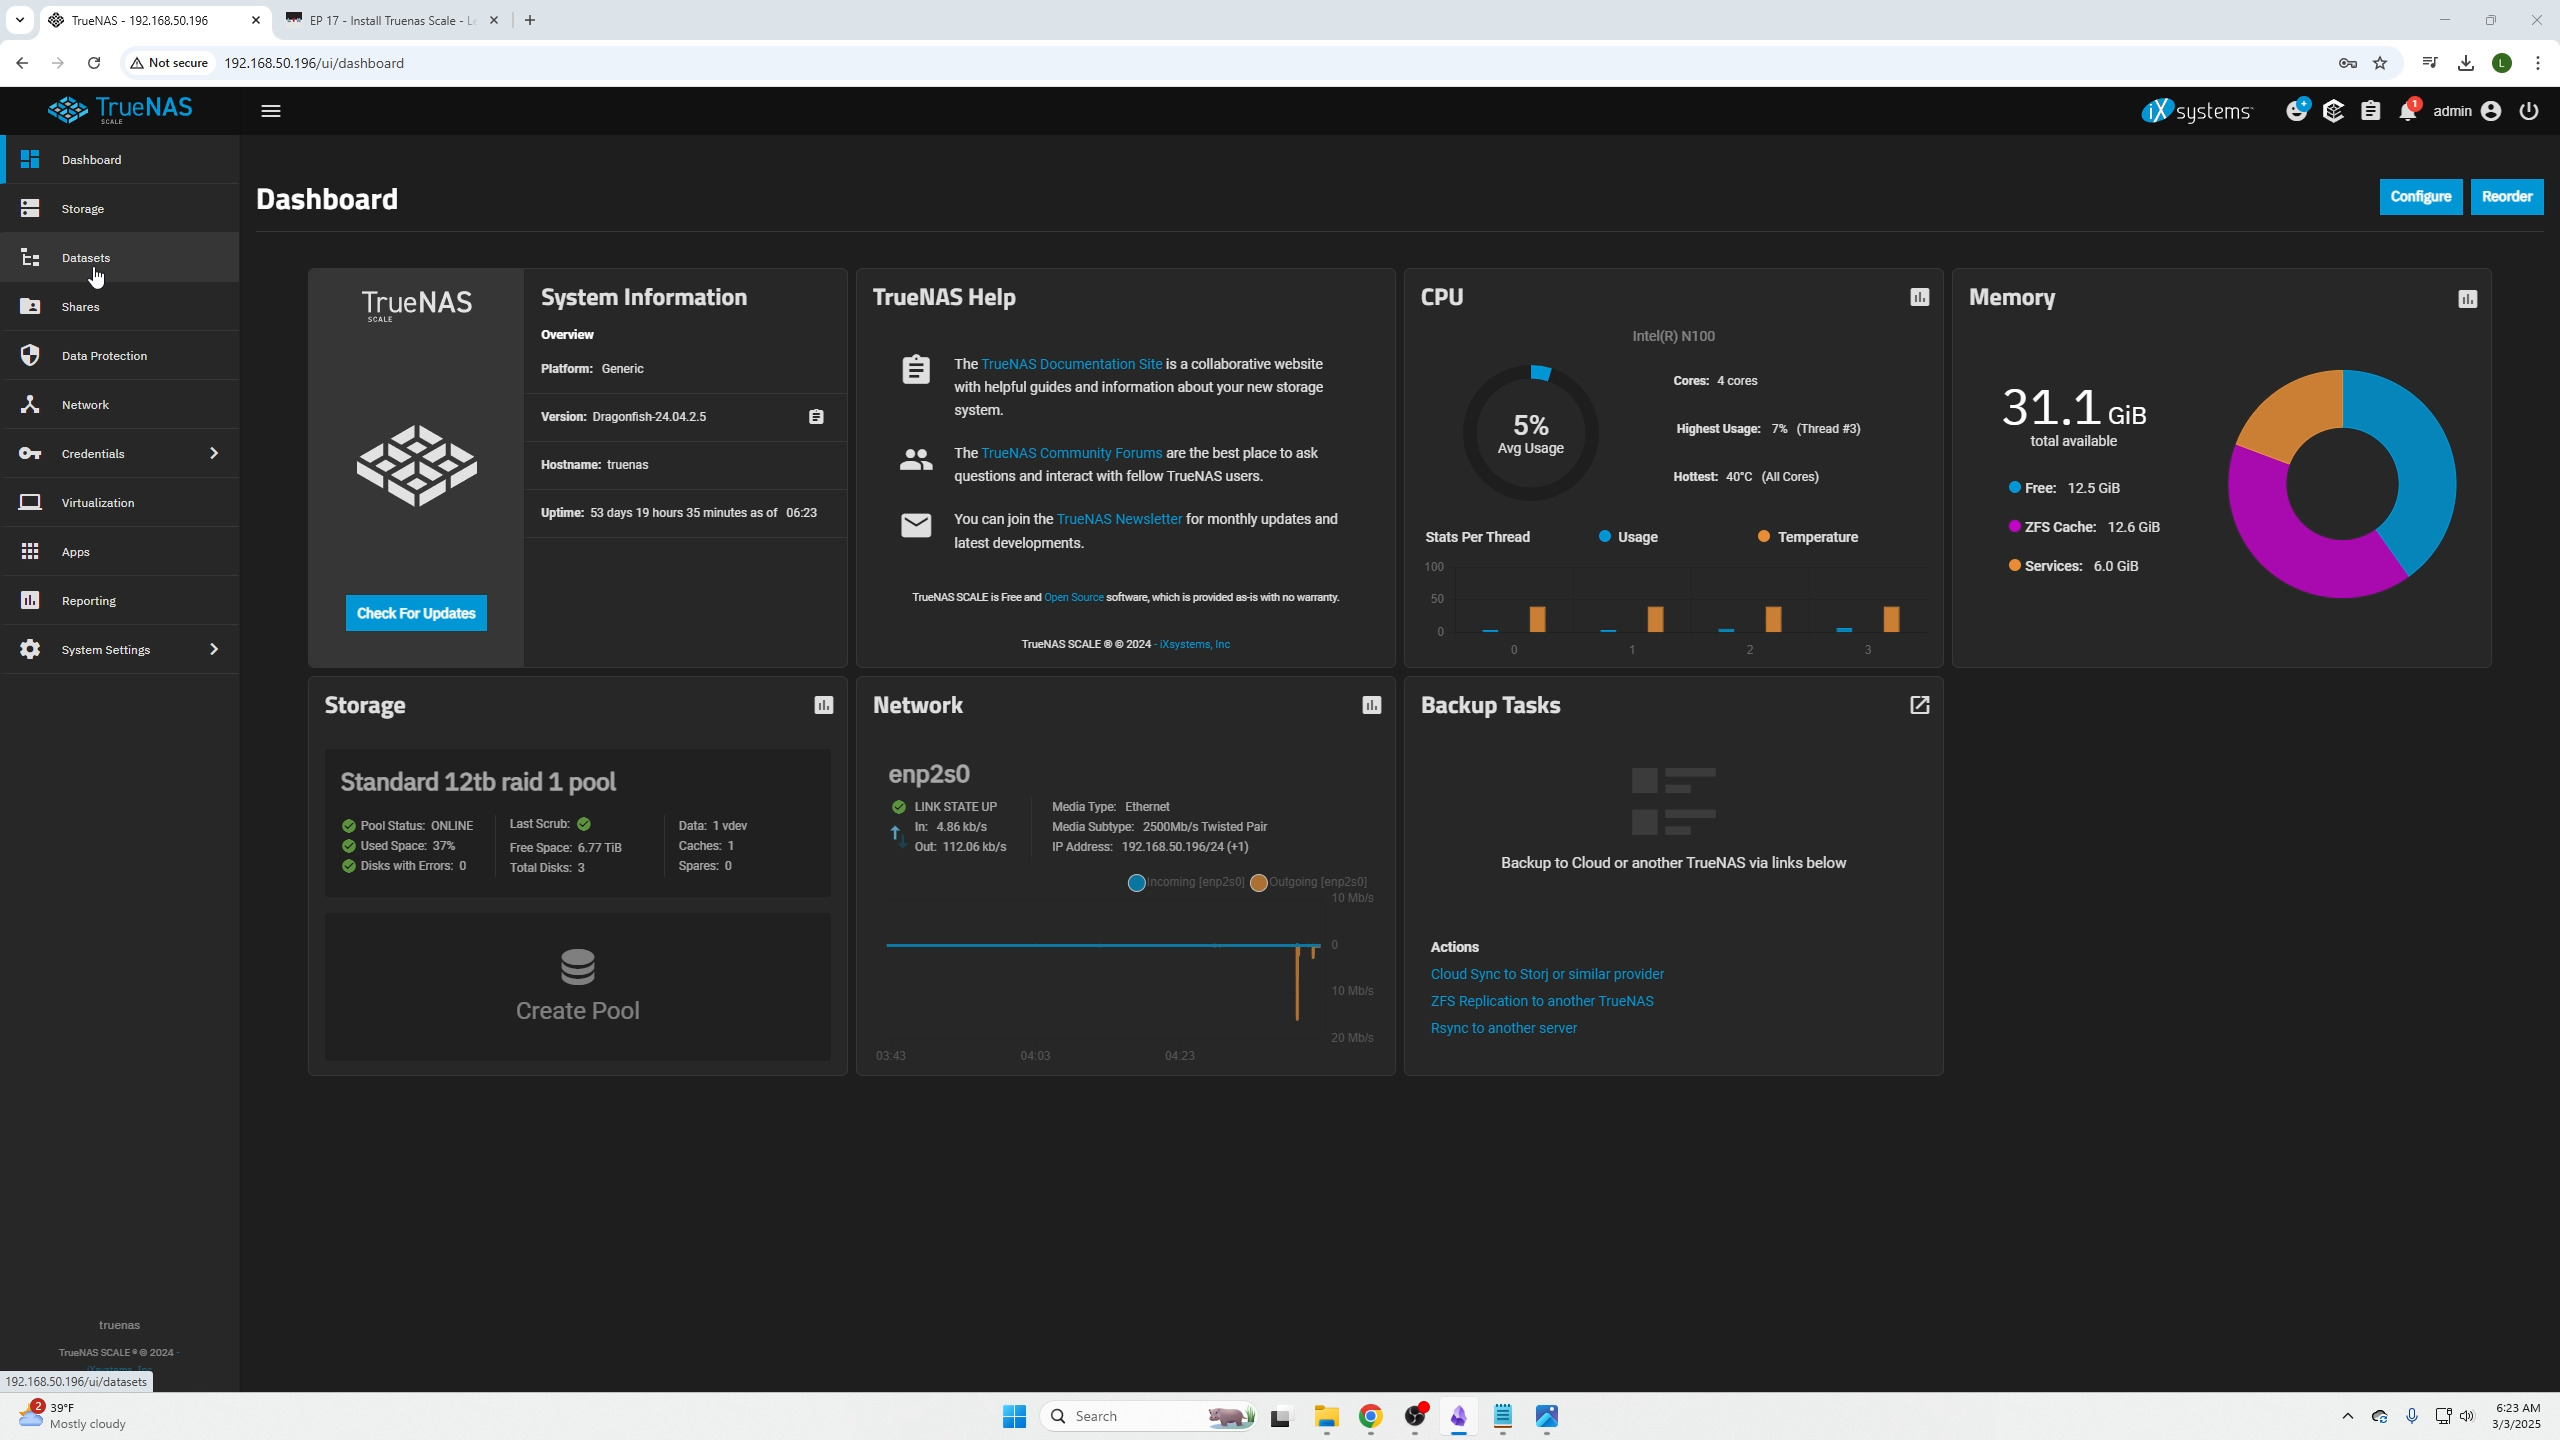
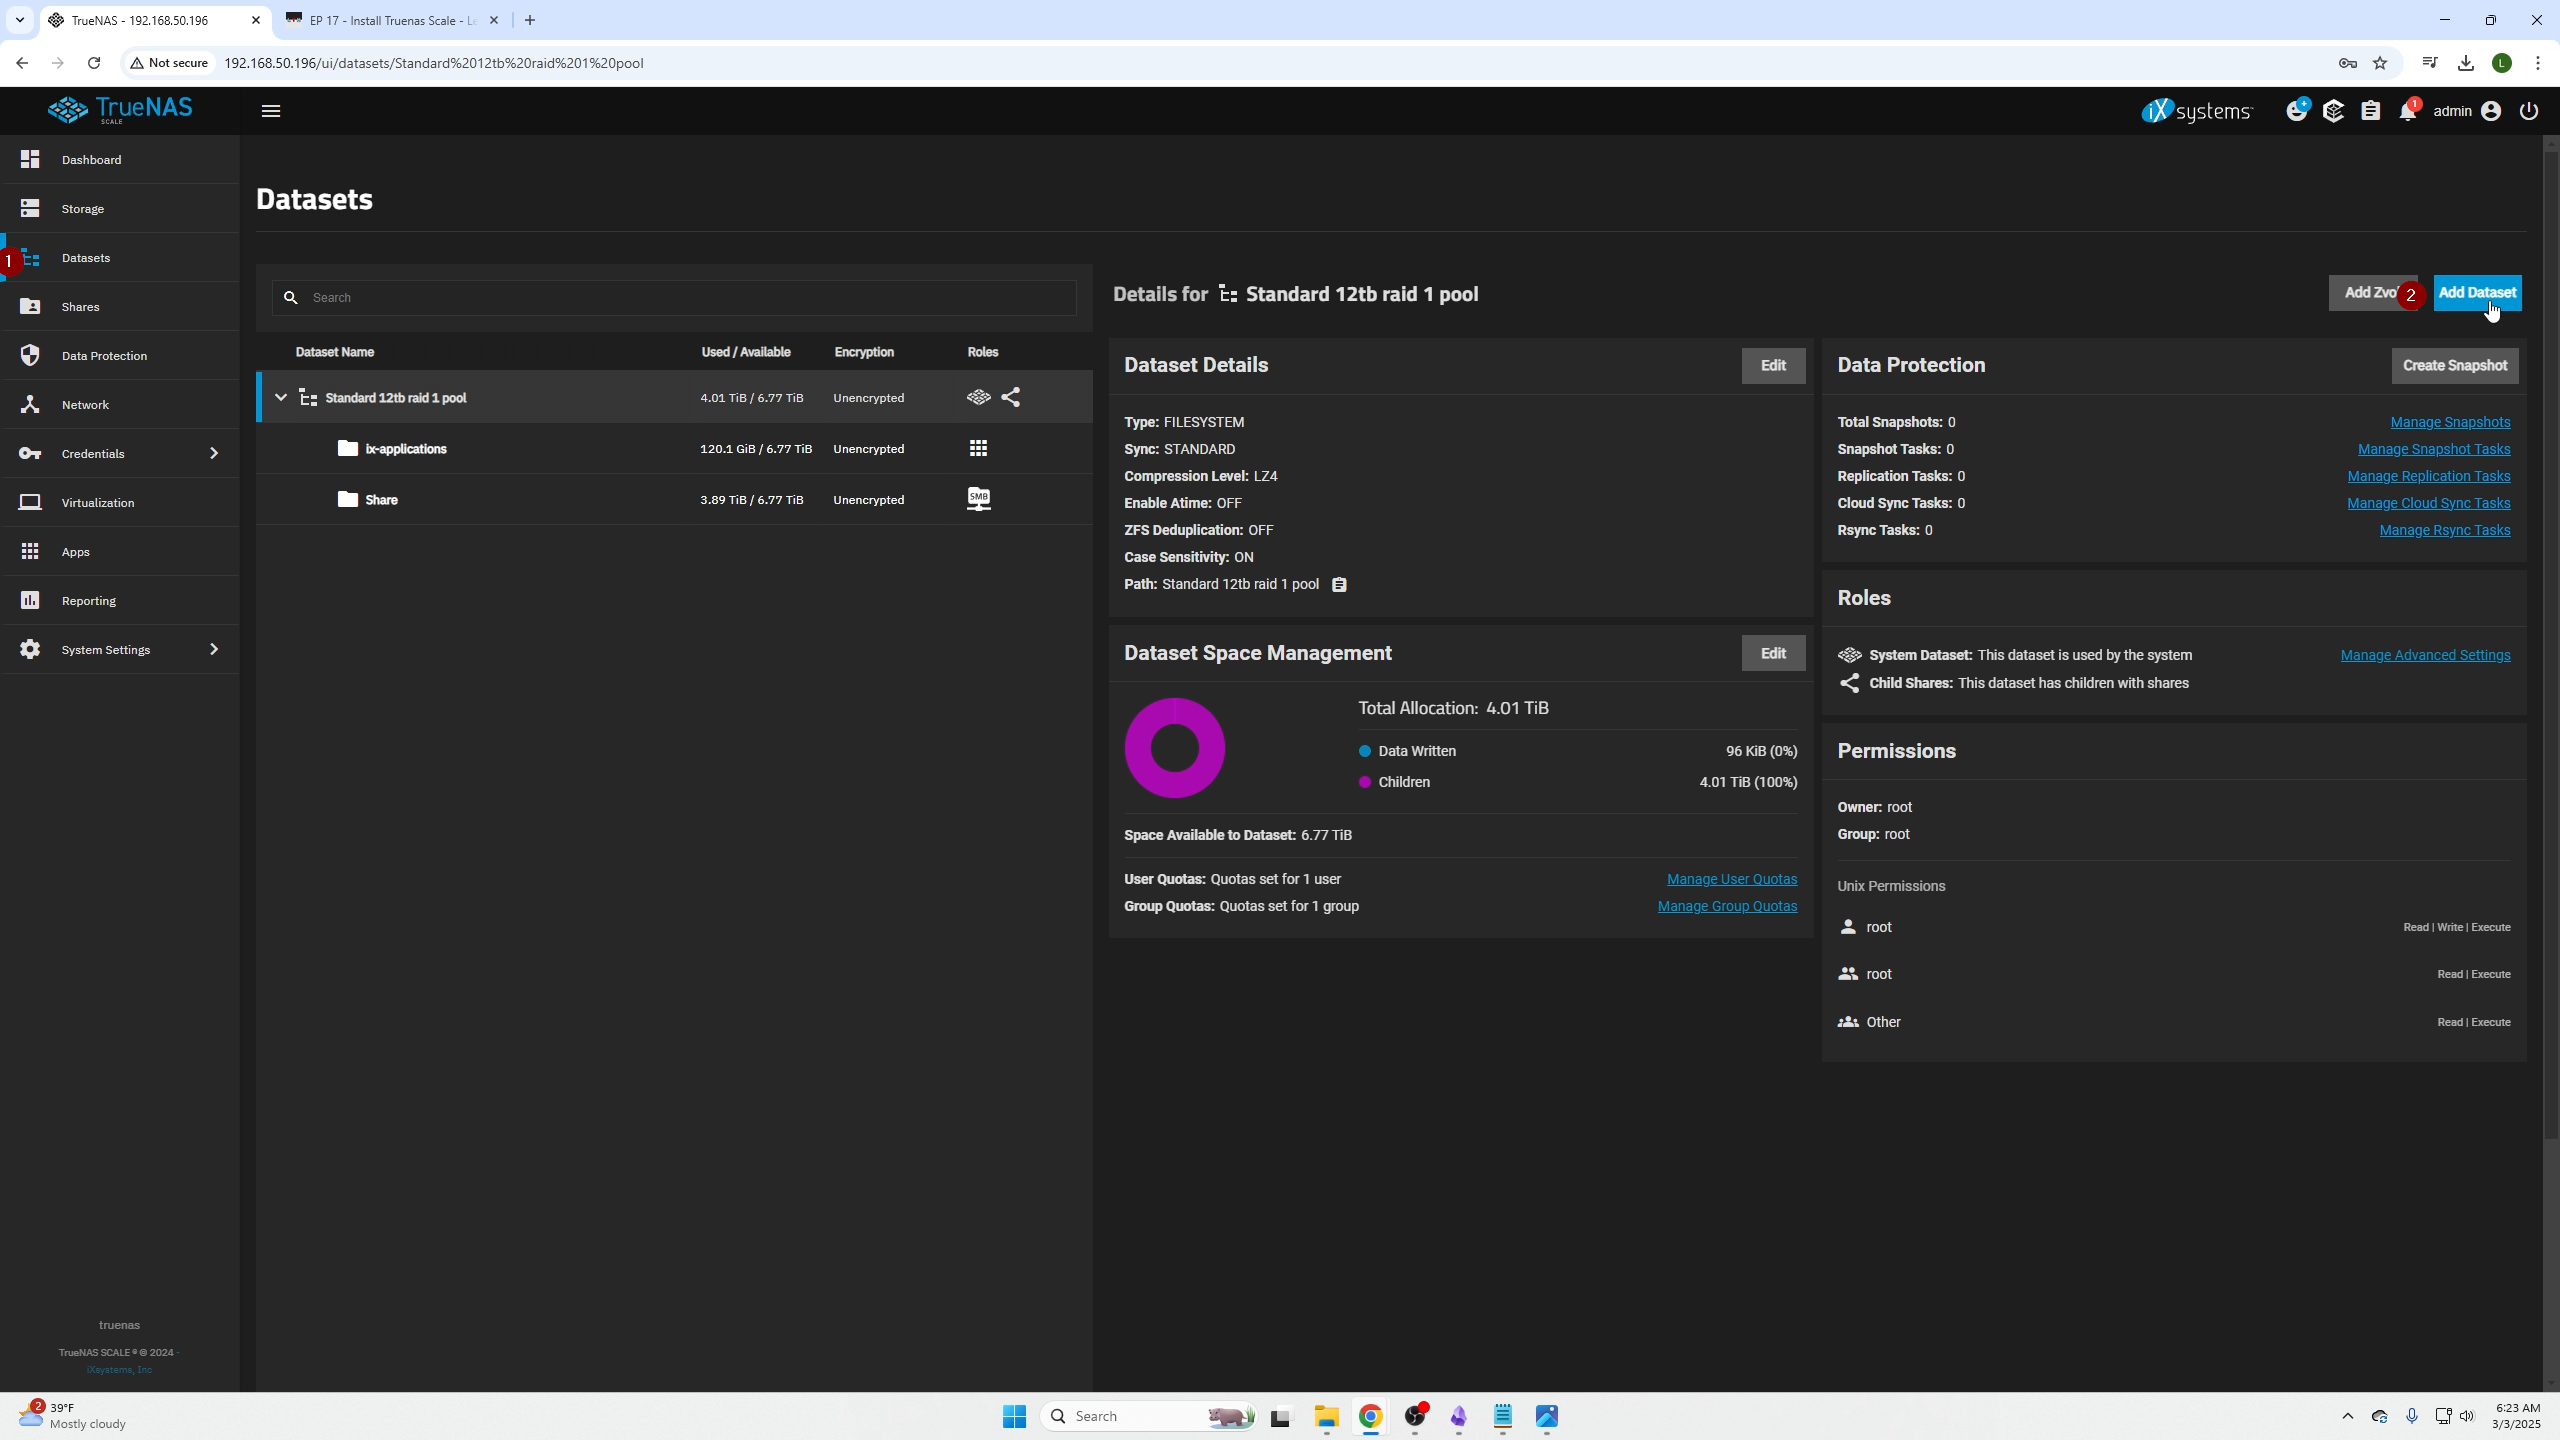
Create a Dataset
Go to the Datasets tab and click "Add Dataset" on the top right.
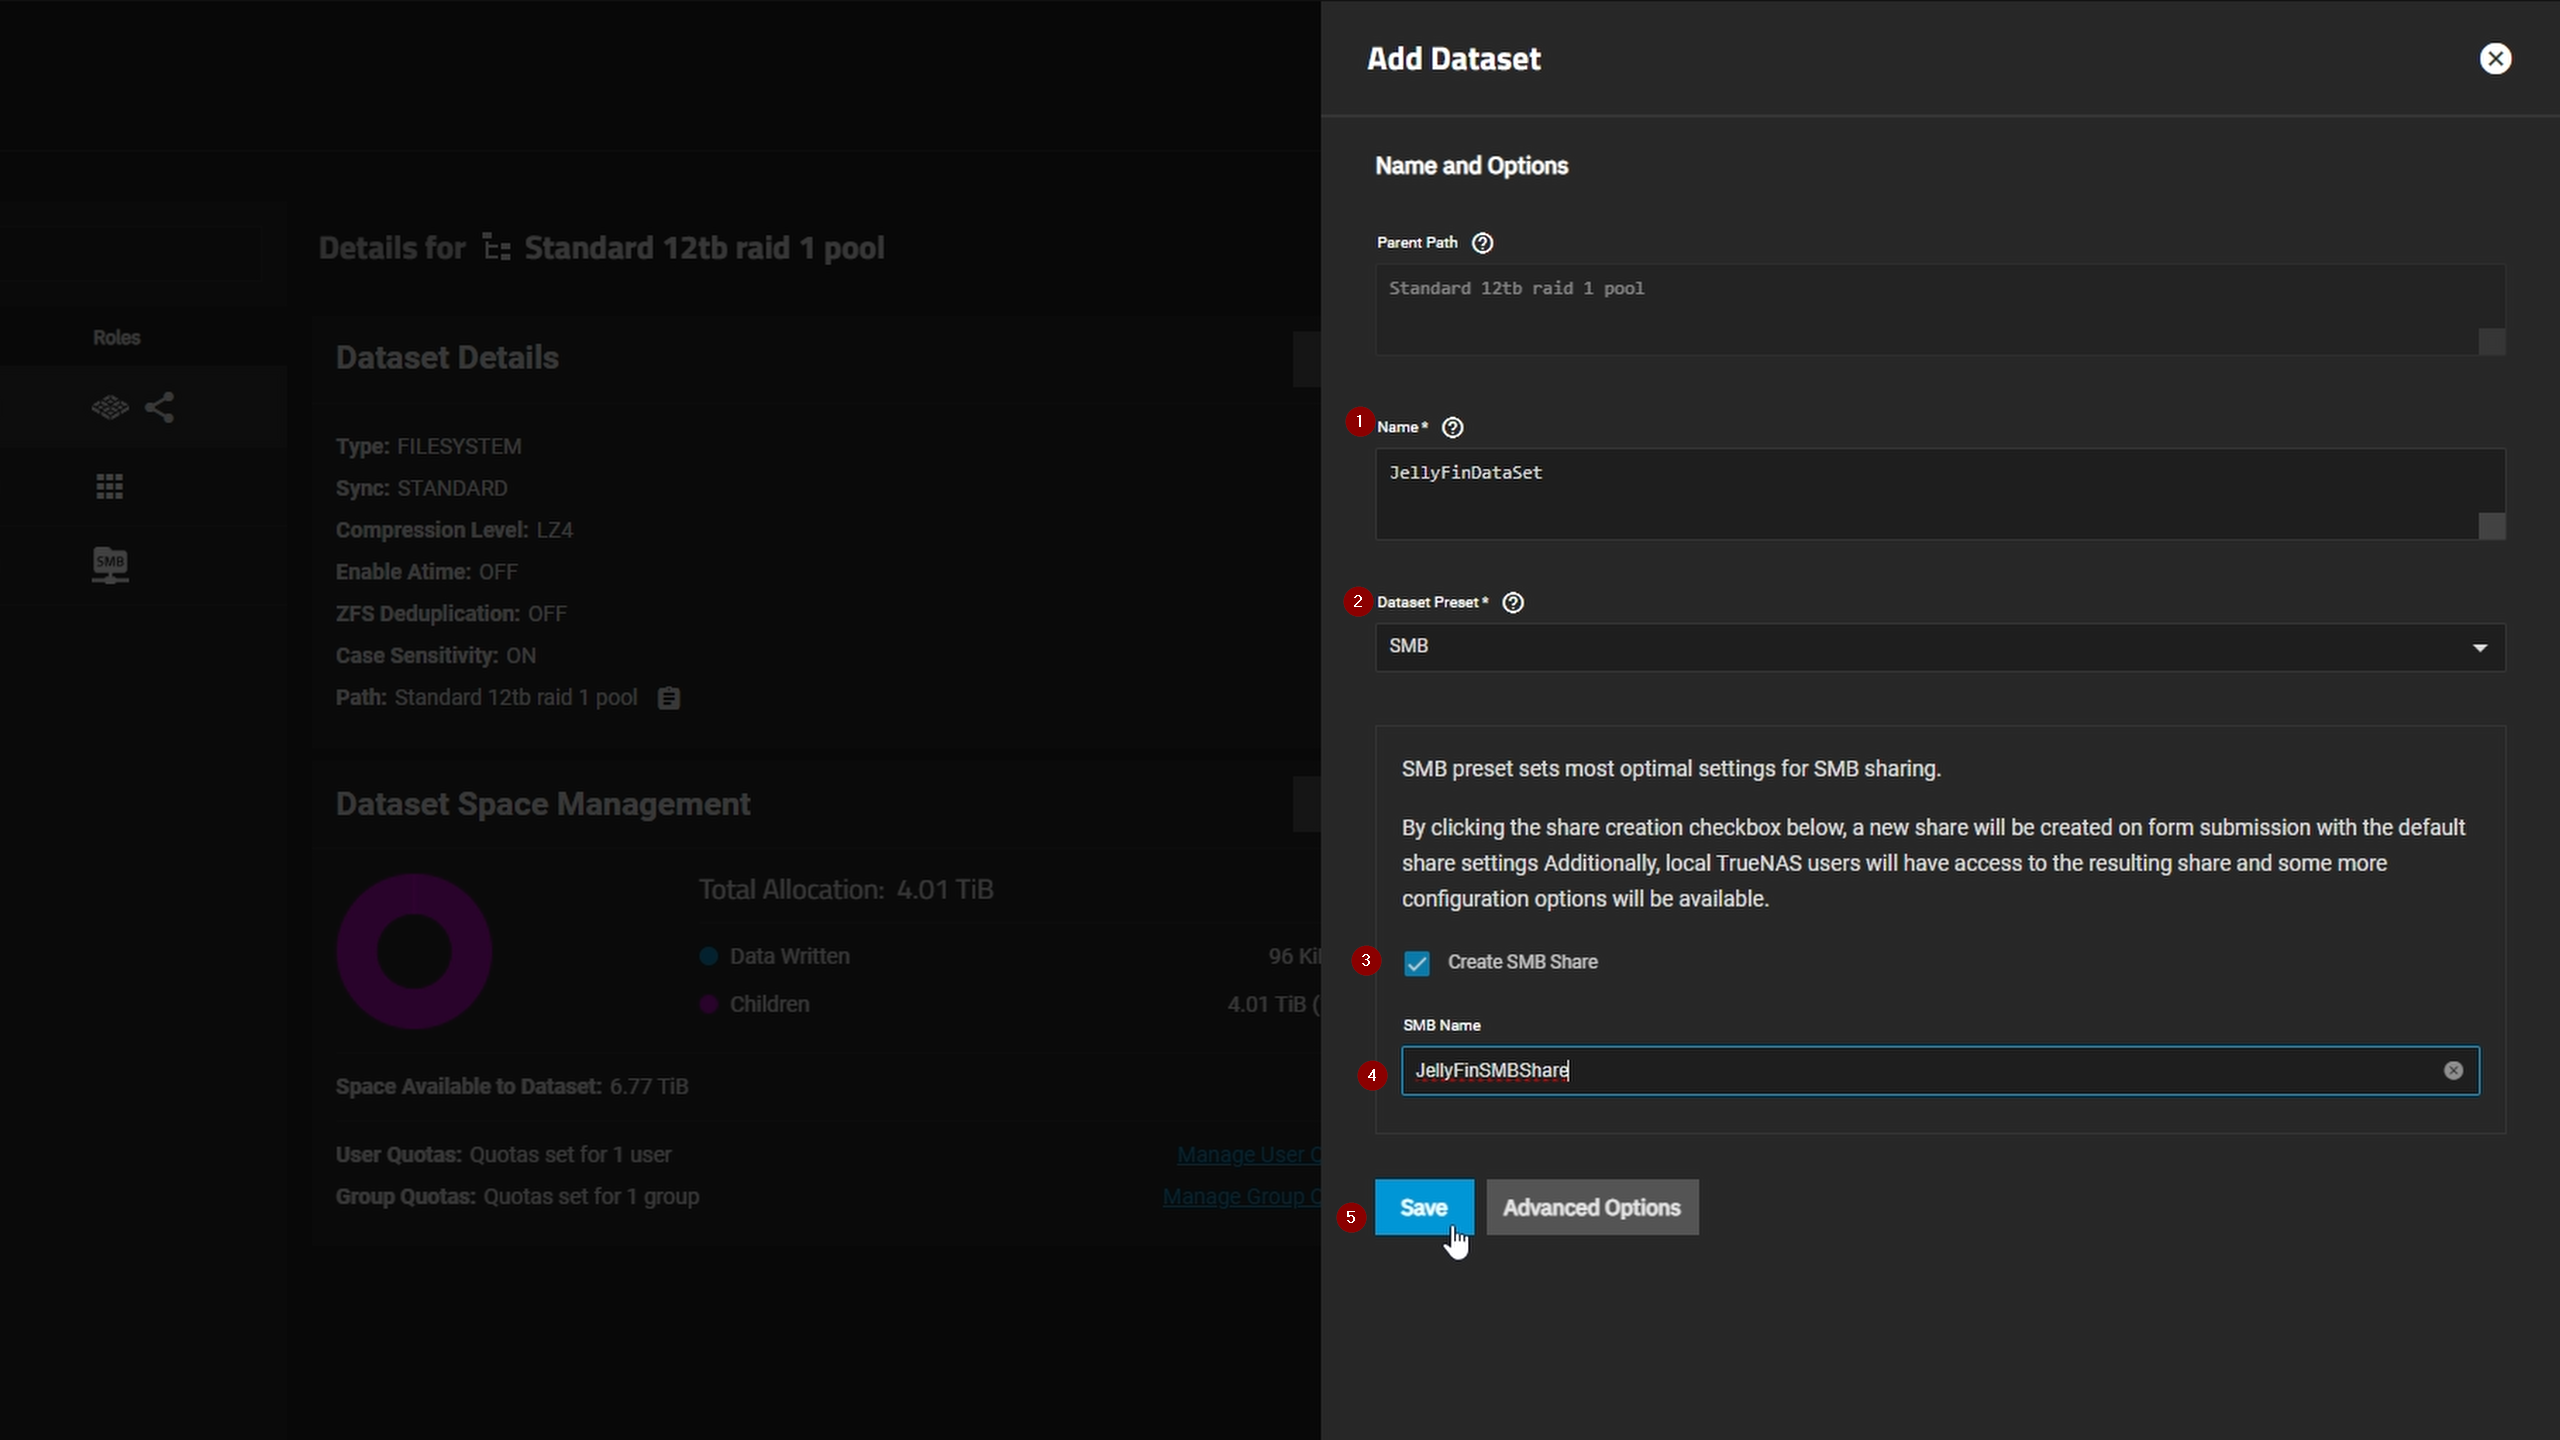
Name your dataset, select the SMB preset, give your SMB share a descriptive name like "smbshare," then click Save.
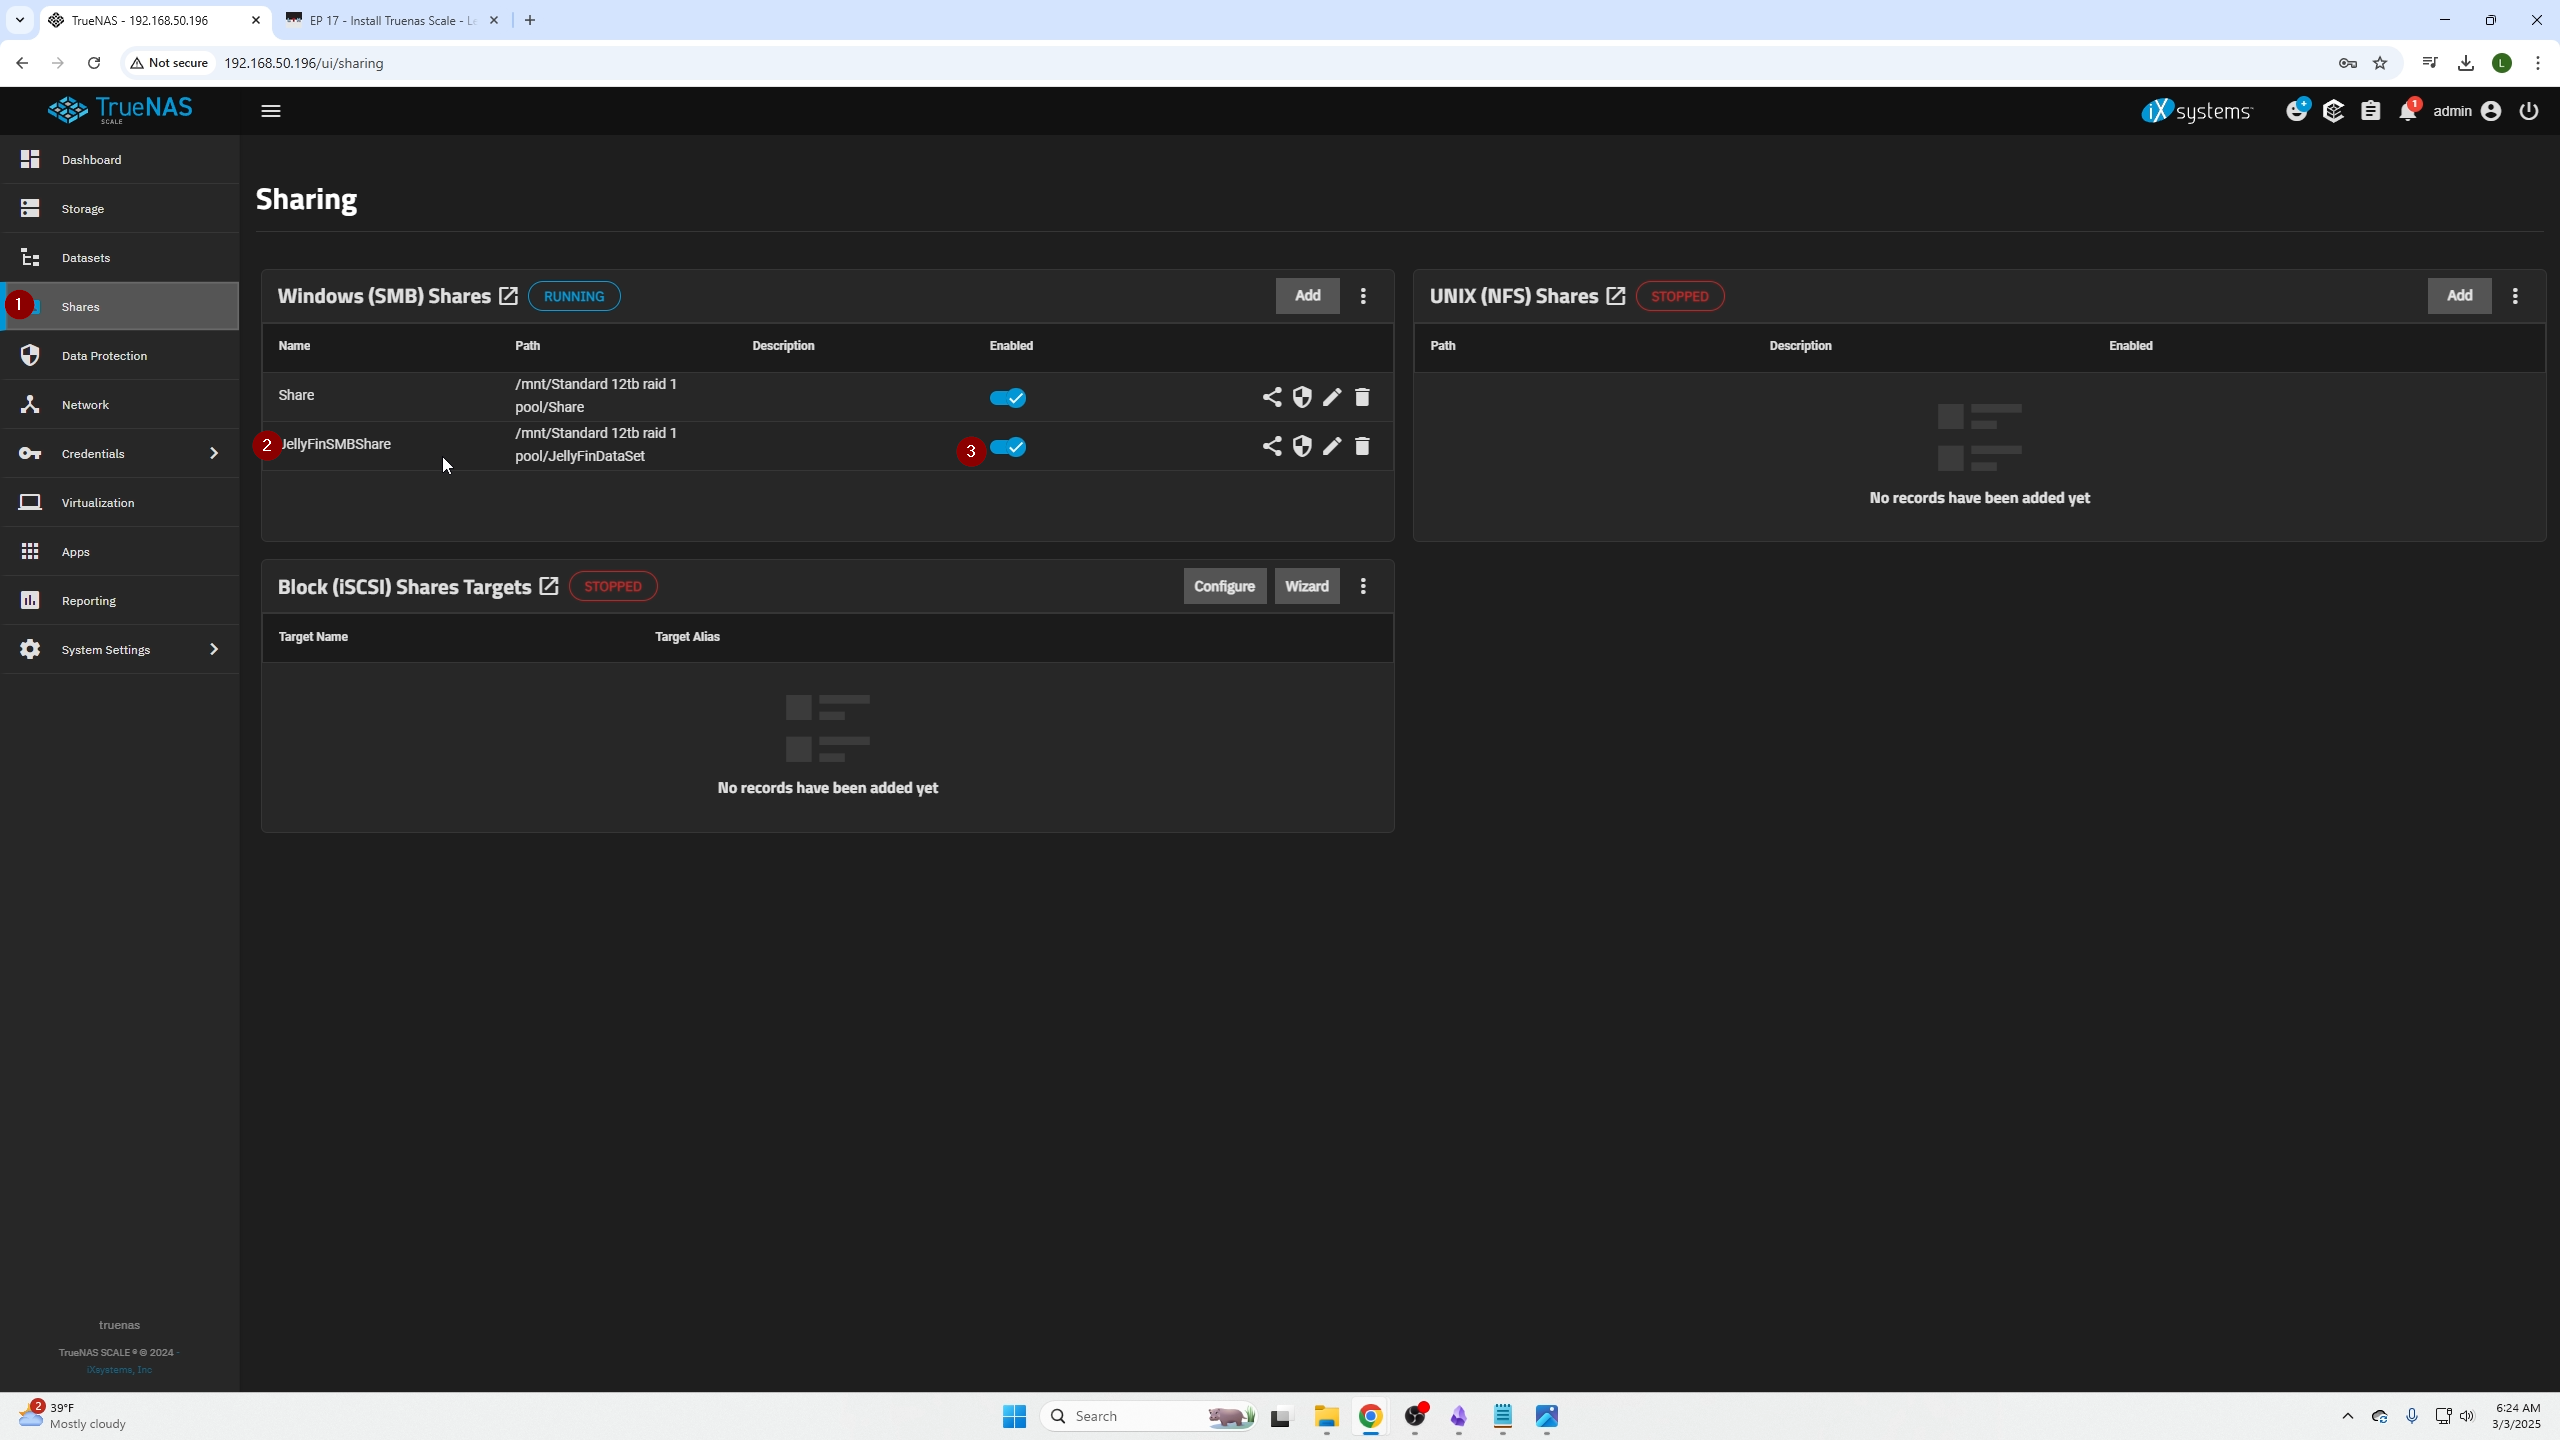
SMB Share
Go to the Shares tab and confirm your SMB share is created and enabled.
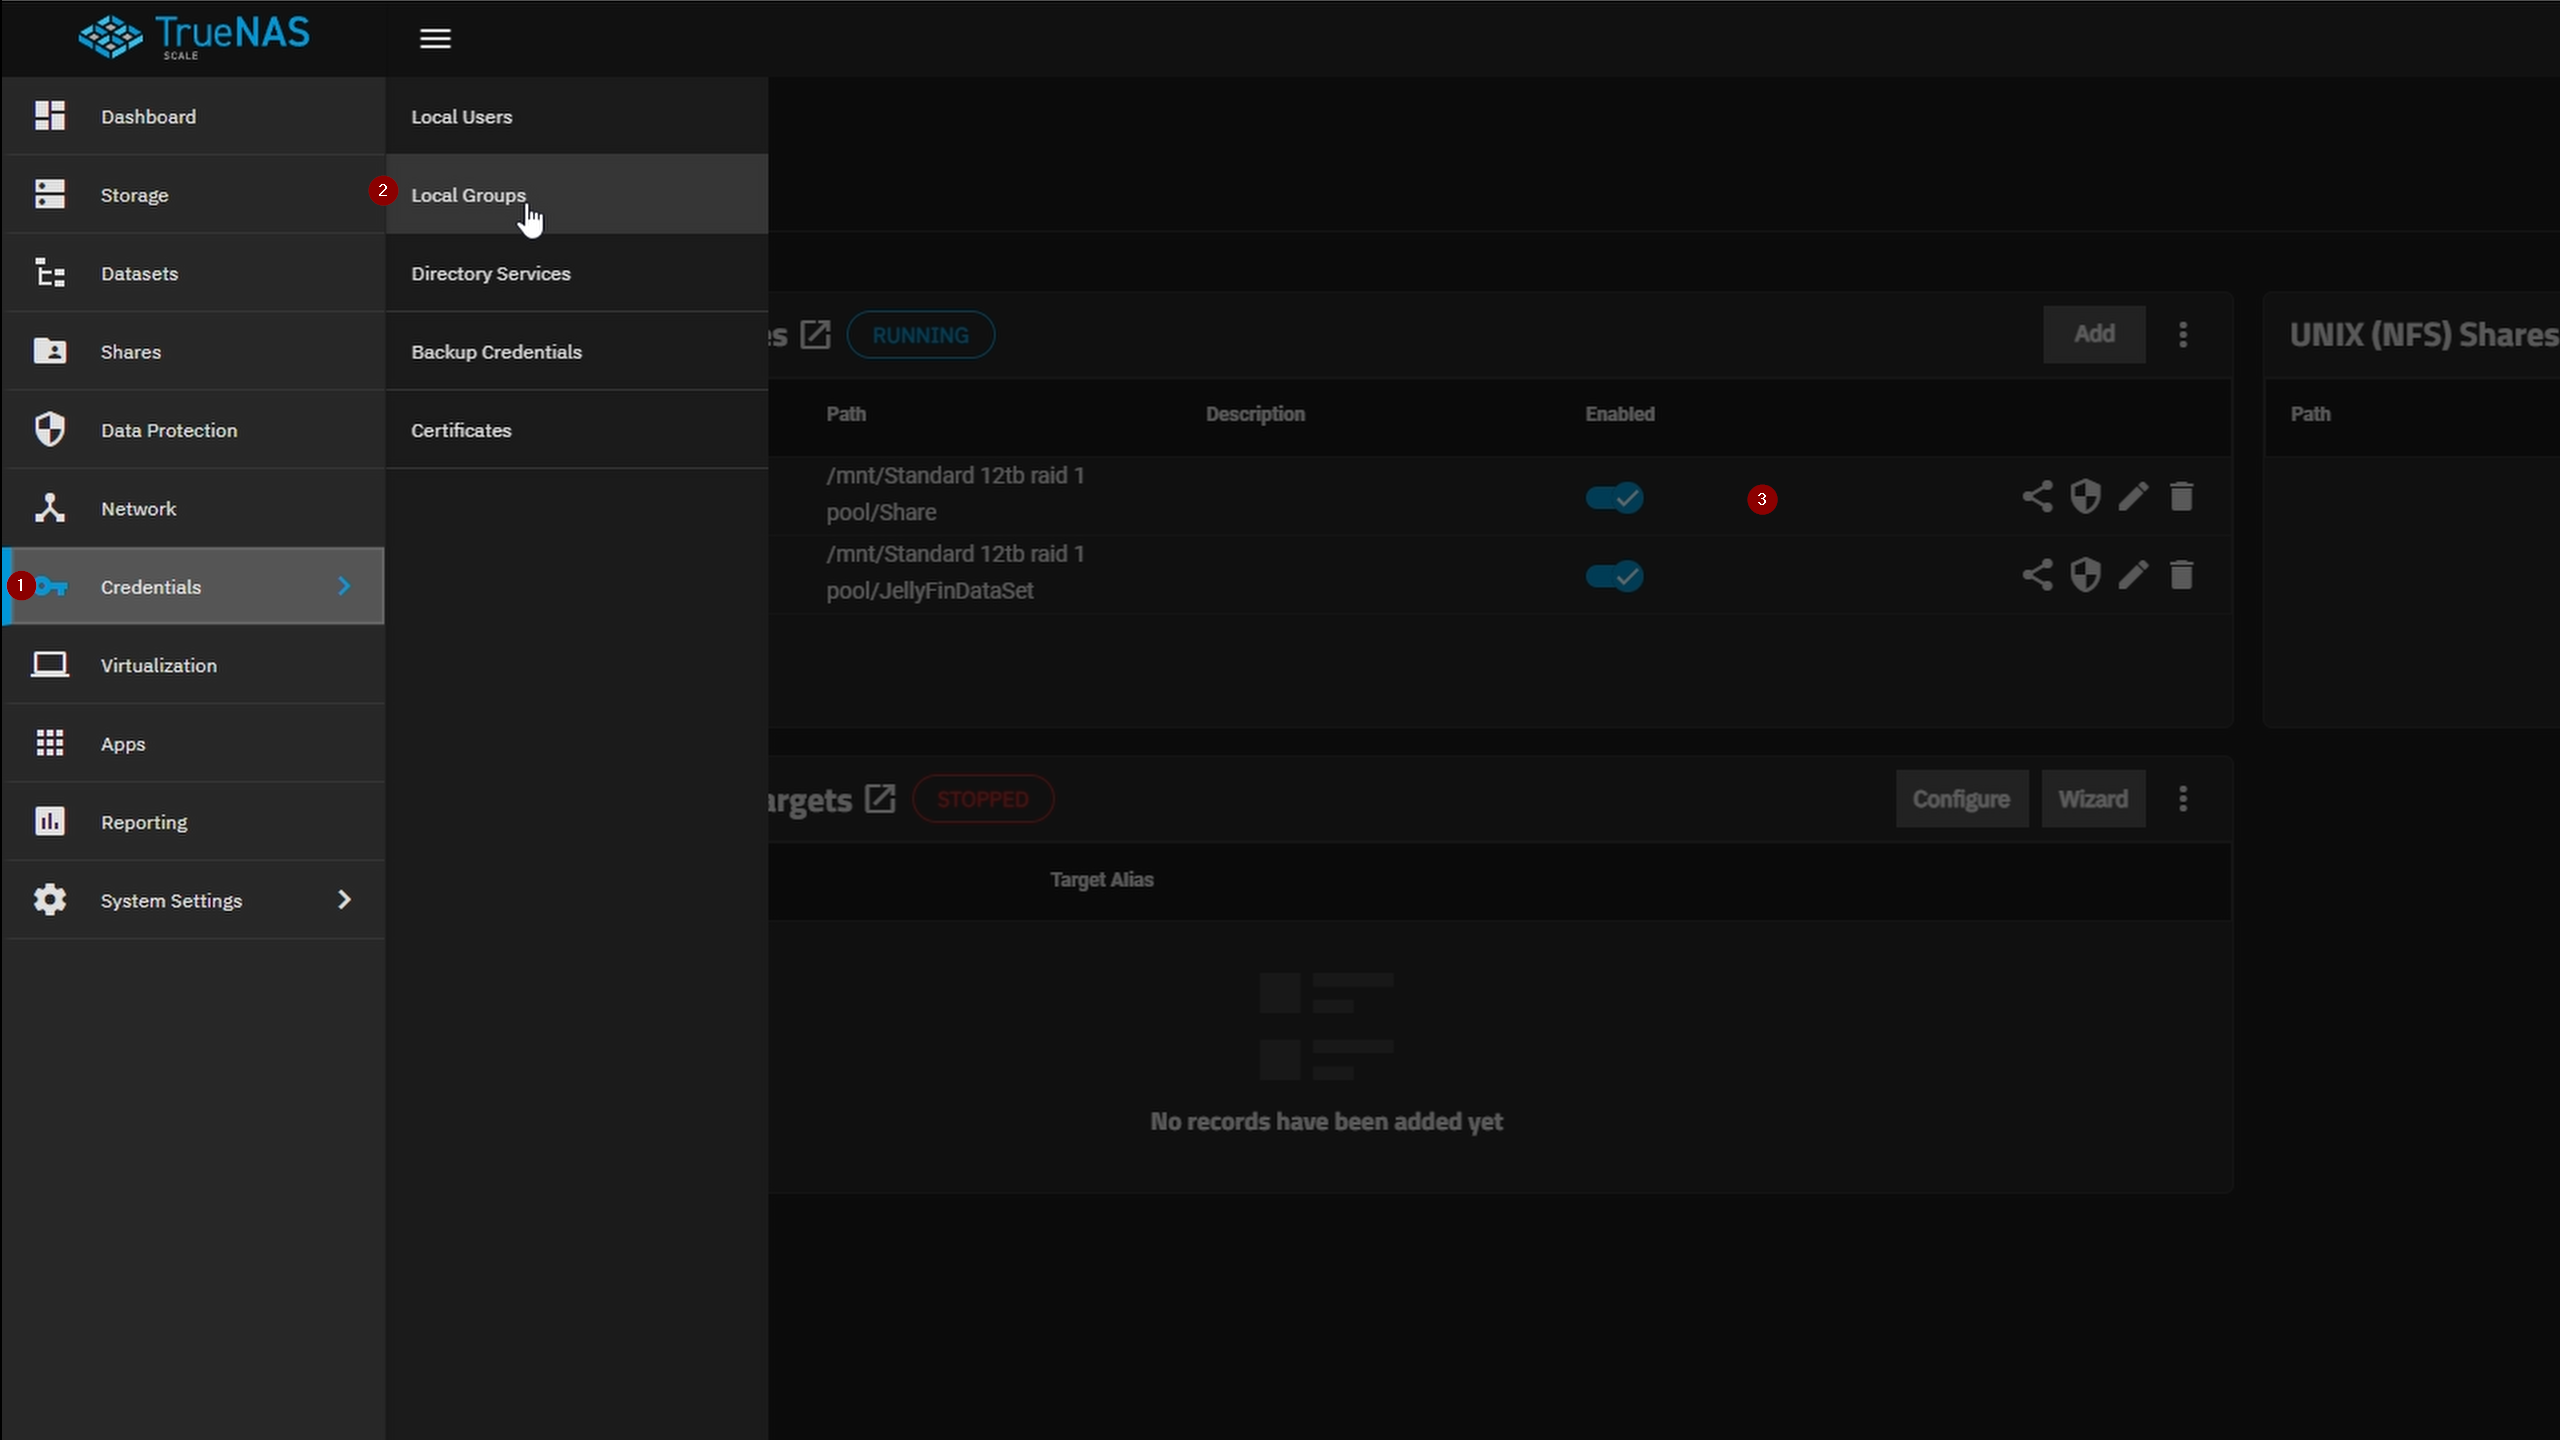
Create Local Group
Go to Credentials → Local Groups.
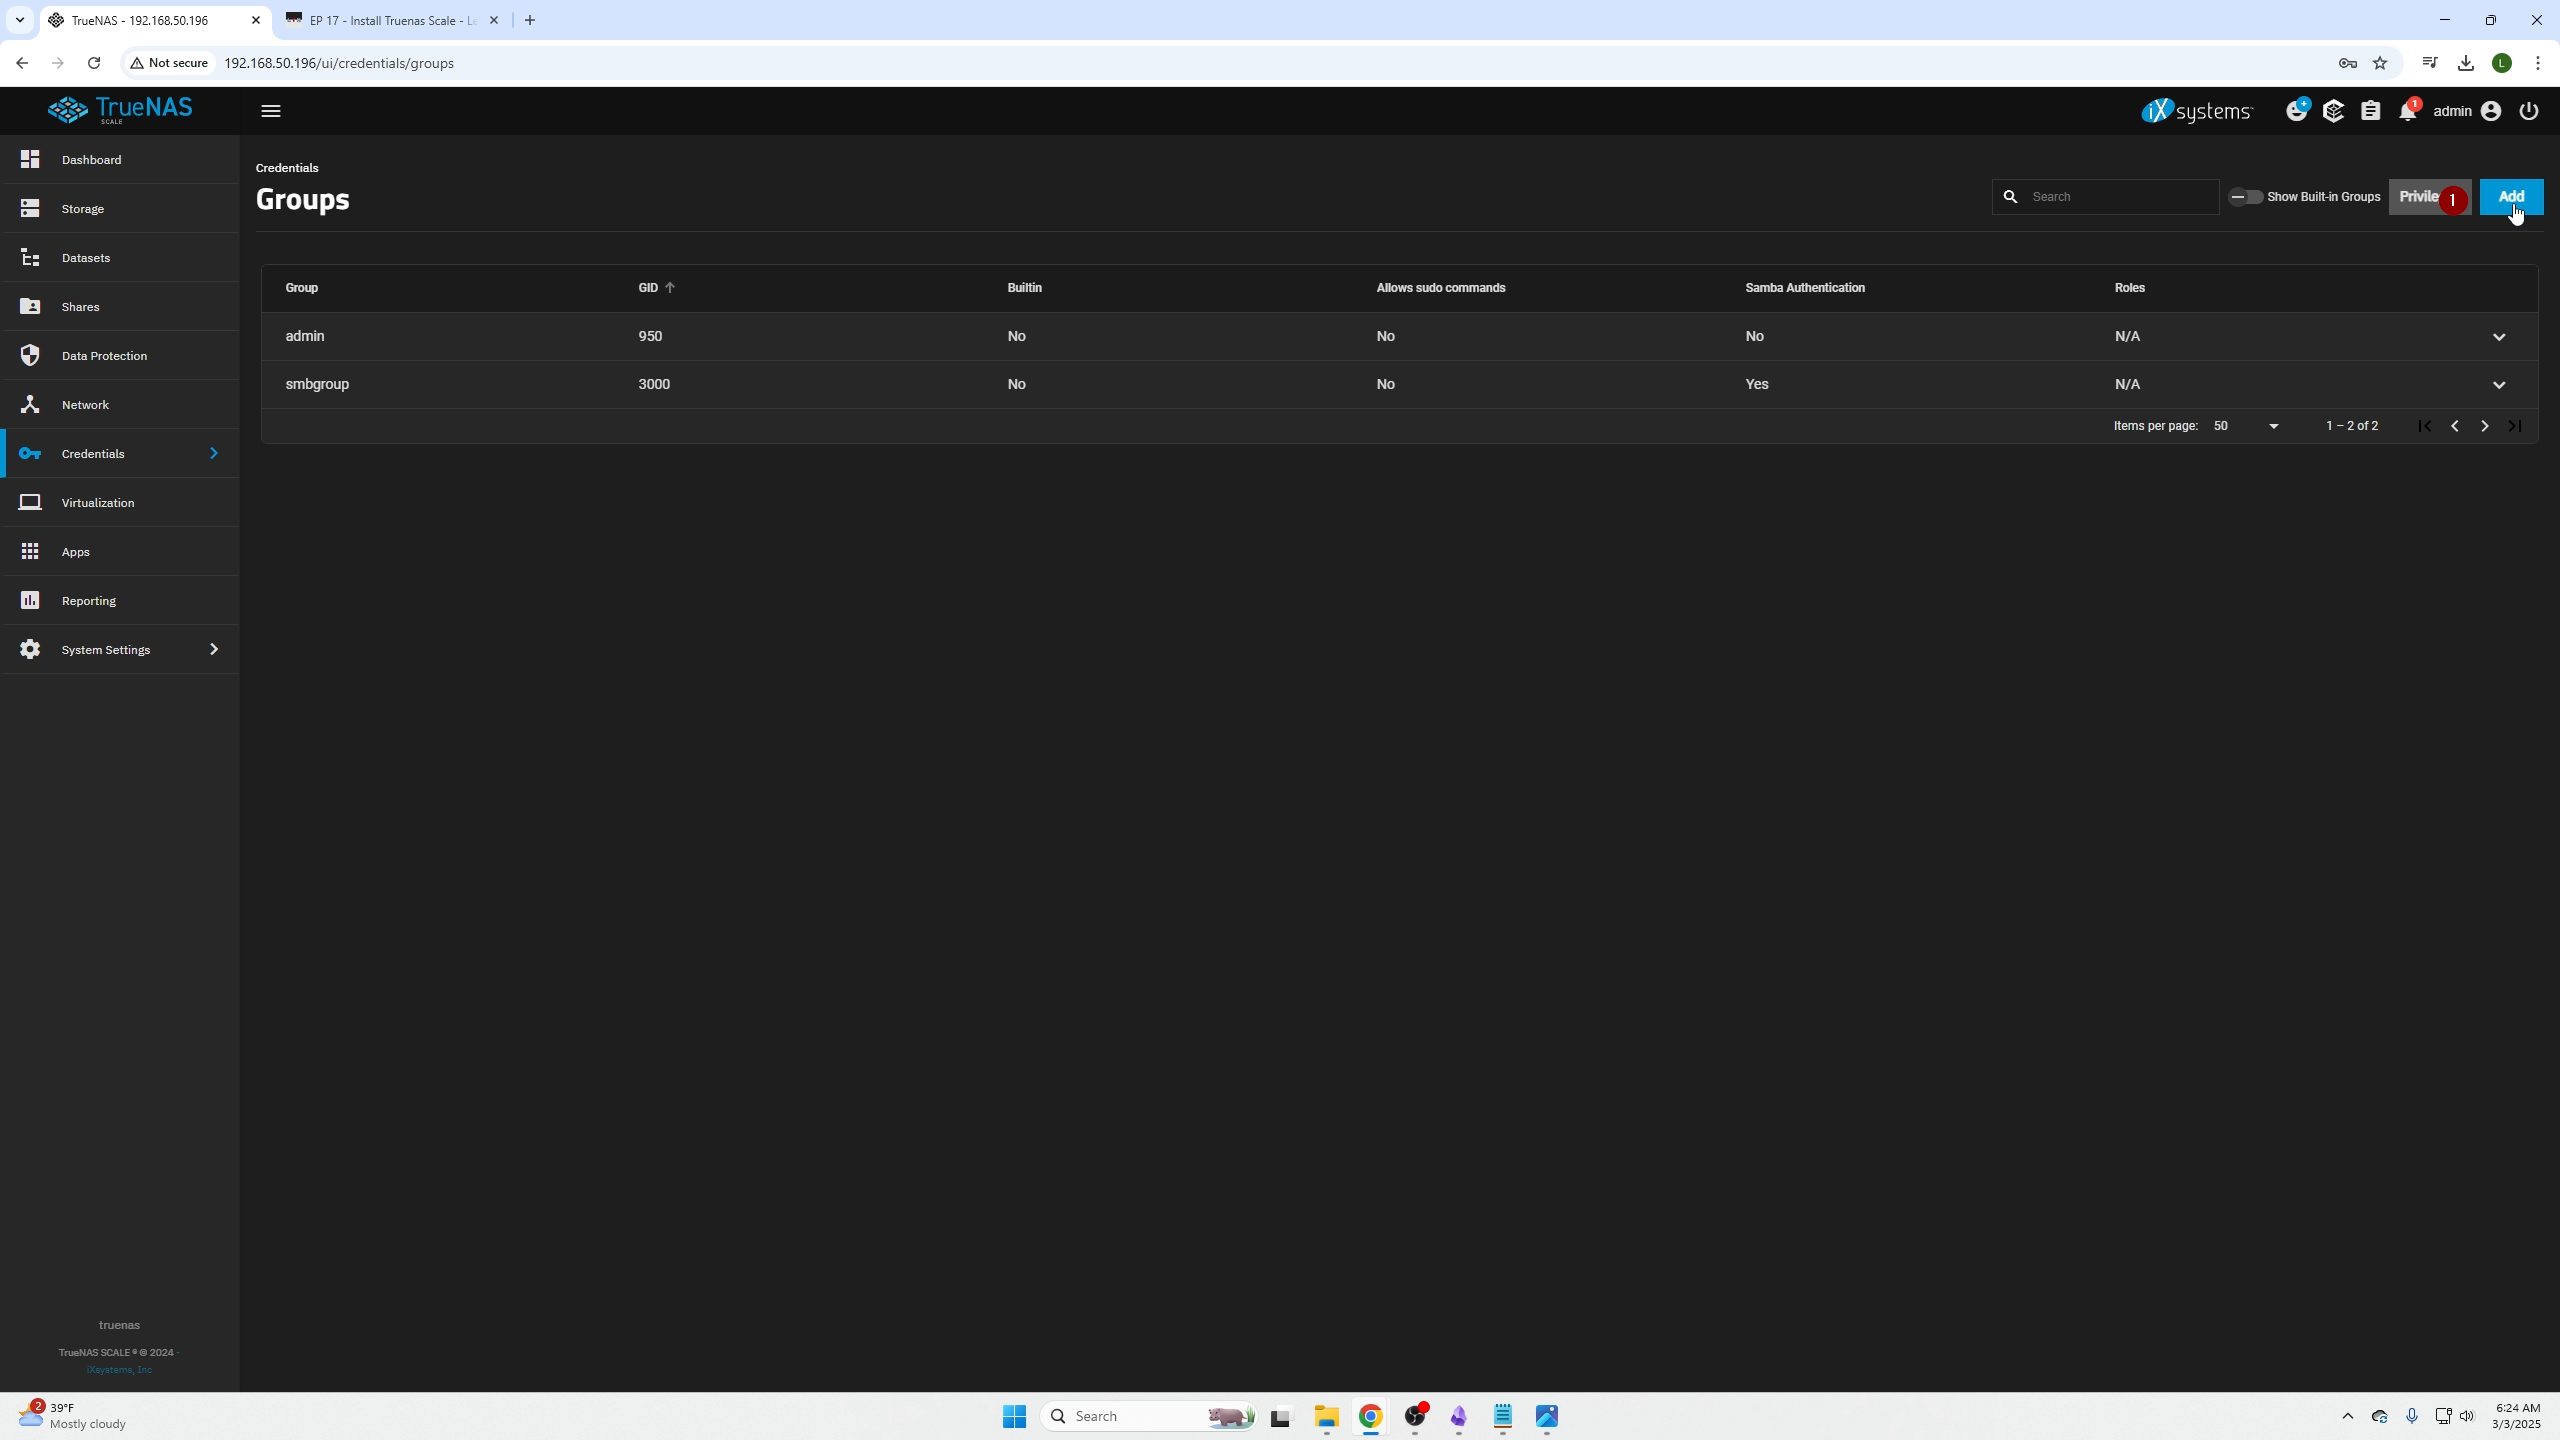
Click Add on the top right.
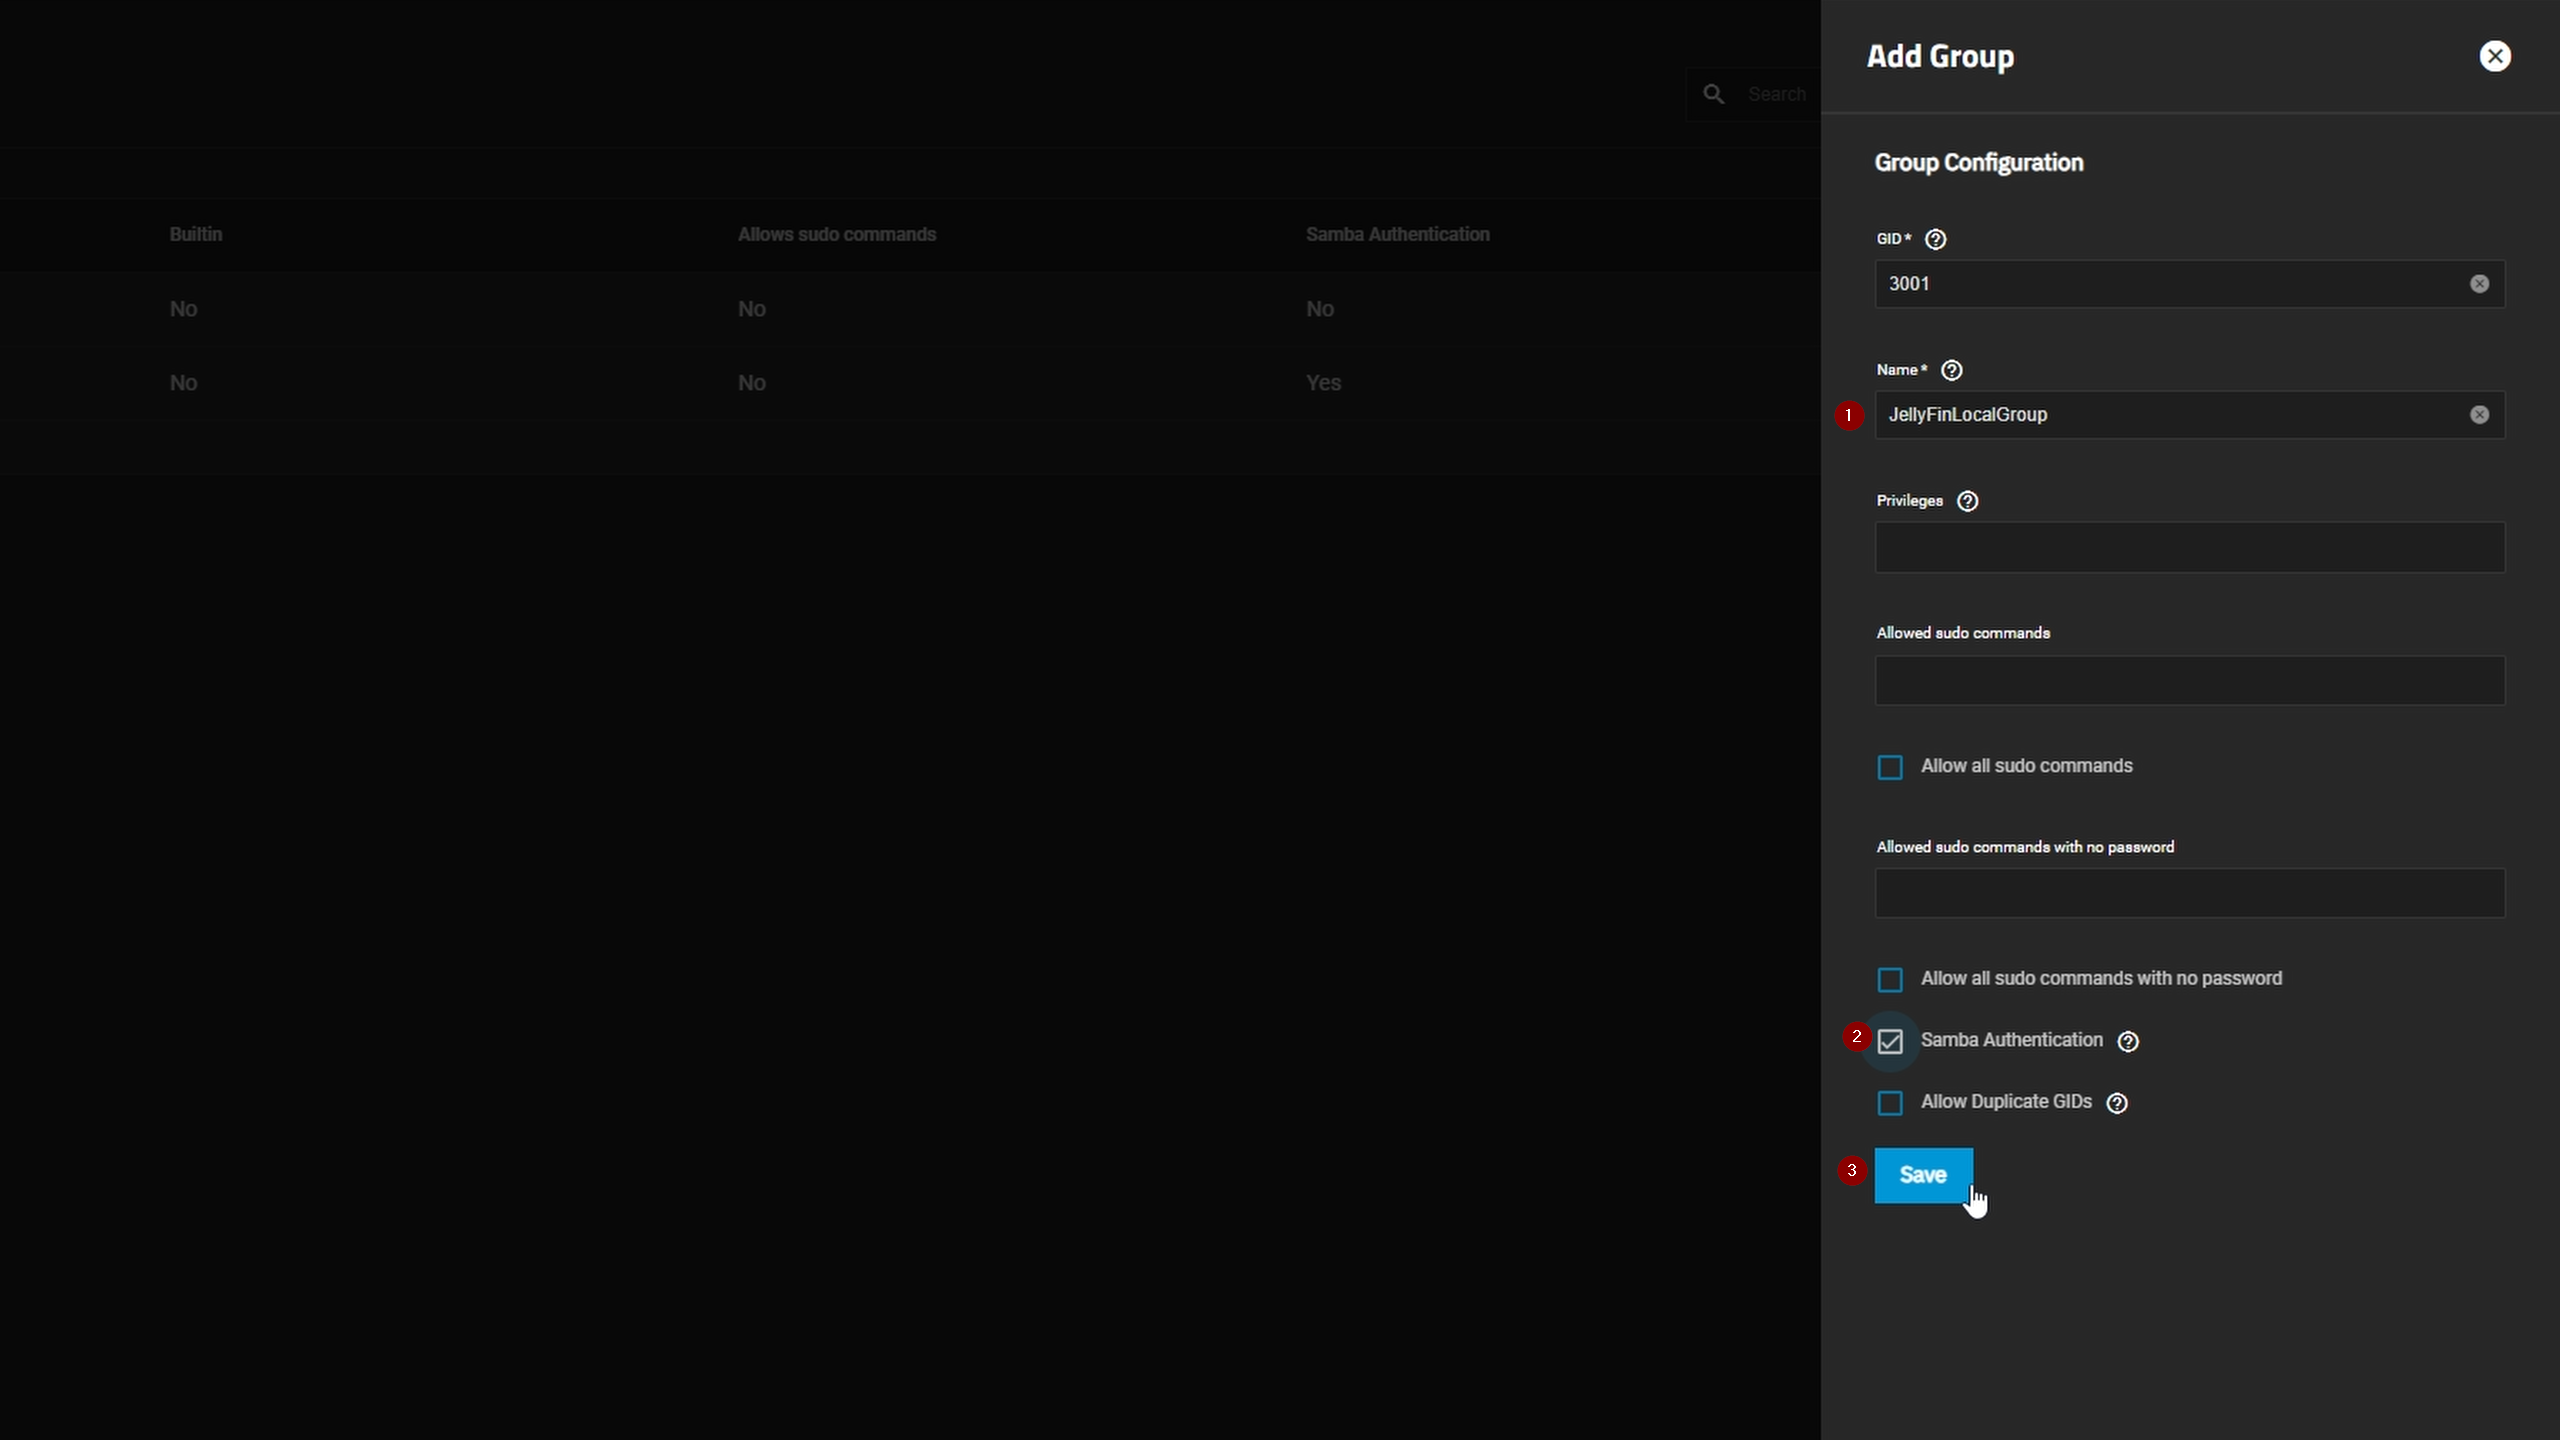
Give the group a name, enable Samba authentication, and save.
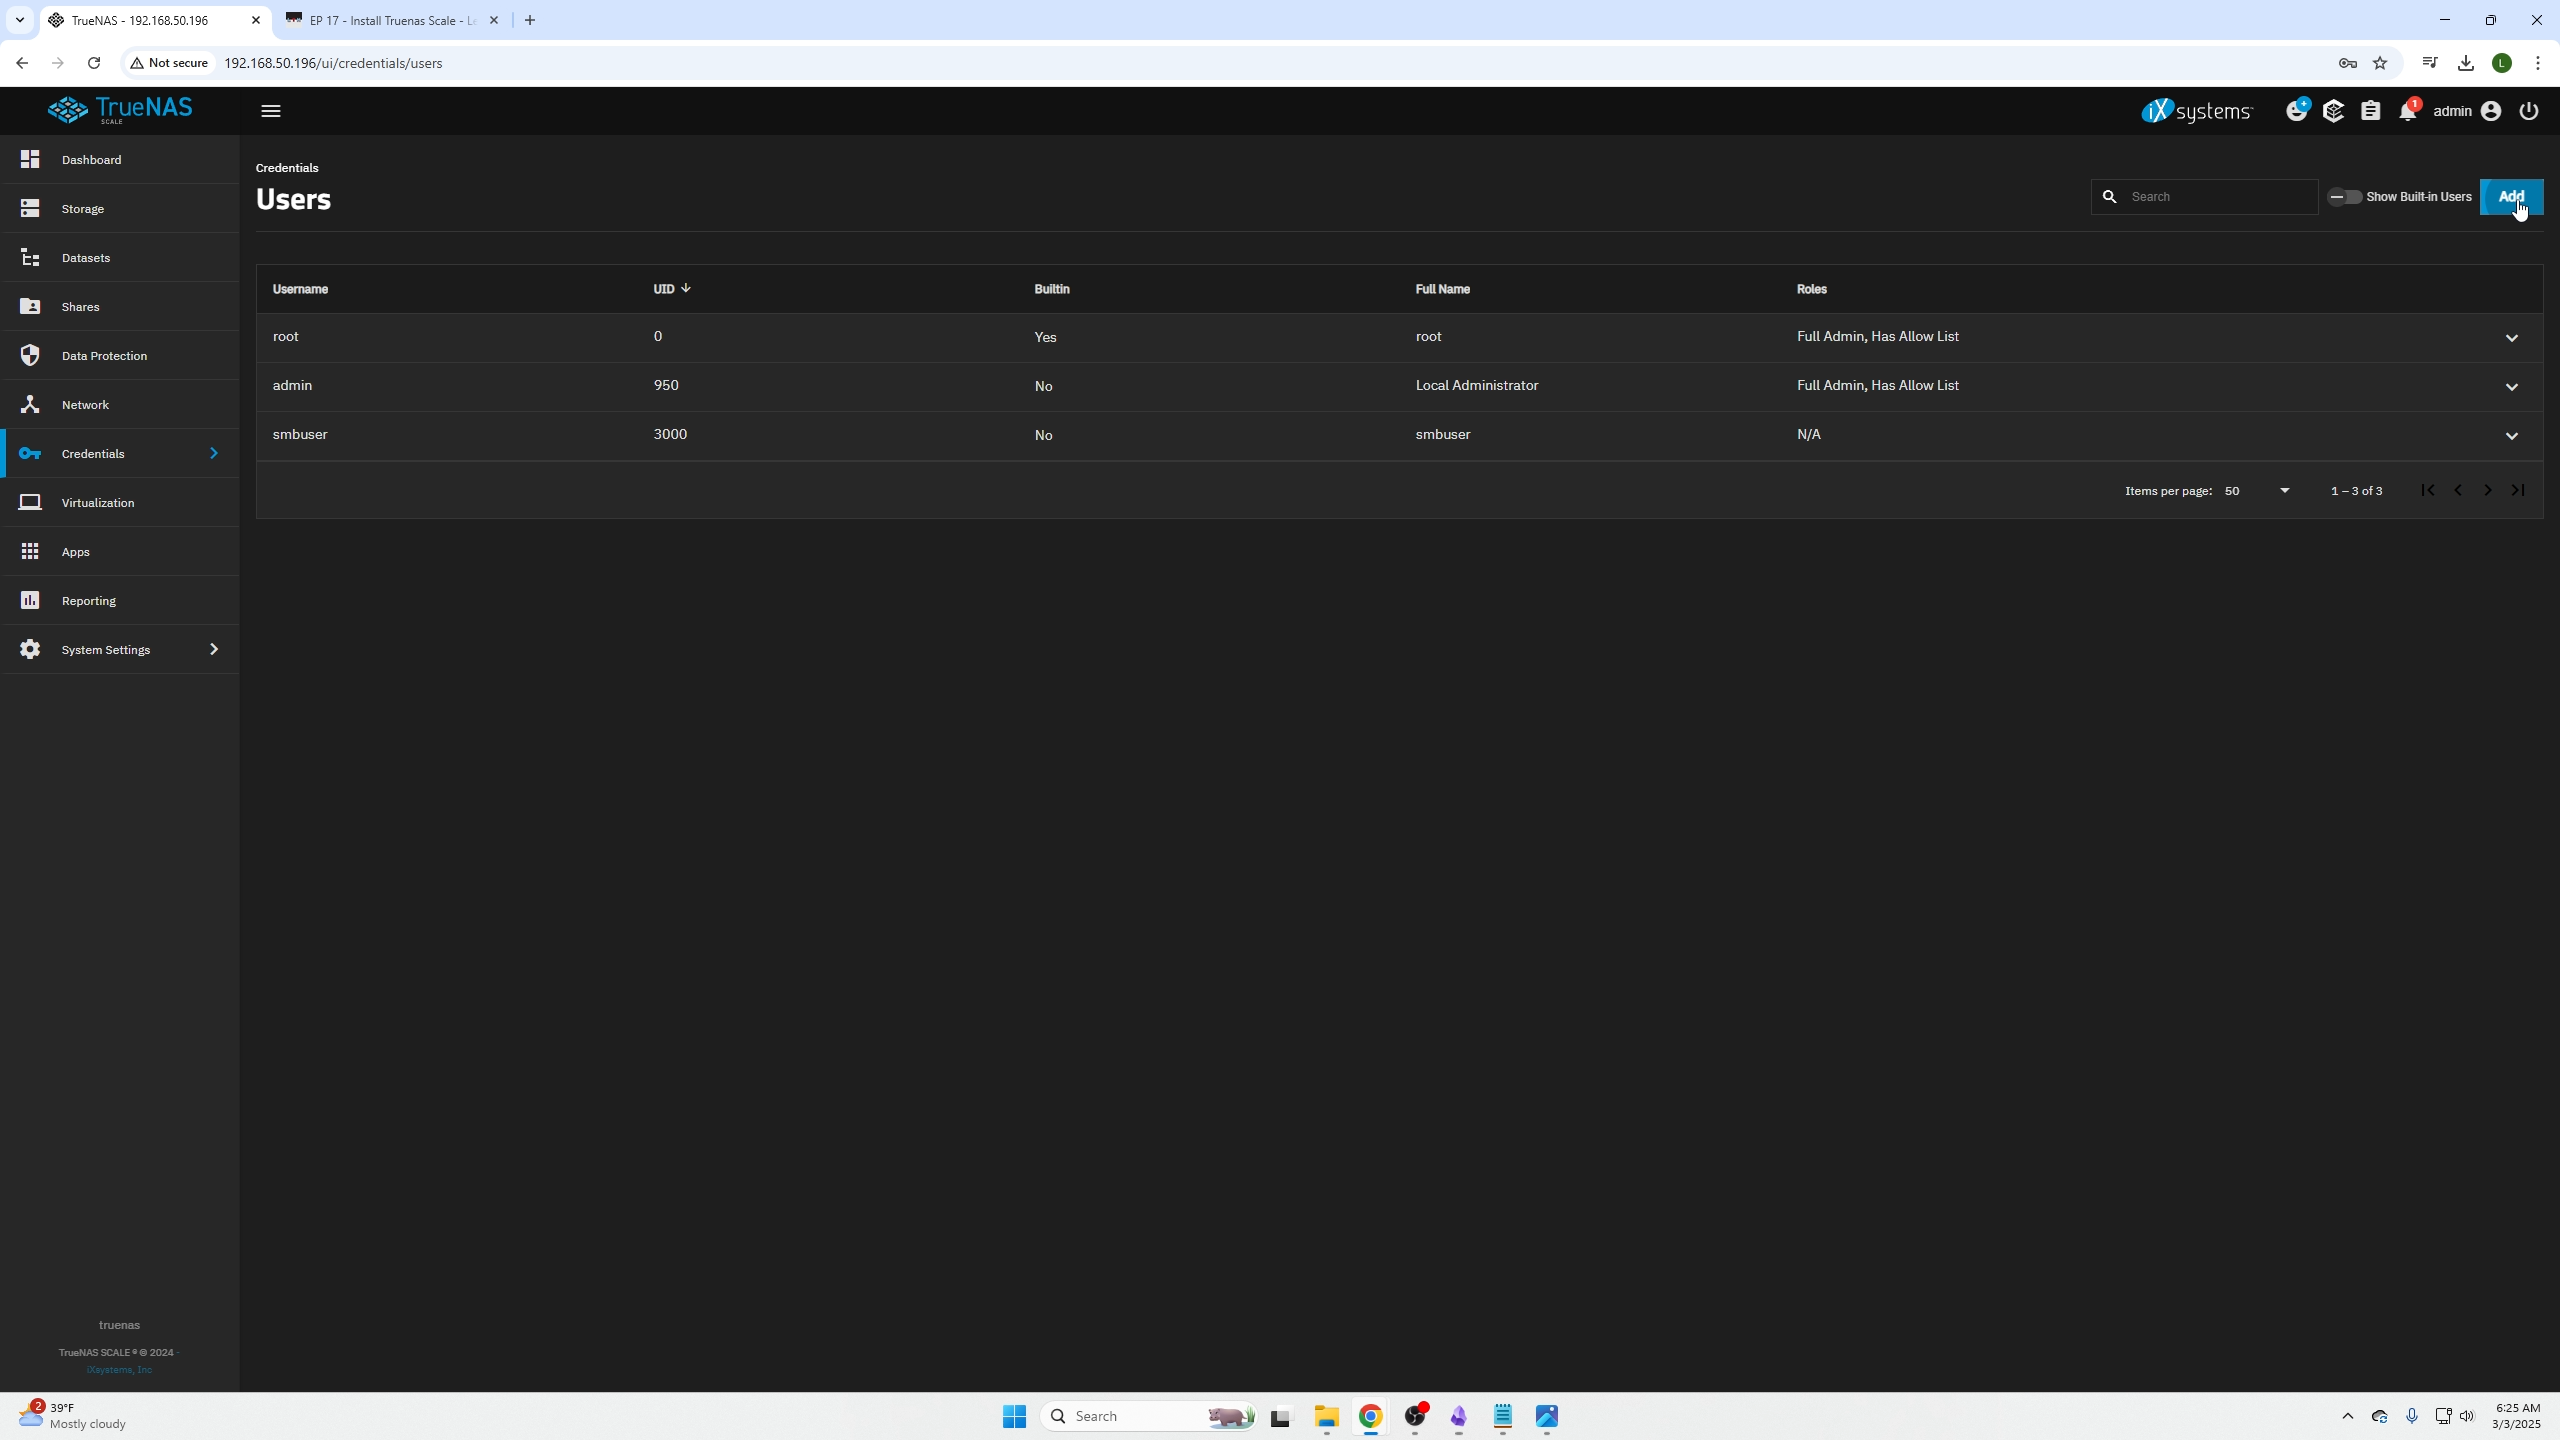
Create a Local User
Go to Local Users tab.
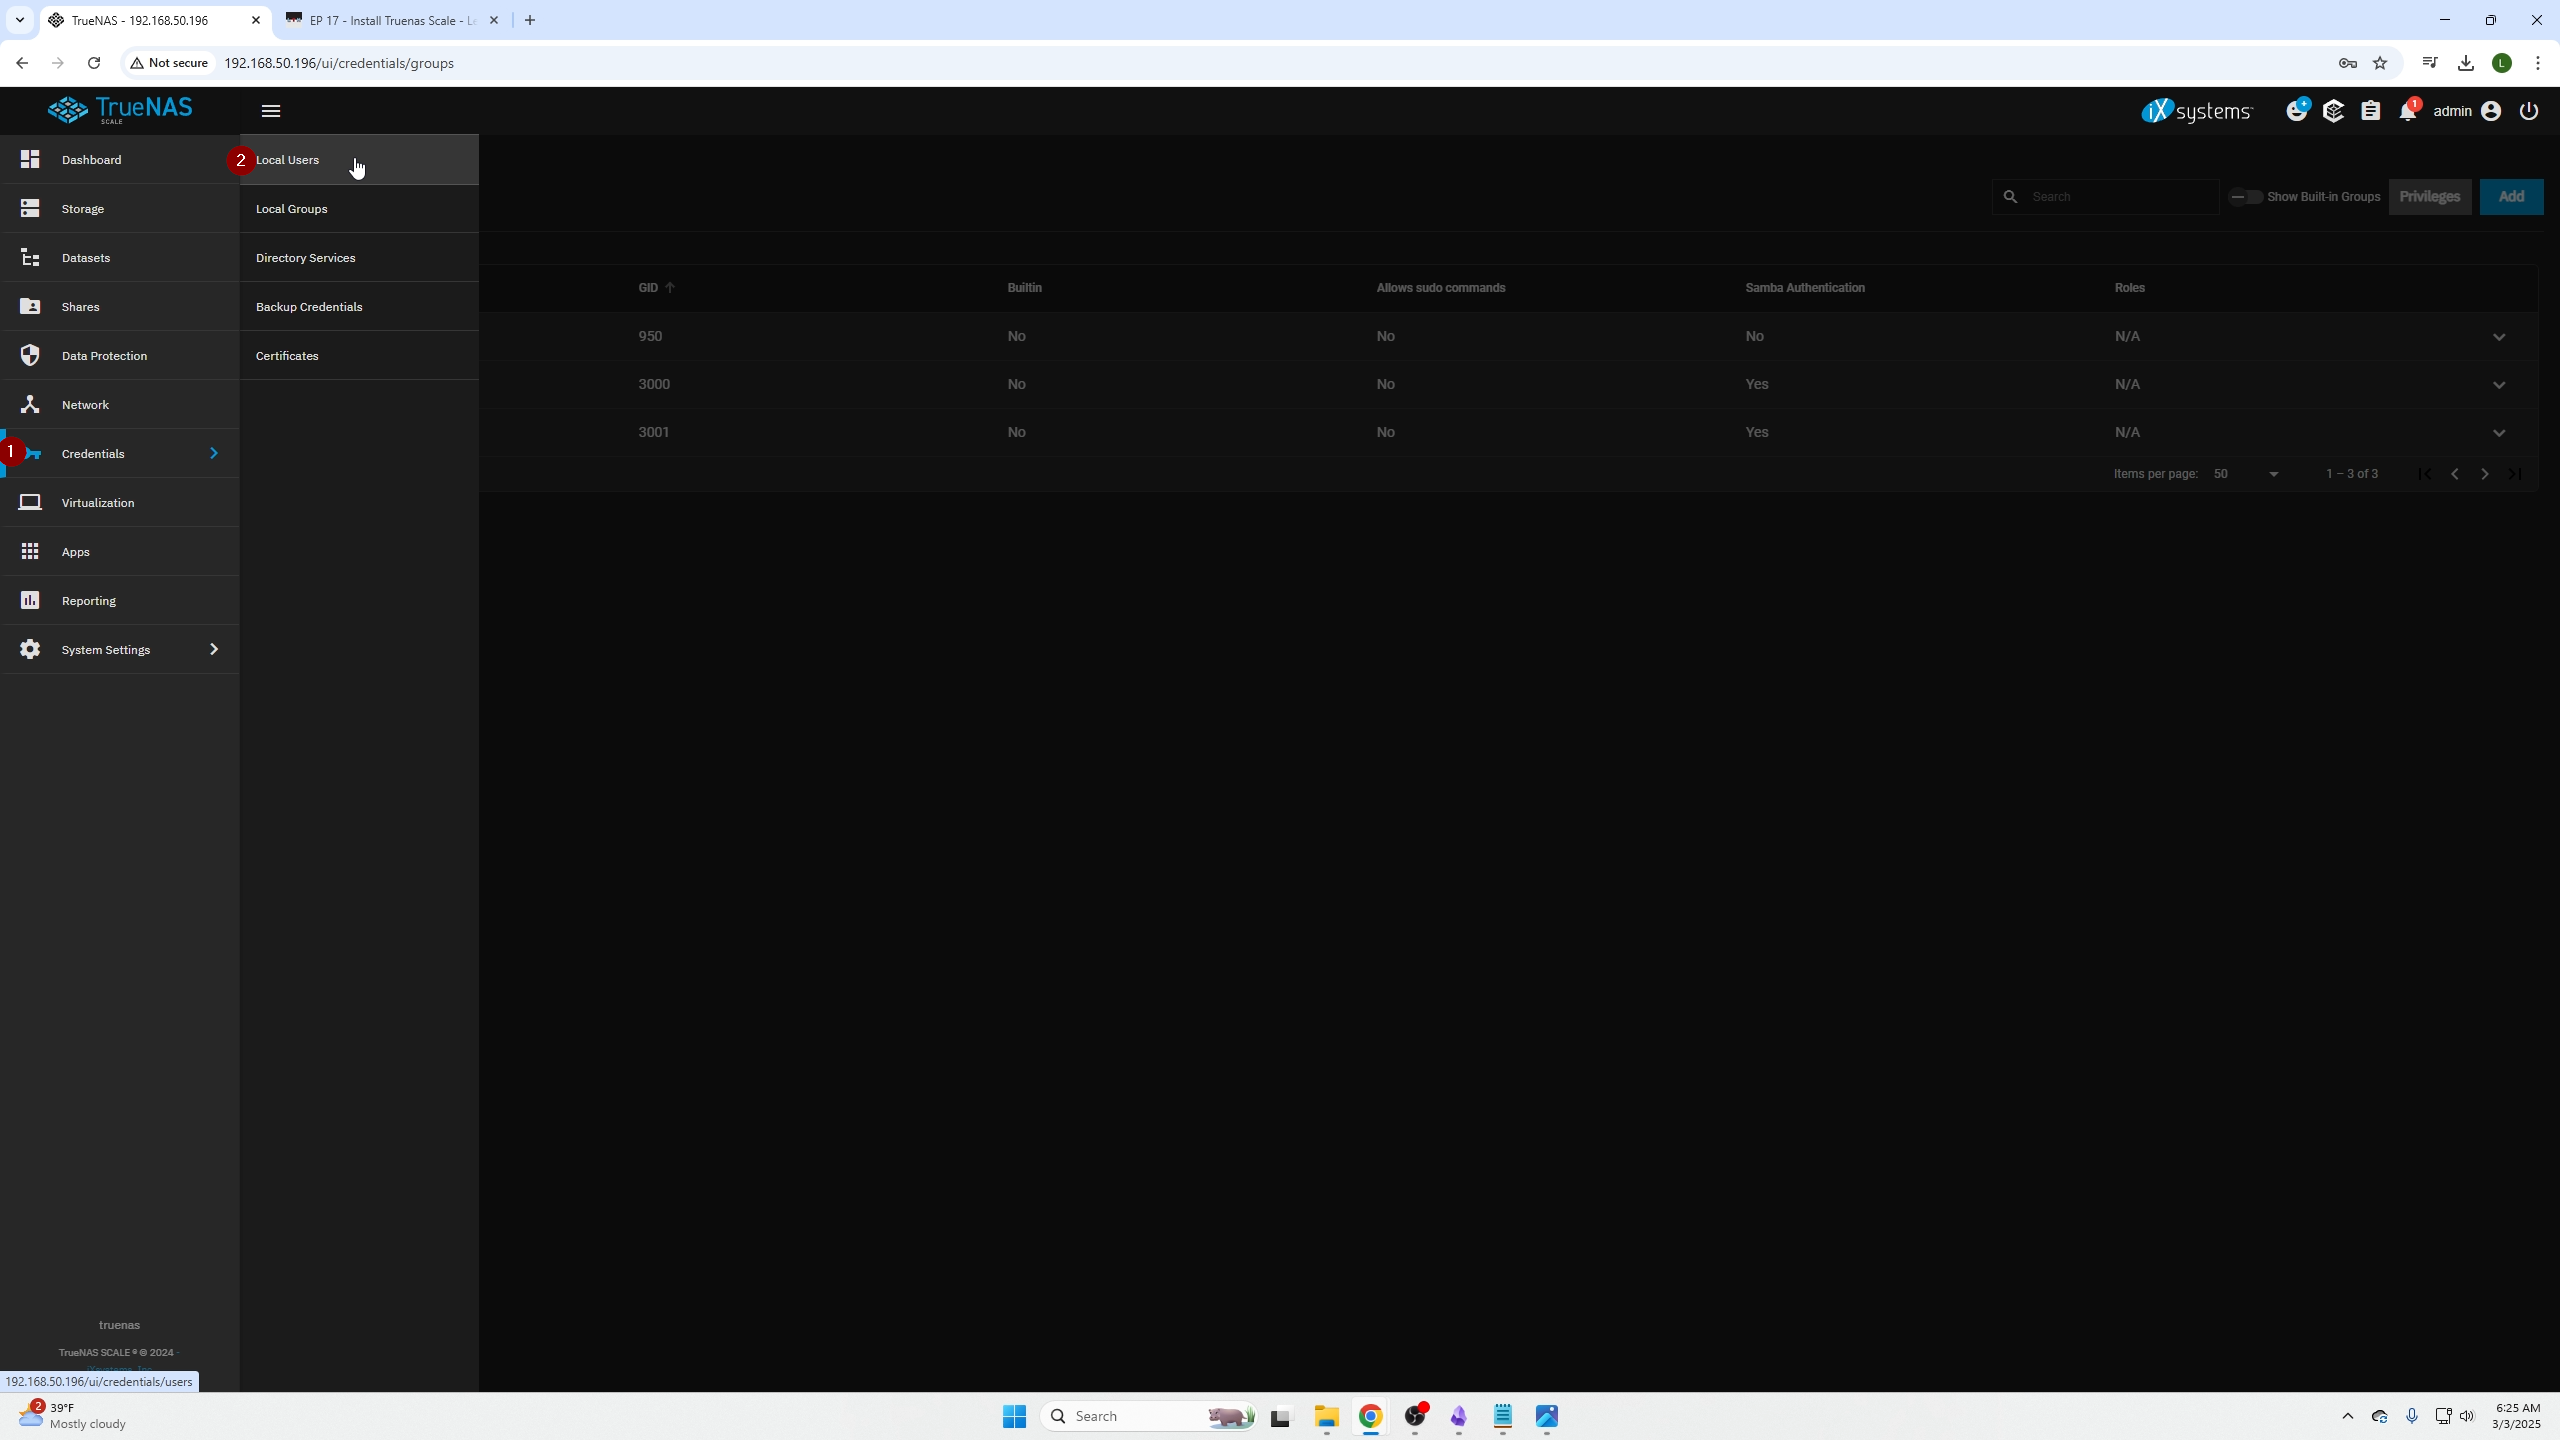
Click Add on top right.
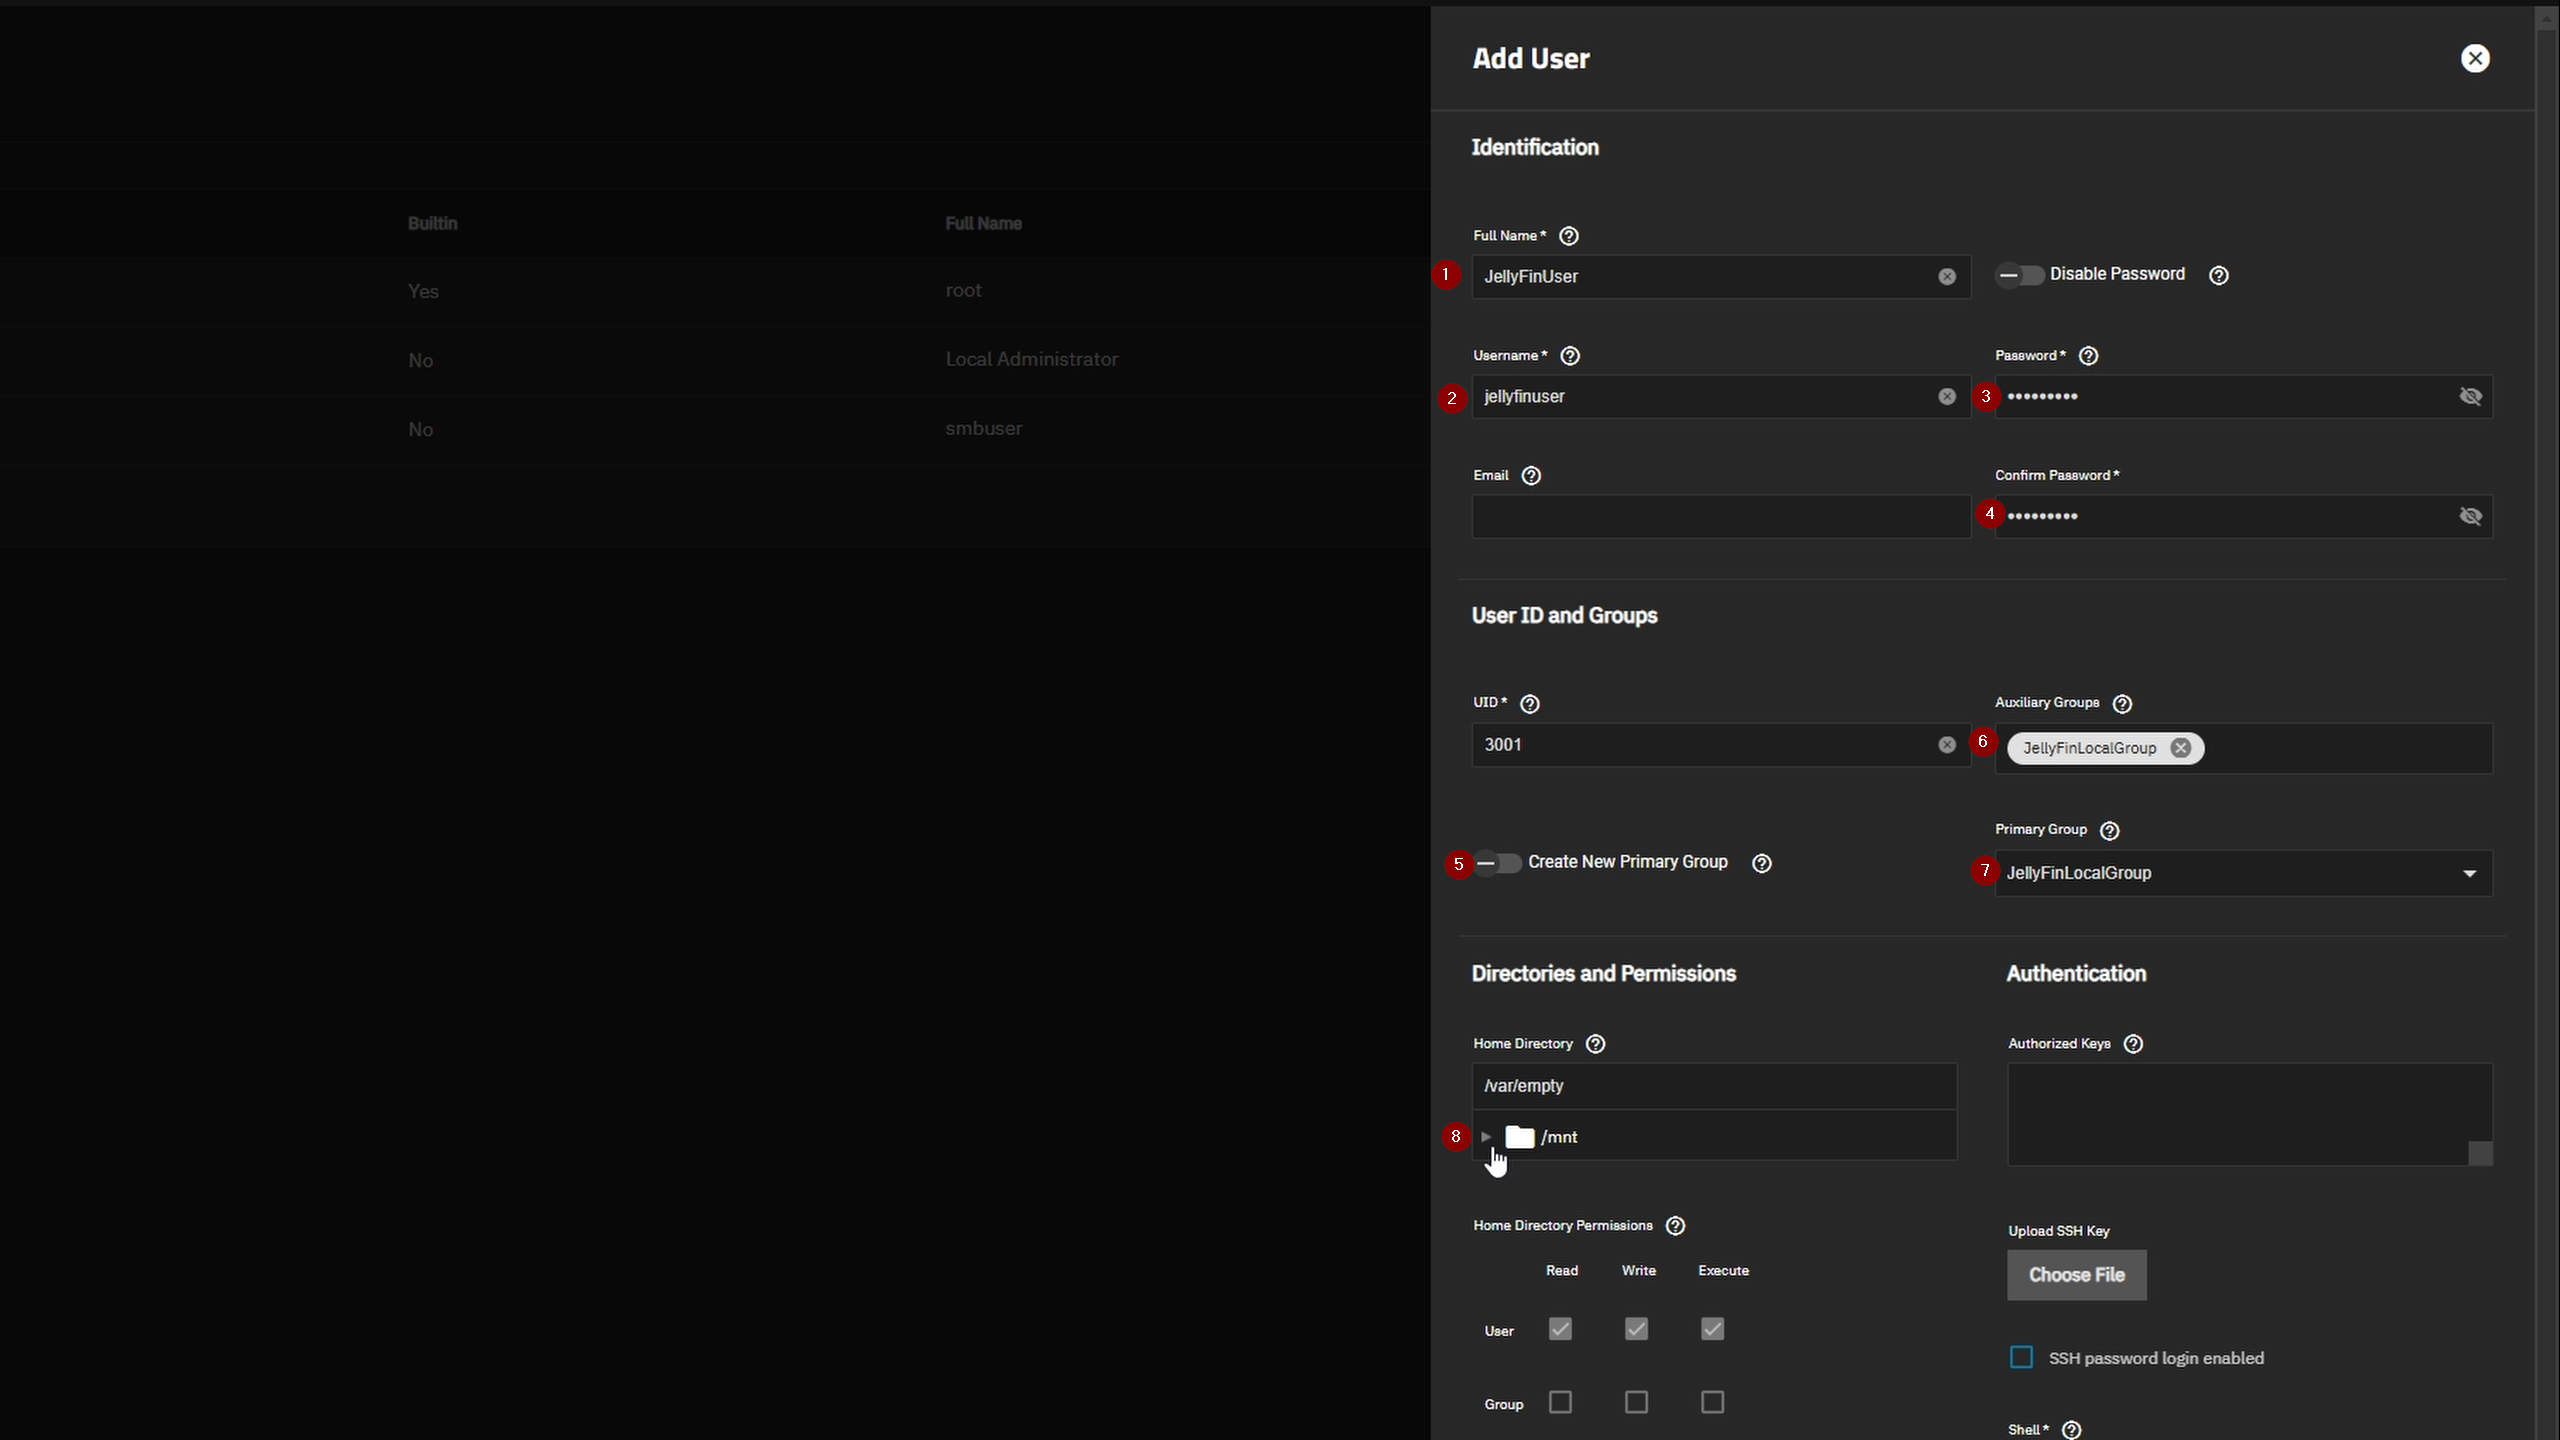
Configure the user:
- Assign full name
- Create username
- Set password
- Confirm password
- Turn off "Create a New Primary Group"
- Assign the previously created local group
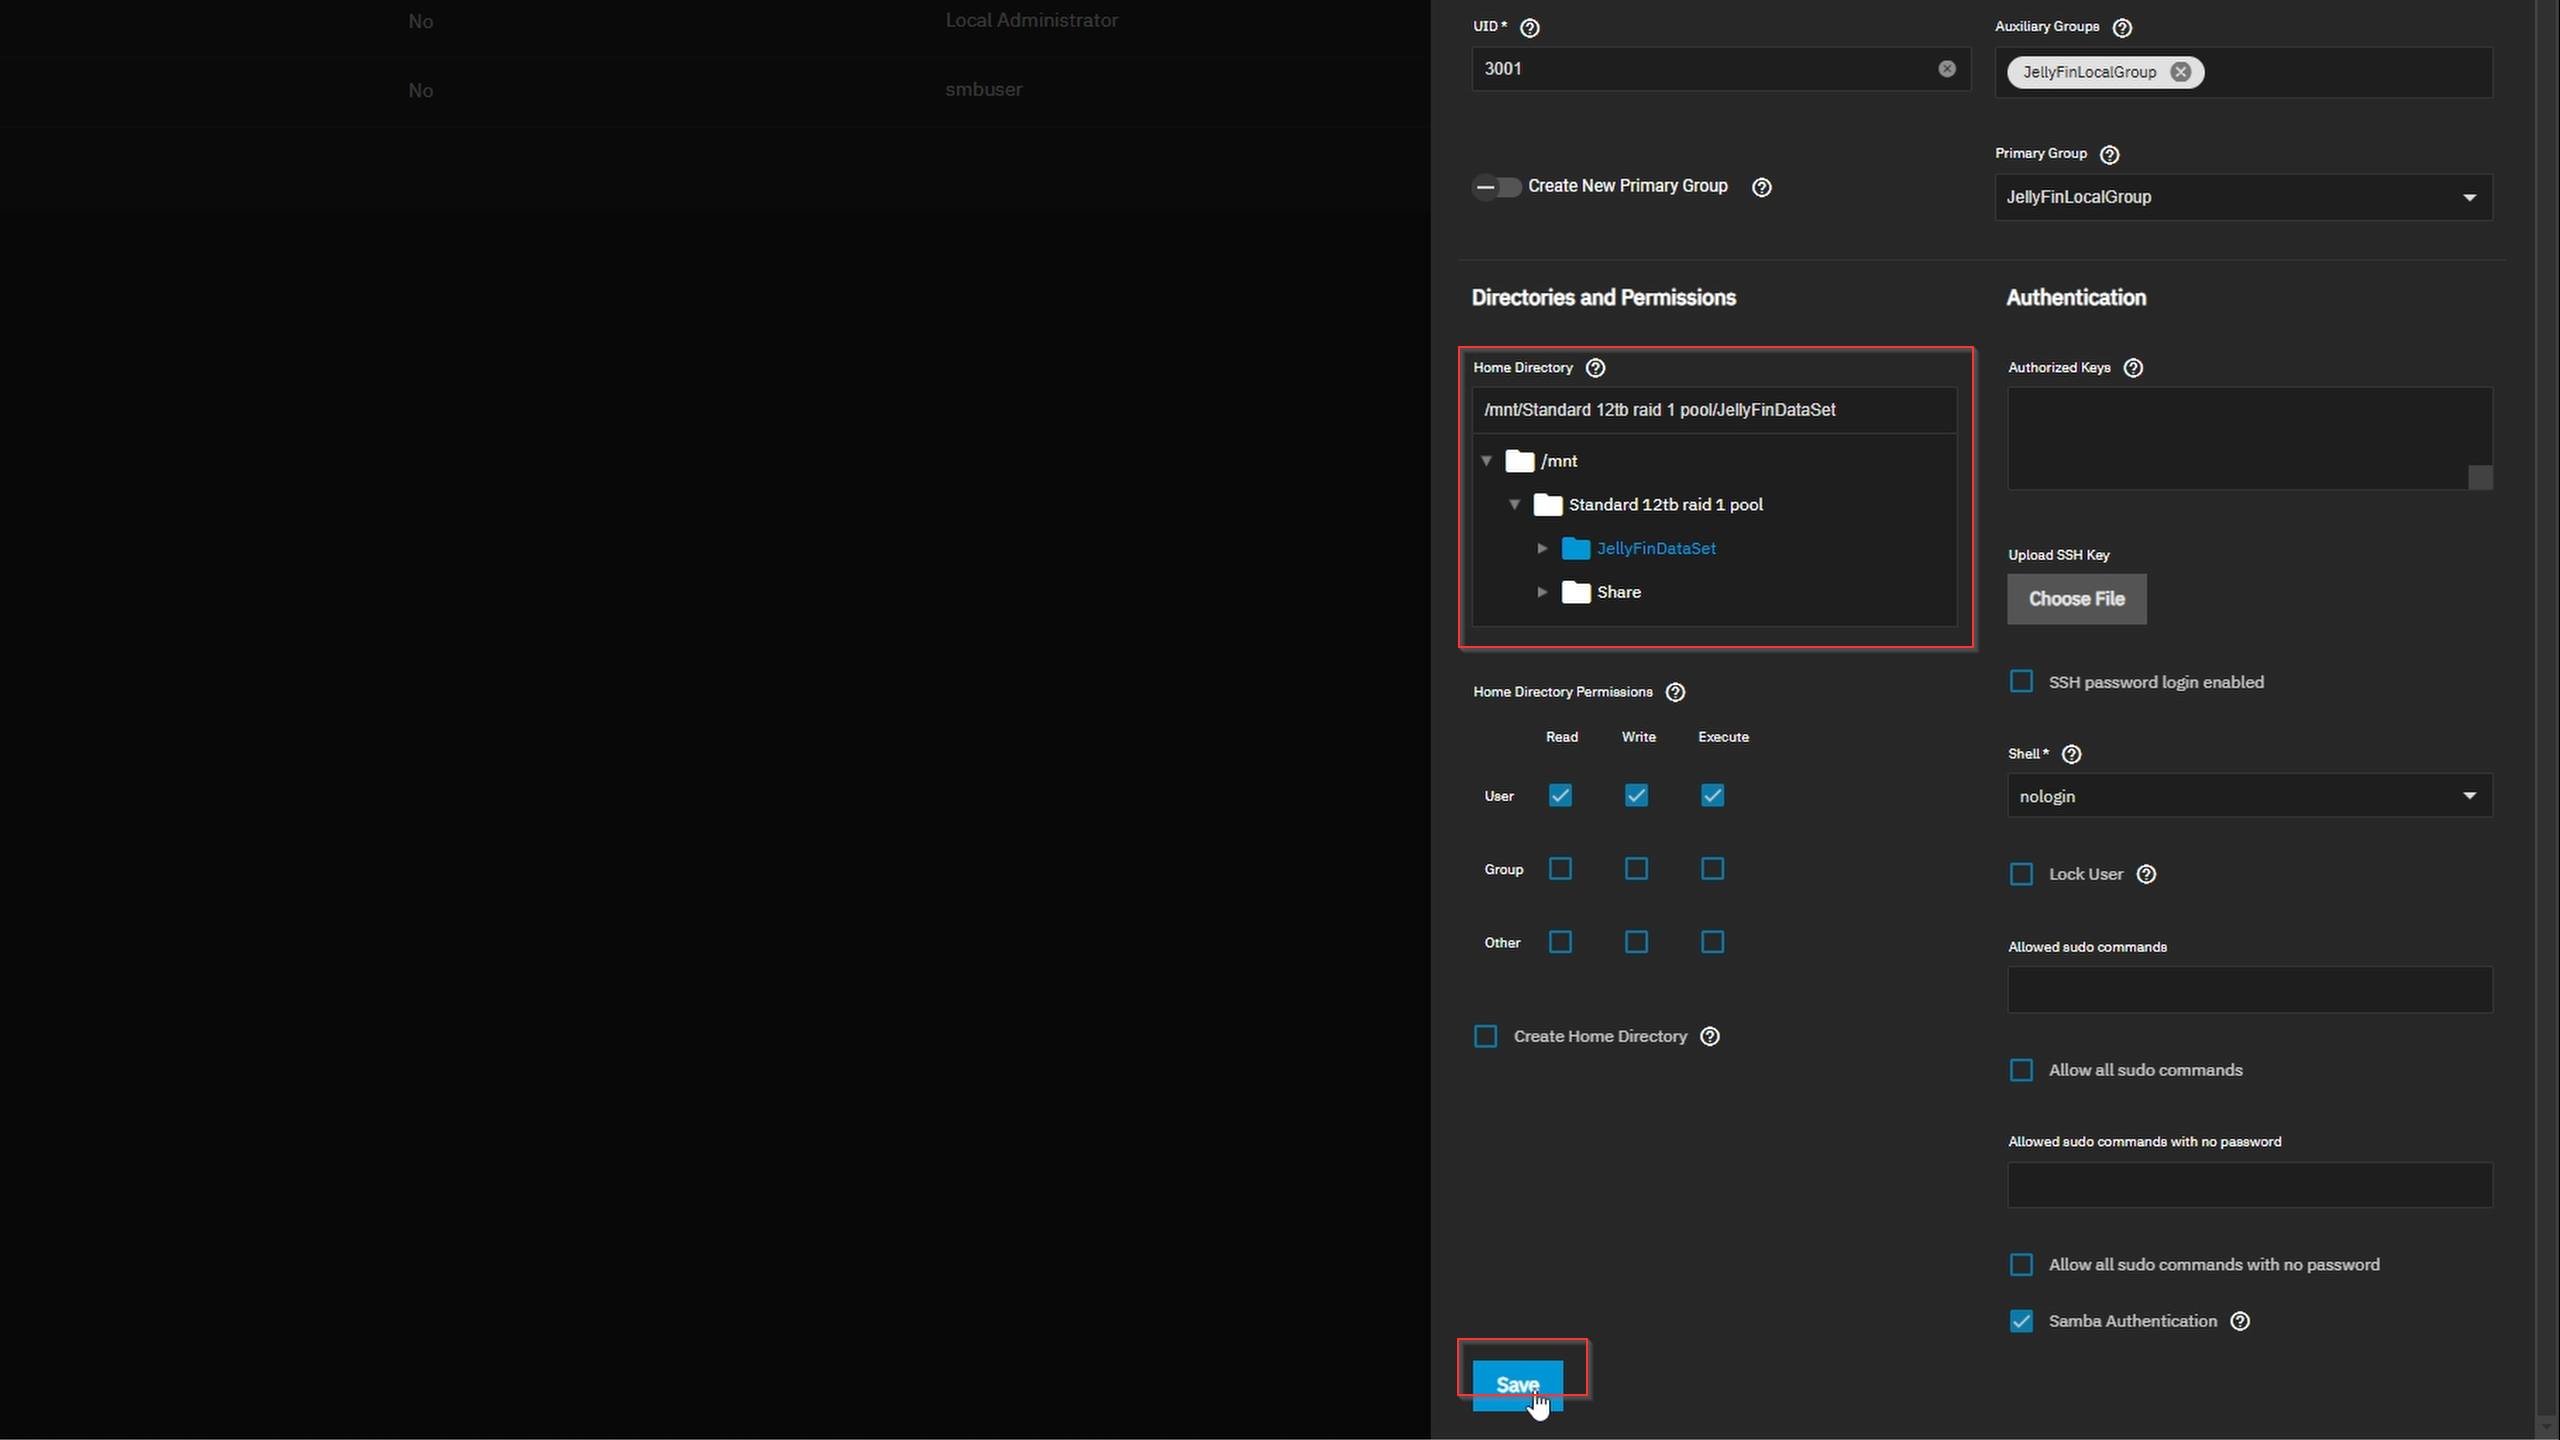
- Set the home directory to your JellyFin SMB share folder
Scroll to the bottom and click Save.
Enable SMB on TrueNAS
Navigate to System Settings → Services.
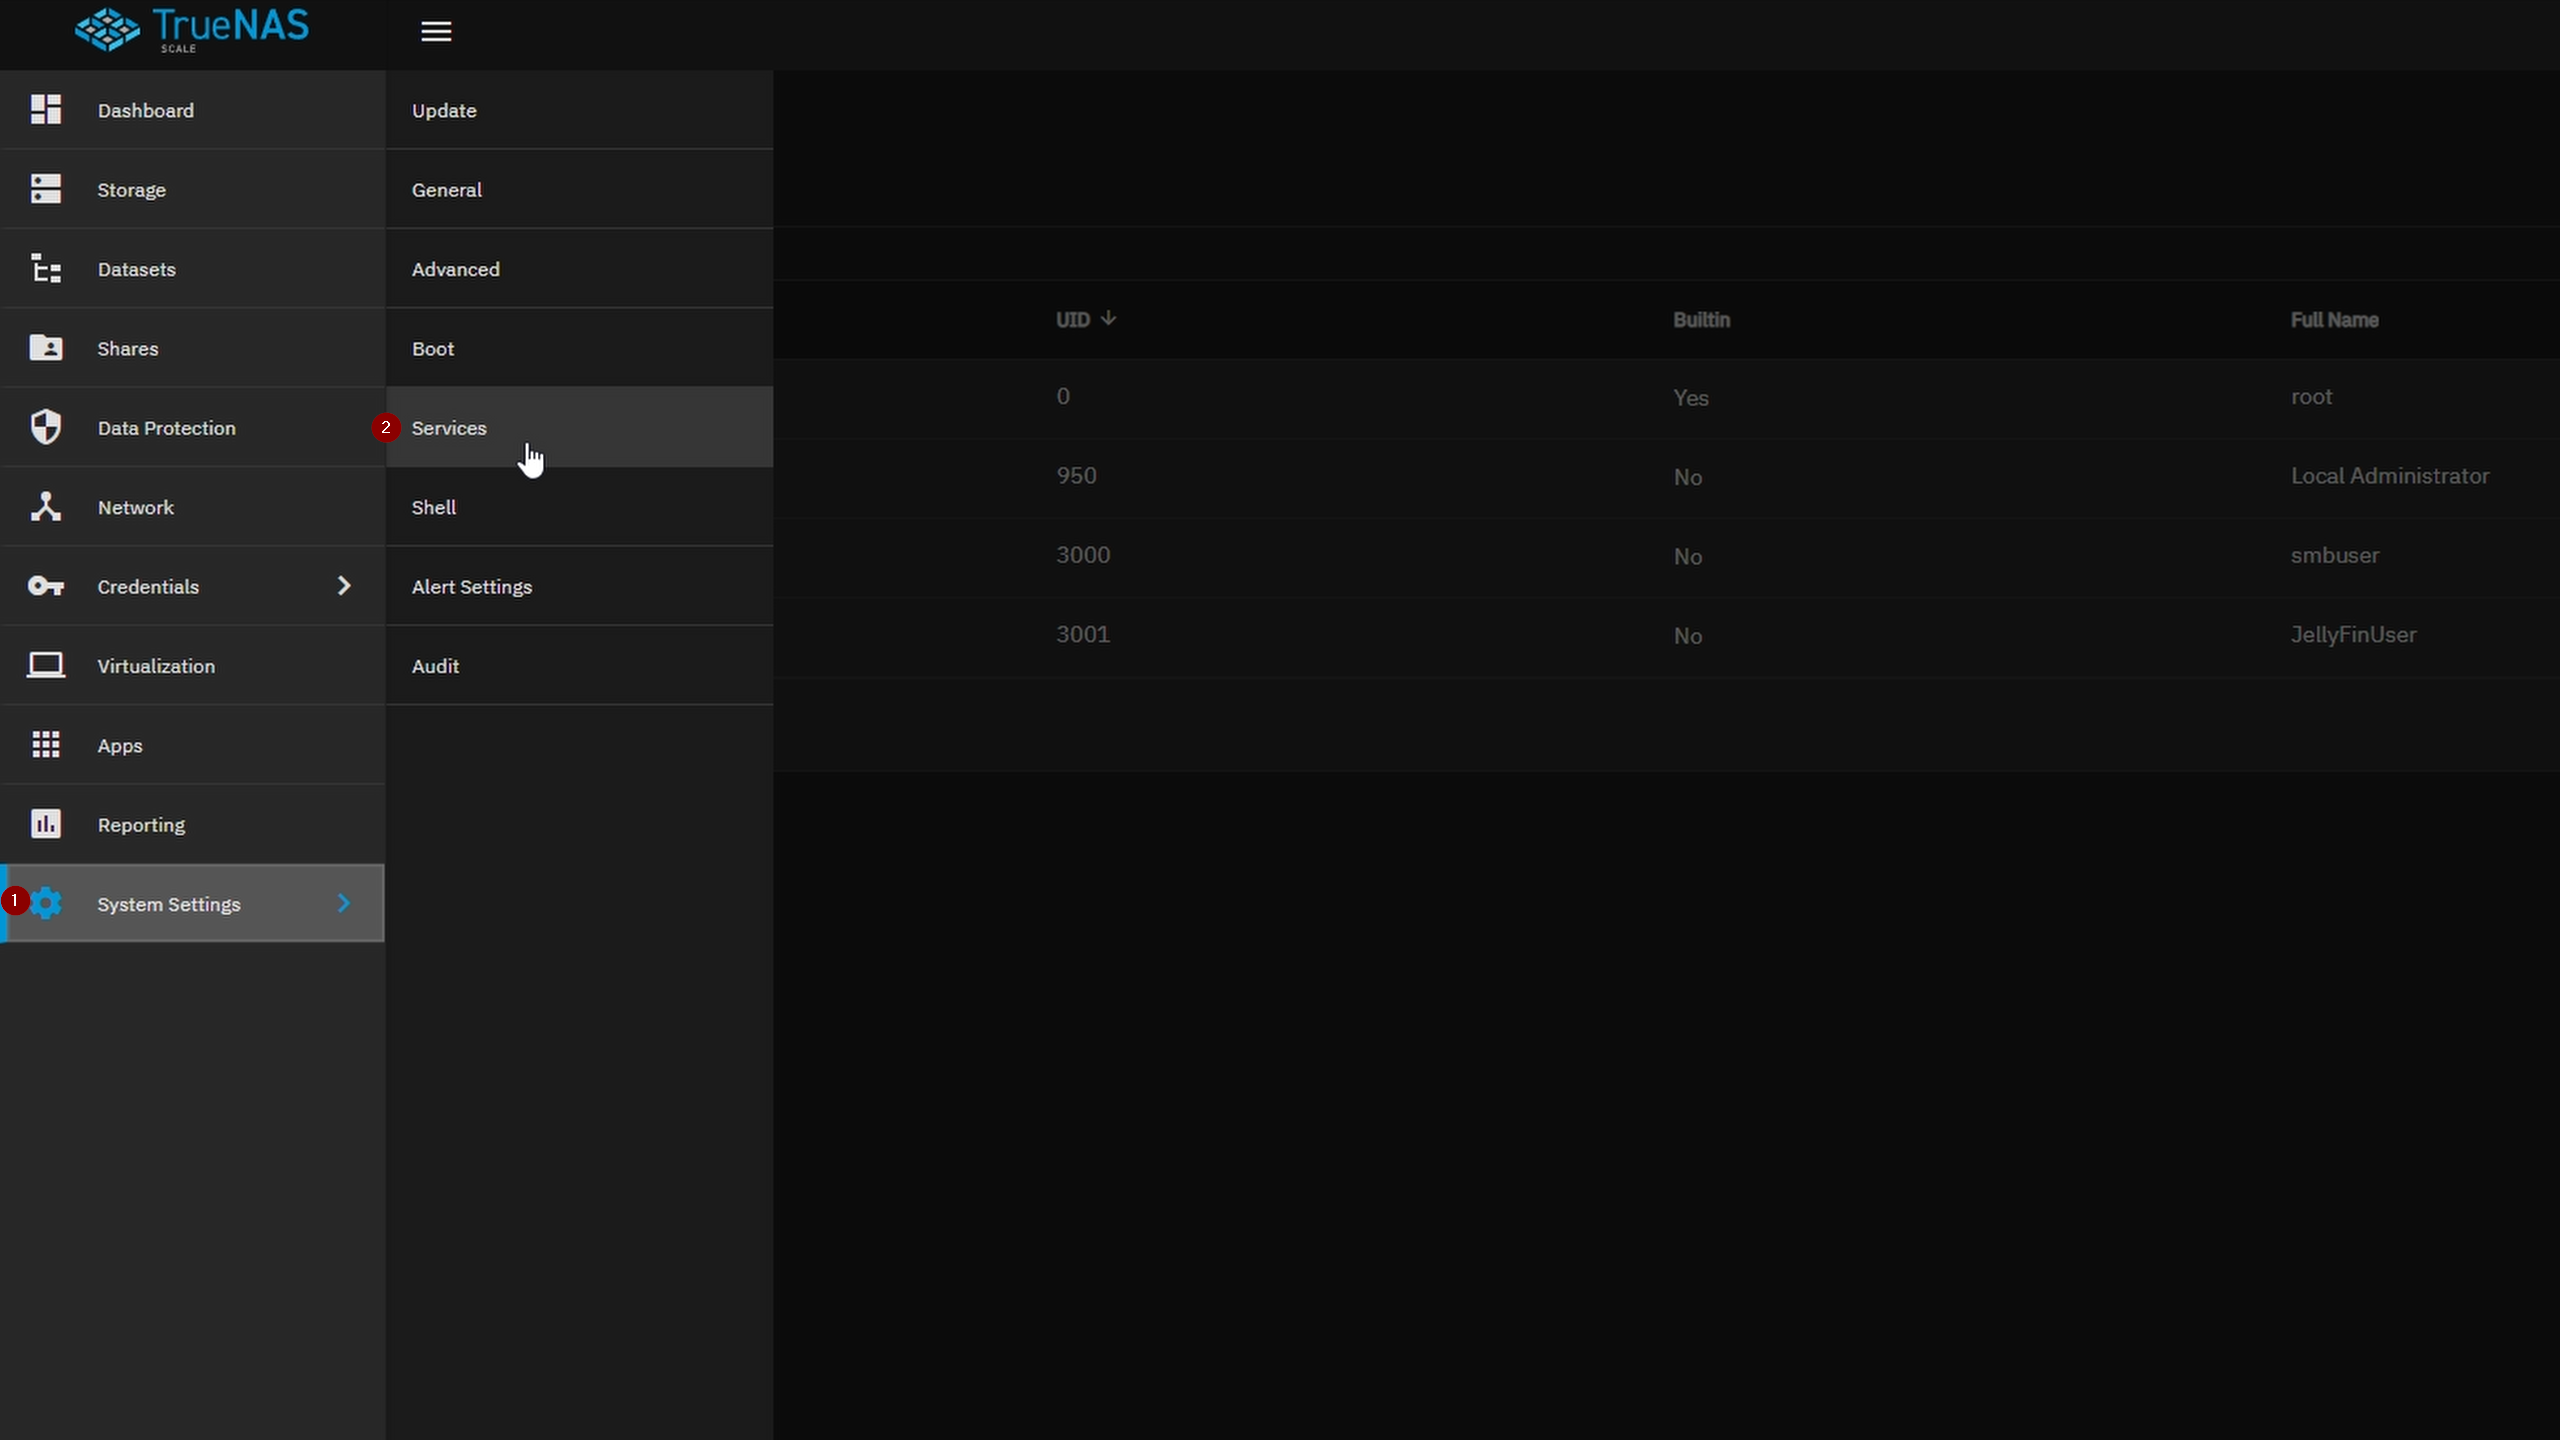
Make sure the SMB service is enabled and running.

Configure SMB Share ACLs
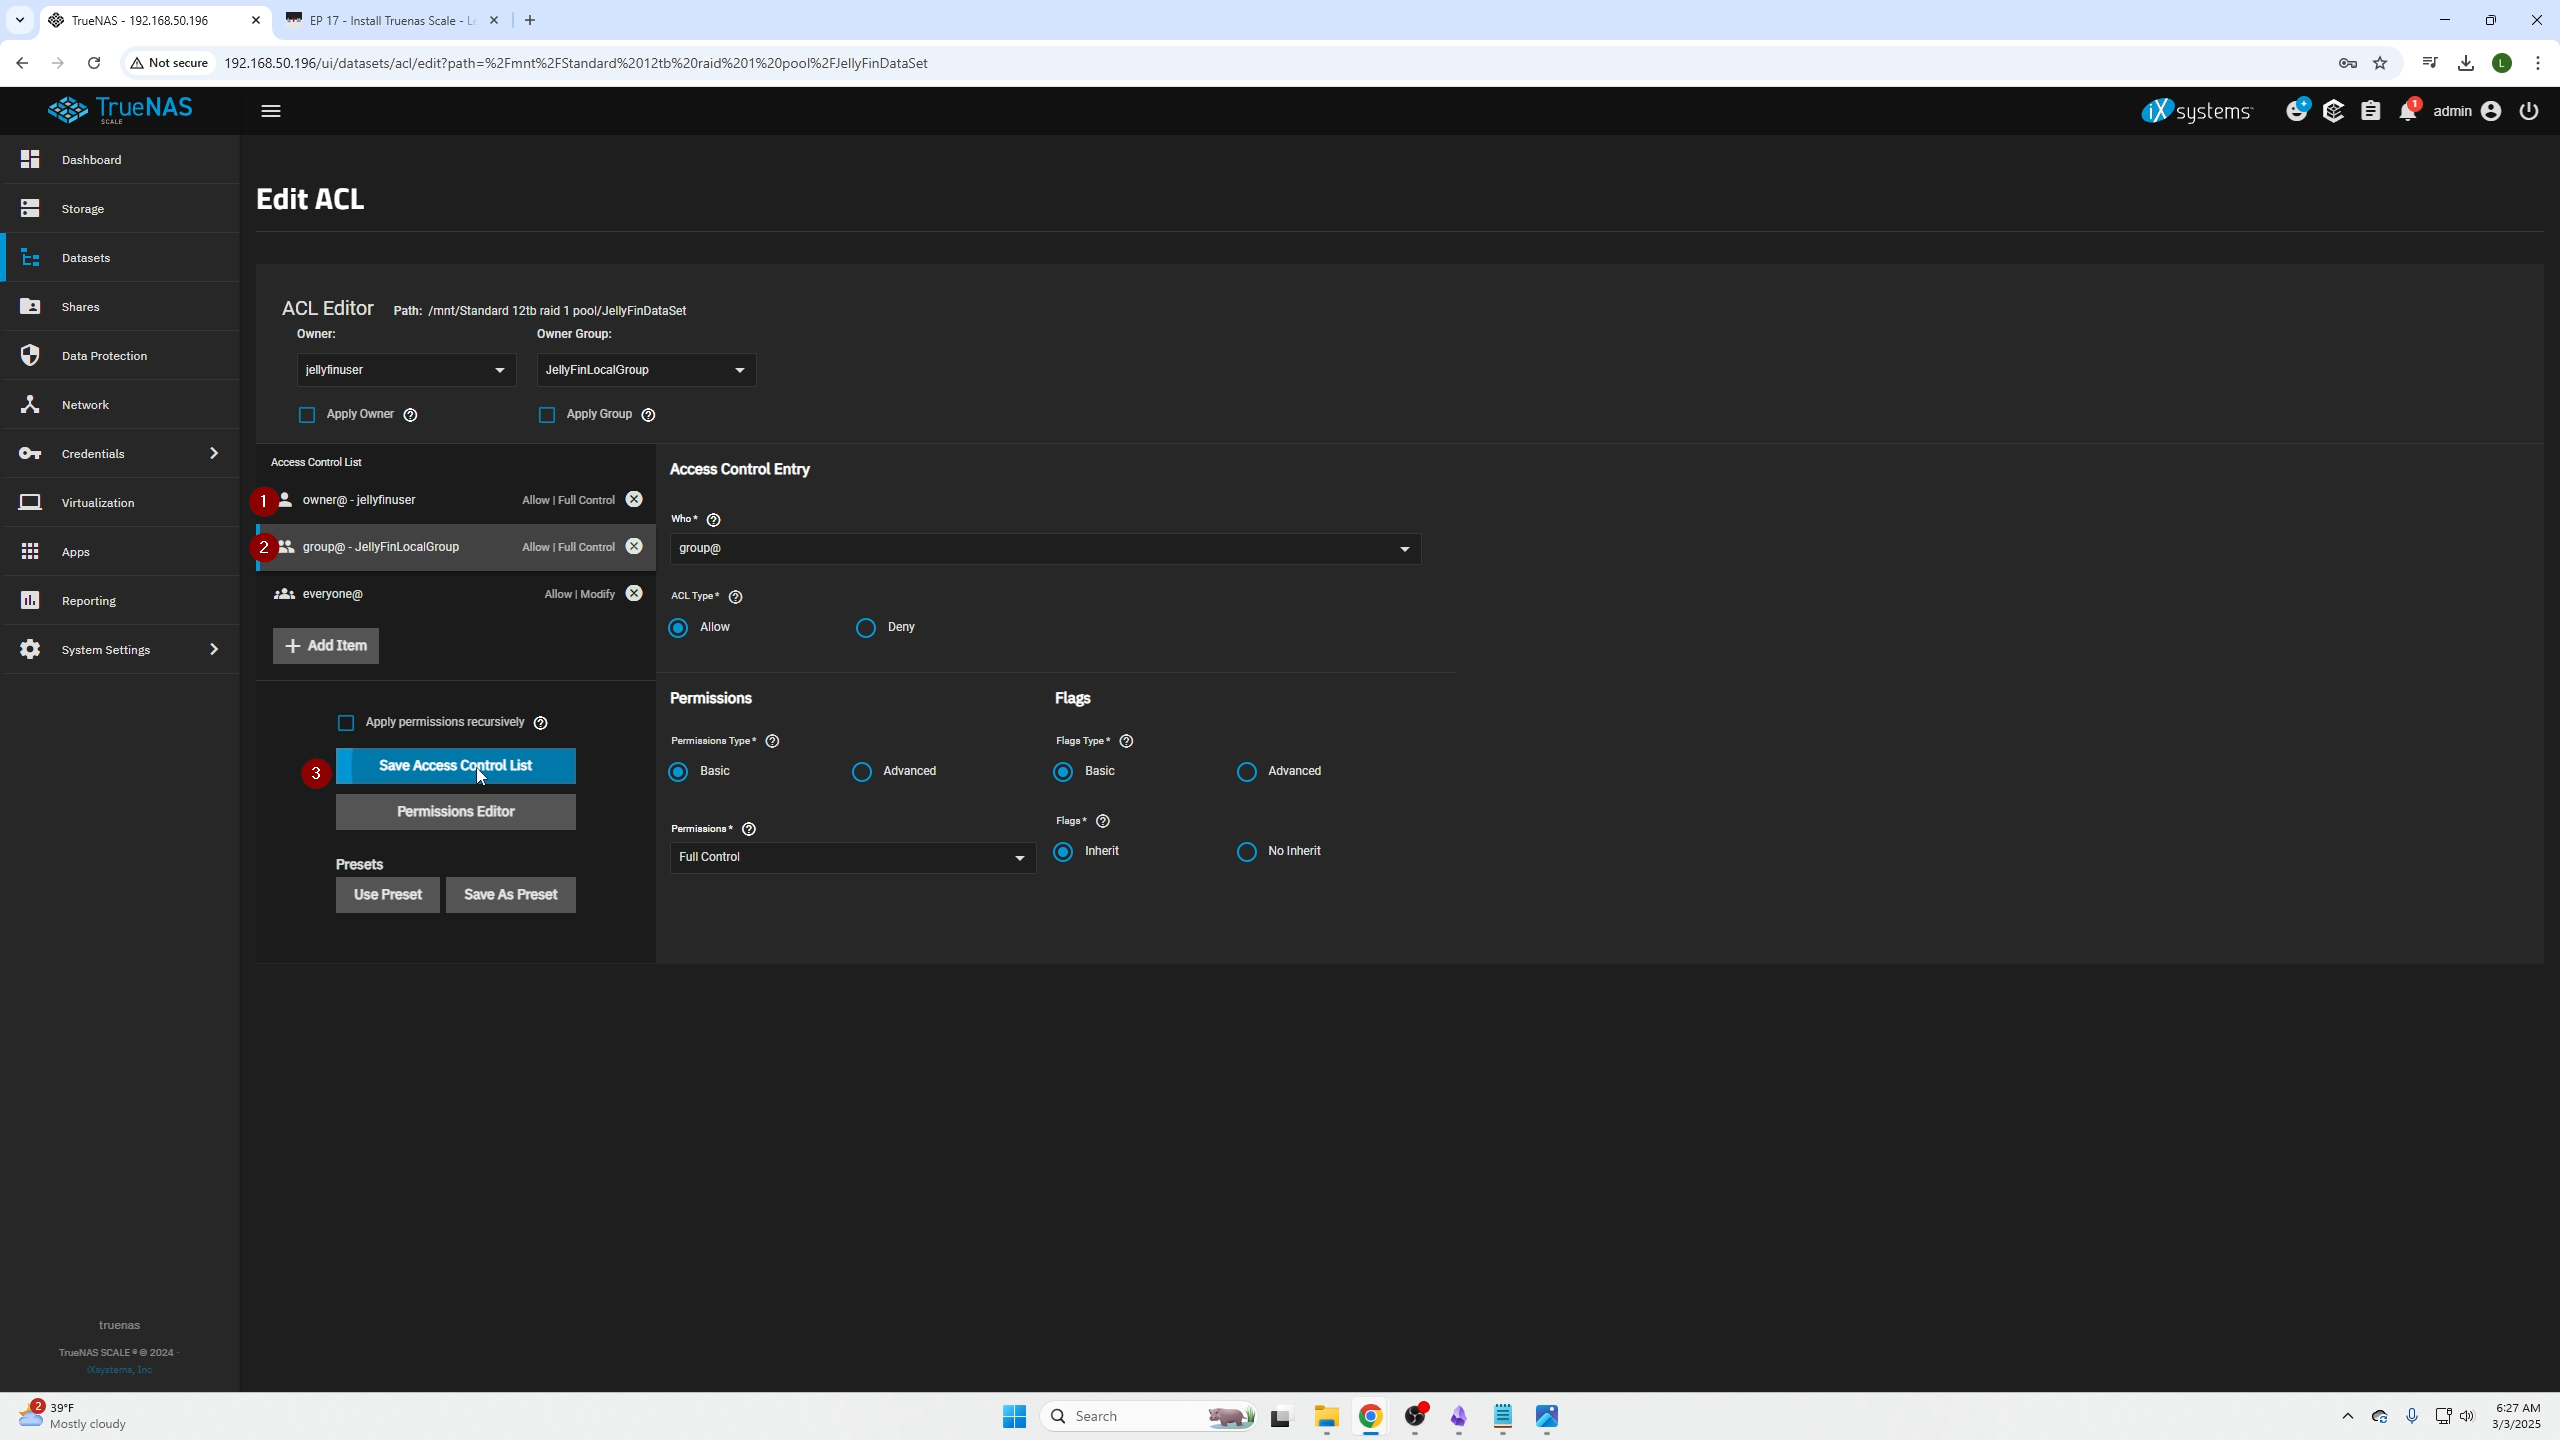
Go back to Shares tab, click the Shield icon on the right of your SMB share to configure ACLs.

Select the pre-made ACL "nsf4_open" and click Continue.

Confirm the settings look correct then save.
Connecting SMB Share on Windows
Connect with this path syntax:
\\<IP_address_of_SMB_server>\<smb_share_filename>
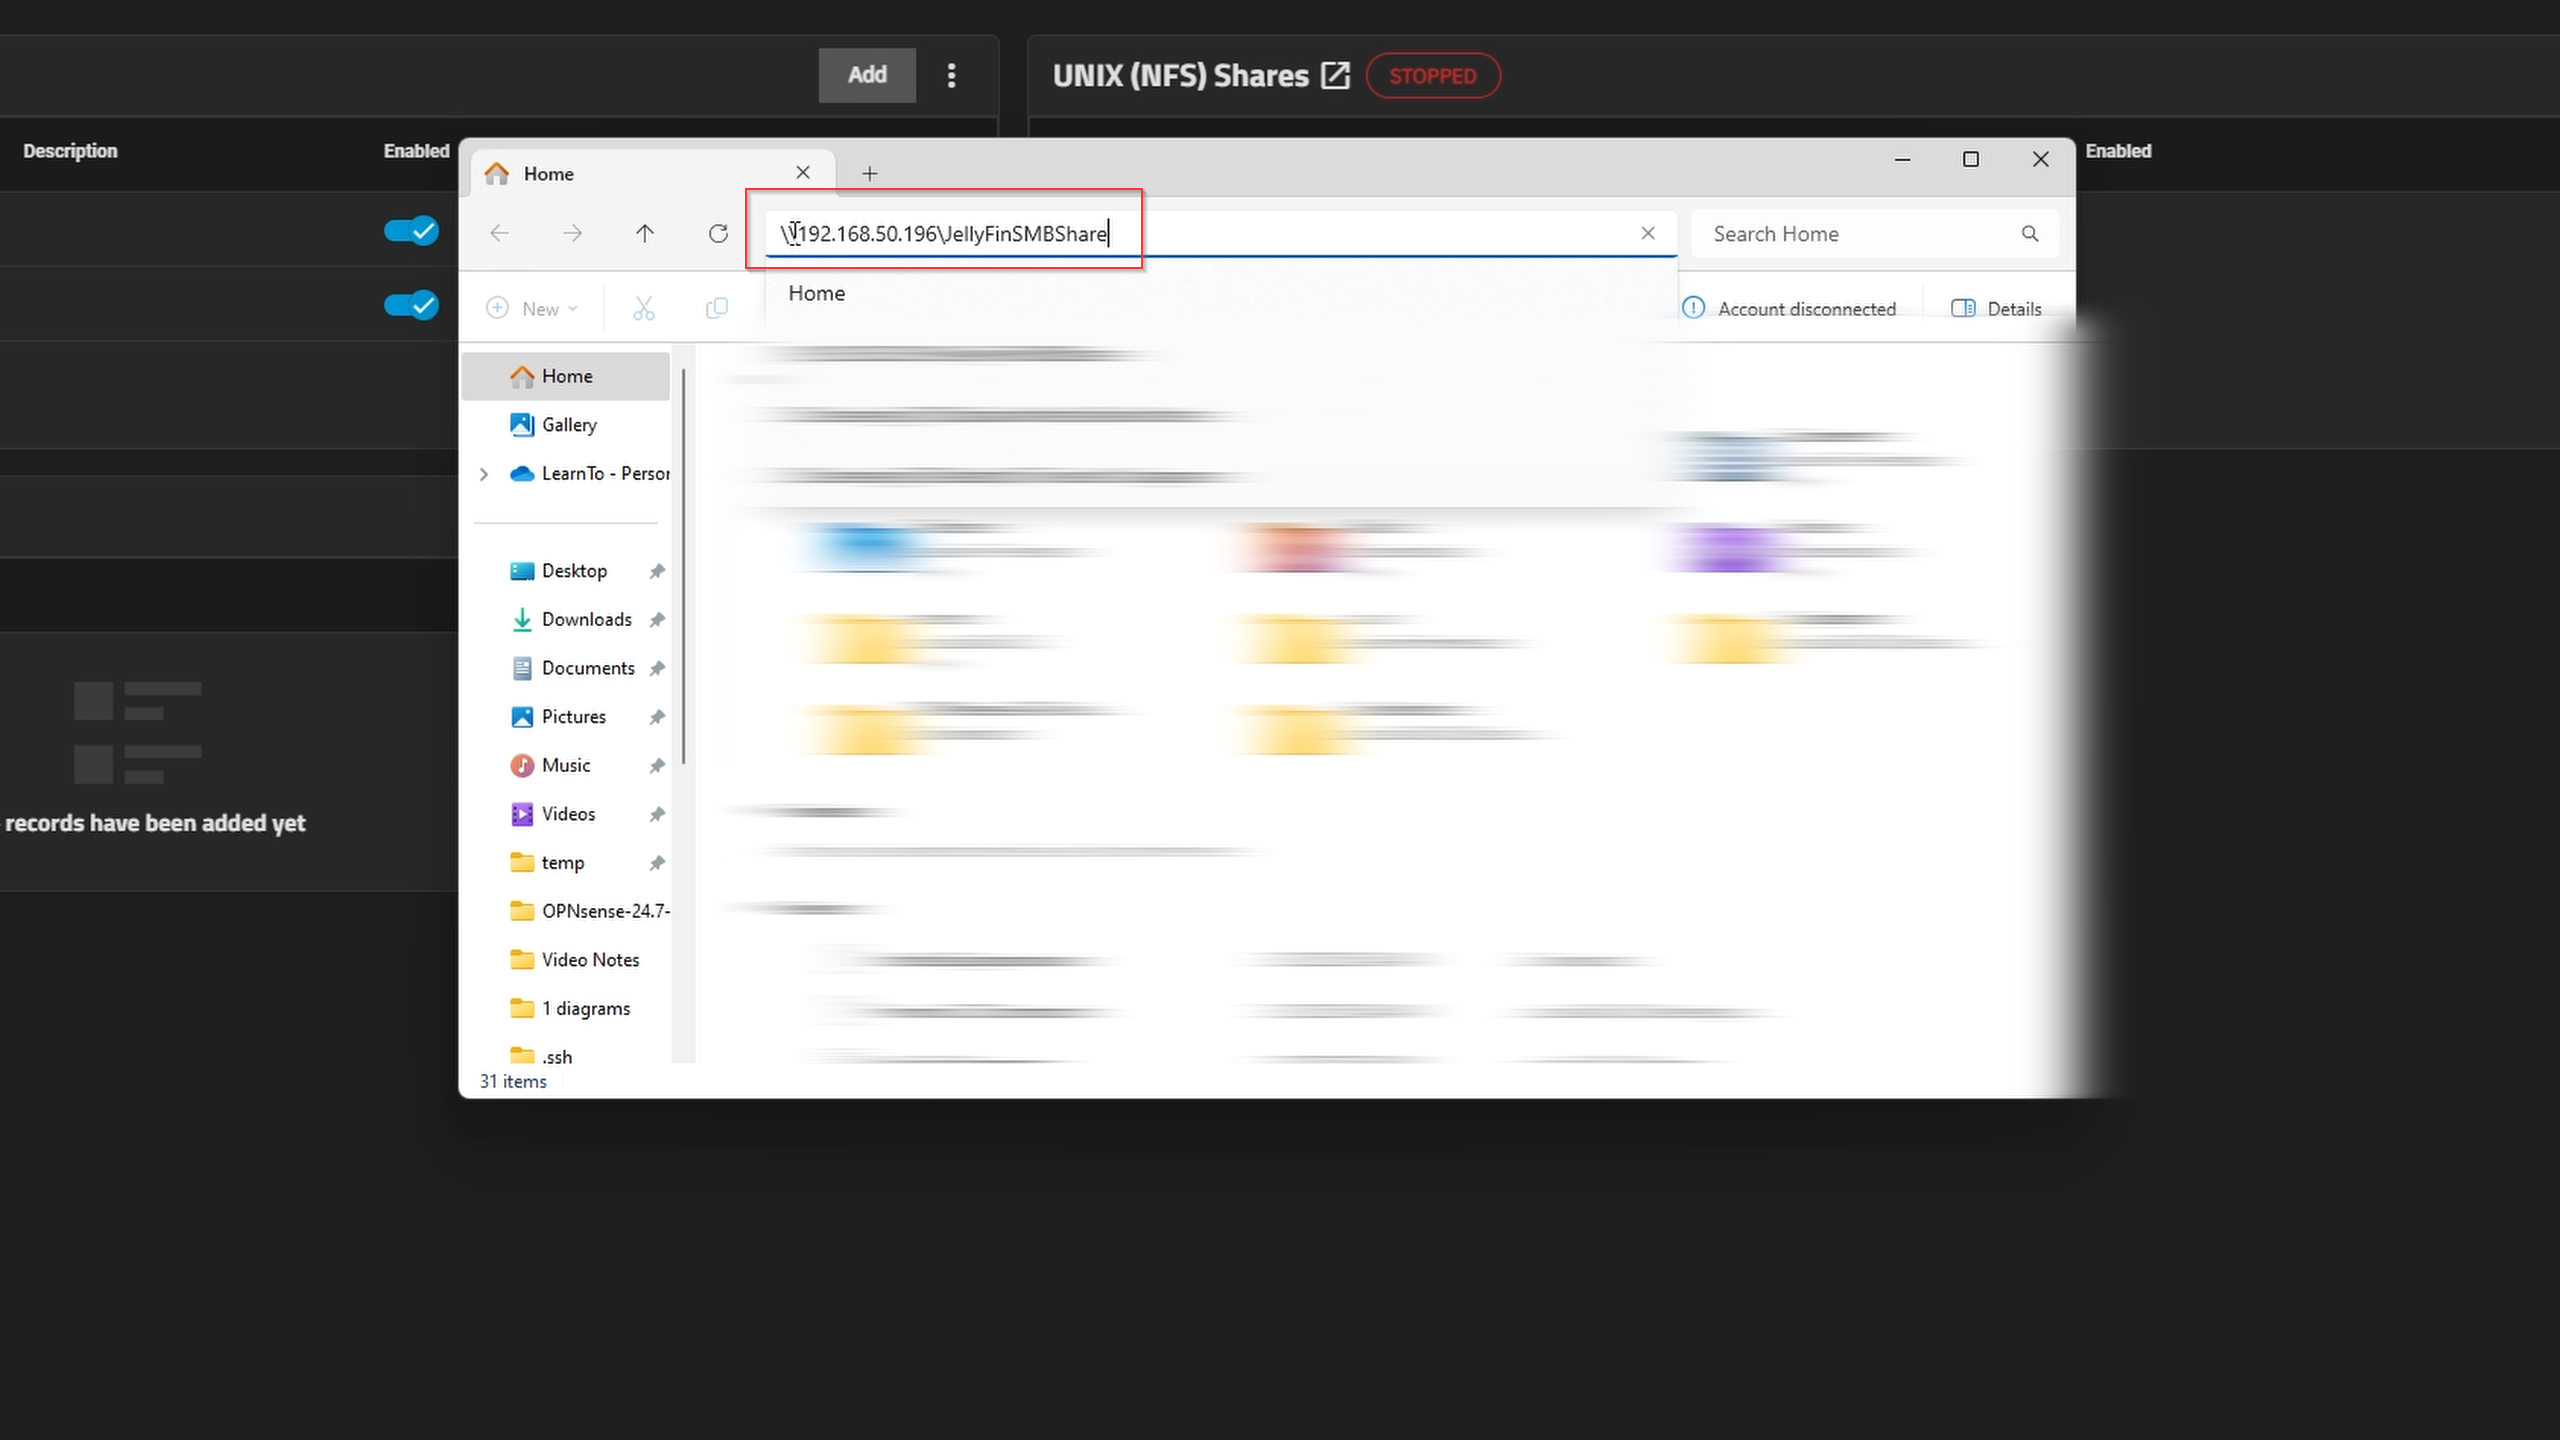
When prompted, enter the SMB local user's credentials.
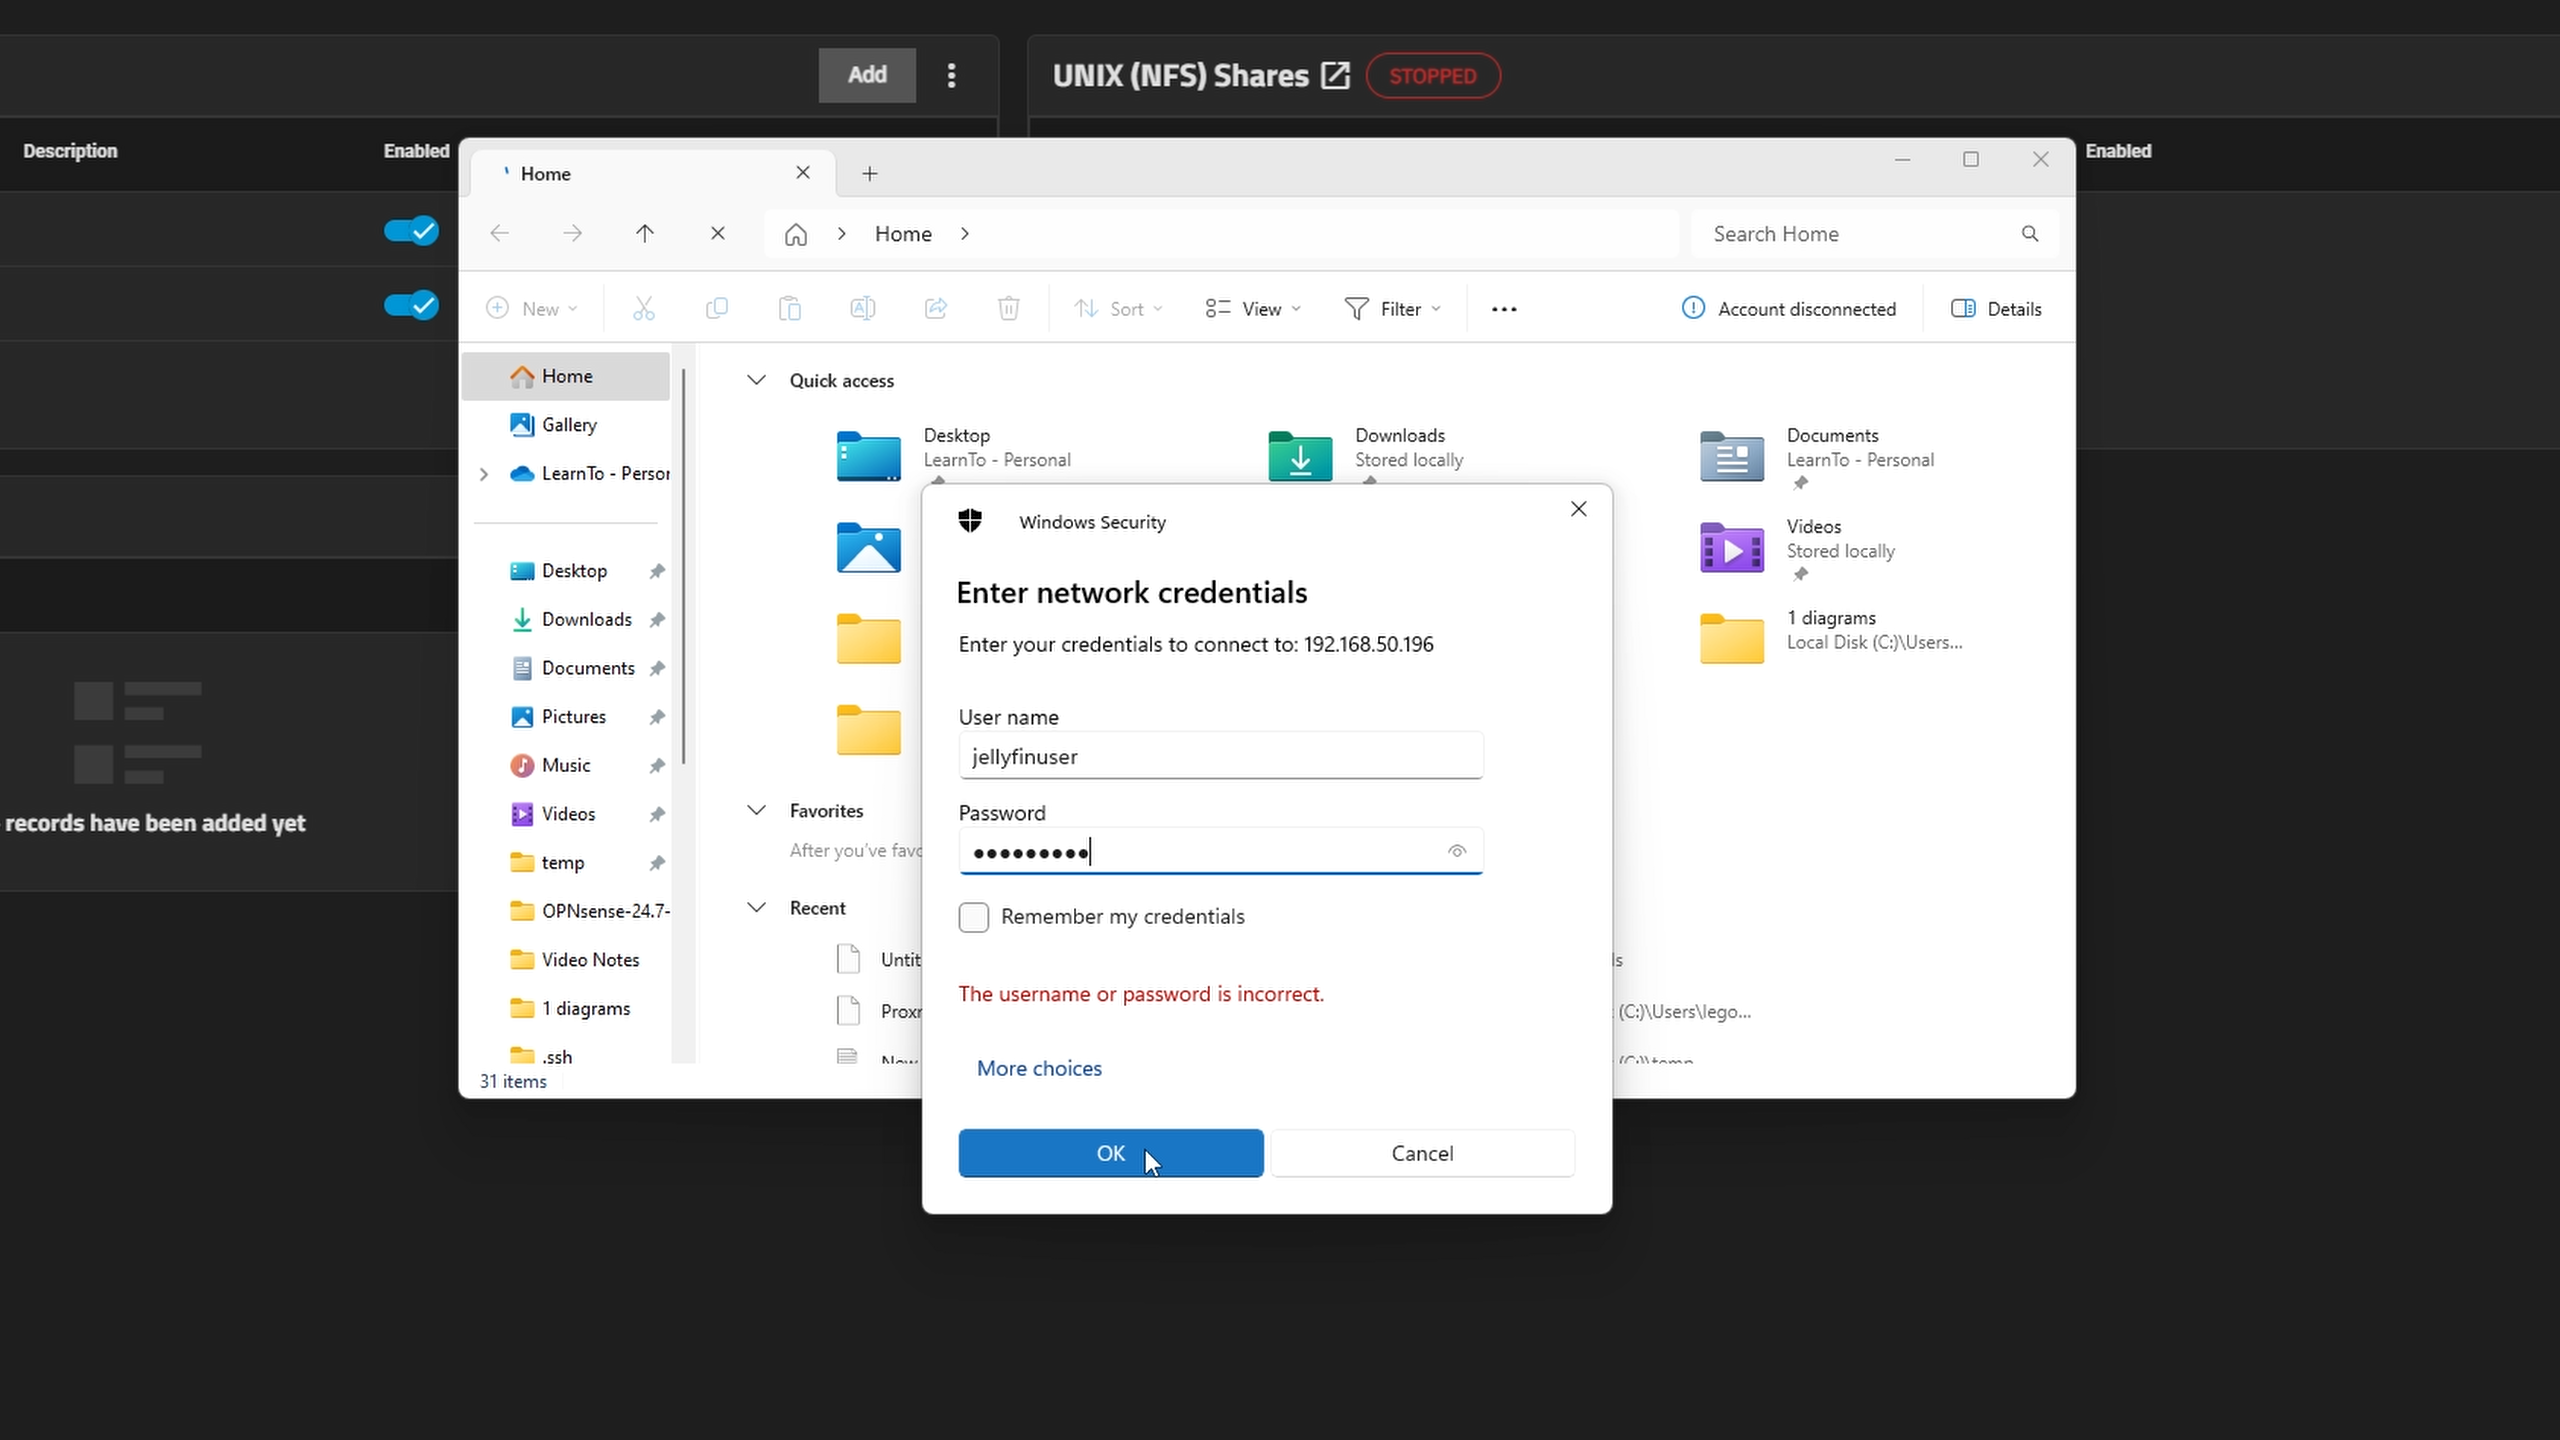
Create folders inside the share to organize your movies, pictures, and documents for JellyFin browsing.

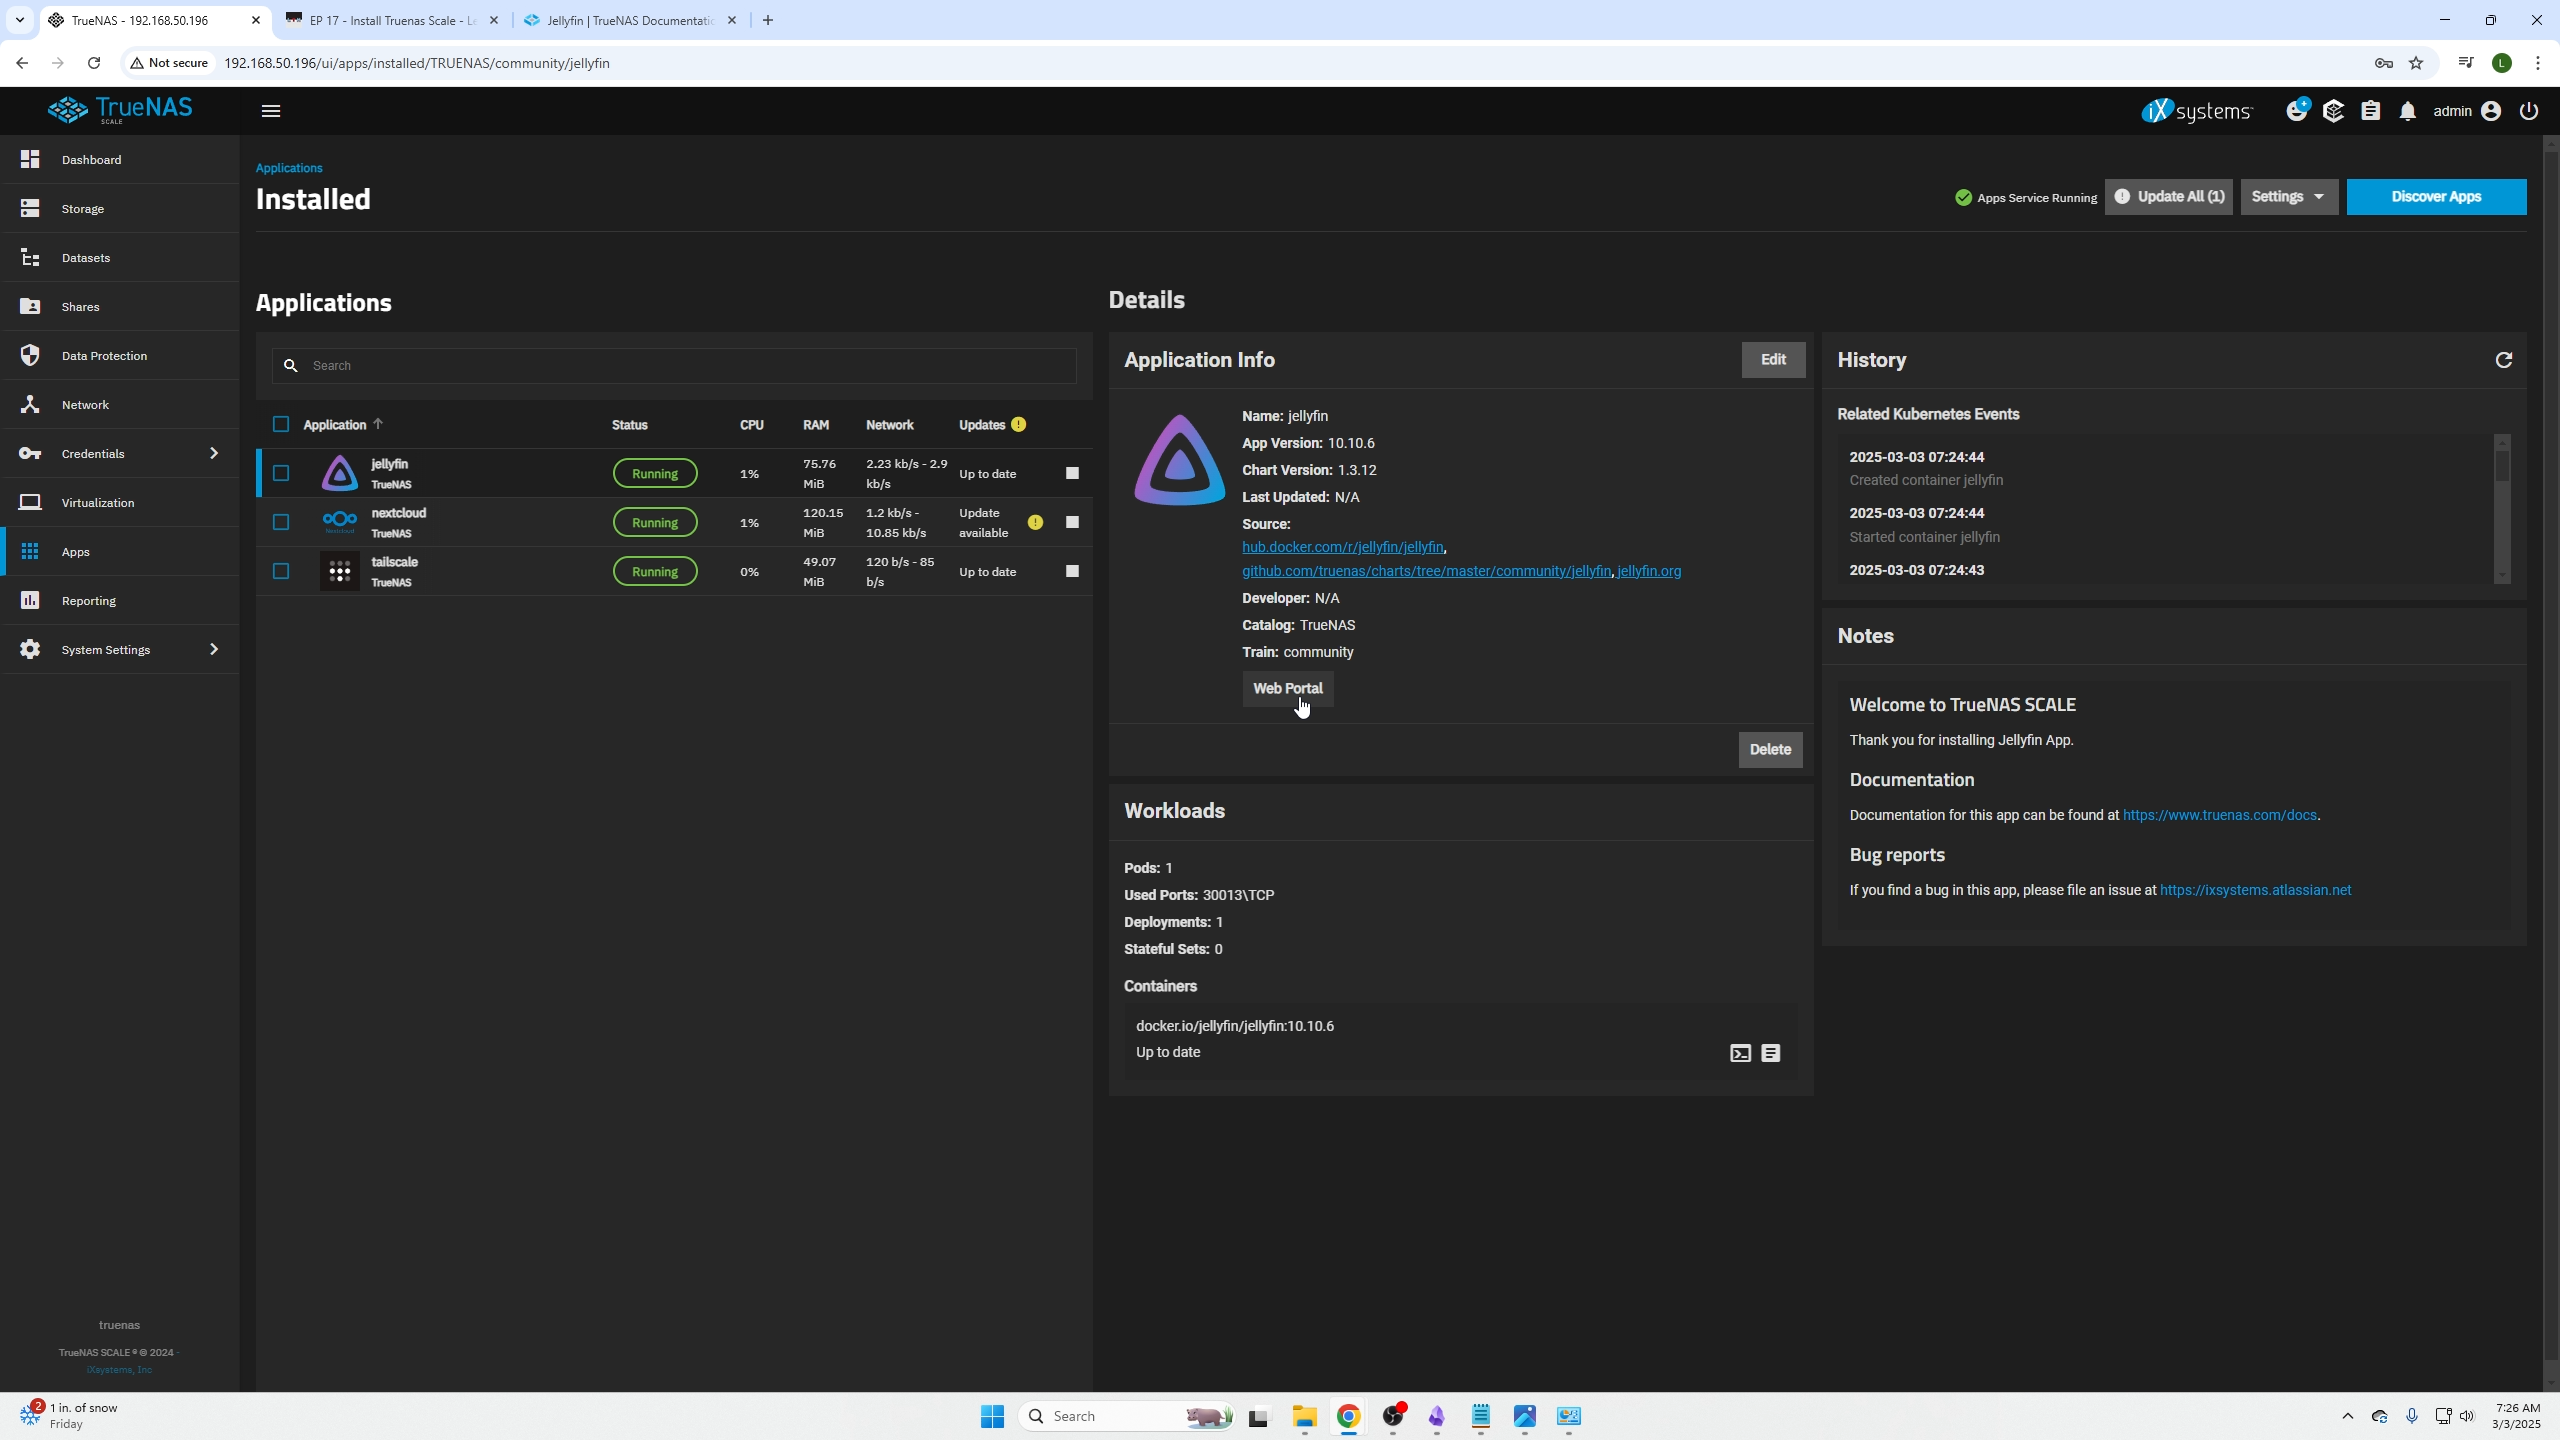
Installing JellyFin Media Server
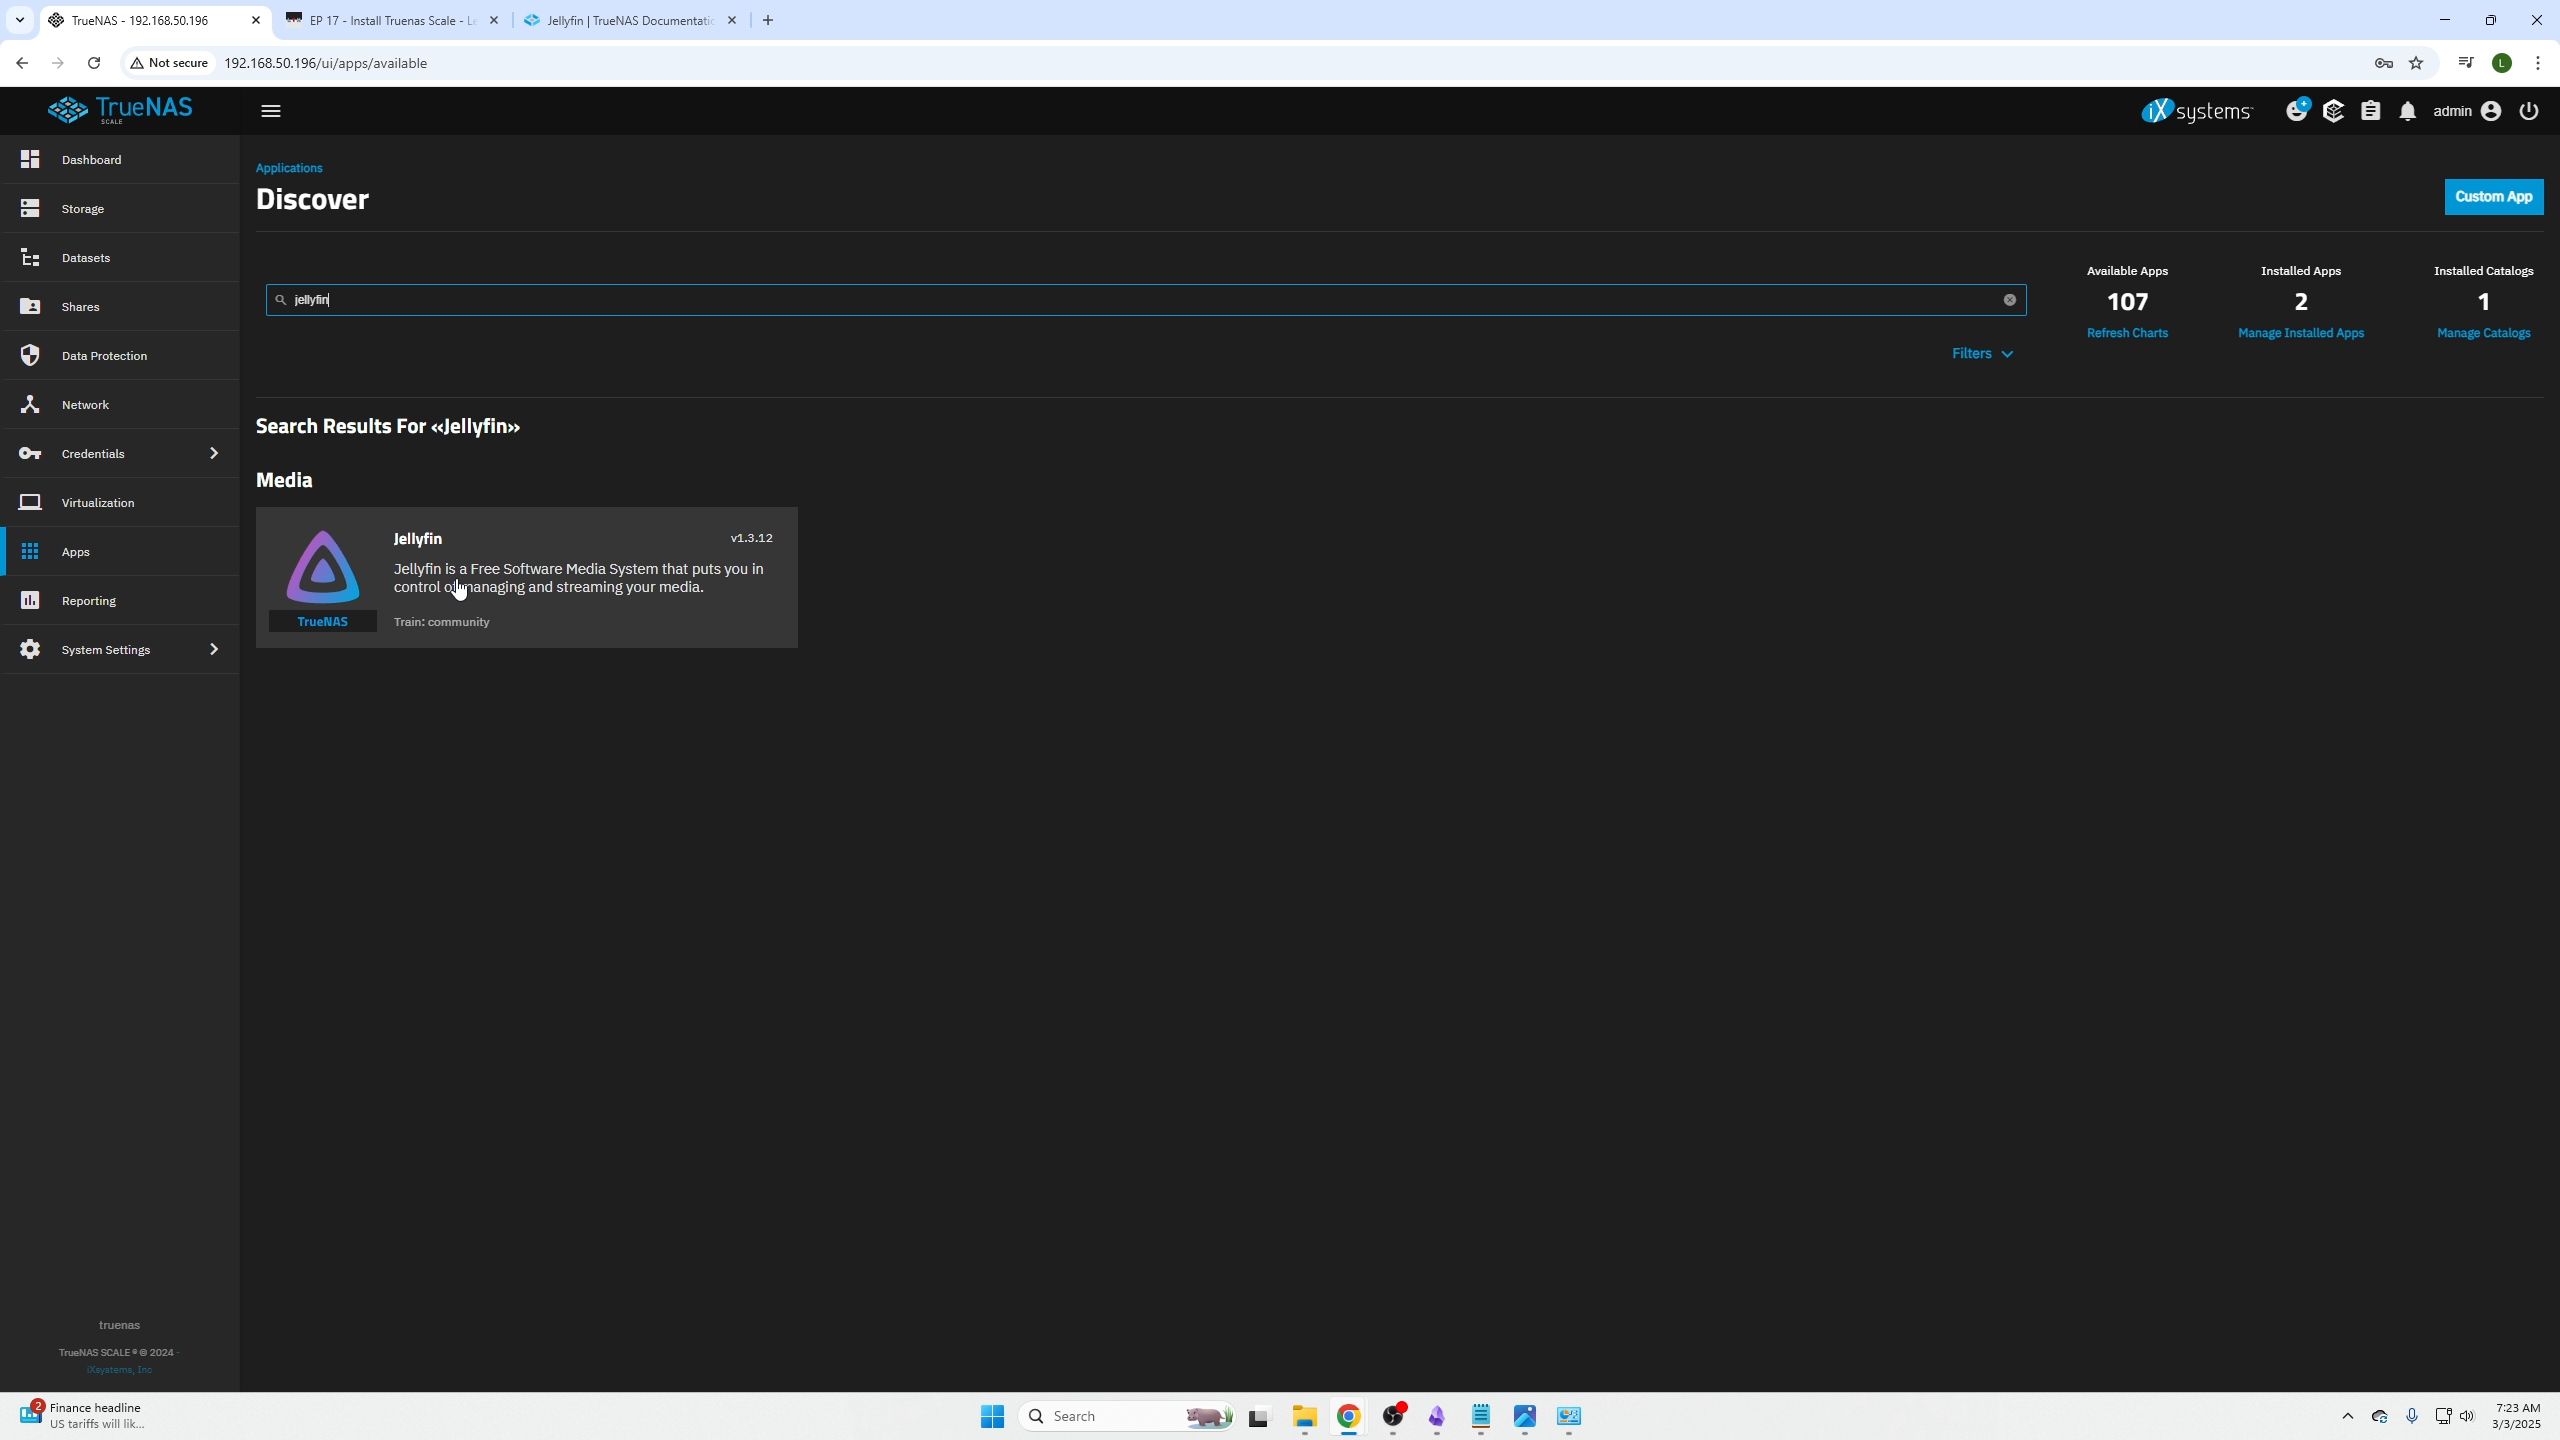
Go to the Apps tab in TrueNAS and click Discover Apps.
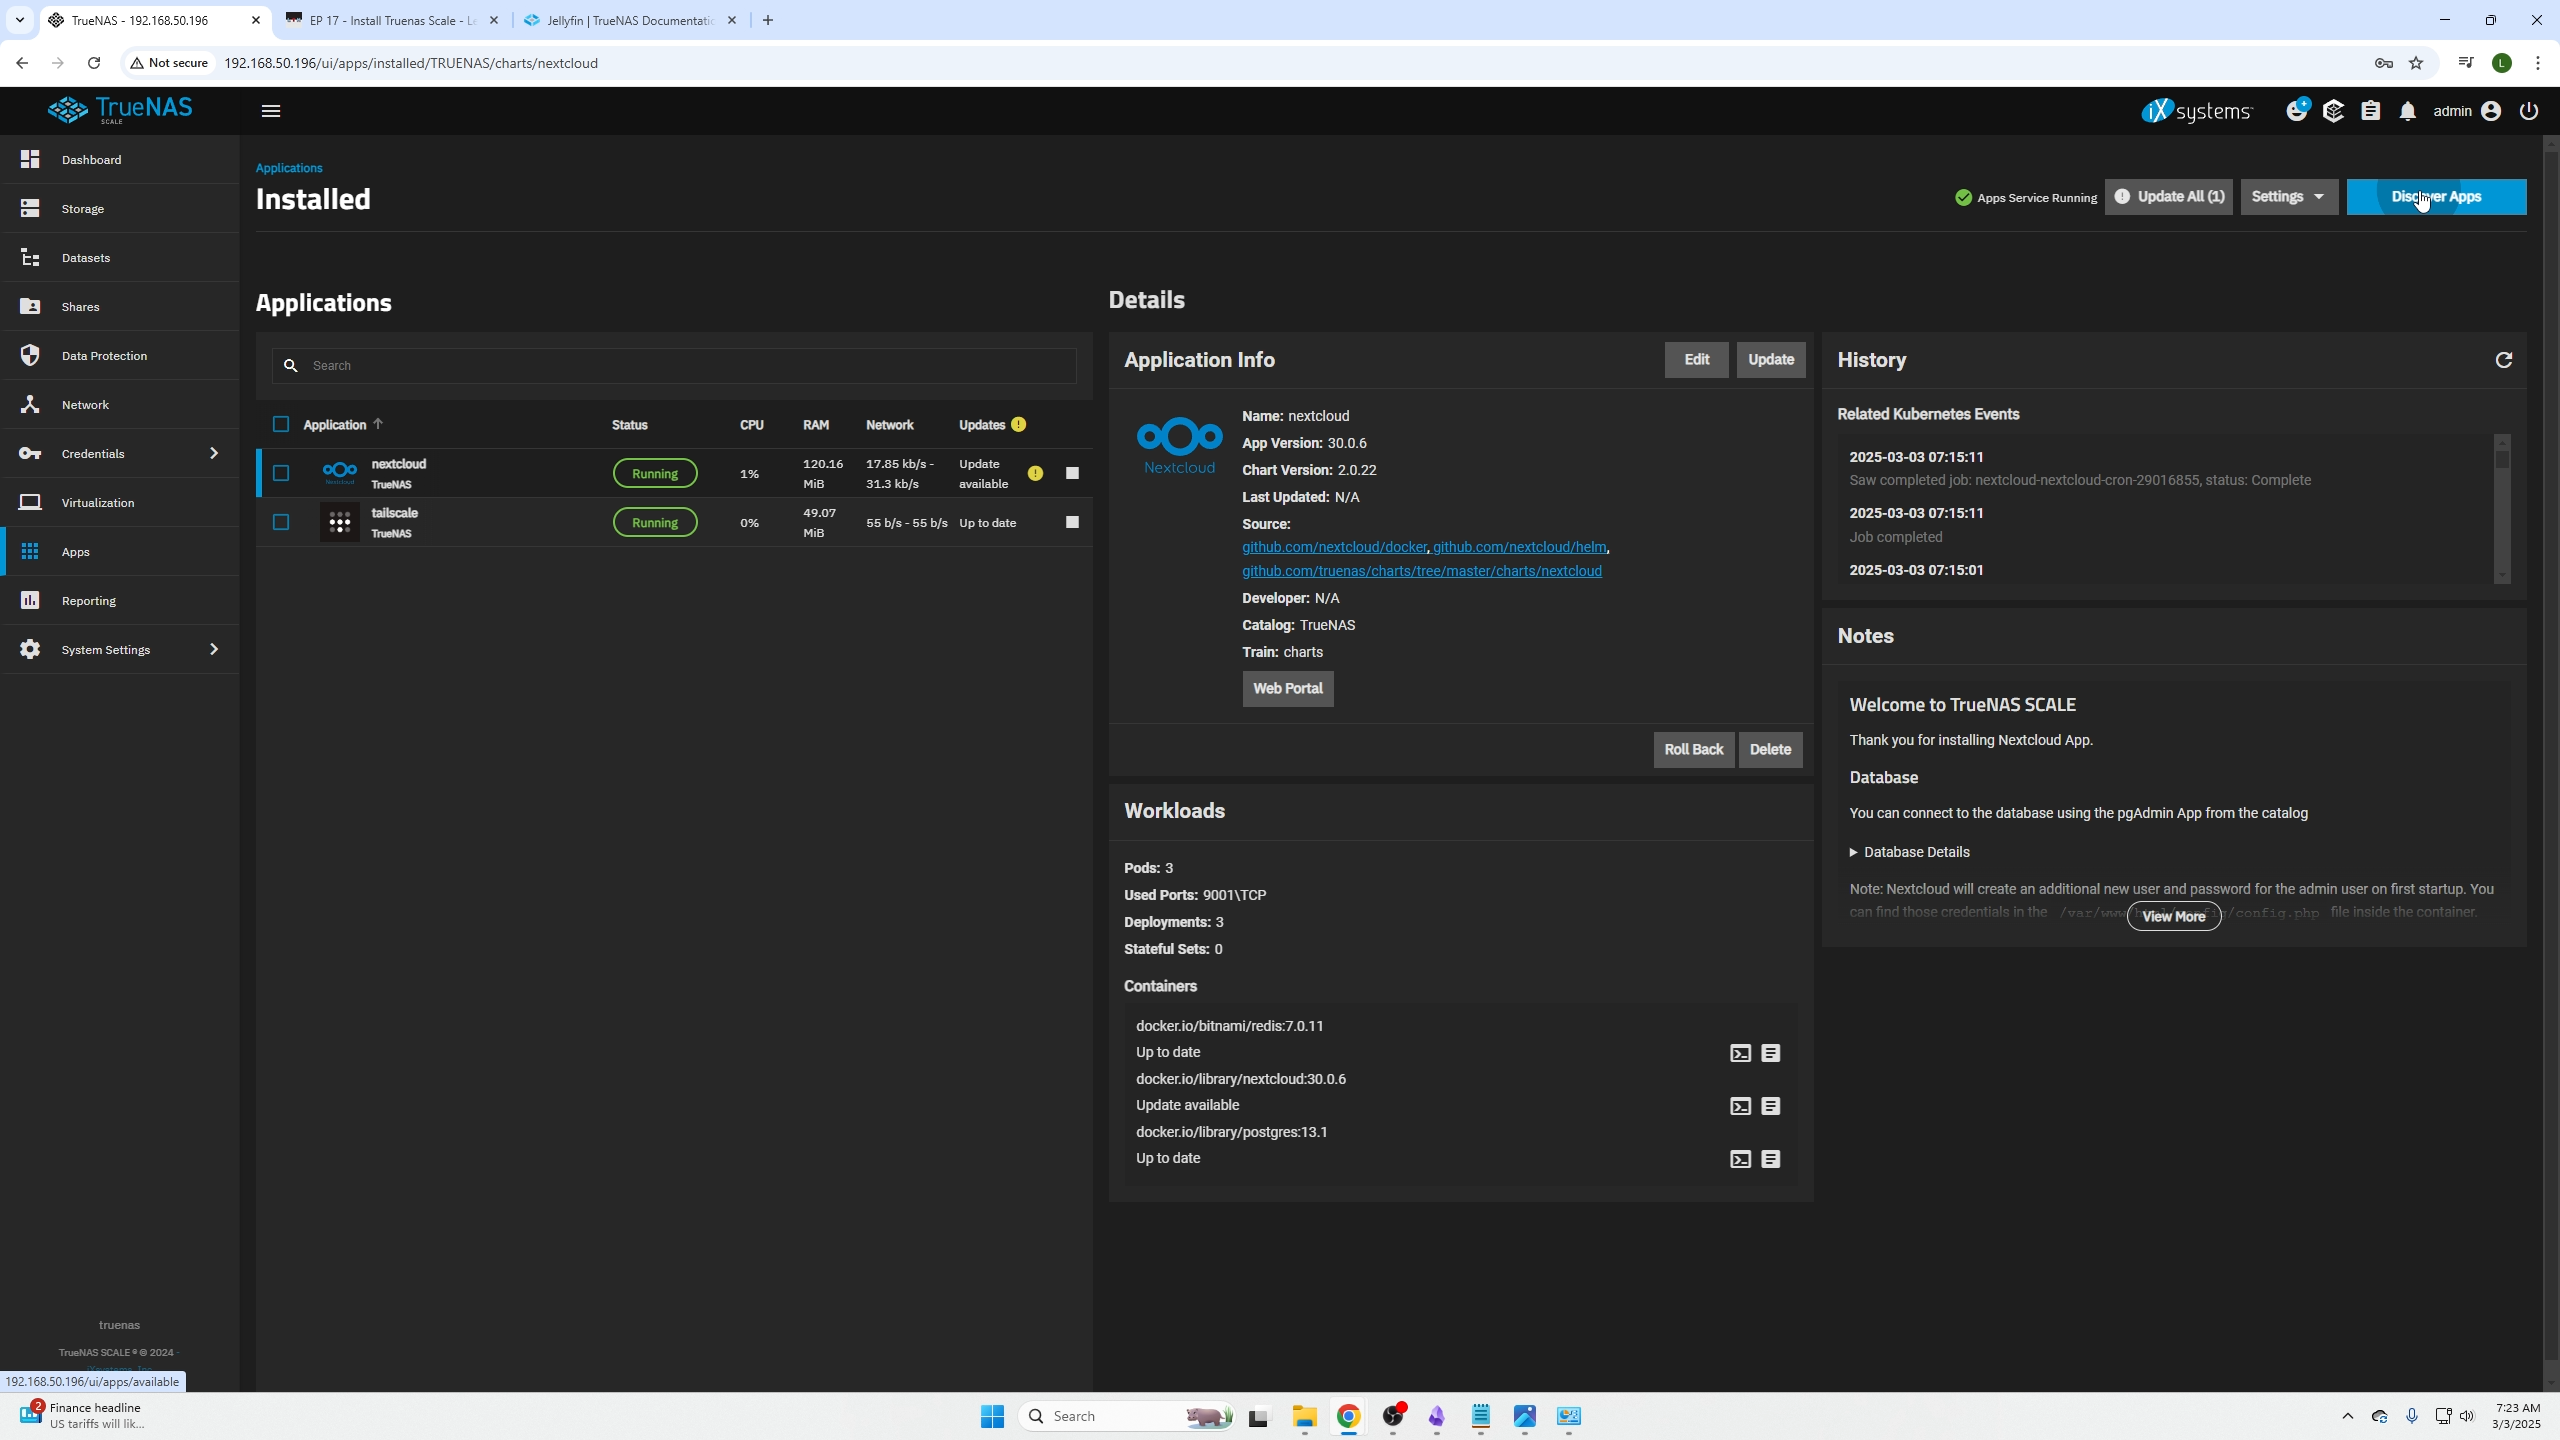
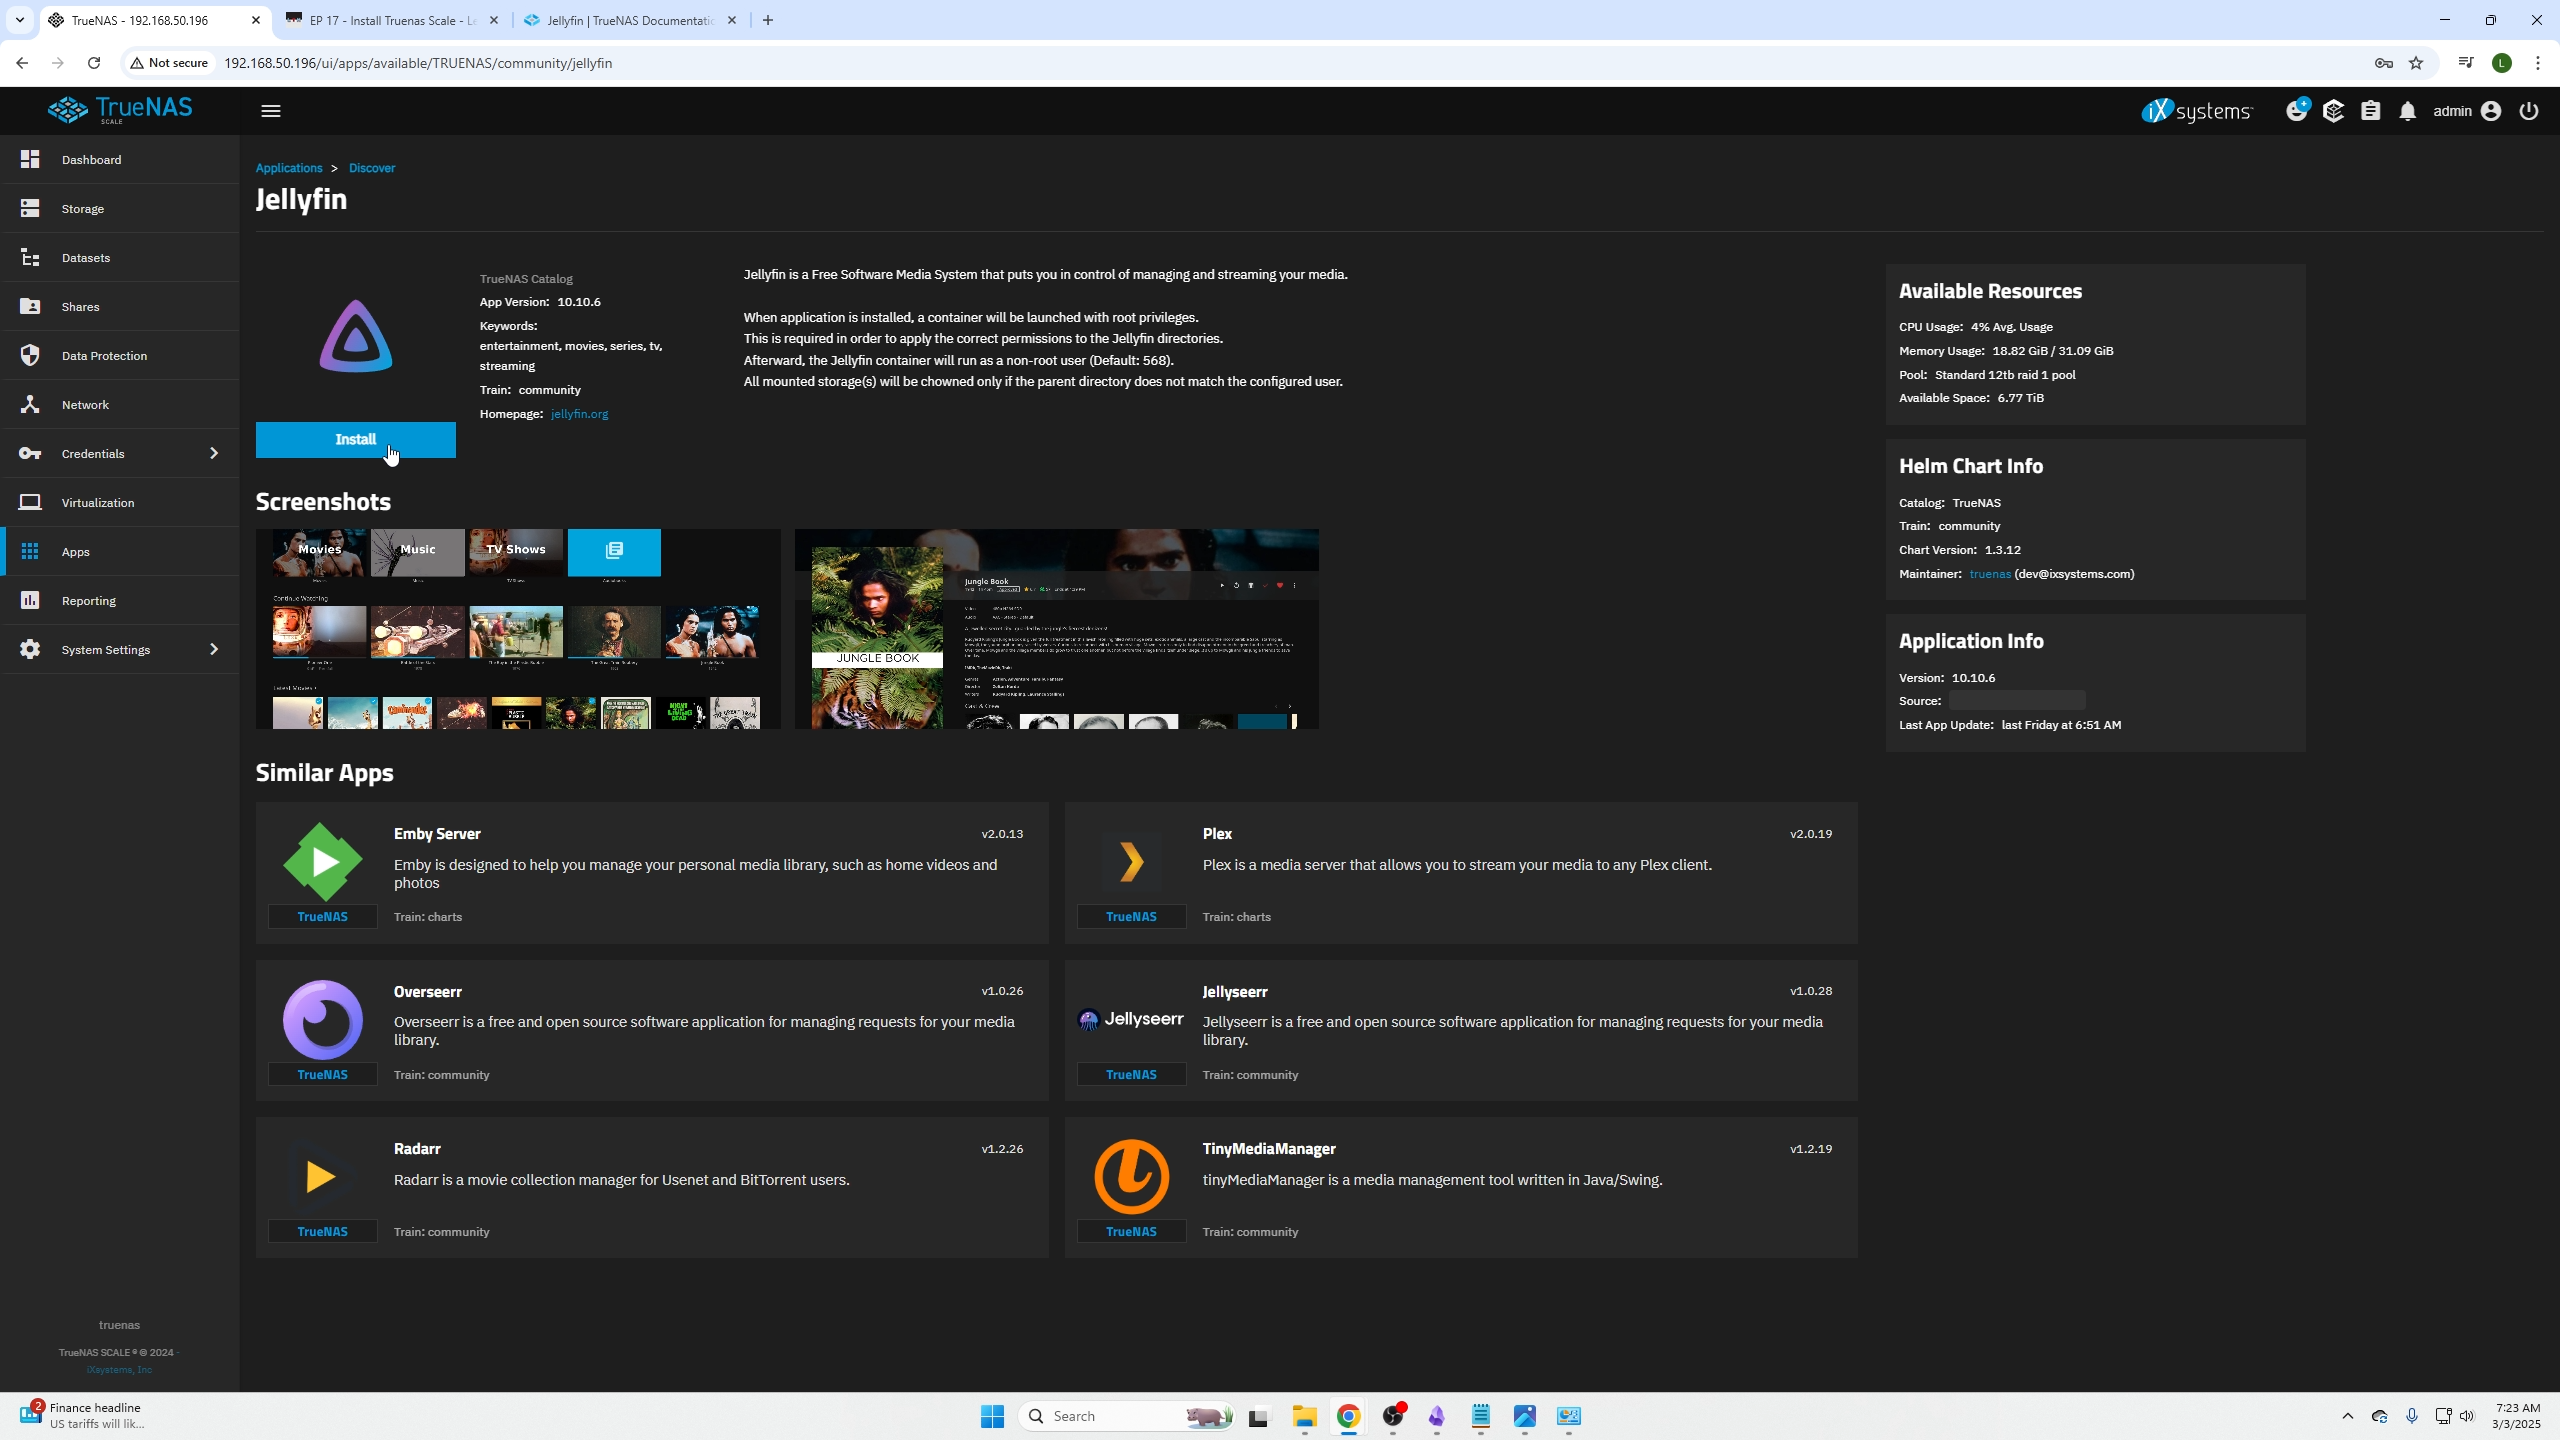
Search for JellyFin and click it.
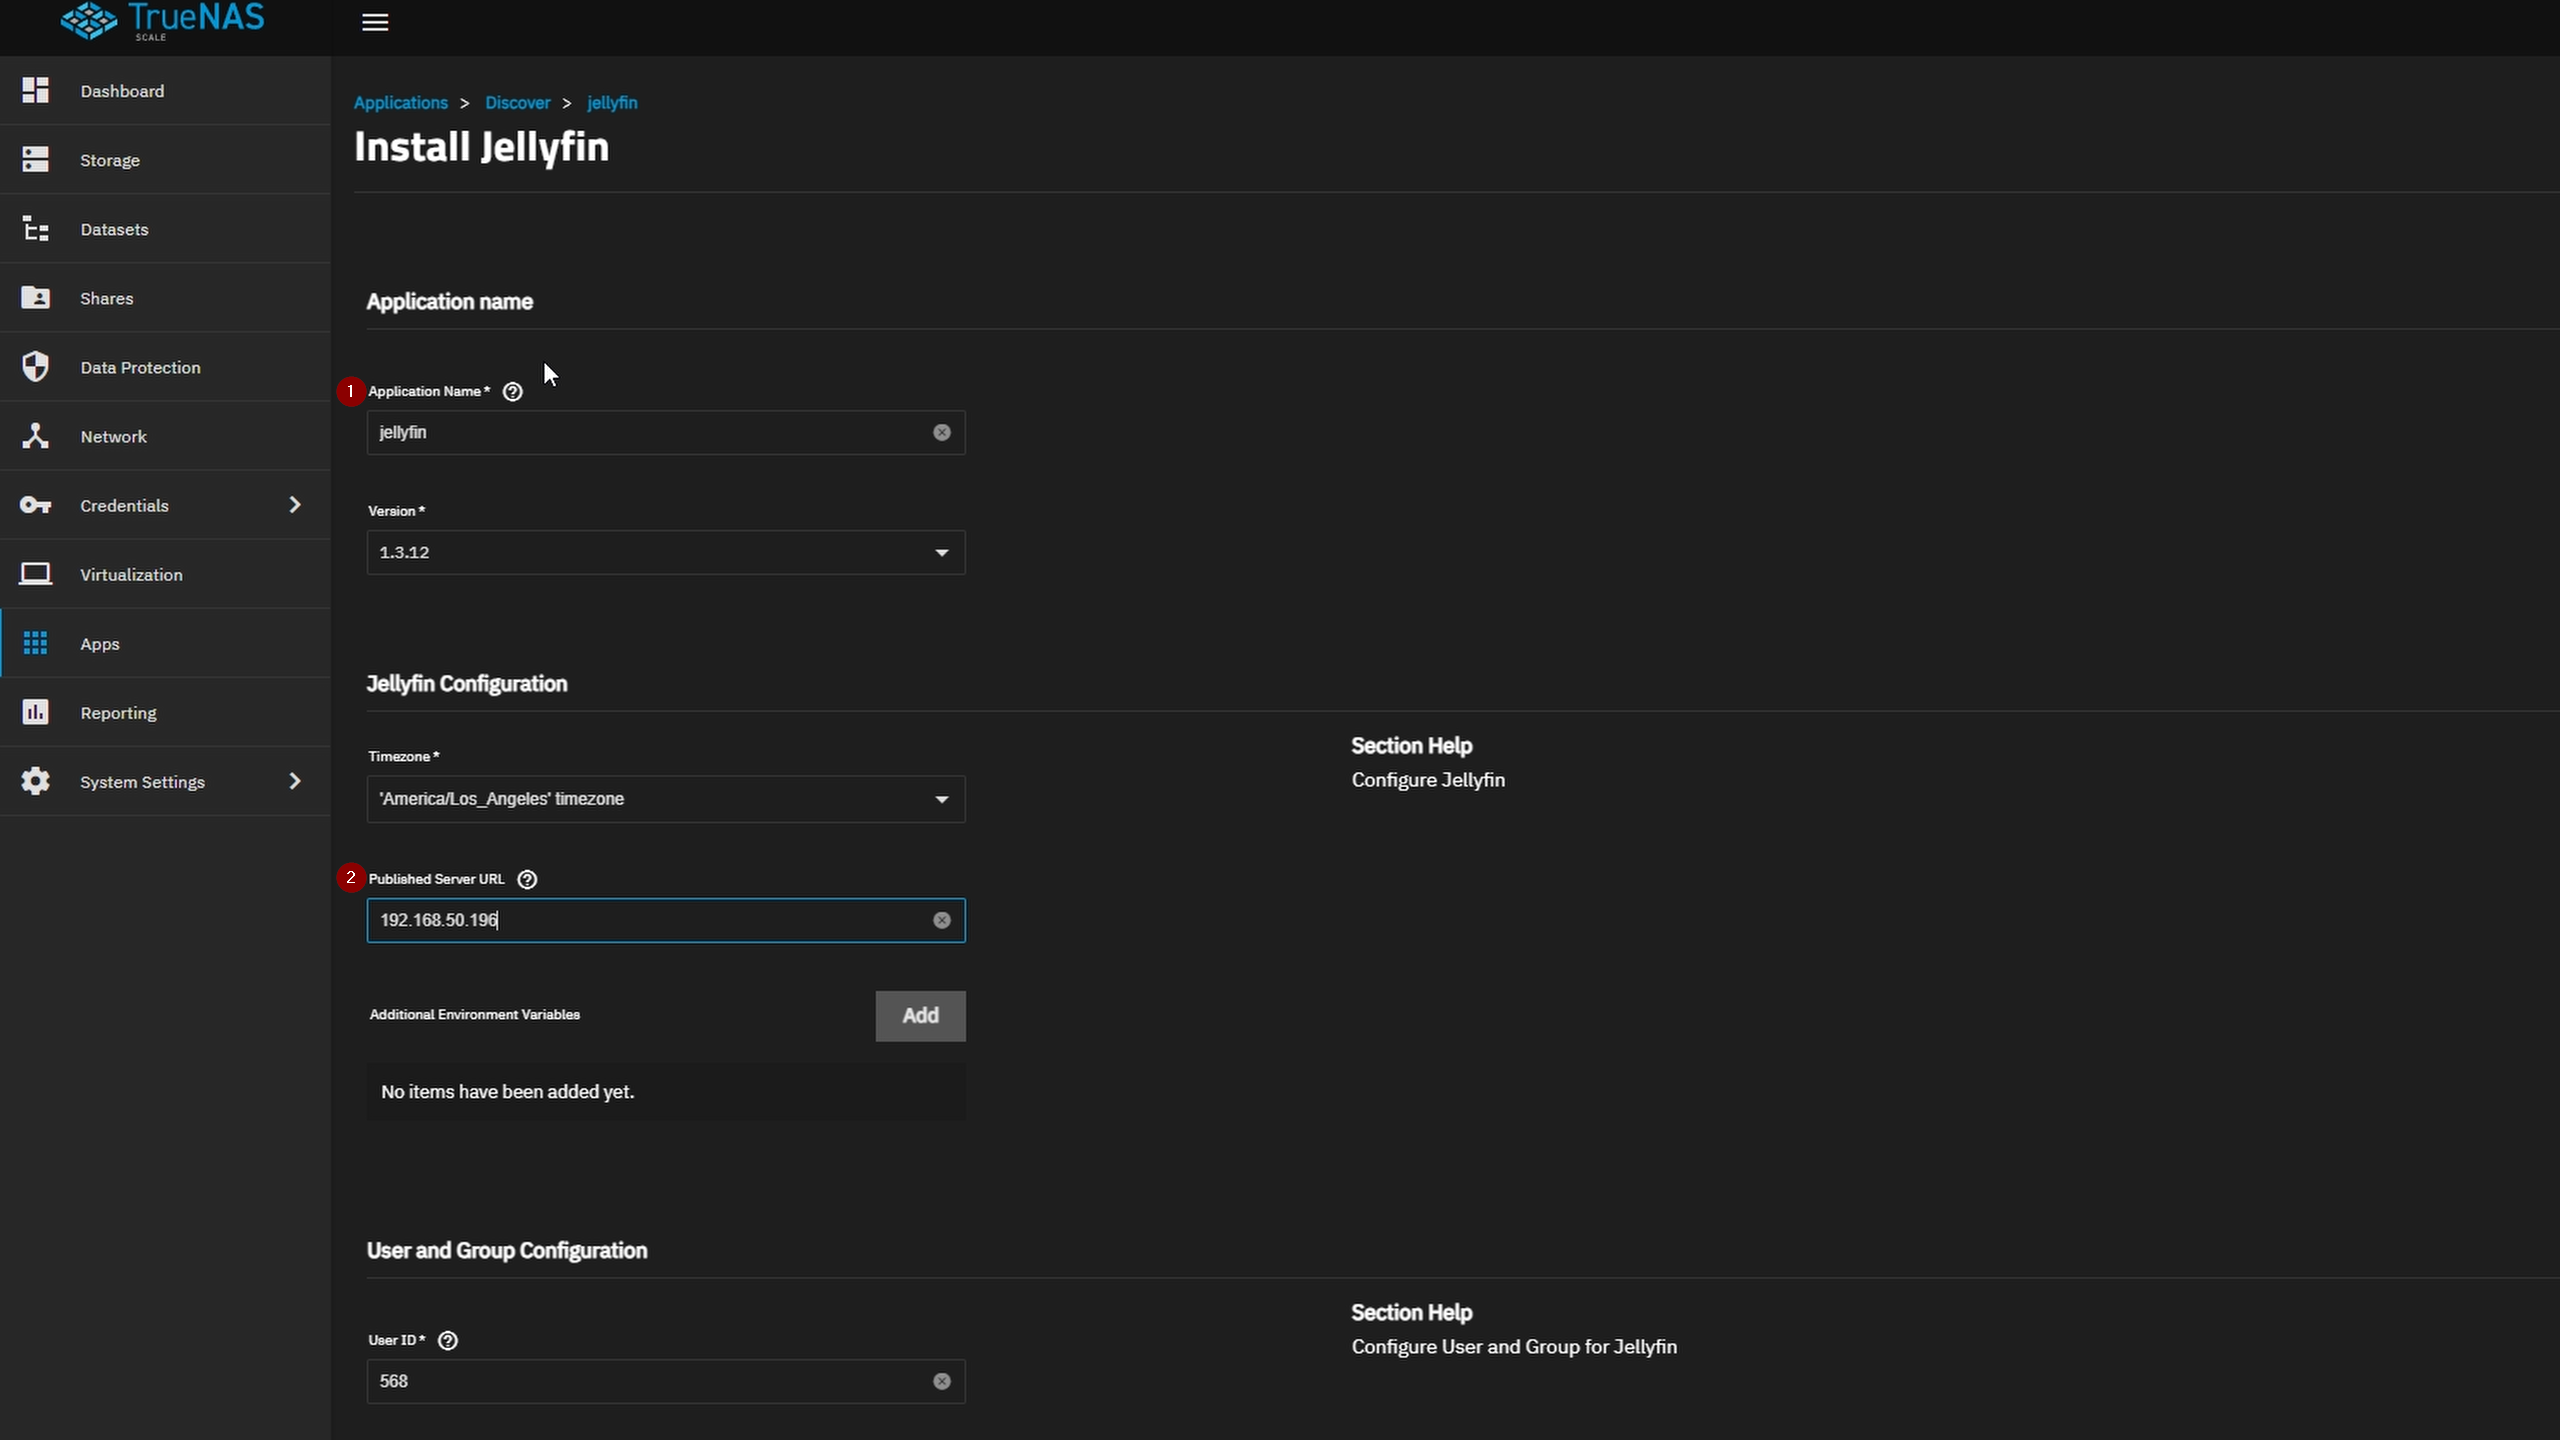
Click Install.
Set application name and IP address (same as TrueNAS IP shown in your browser URL).
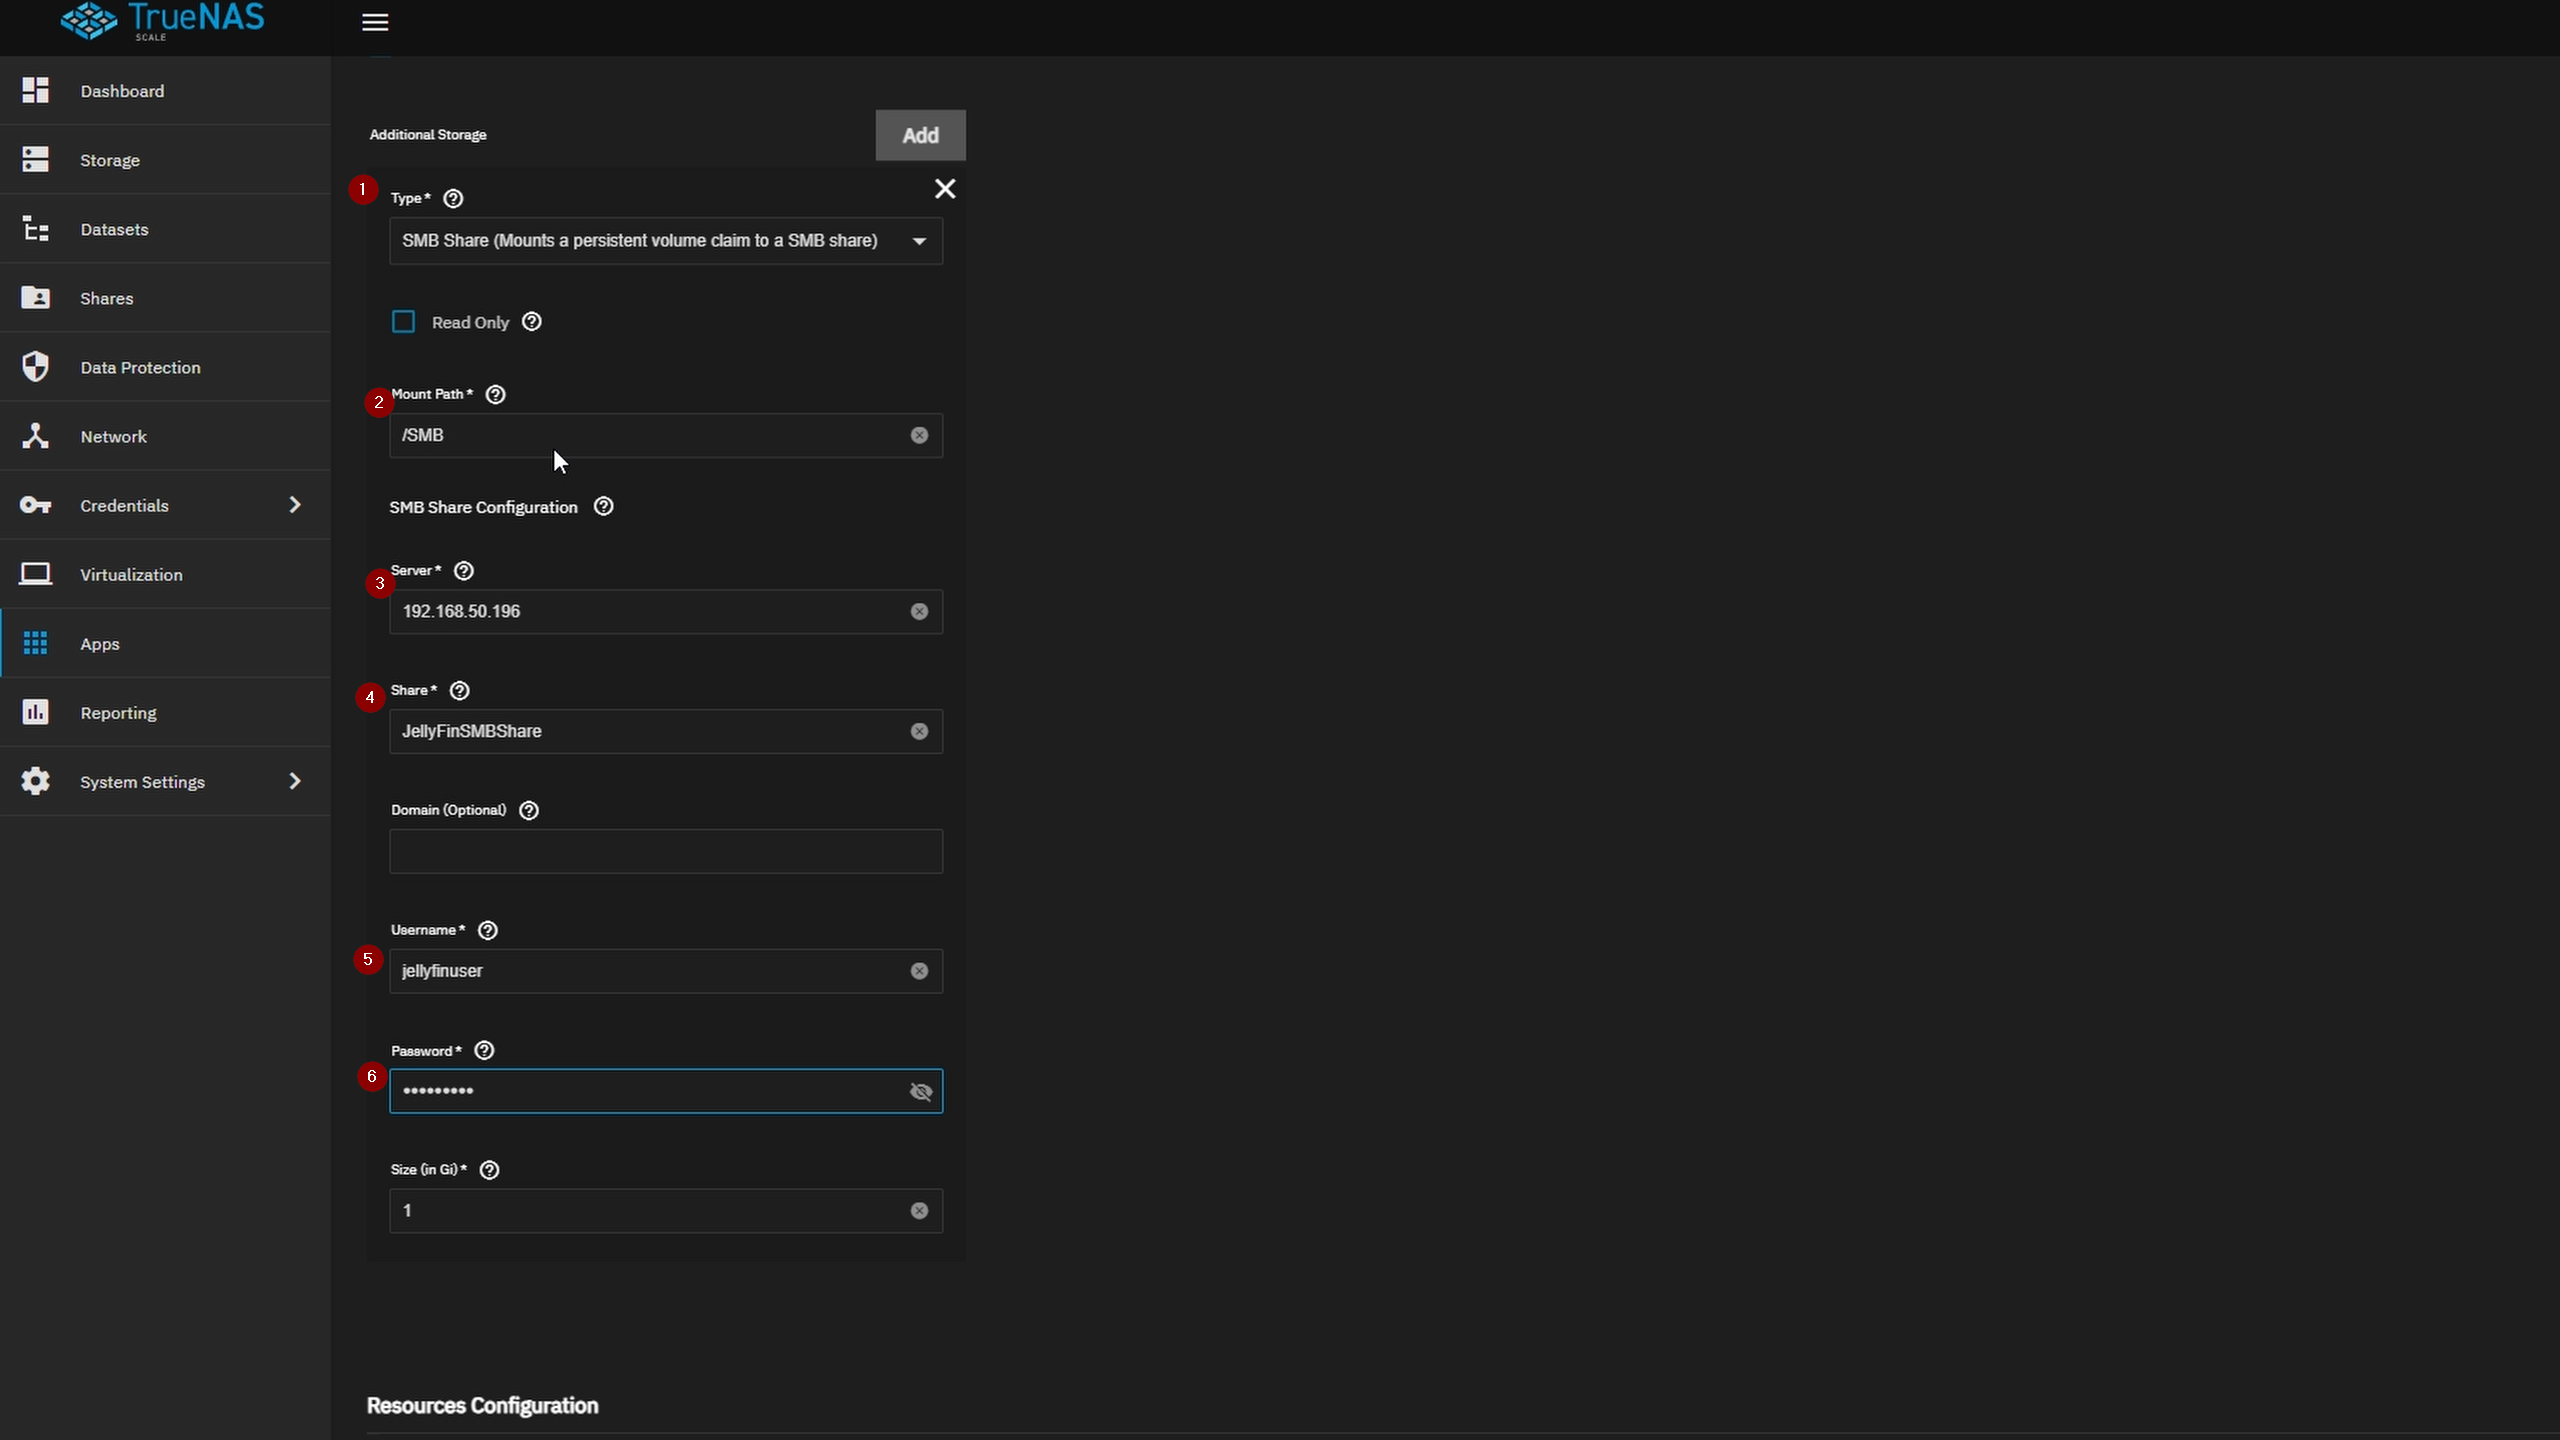
Under Additional Storage:
- Select SMB share as storage type
- Set Mount Path as desired (e.g. /SMB)
- Enter TrueNAS IP address
- Enter SMB share name
- Enter SMB local user name
- Enter SMB user password
Click Save and wait for deployment status.
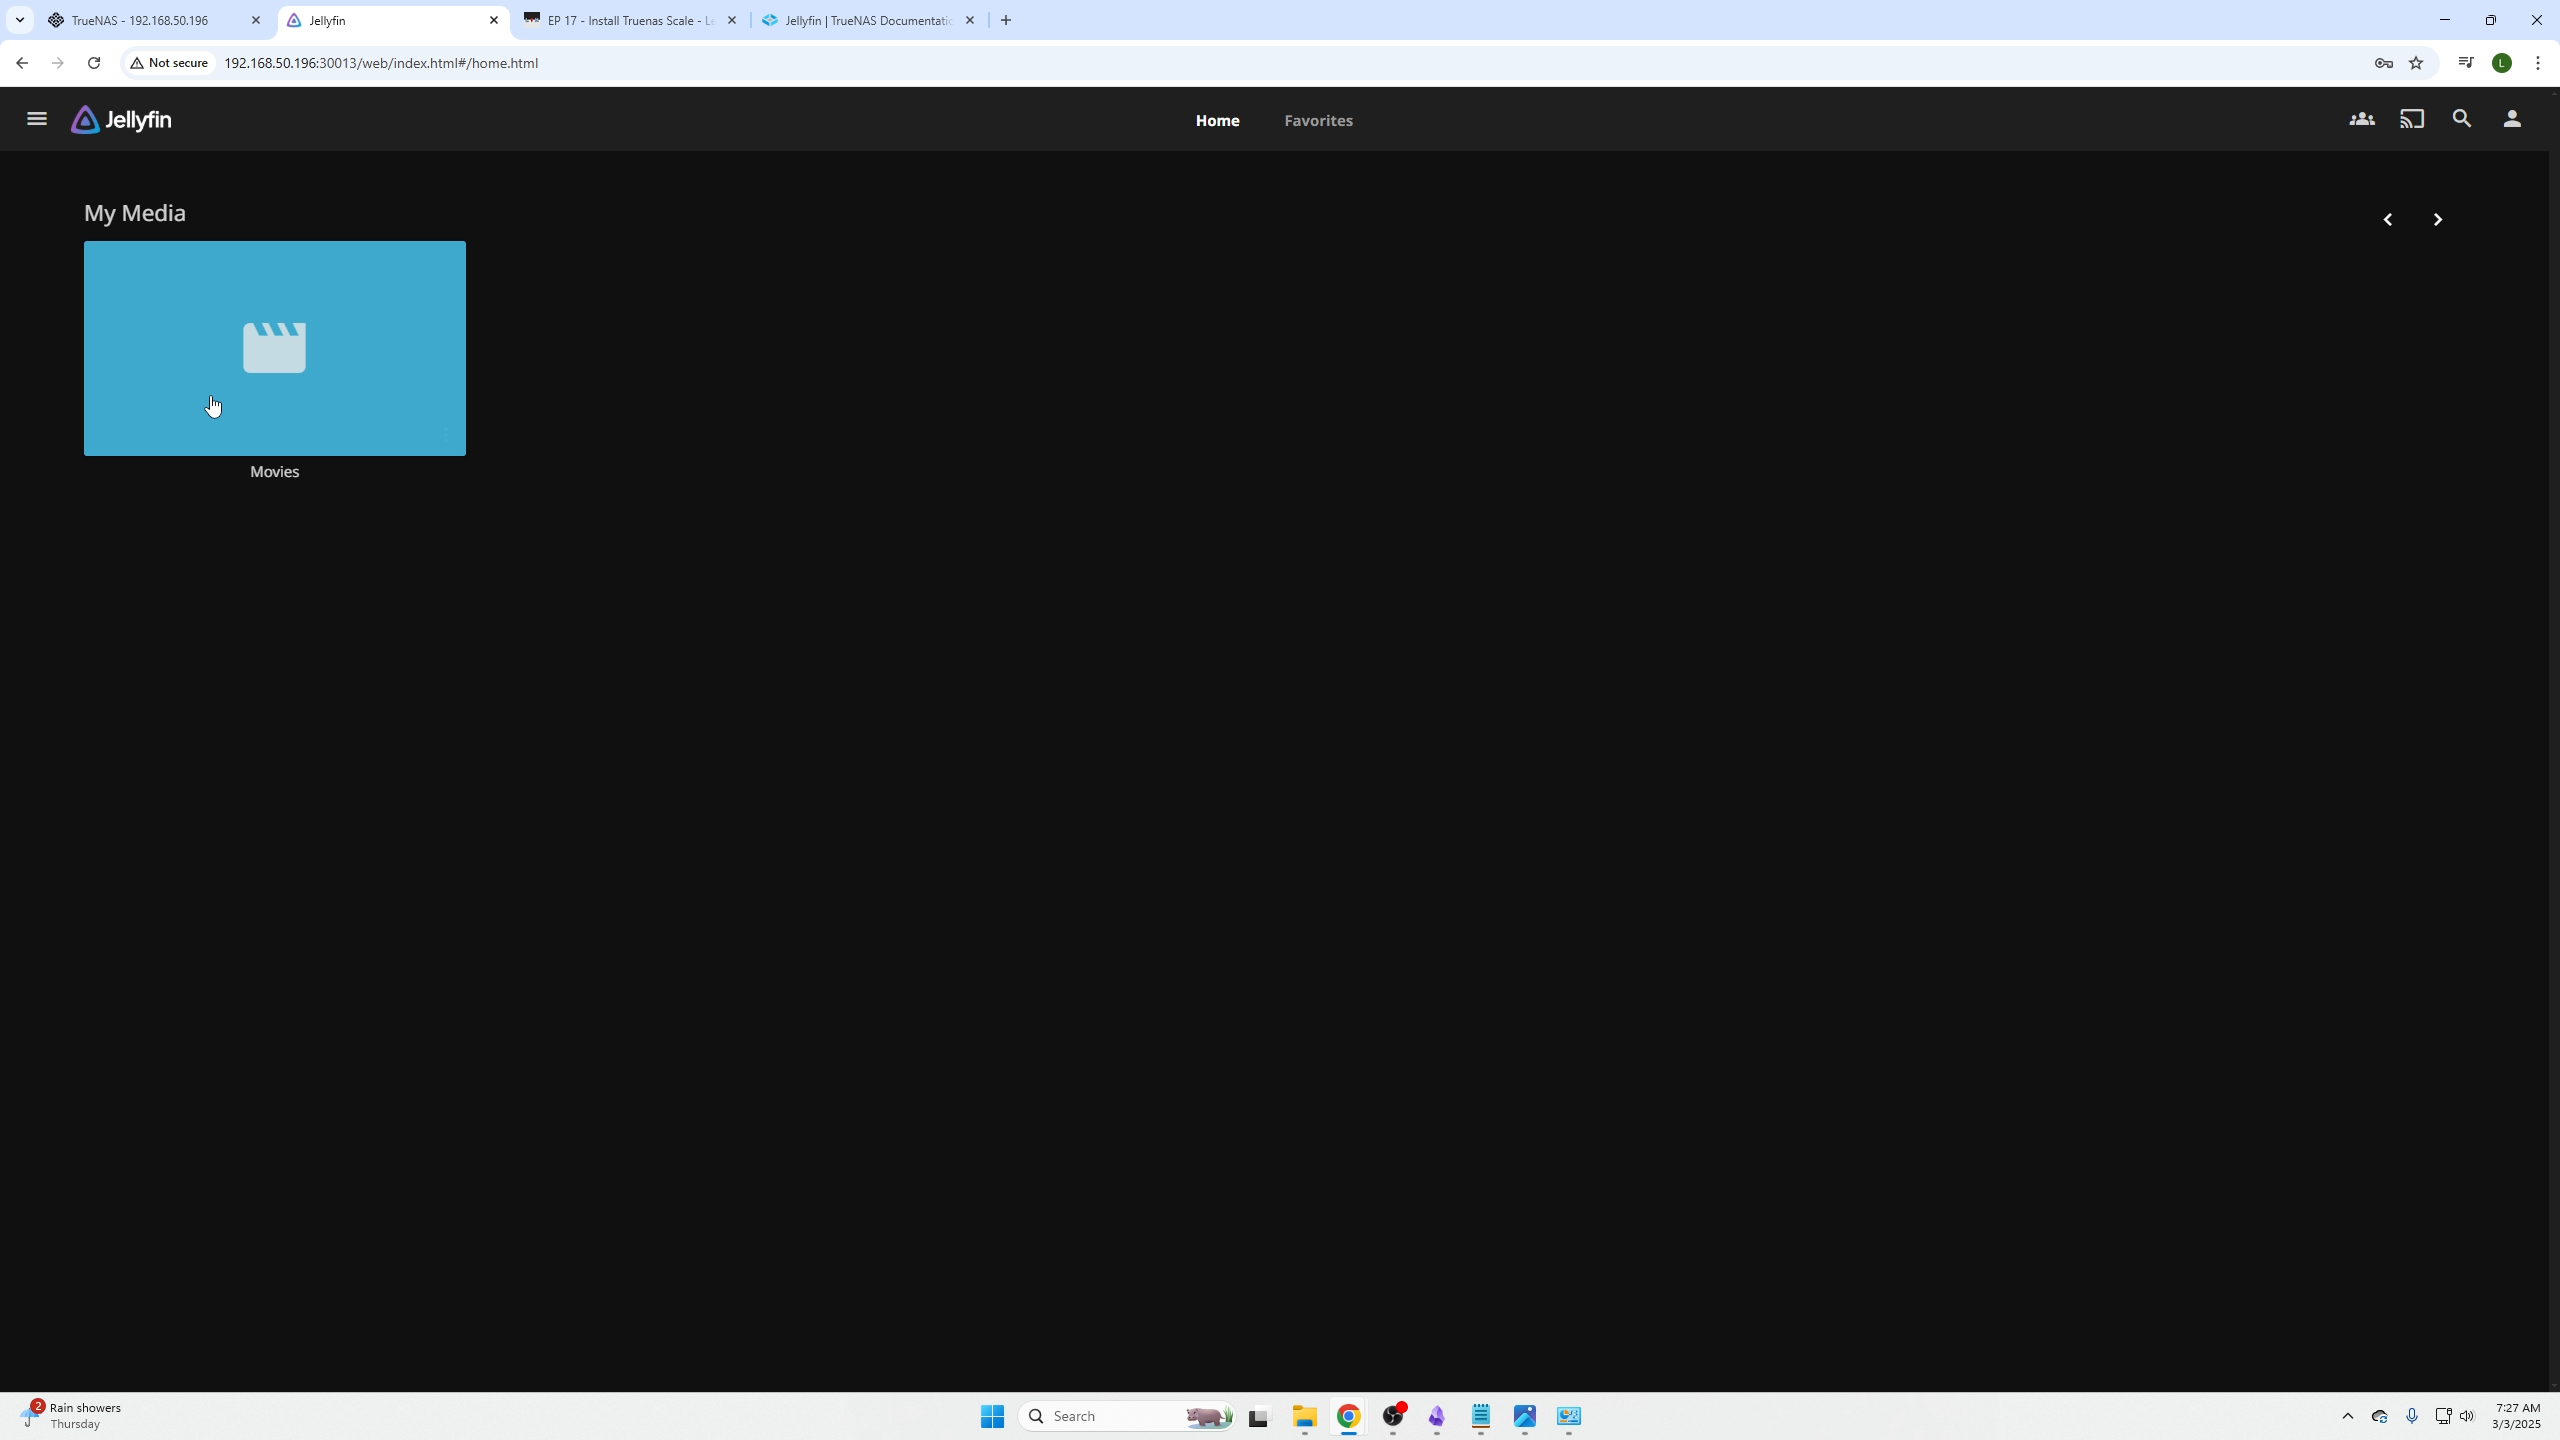
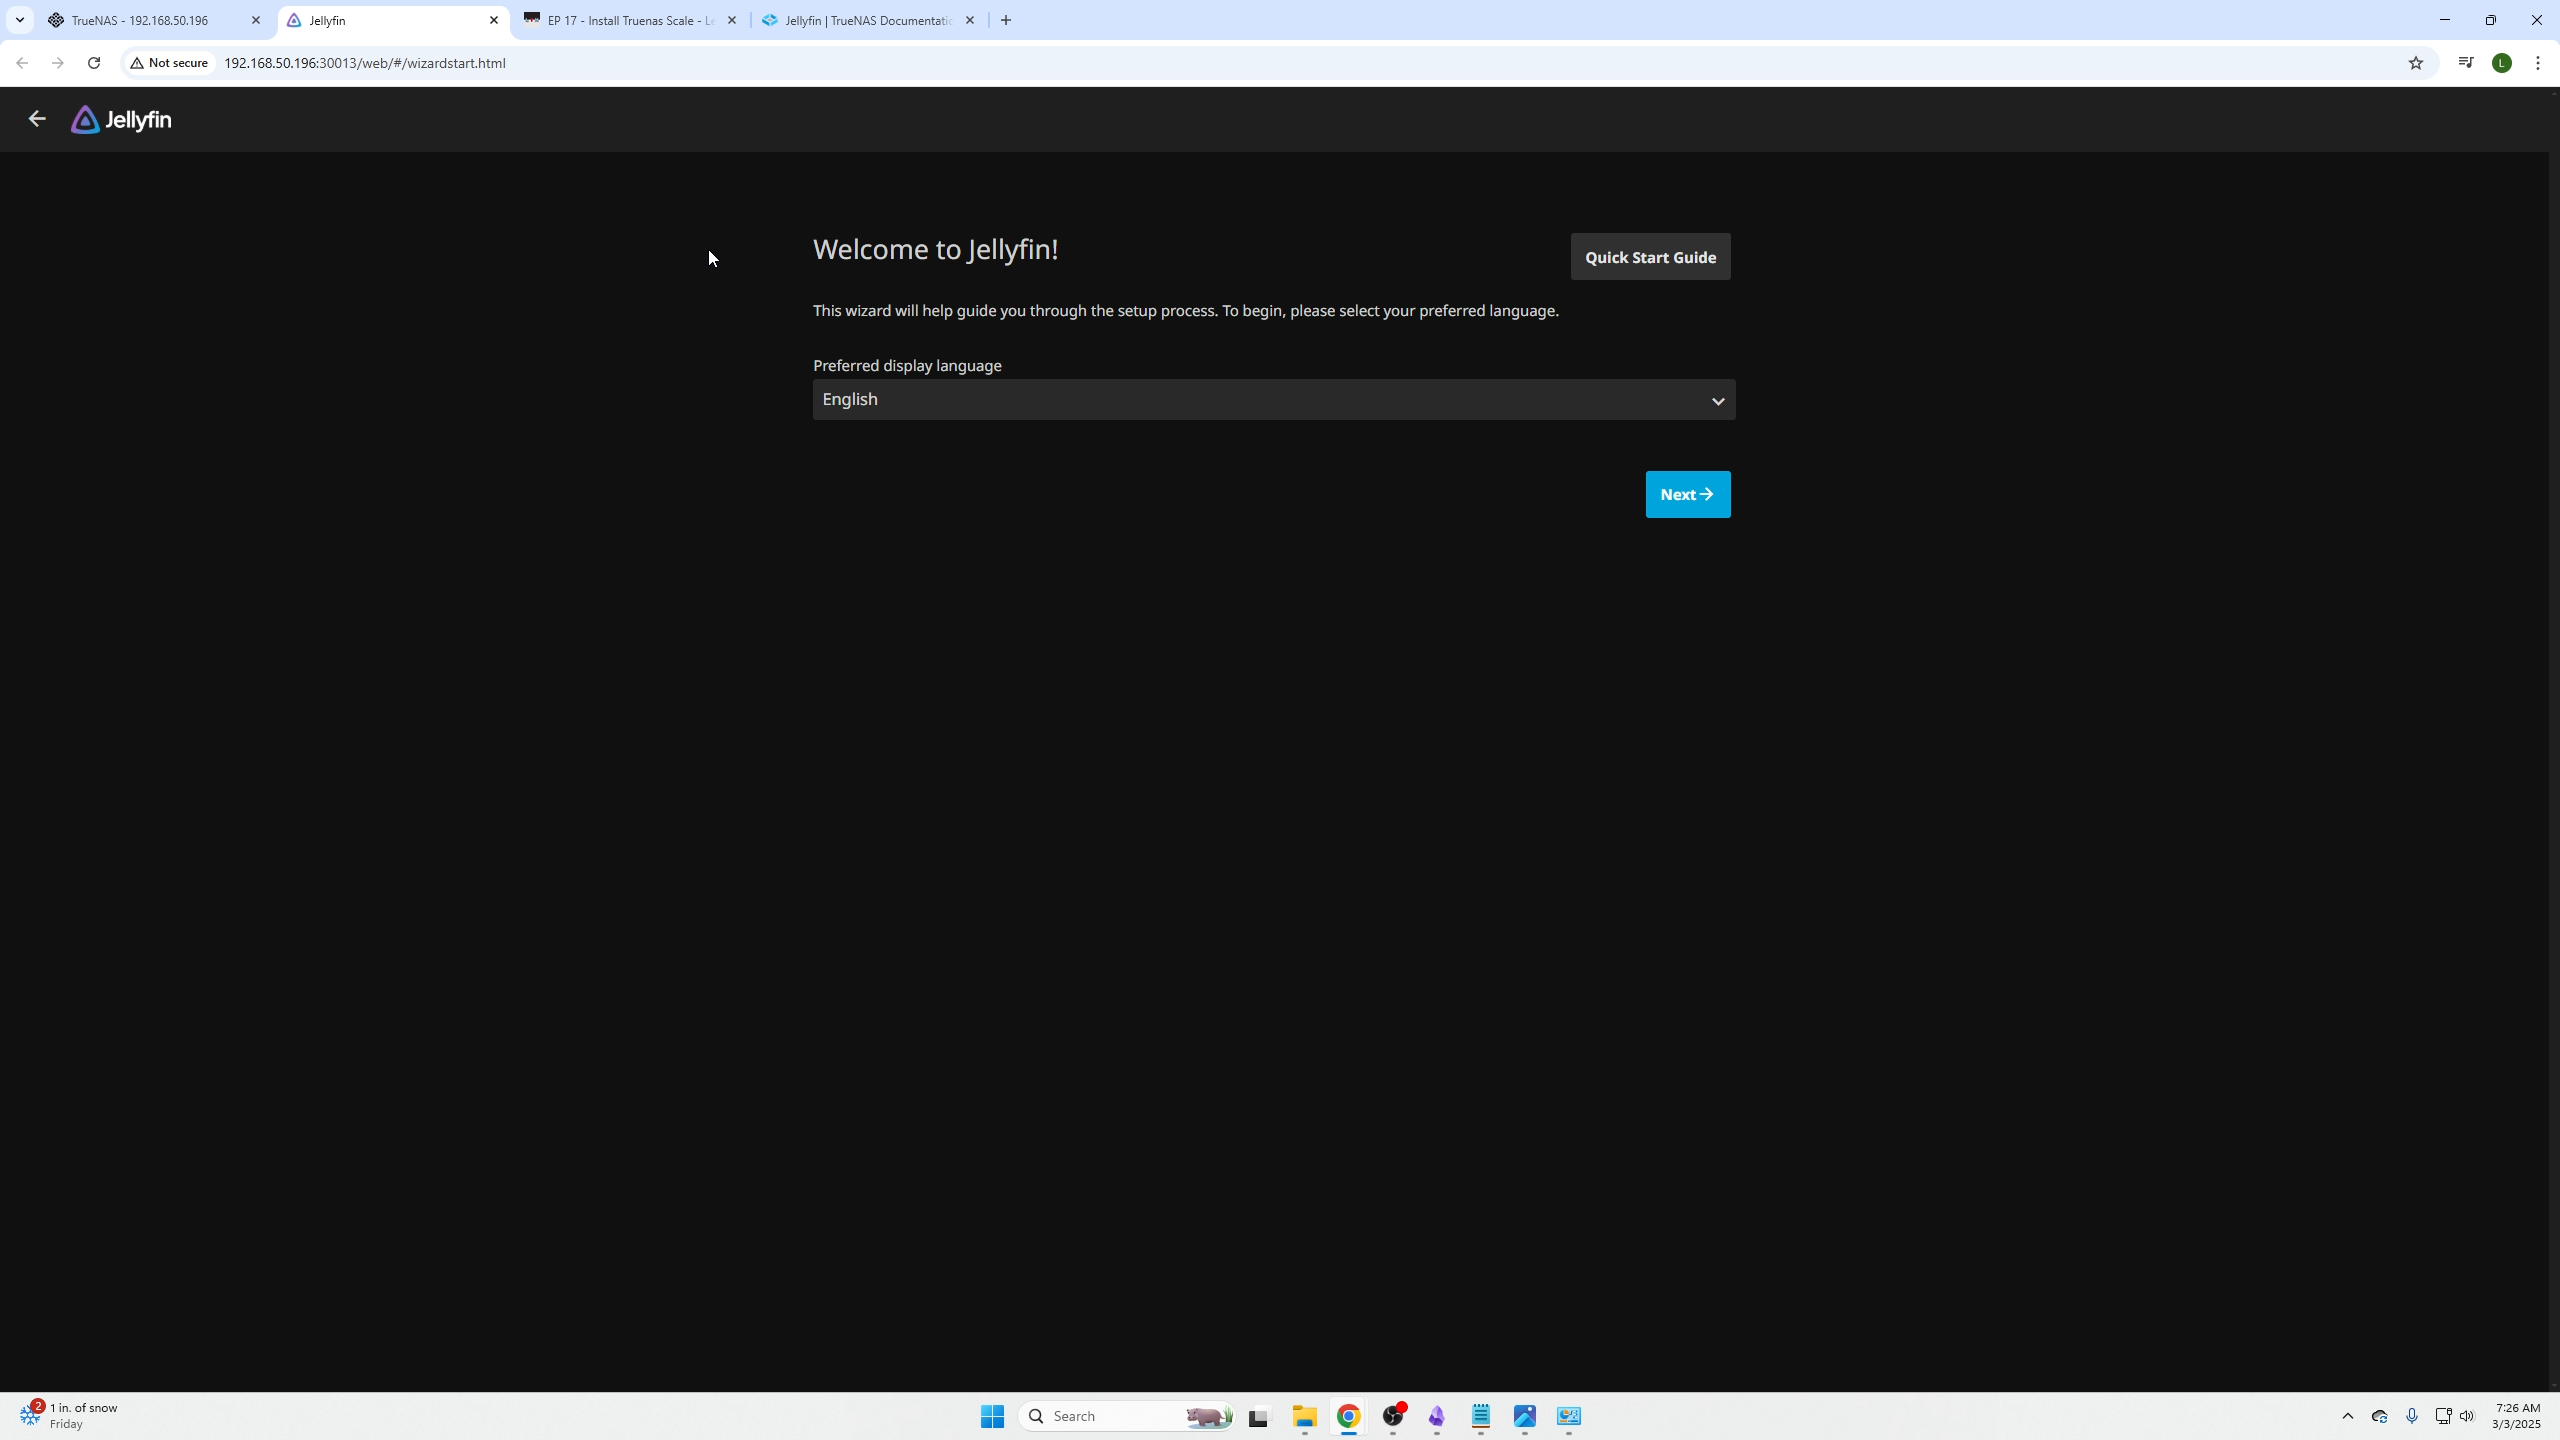
After deployment, click the web portal icon to open JellyFin.
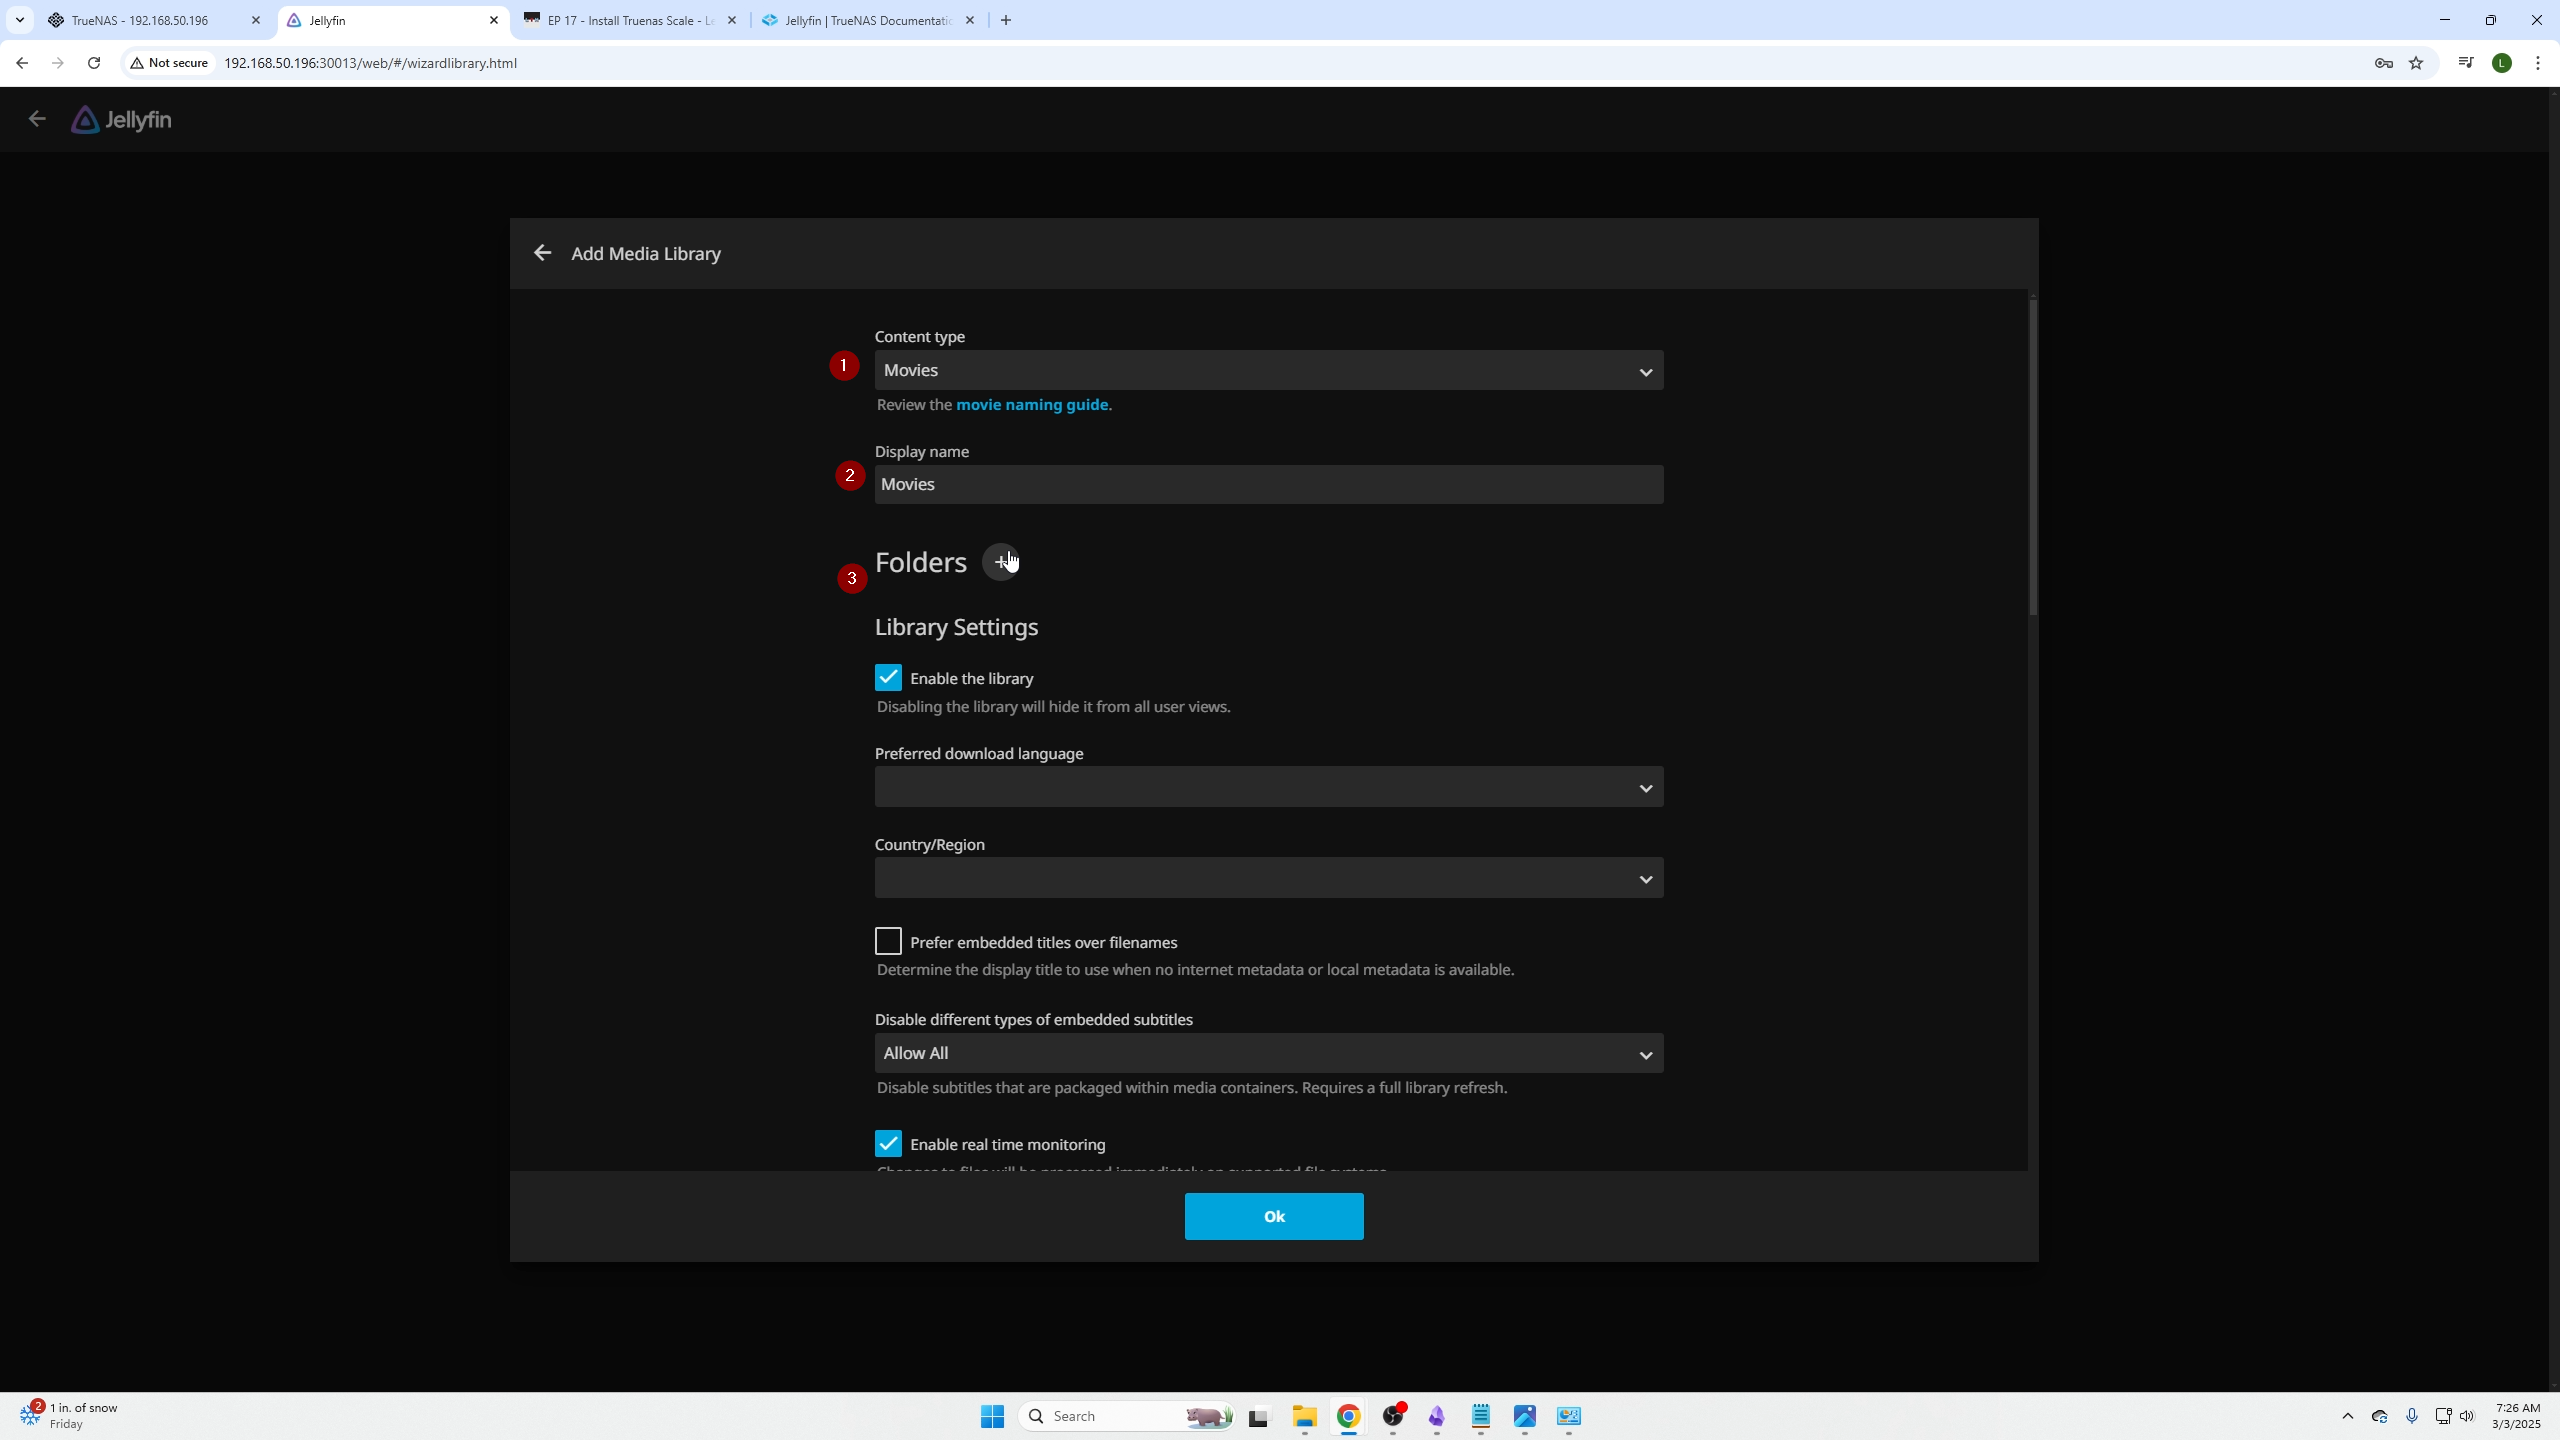
Select your language and click Next.
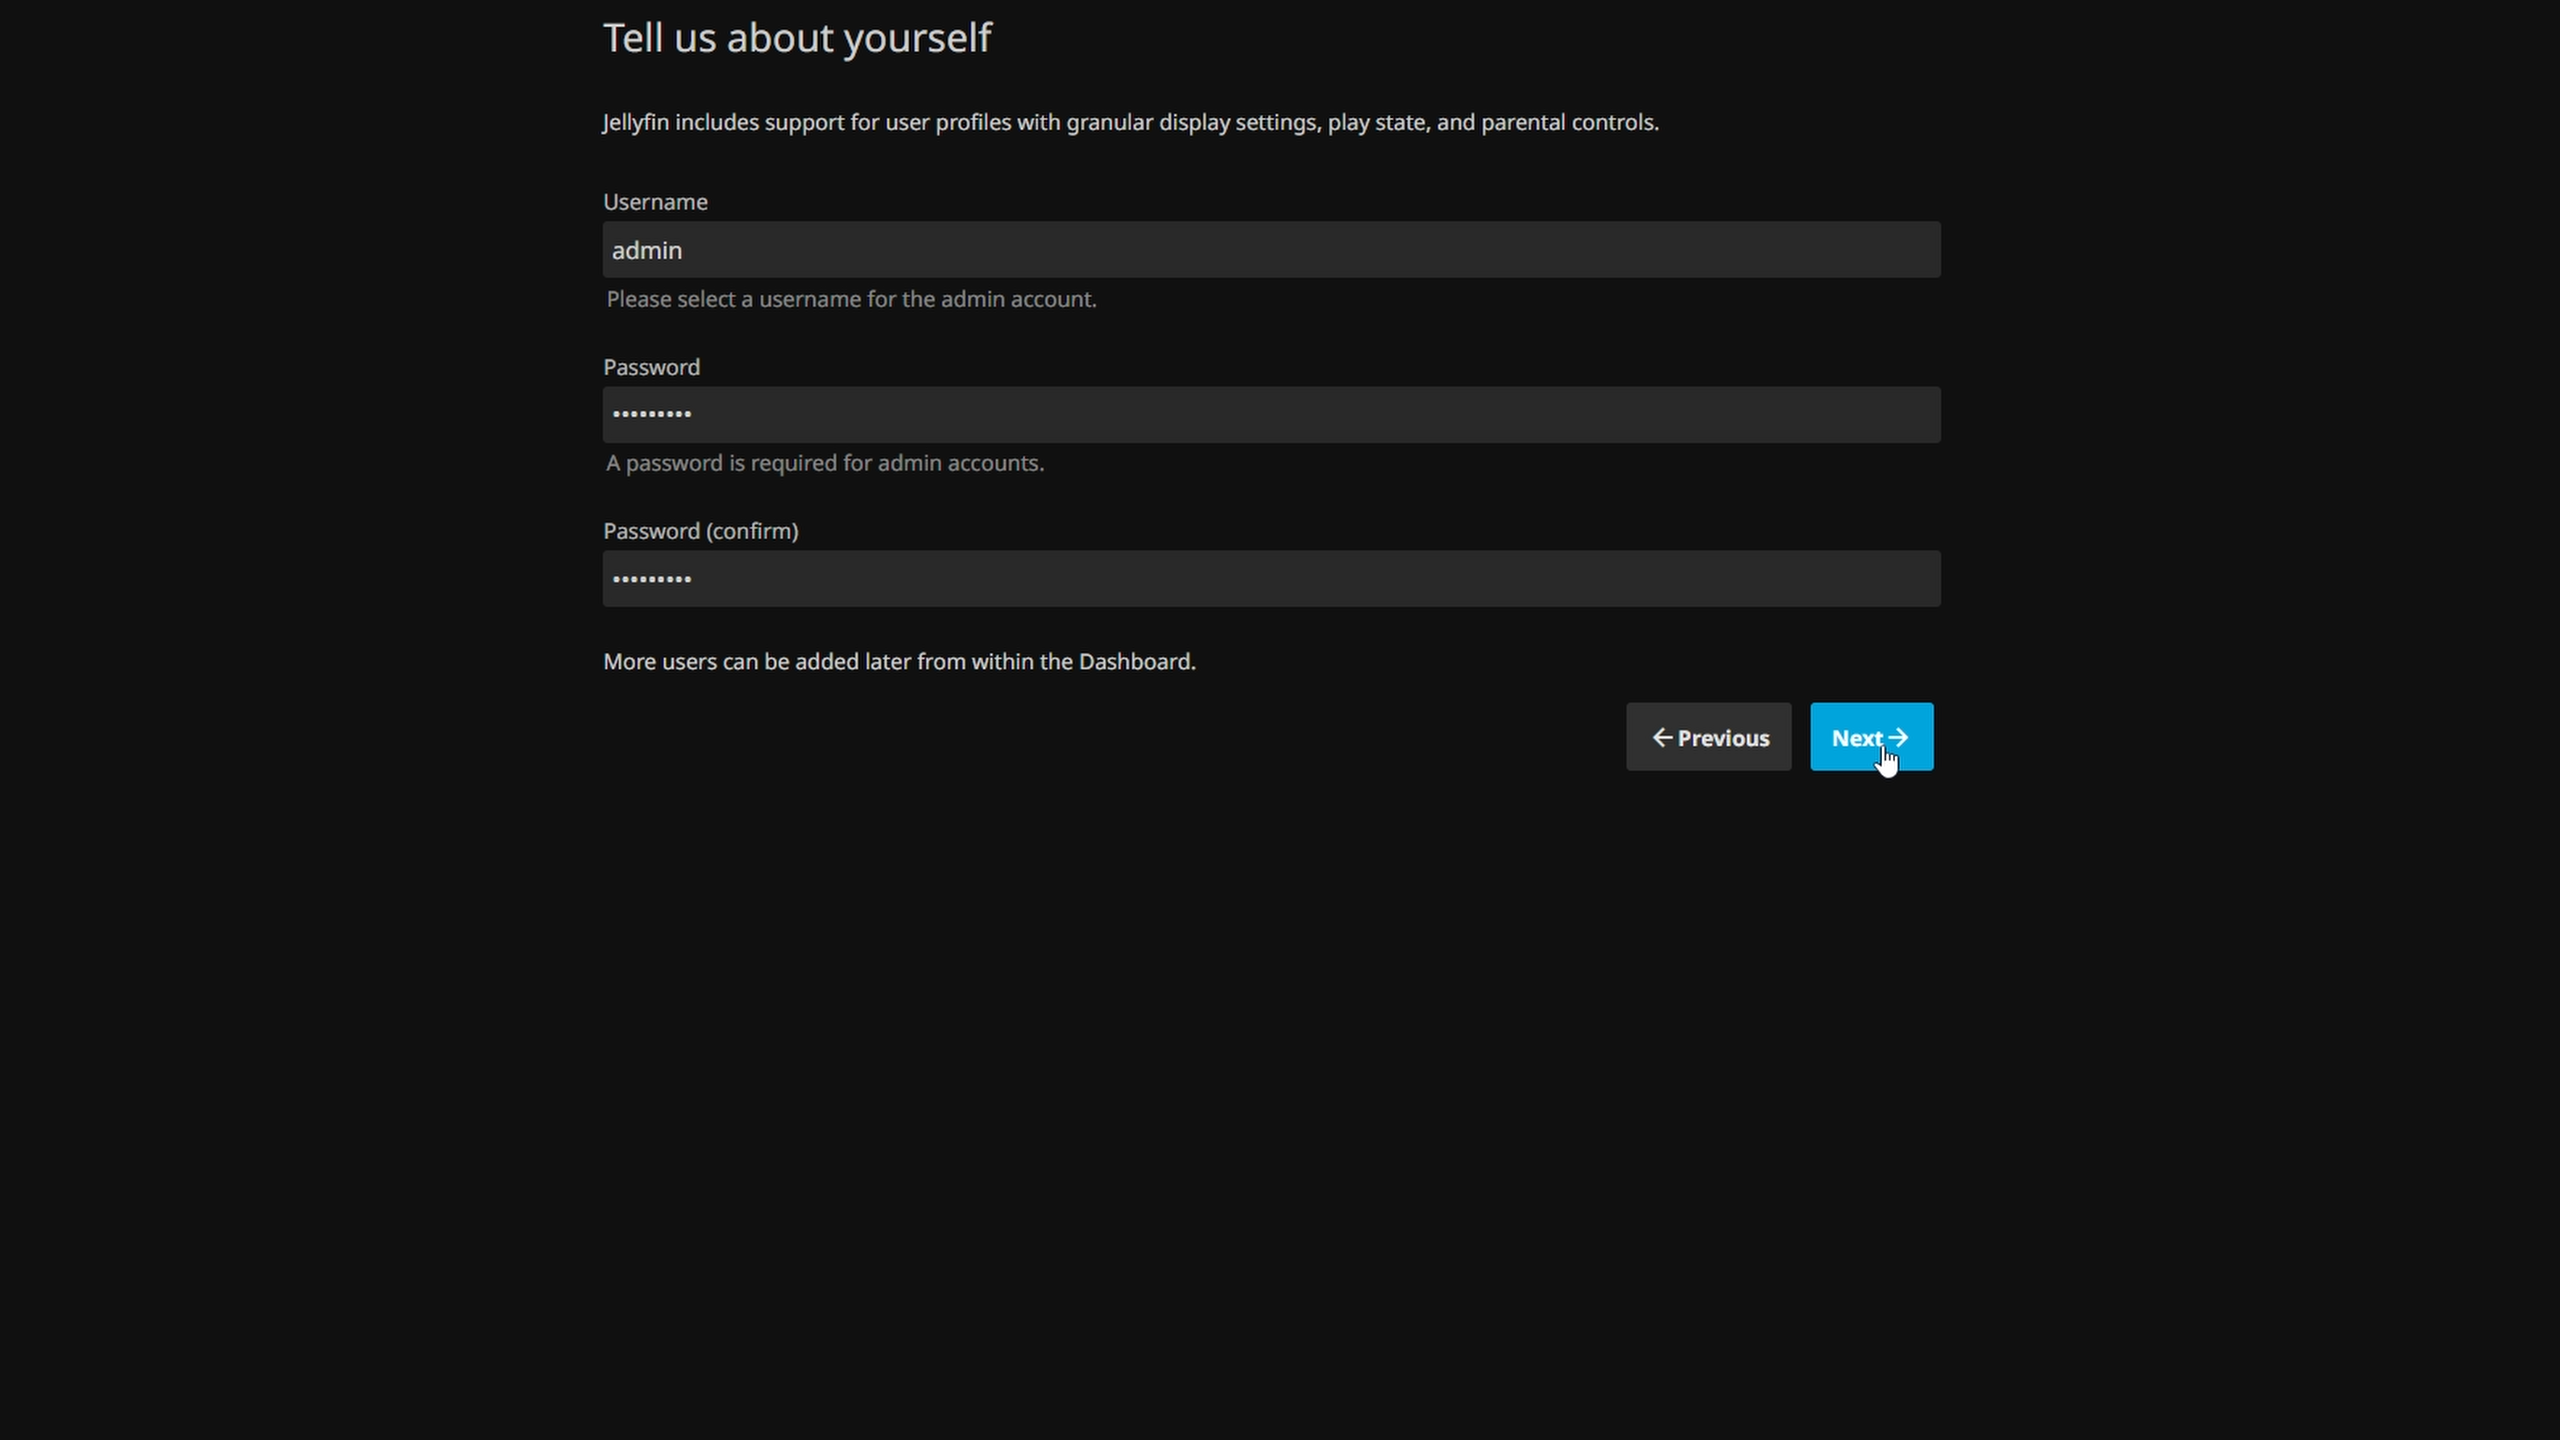
Create a user to log in and click Next.
Select content type (e.g. Movies), then add folders from your SMB share under the /SMB directory.
Showing the /SMB directory:
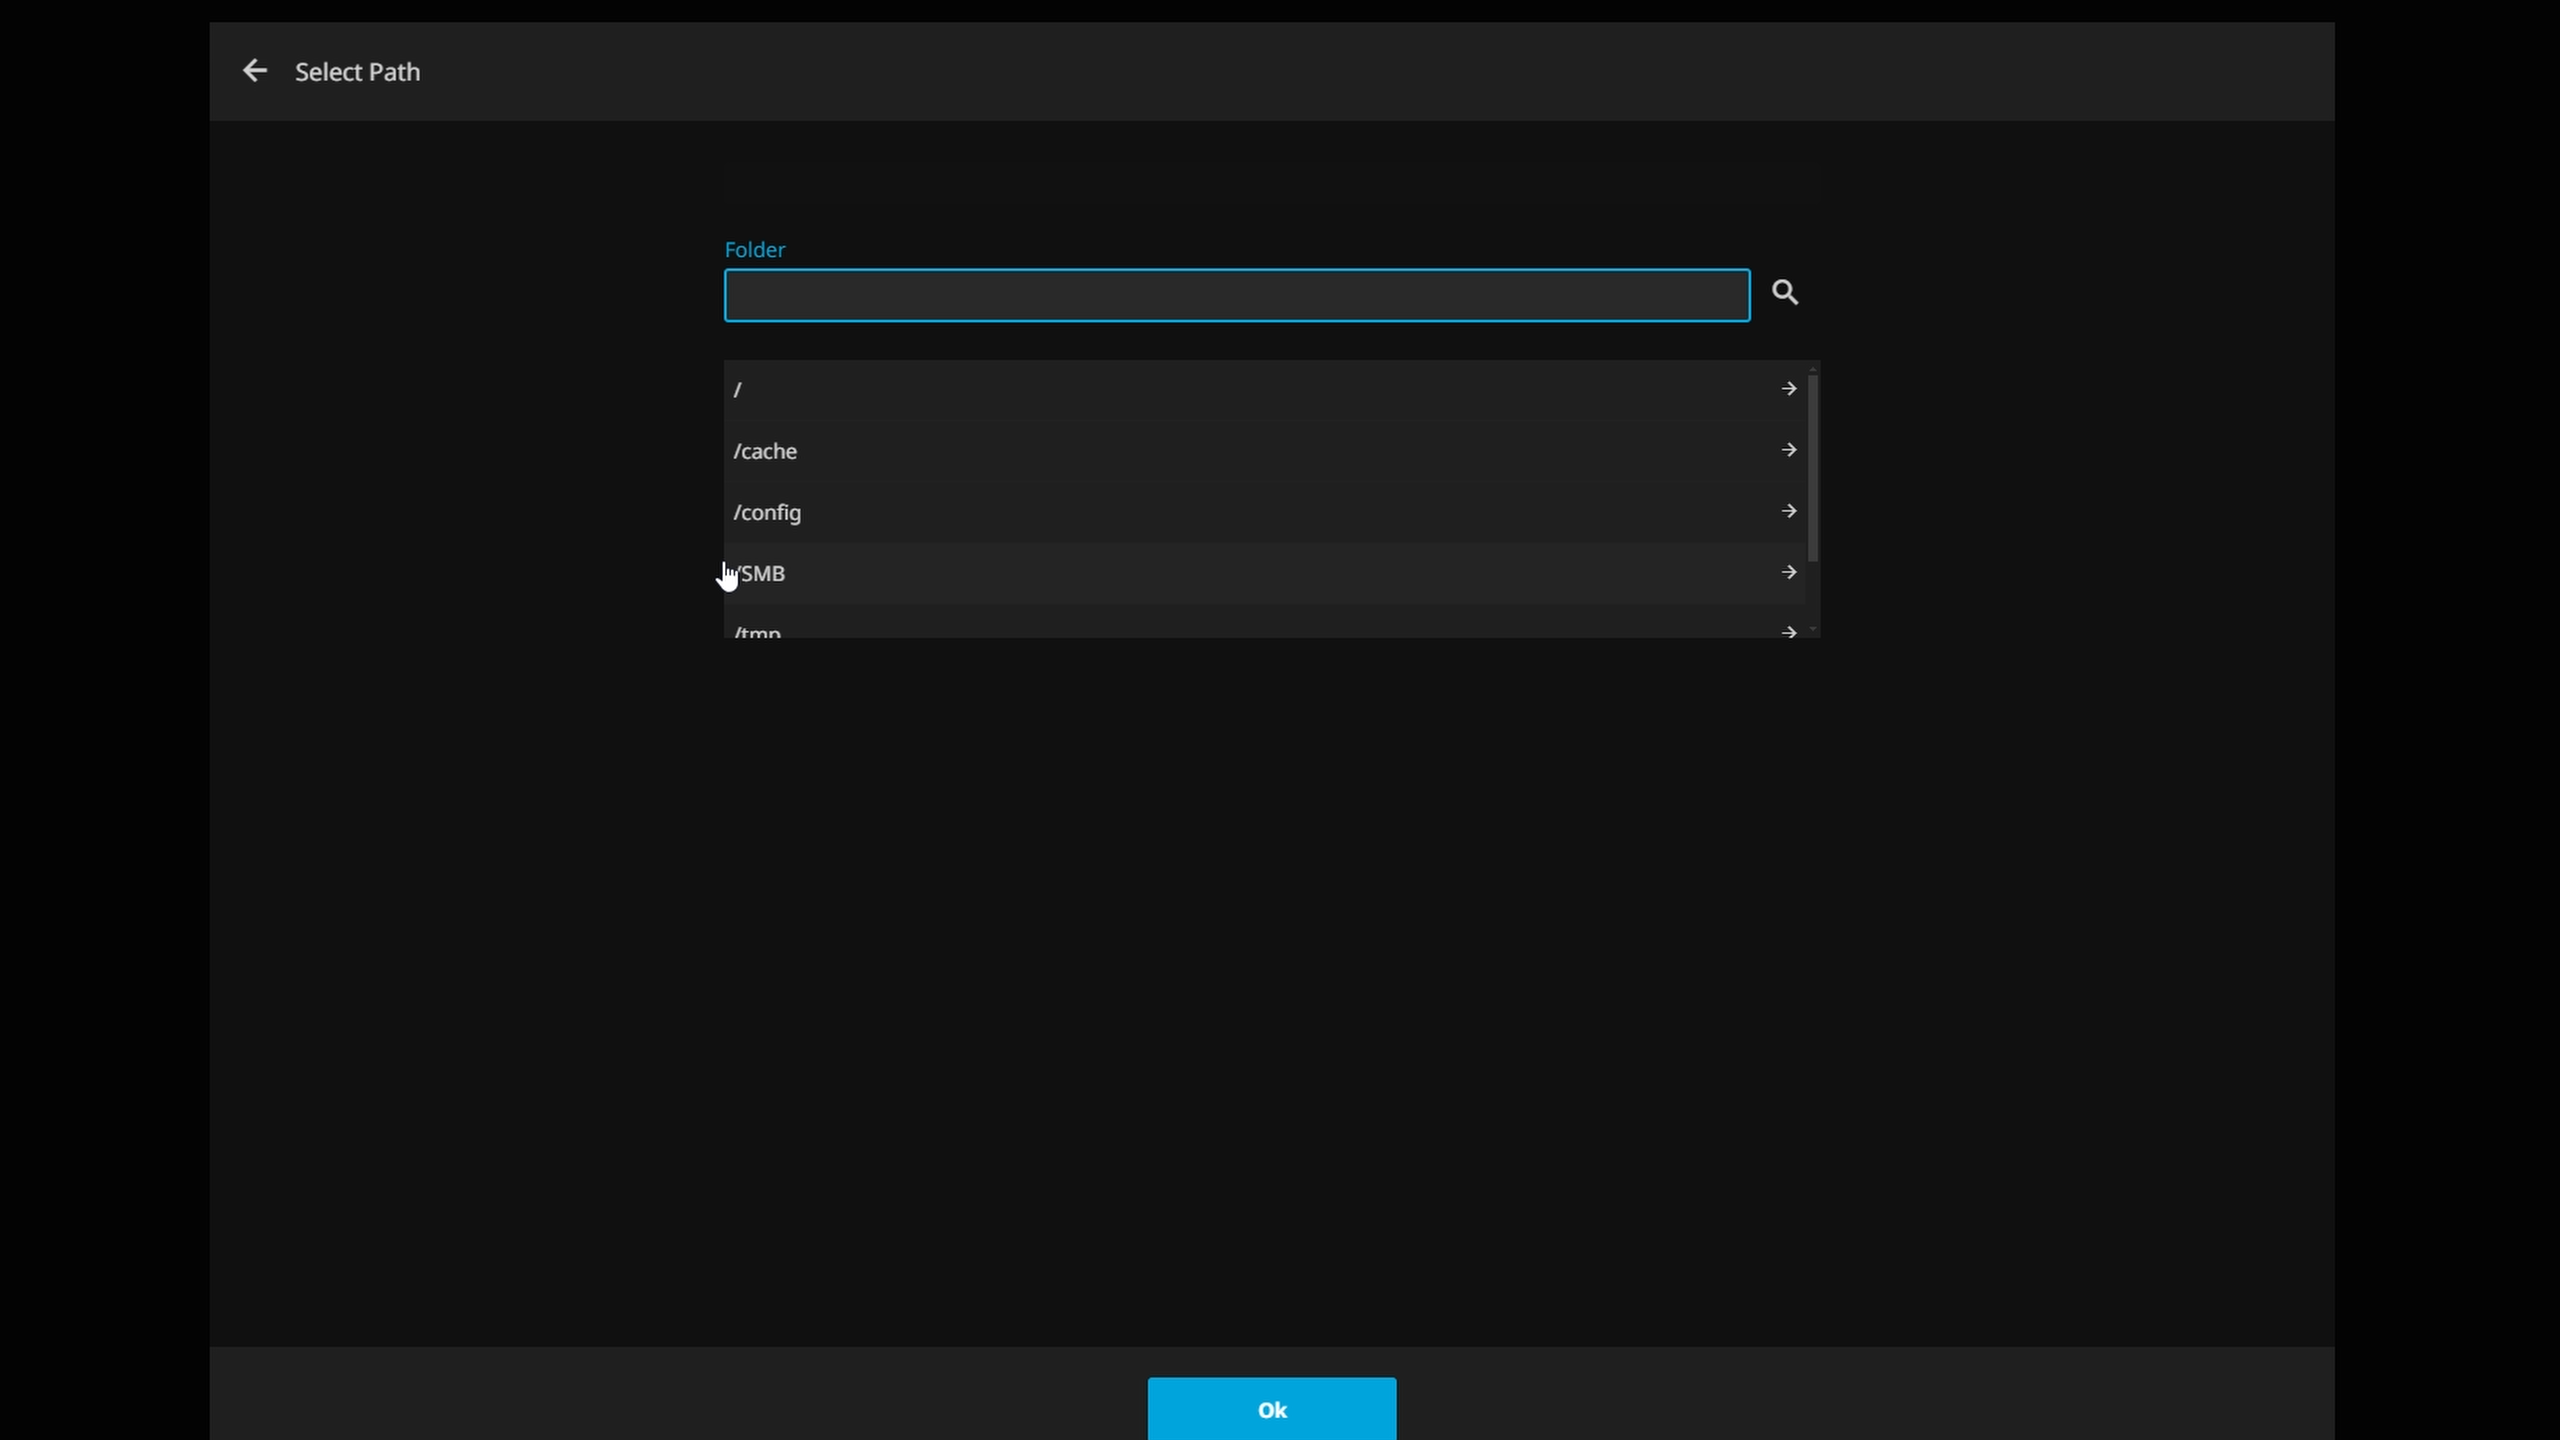
Browse folders created earlier inside.
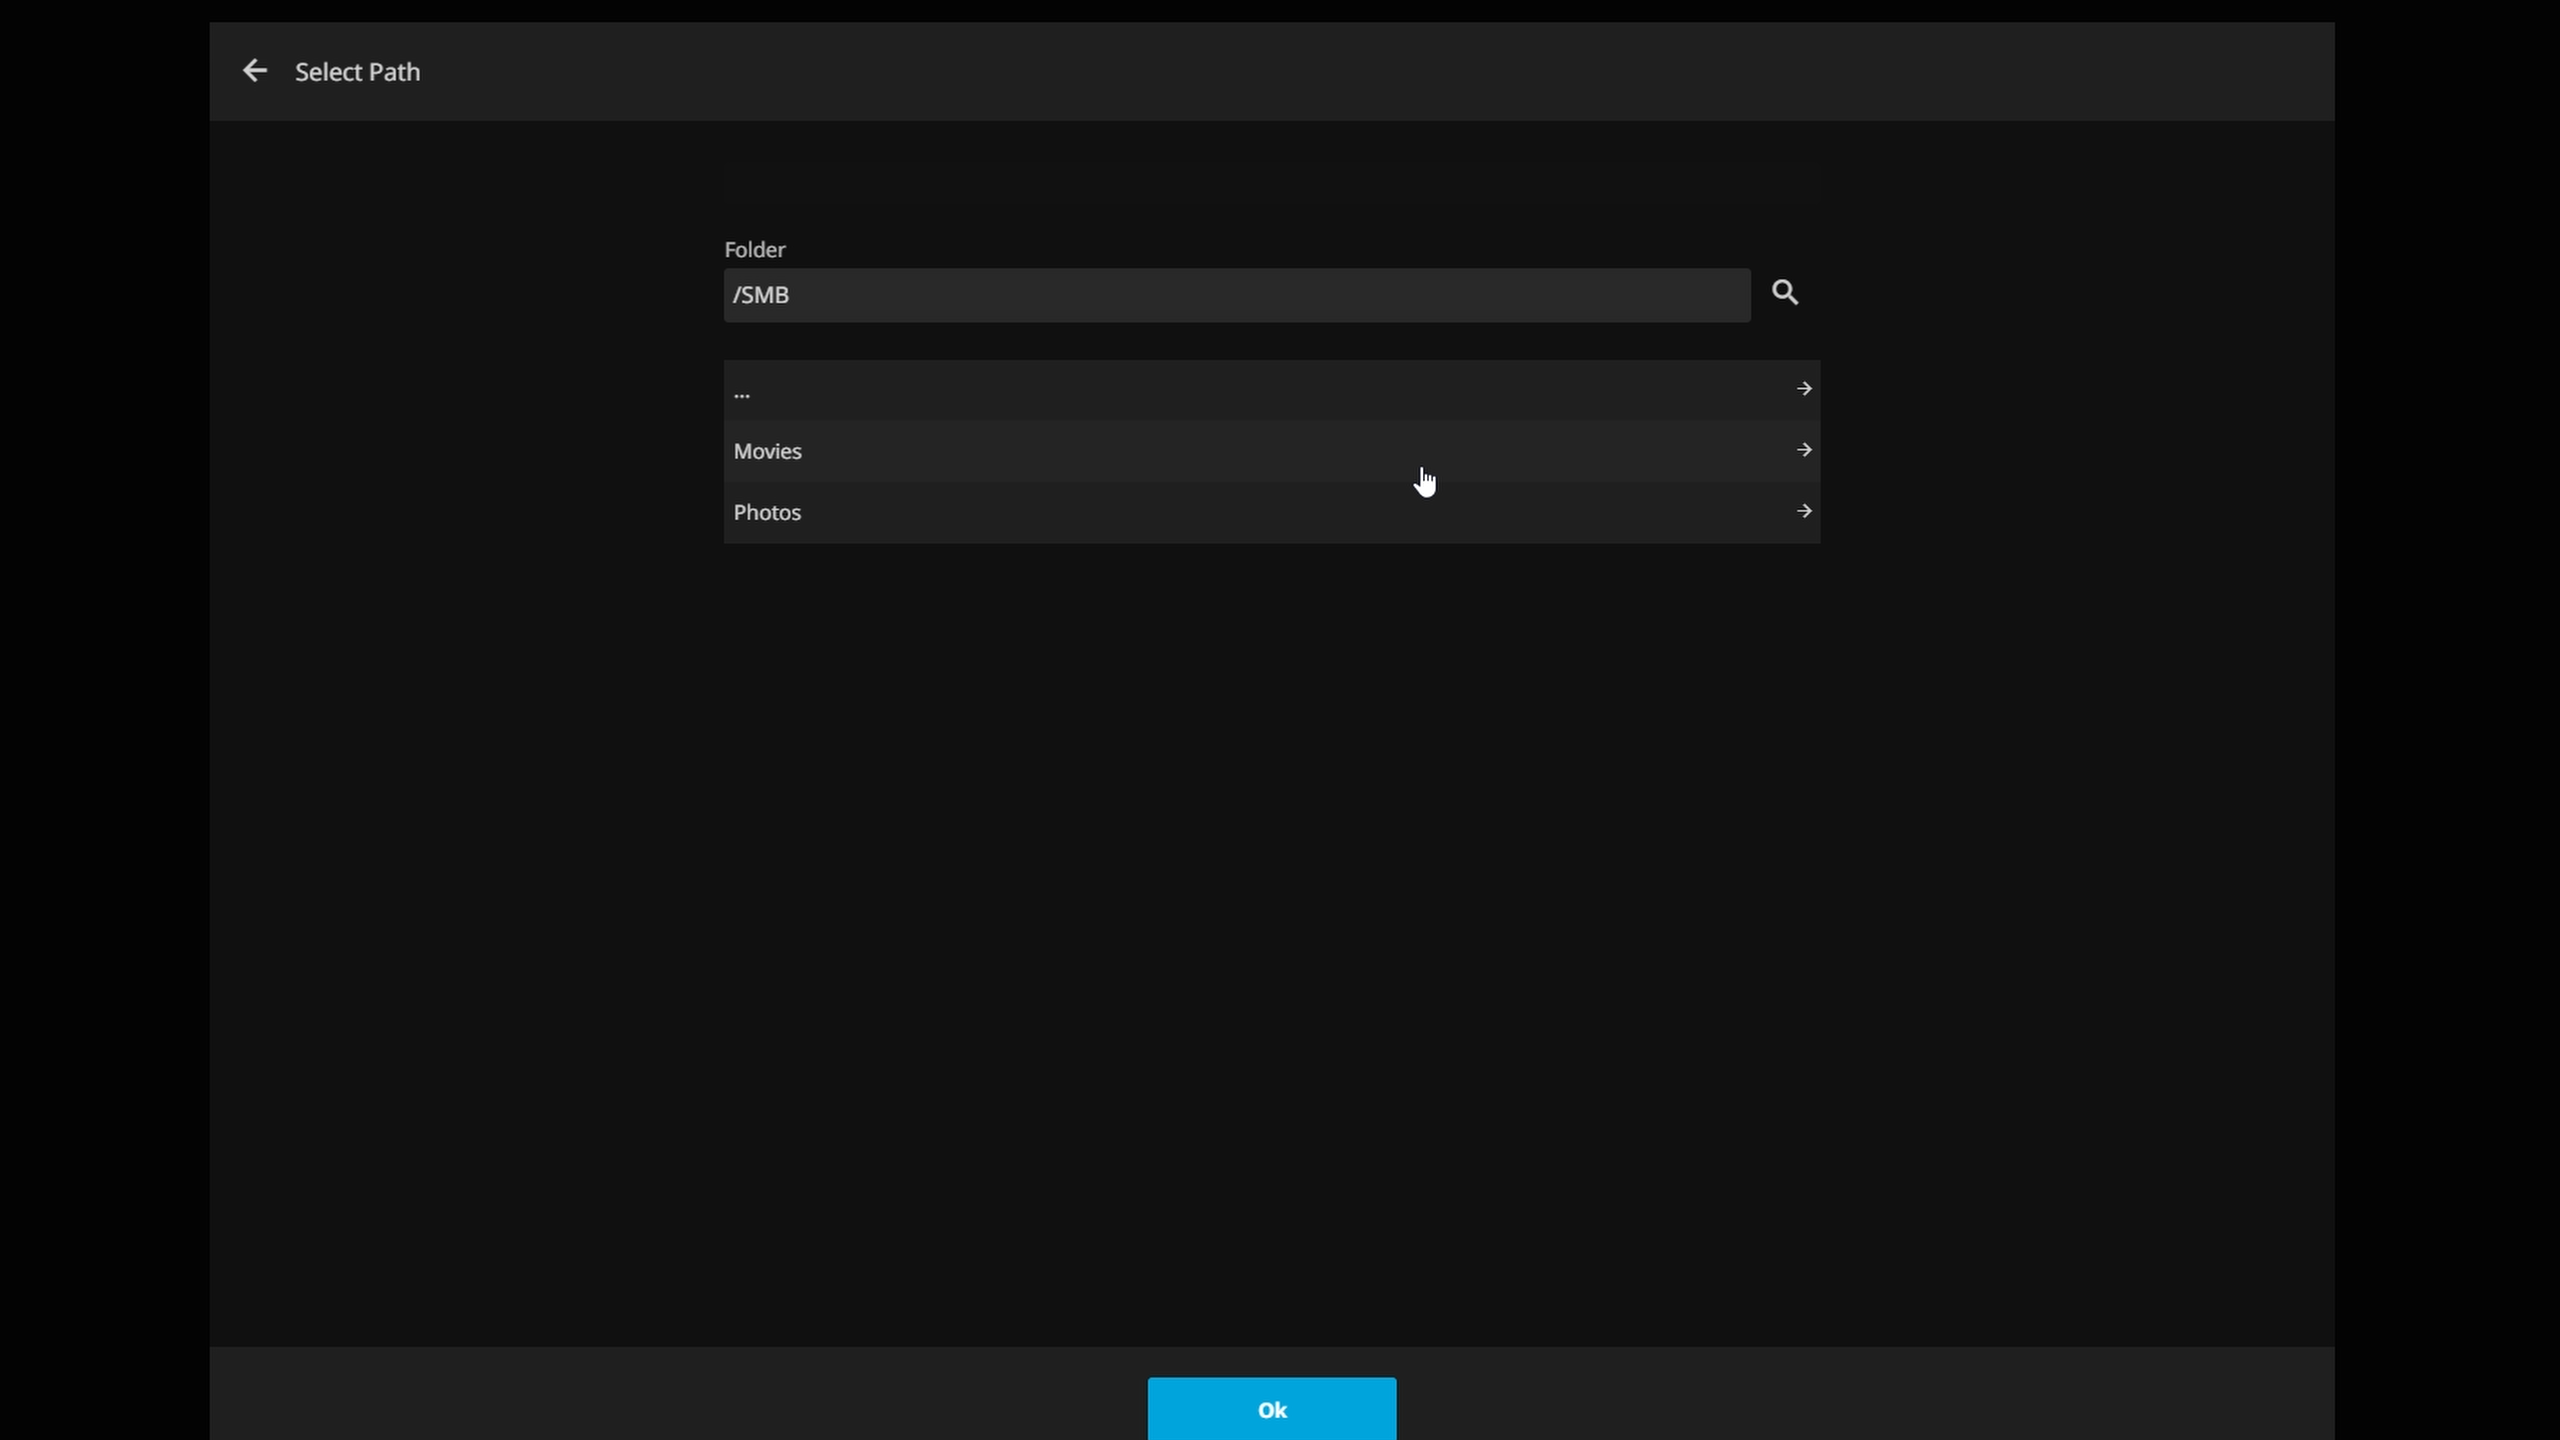
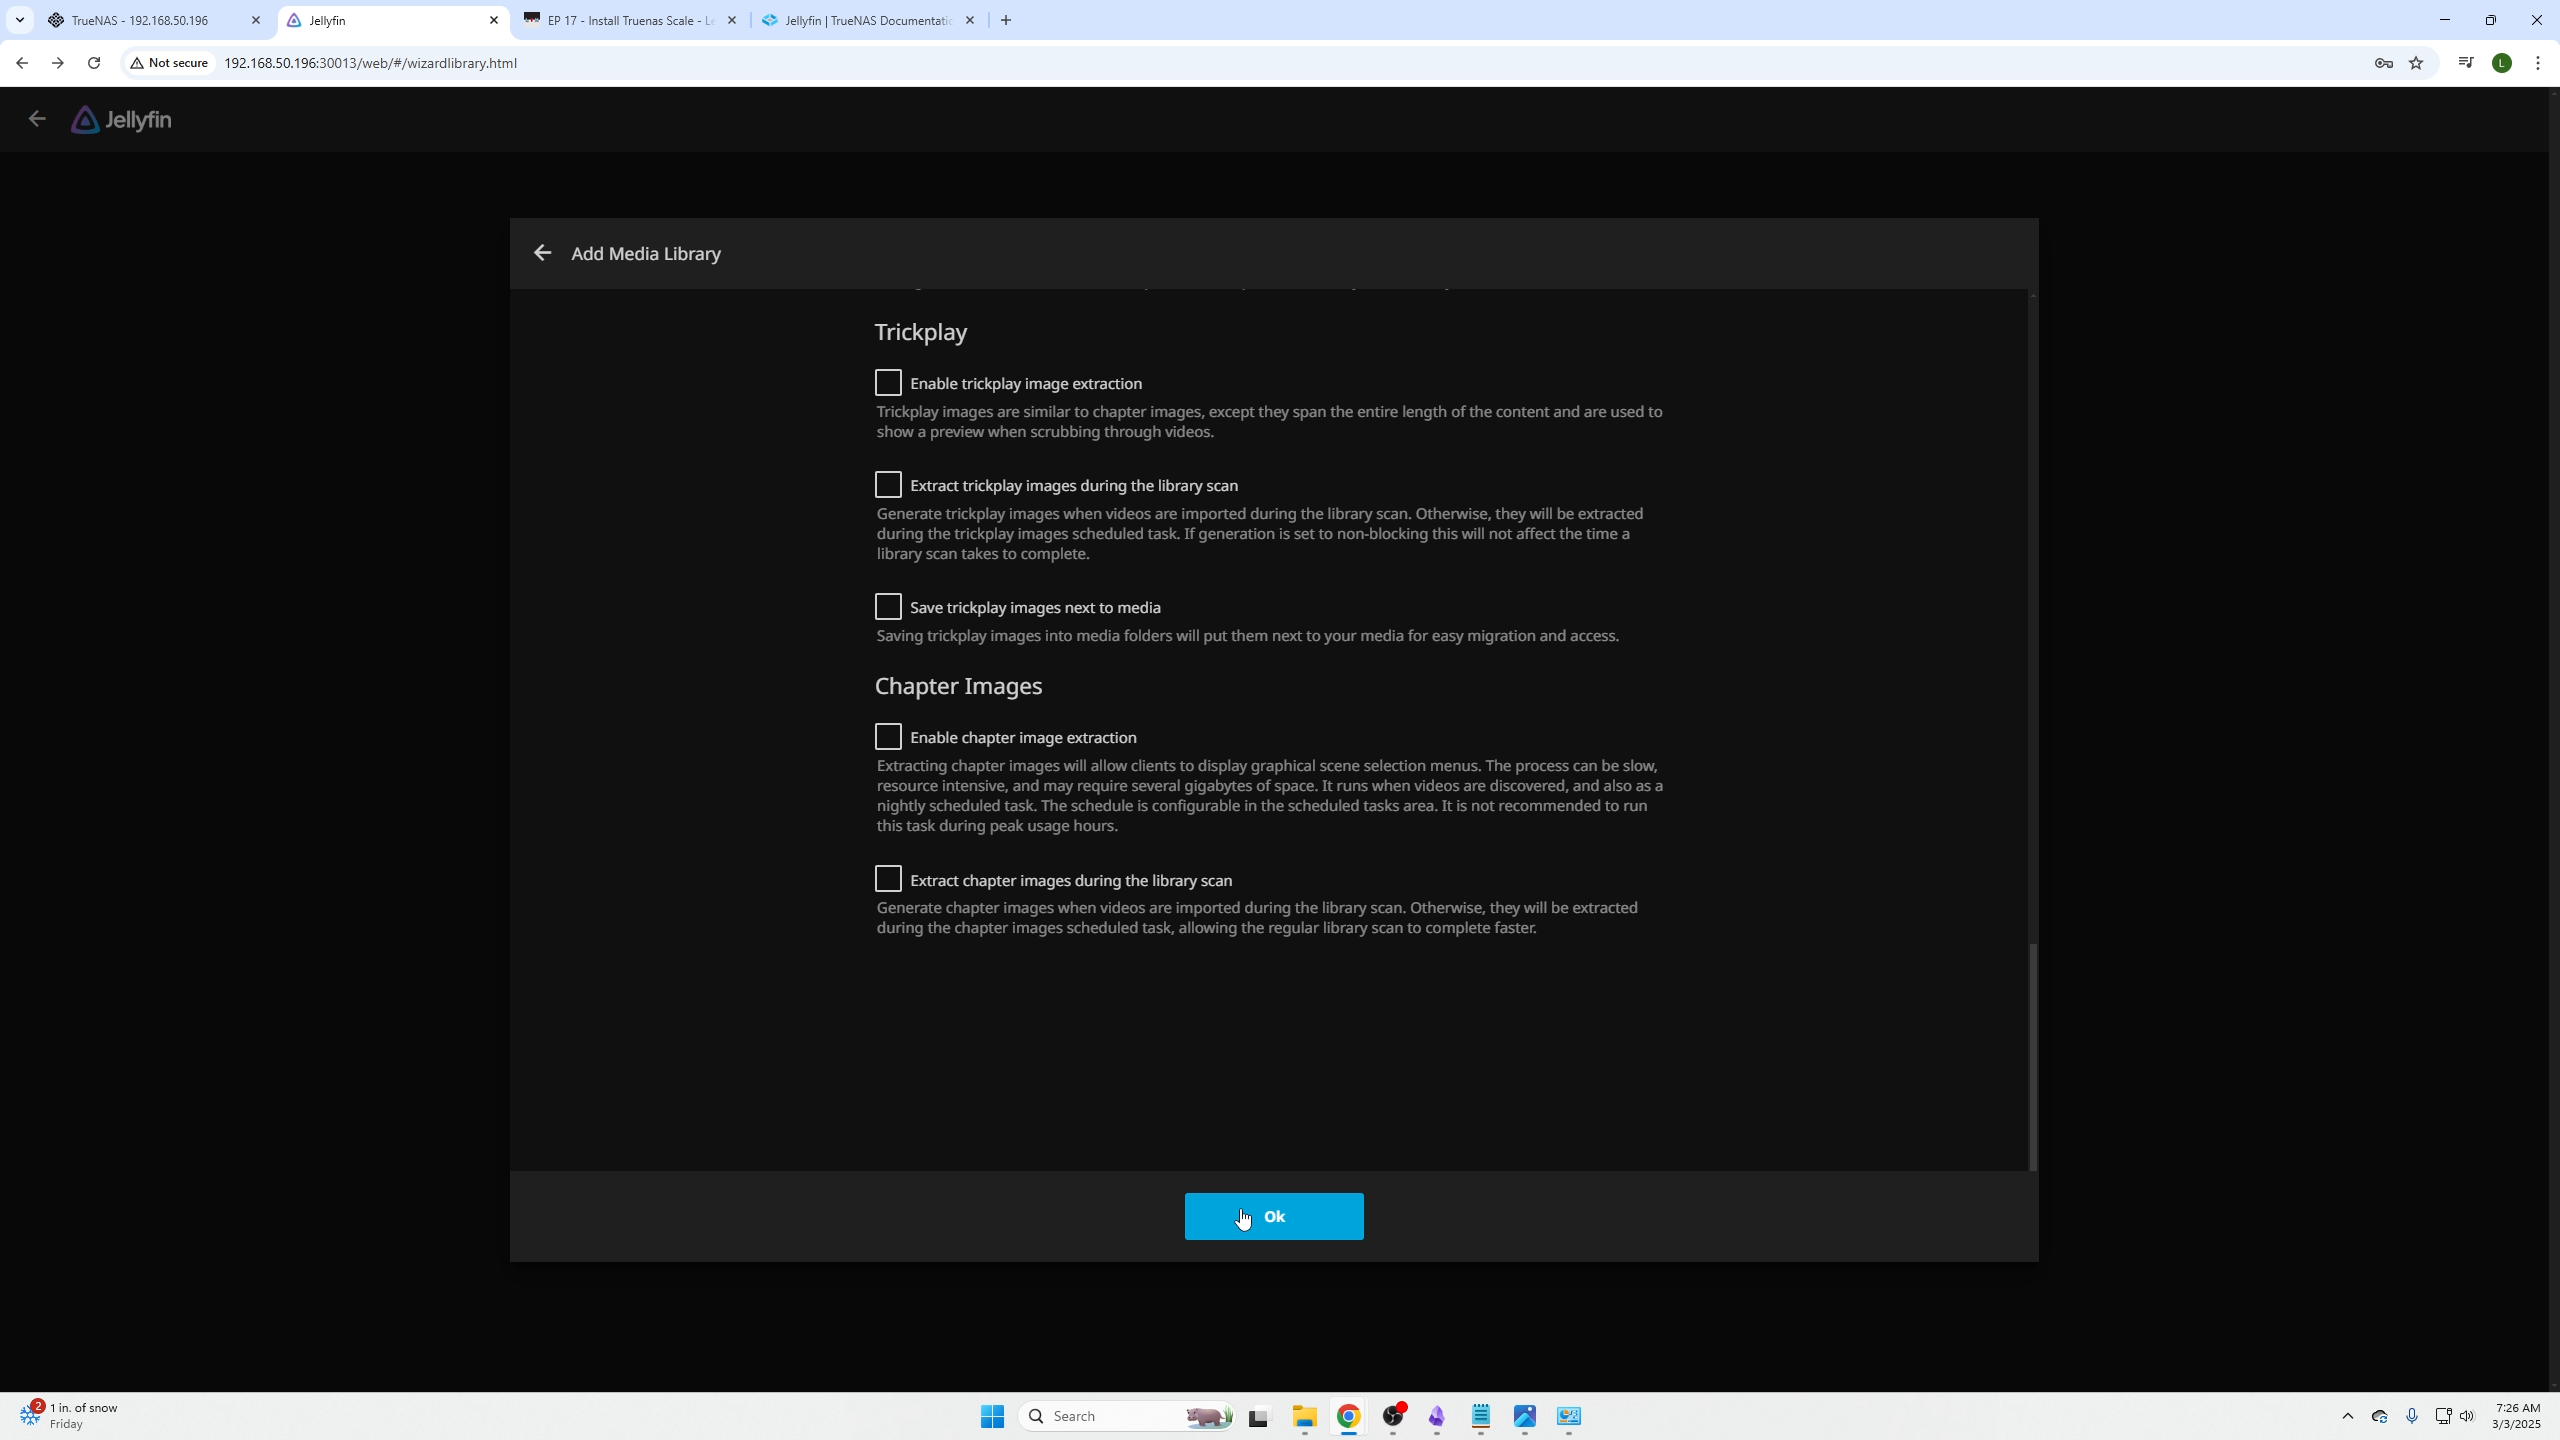
Scroll down and click OK.
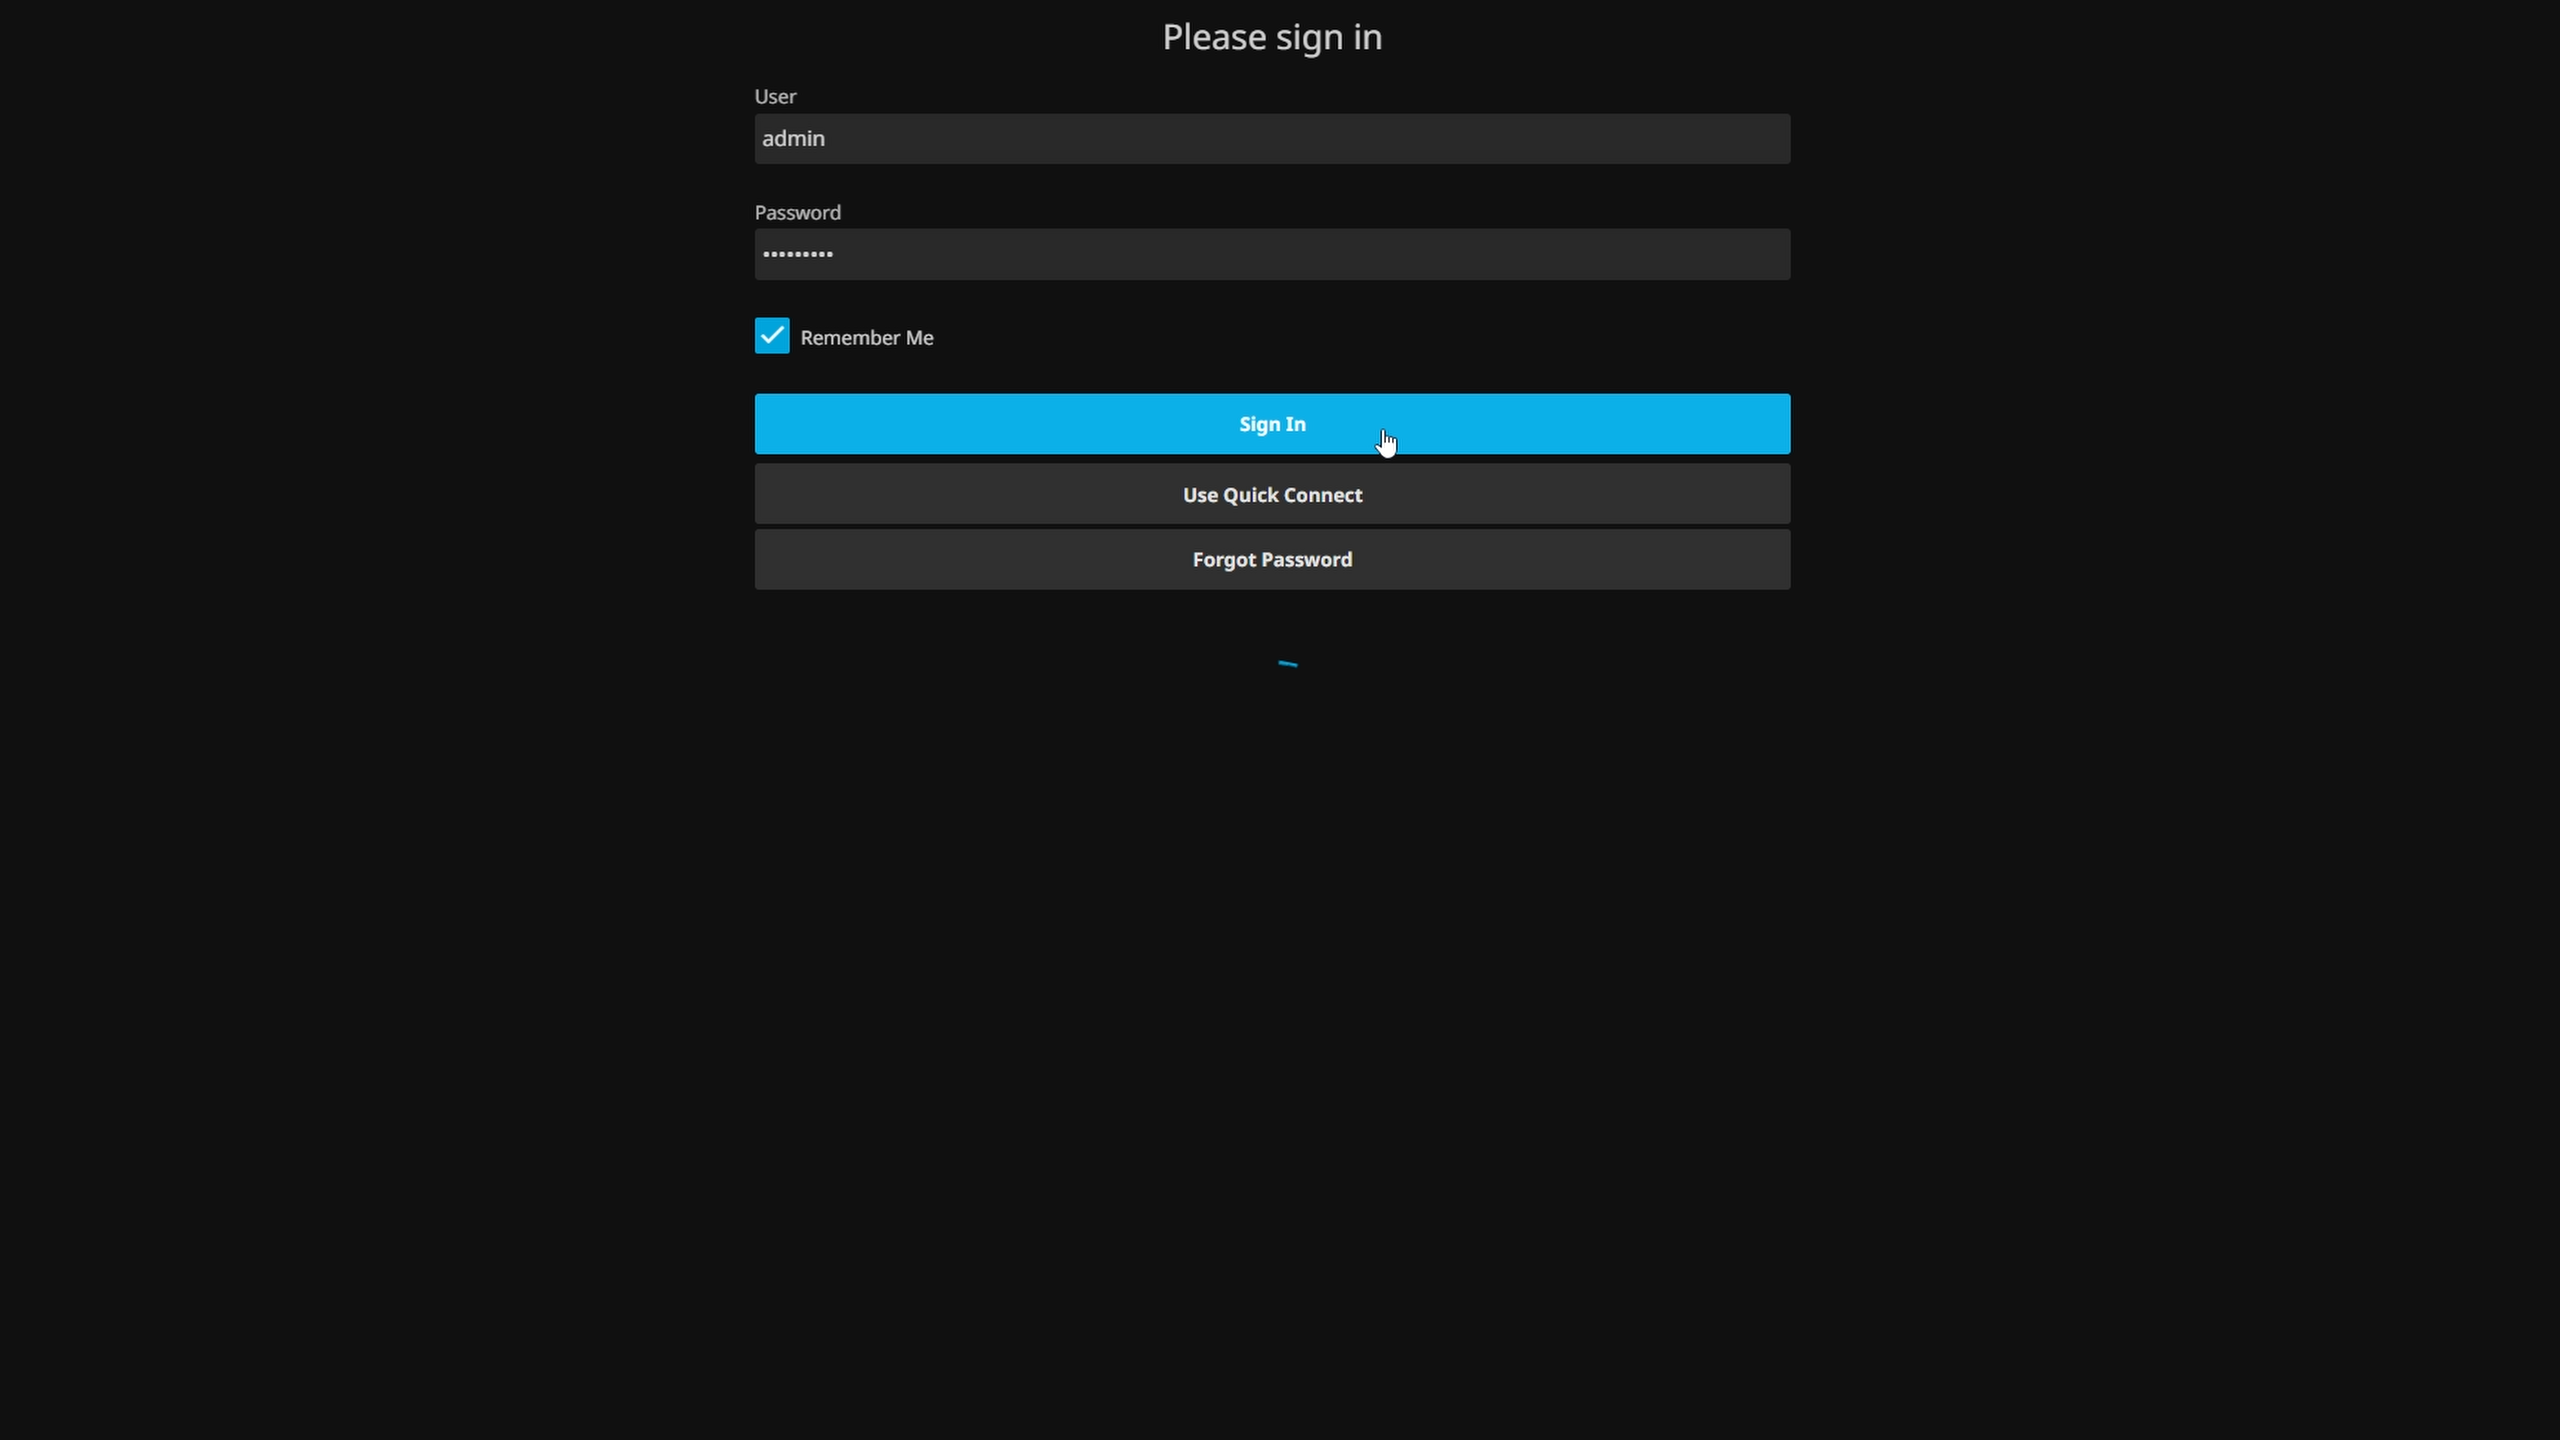
Login with the JellyFin user you created.
You’re all set! Enjoy watching and streaming your content.