How to Install Vaultwarden in 2025
This guide follows the documentation found here.
Prerequisites
You will need to secure your Vaultwarden site with an SSL certificate to prevent man-in-the-middle attacks and enable features requiring secure contexts, like websocket code block auto-copy. We have a video on setting up SSL with Nginx Proxy Manager, watch it here and the article is here.
Create a Container/VM in Proxmox
Configure your CT with 512MB RAM, 2 CPU cores, and 10GB storage.
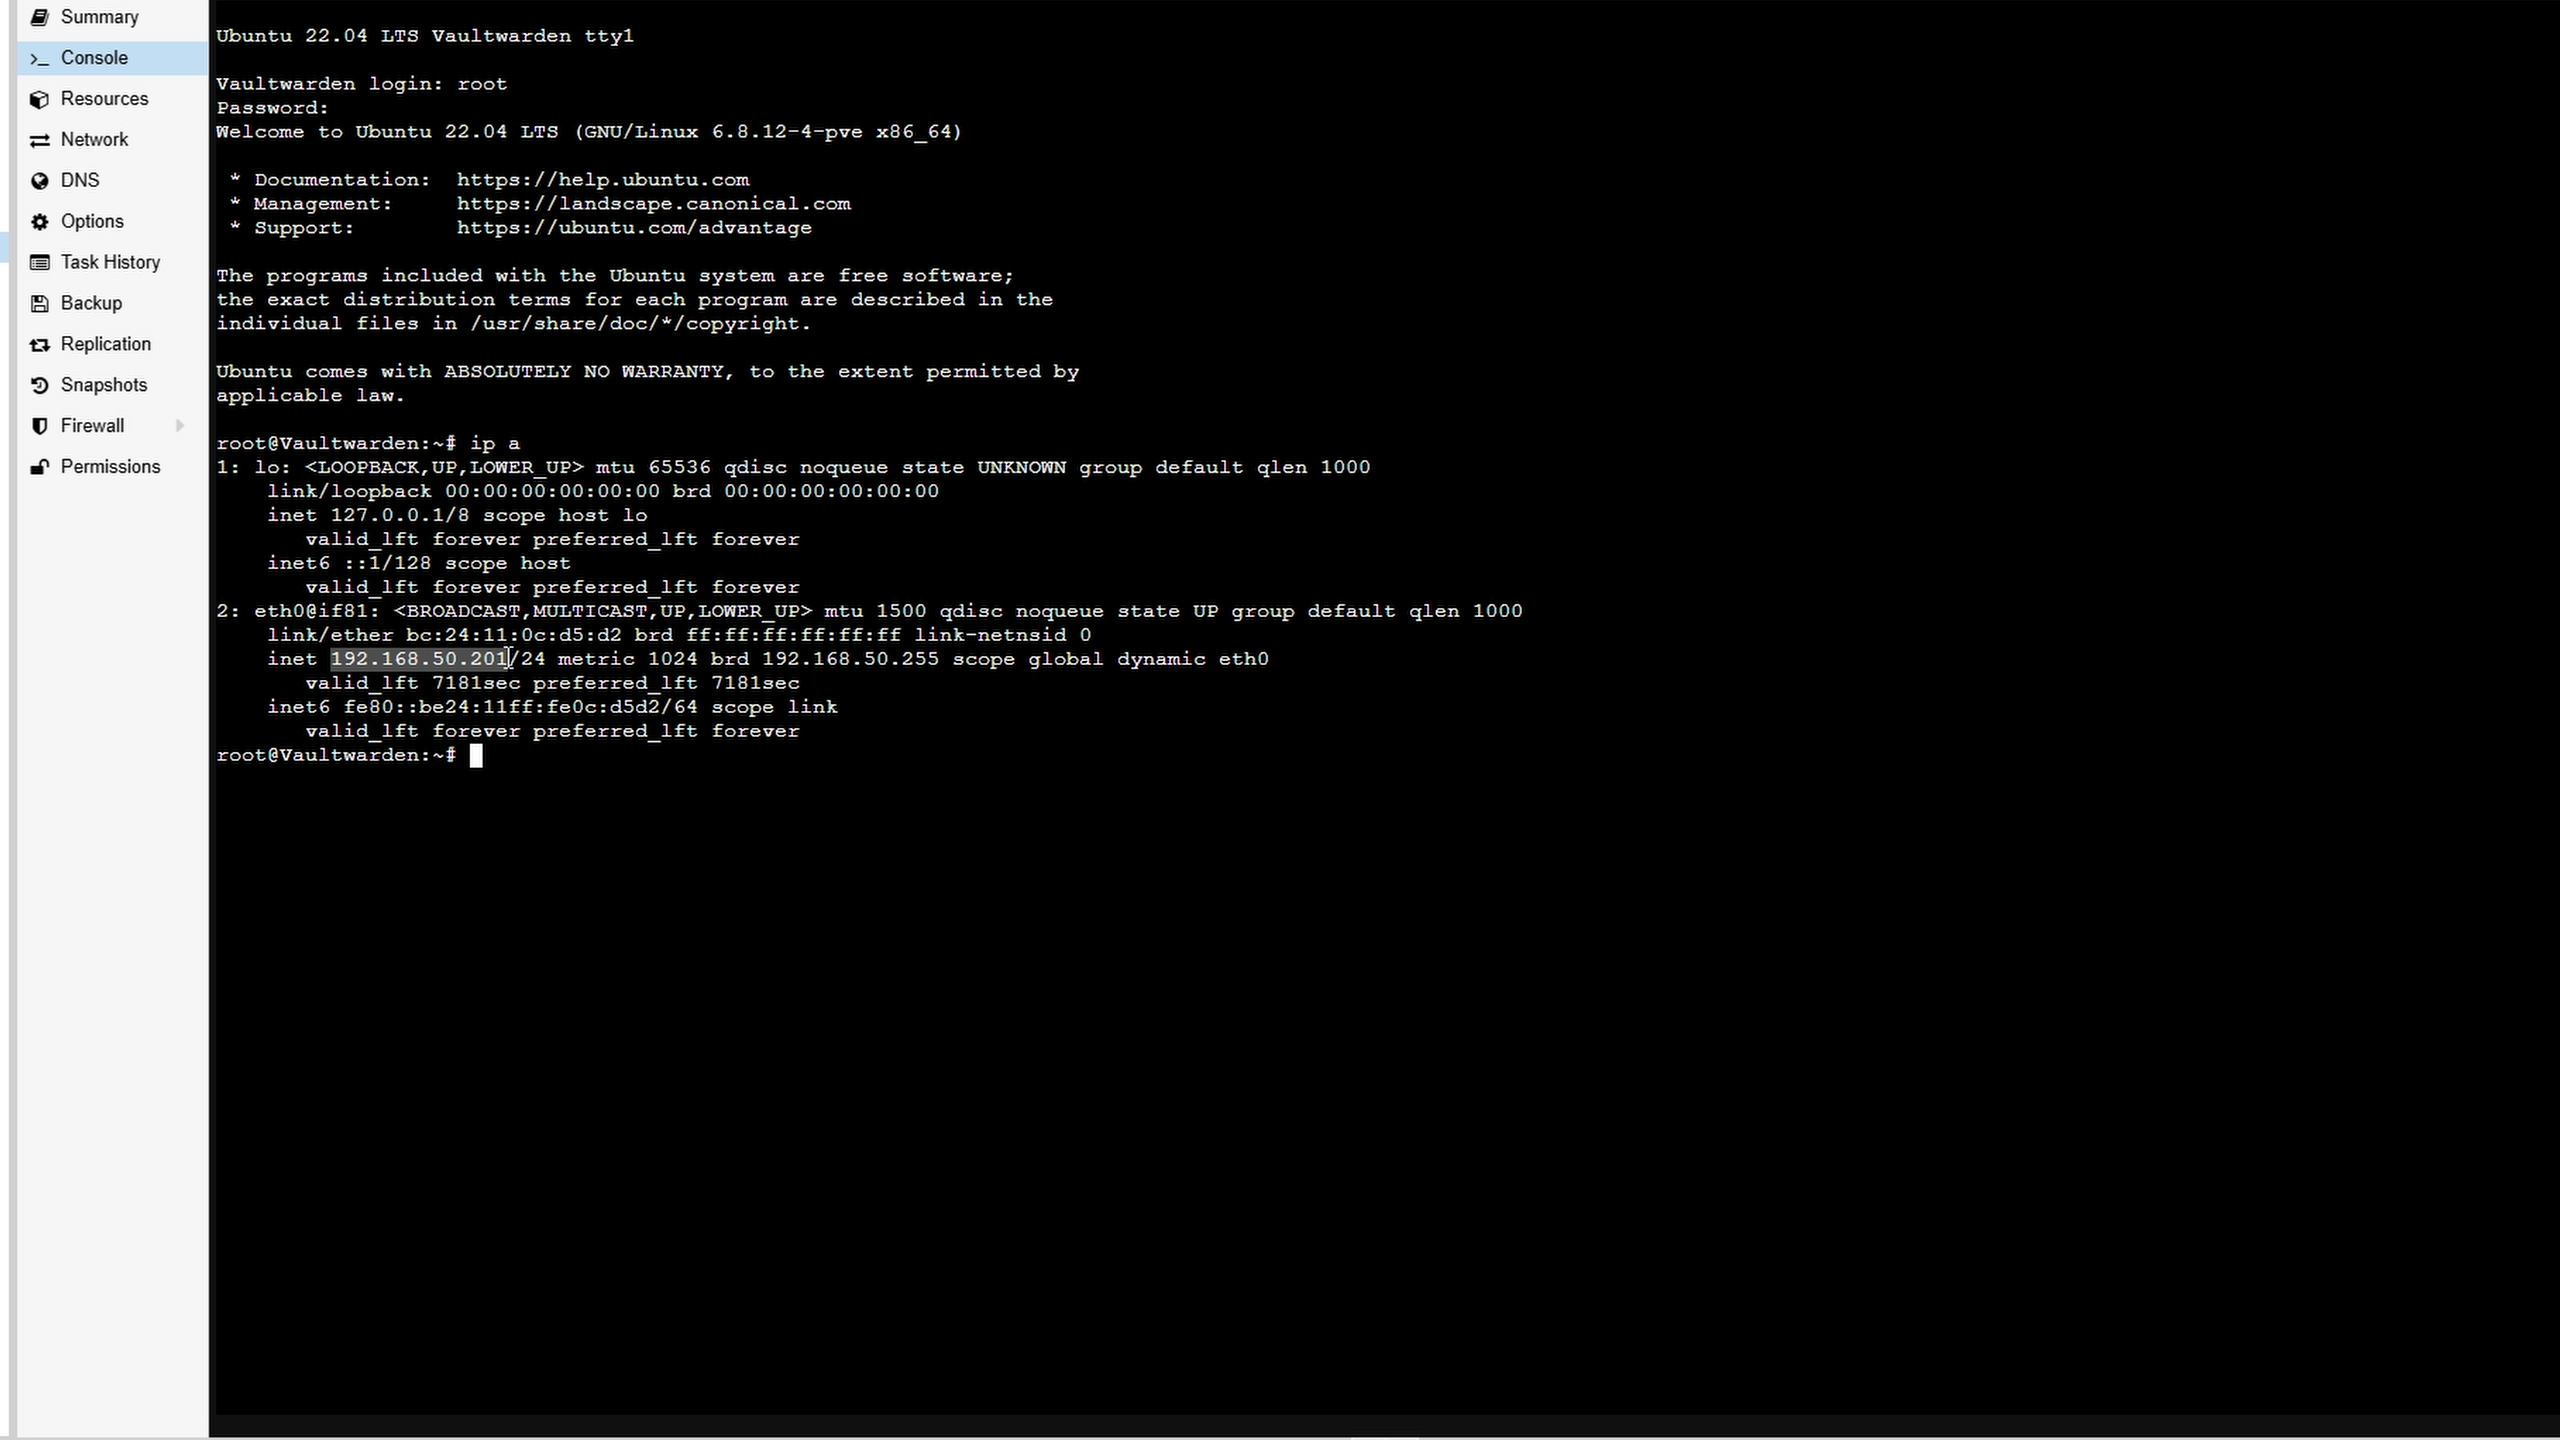
- Login with username
rootand your CT password. - Get your IP address with:
ip a
Installing Vaultwarden Video
Installing Docker & Compose
Follow official Docker documentation here.
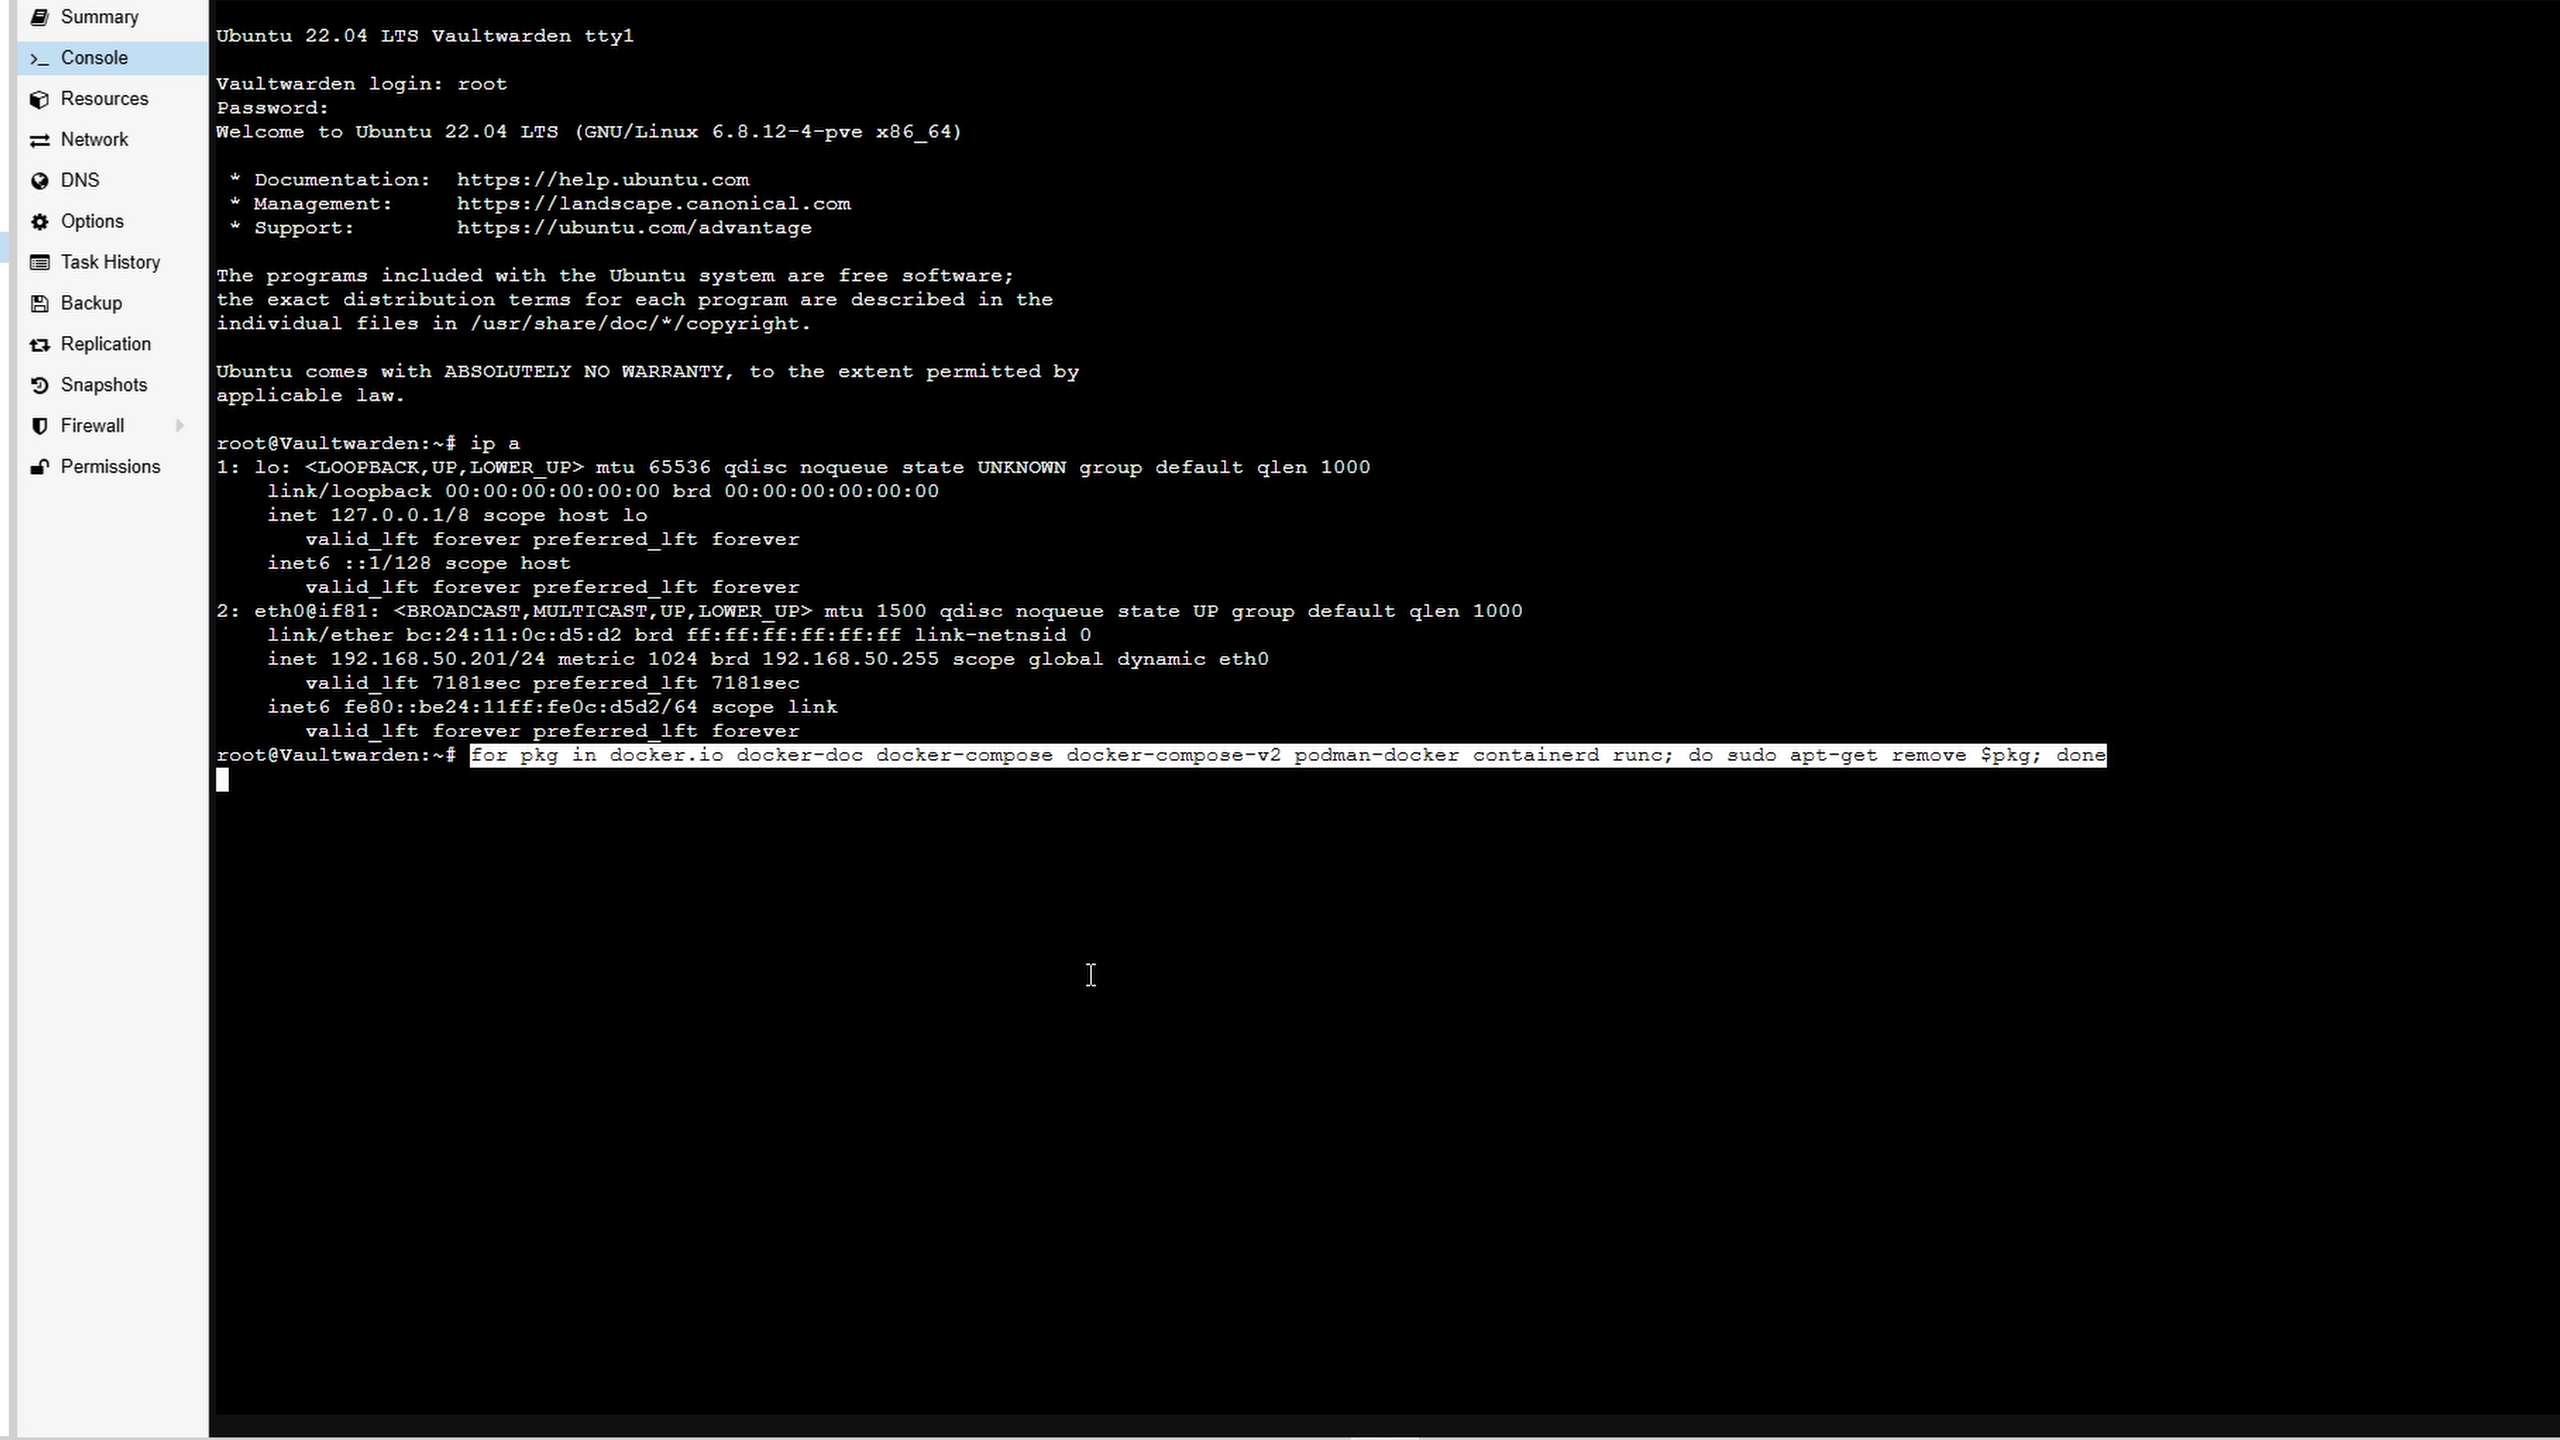
Remove conflicting packages:
for pkg in docker.io docker-doc docker-compose docker-compose-v2 podman-docker containerd runc; do sudo apt-get remove $pkg; done
Add Docker's GPG key and repo:
# Add Docker's official GPG key:
sudo apt-get update
sudo apt-get install ca-certificates curl
sudo install -m 0755 -d /etc/apt/keyrings
sudo curl -fsSL https://download.docker.com/linux/ubuntu/gpg -o /etc/apt/keyrings/docker.asc
sudo chmod a+r /etc/apt/keyrings/docker.asc

# Add the repository to Apt sources:
echo \
  "deb [arch=$(dpkg --print-architecture) signed-by=/etc/apt/keyrings/docker.asc] https://download.docker.com/linux/ubuntu \
  $(. /etc/os-release && echo "${UBUNTU_CODENAME:-$VERSION_CODENAME}") stable" | \
  sudo tee /etc/apt/sources.list.d/docker.list > /dev/null
sudo apt-get update
Install Docker packages:
sudo apt-get install docker-ce docker-ce-cli containerd.io docker-buildx-plugin docker-compose-plugin
Verify Docker installation:
sudo docker run hello-world
Verify docker compose version:
docker compose version
Create a Compose File
Create compose.yml:
nano compose.yml
Paste this:
services:
  vaultwarden:
    image: vaultwarden/server:latest
    container_name: vaultwarden
    restart: unless-stopped
    environment:
      DOMAIN: "https://vw.domain.tld"
    volumes:
      - ./vw-data/:/data/
    ports:
      - 80:80
Start container in detached mode:
docker compose up -d
Set Up Your SSL Certificate
If you haven’t done this, watch our previous video on setting up SSL with Nginx Proxy Manager here.
After Logging Into Vaultwarden
- Open Vaultwarden via your configured URL.
- Create a username and password, then login.
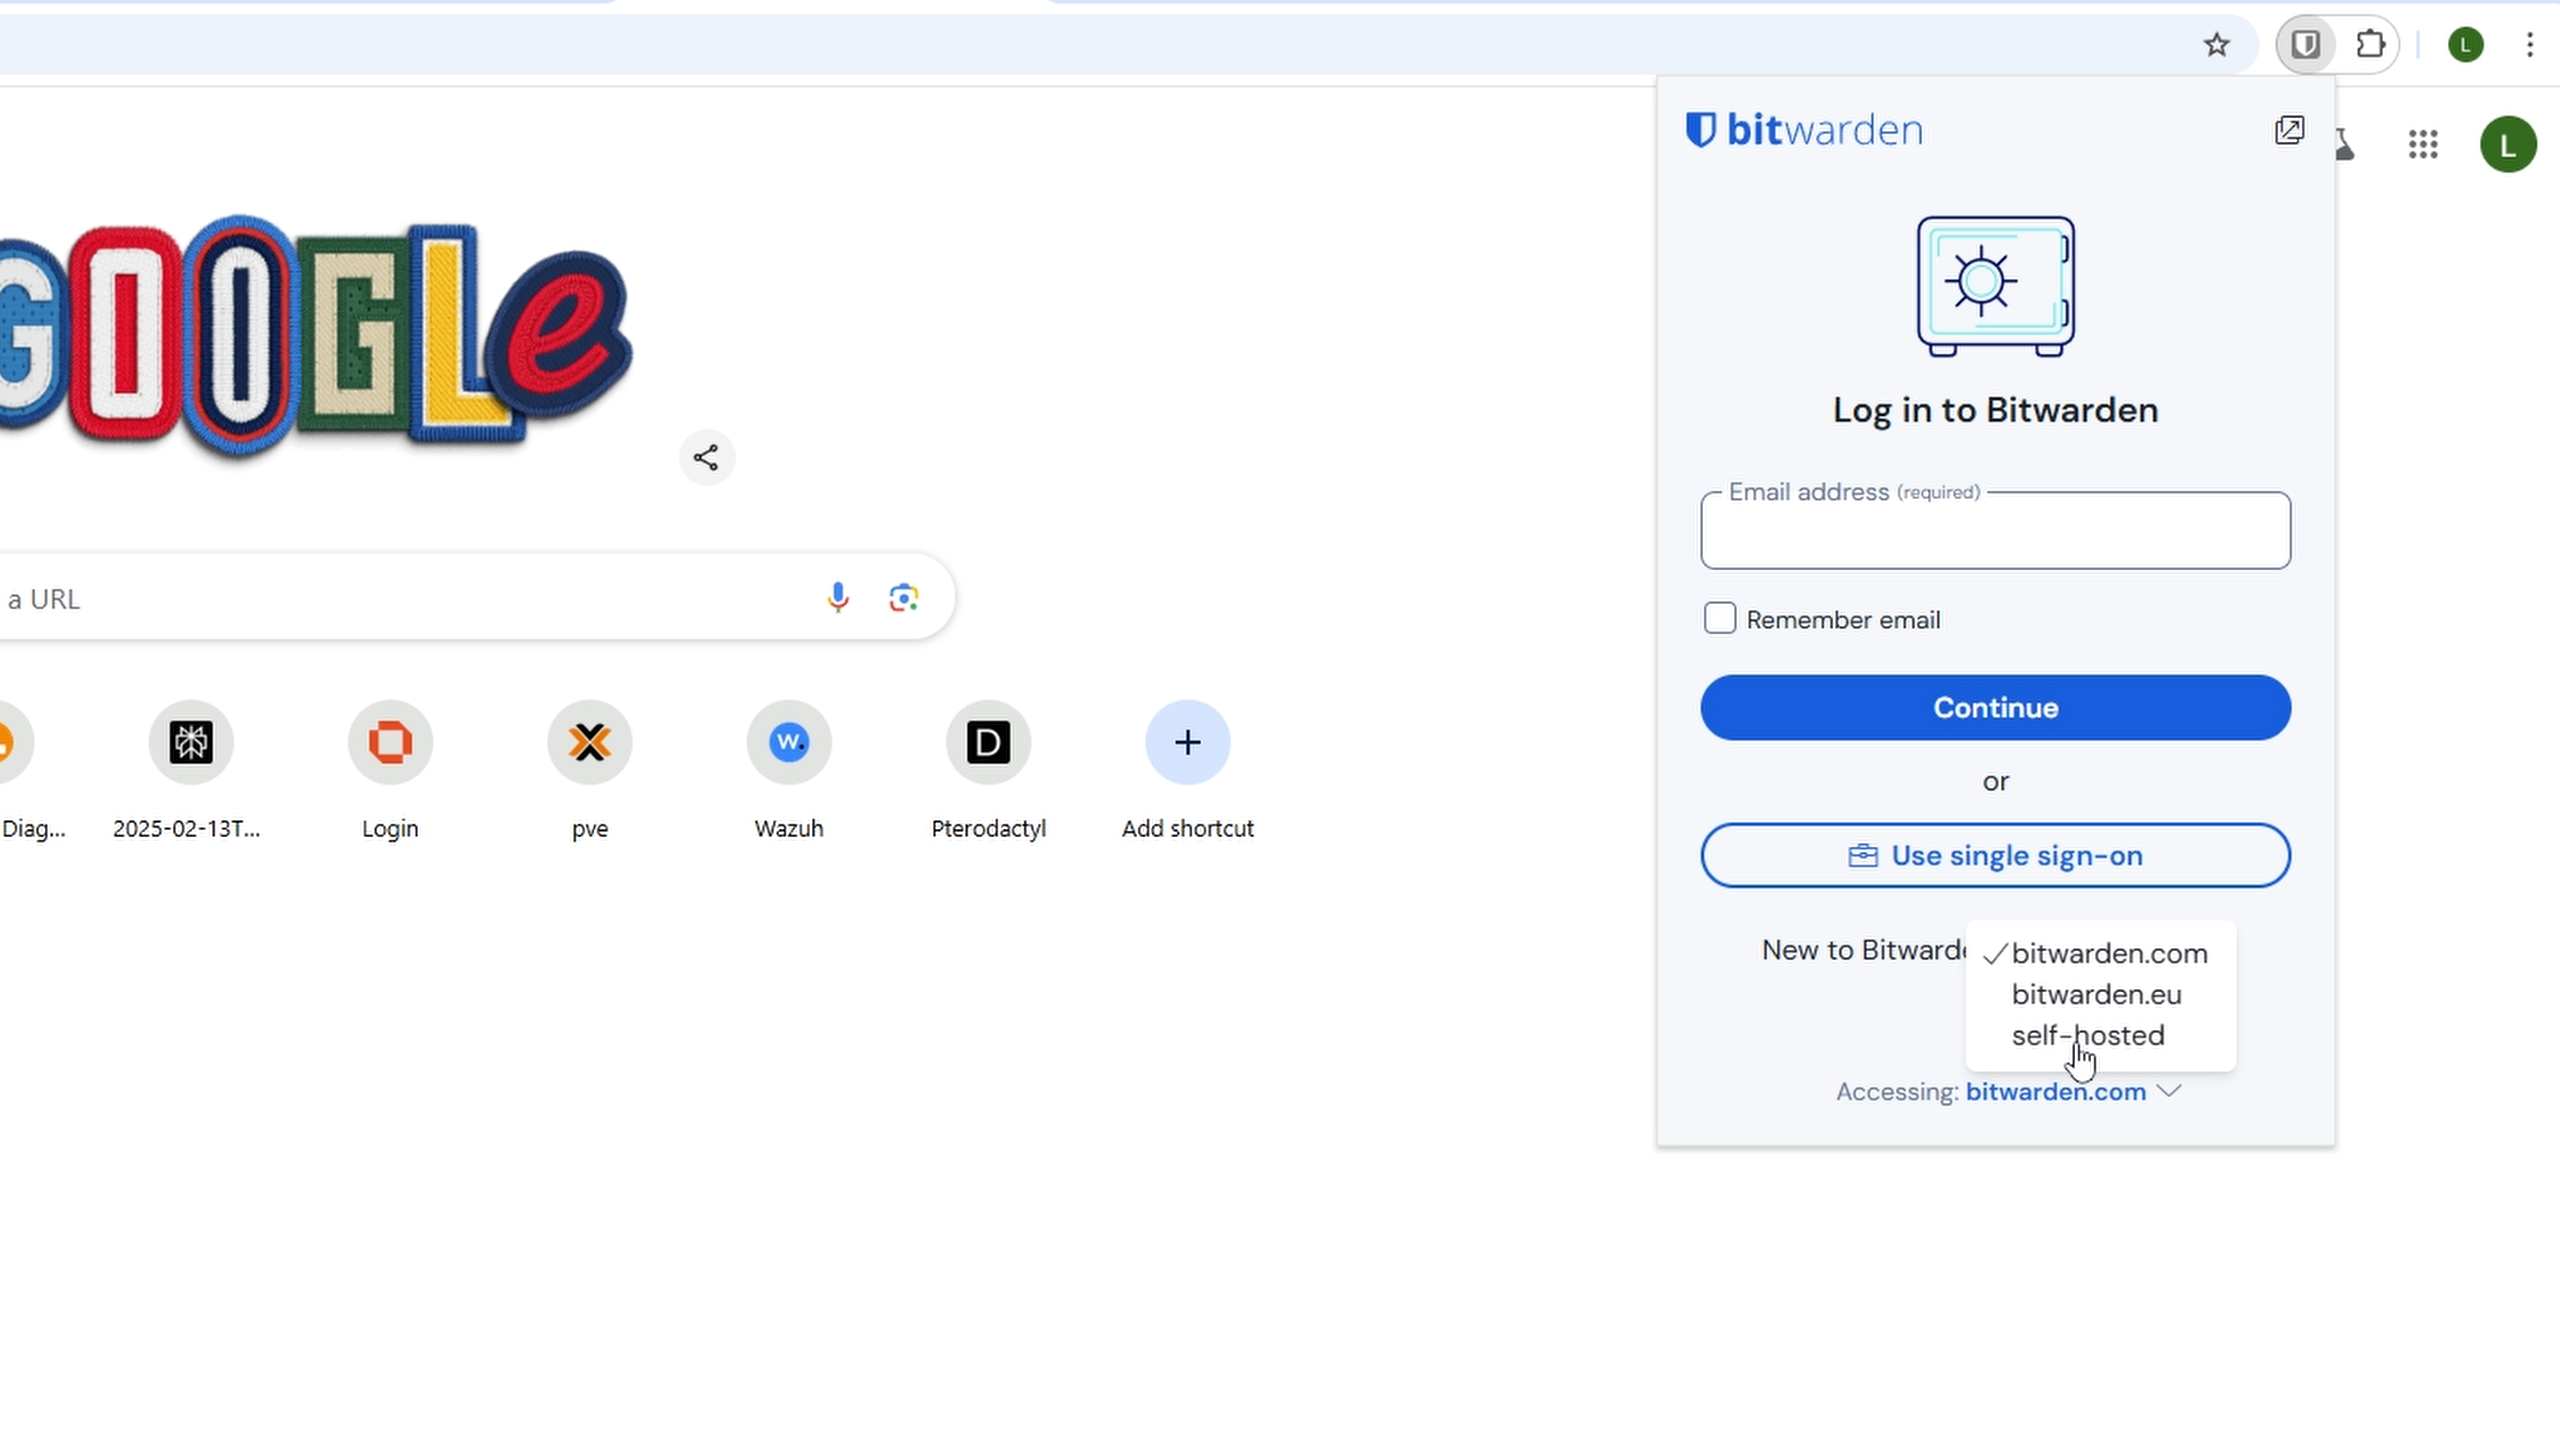
- Install the browser extension via the link in Vaultwarden.
- In Chrome, find the Vaultwarden extension, select "Accessing," choose self-hosted option, and enter your Vaultwarden URL.
- You can now save passwords on your websites, generate complex passwords, and manage them with Vaultwarden.