How to Setup Ceph on Proxmox and Perform Live VM Migration
In this video, we will cover how to perform live VM migration between Proxmox nodes in a cluster using Ceph as the distributed data storage.
Setting up a Ceph Storage Pool
Steps to create a Ceph cluster:
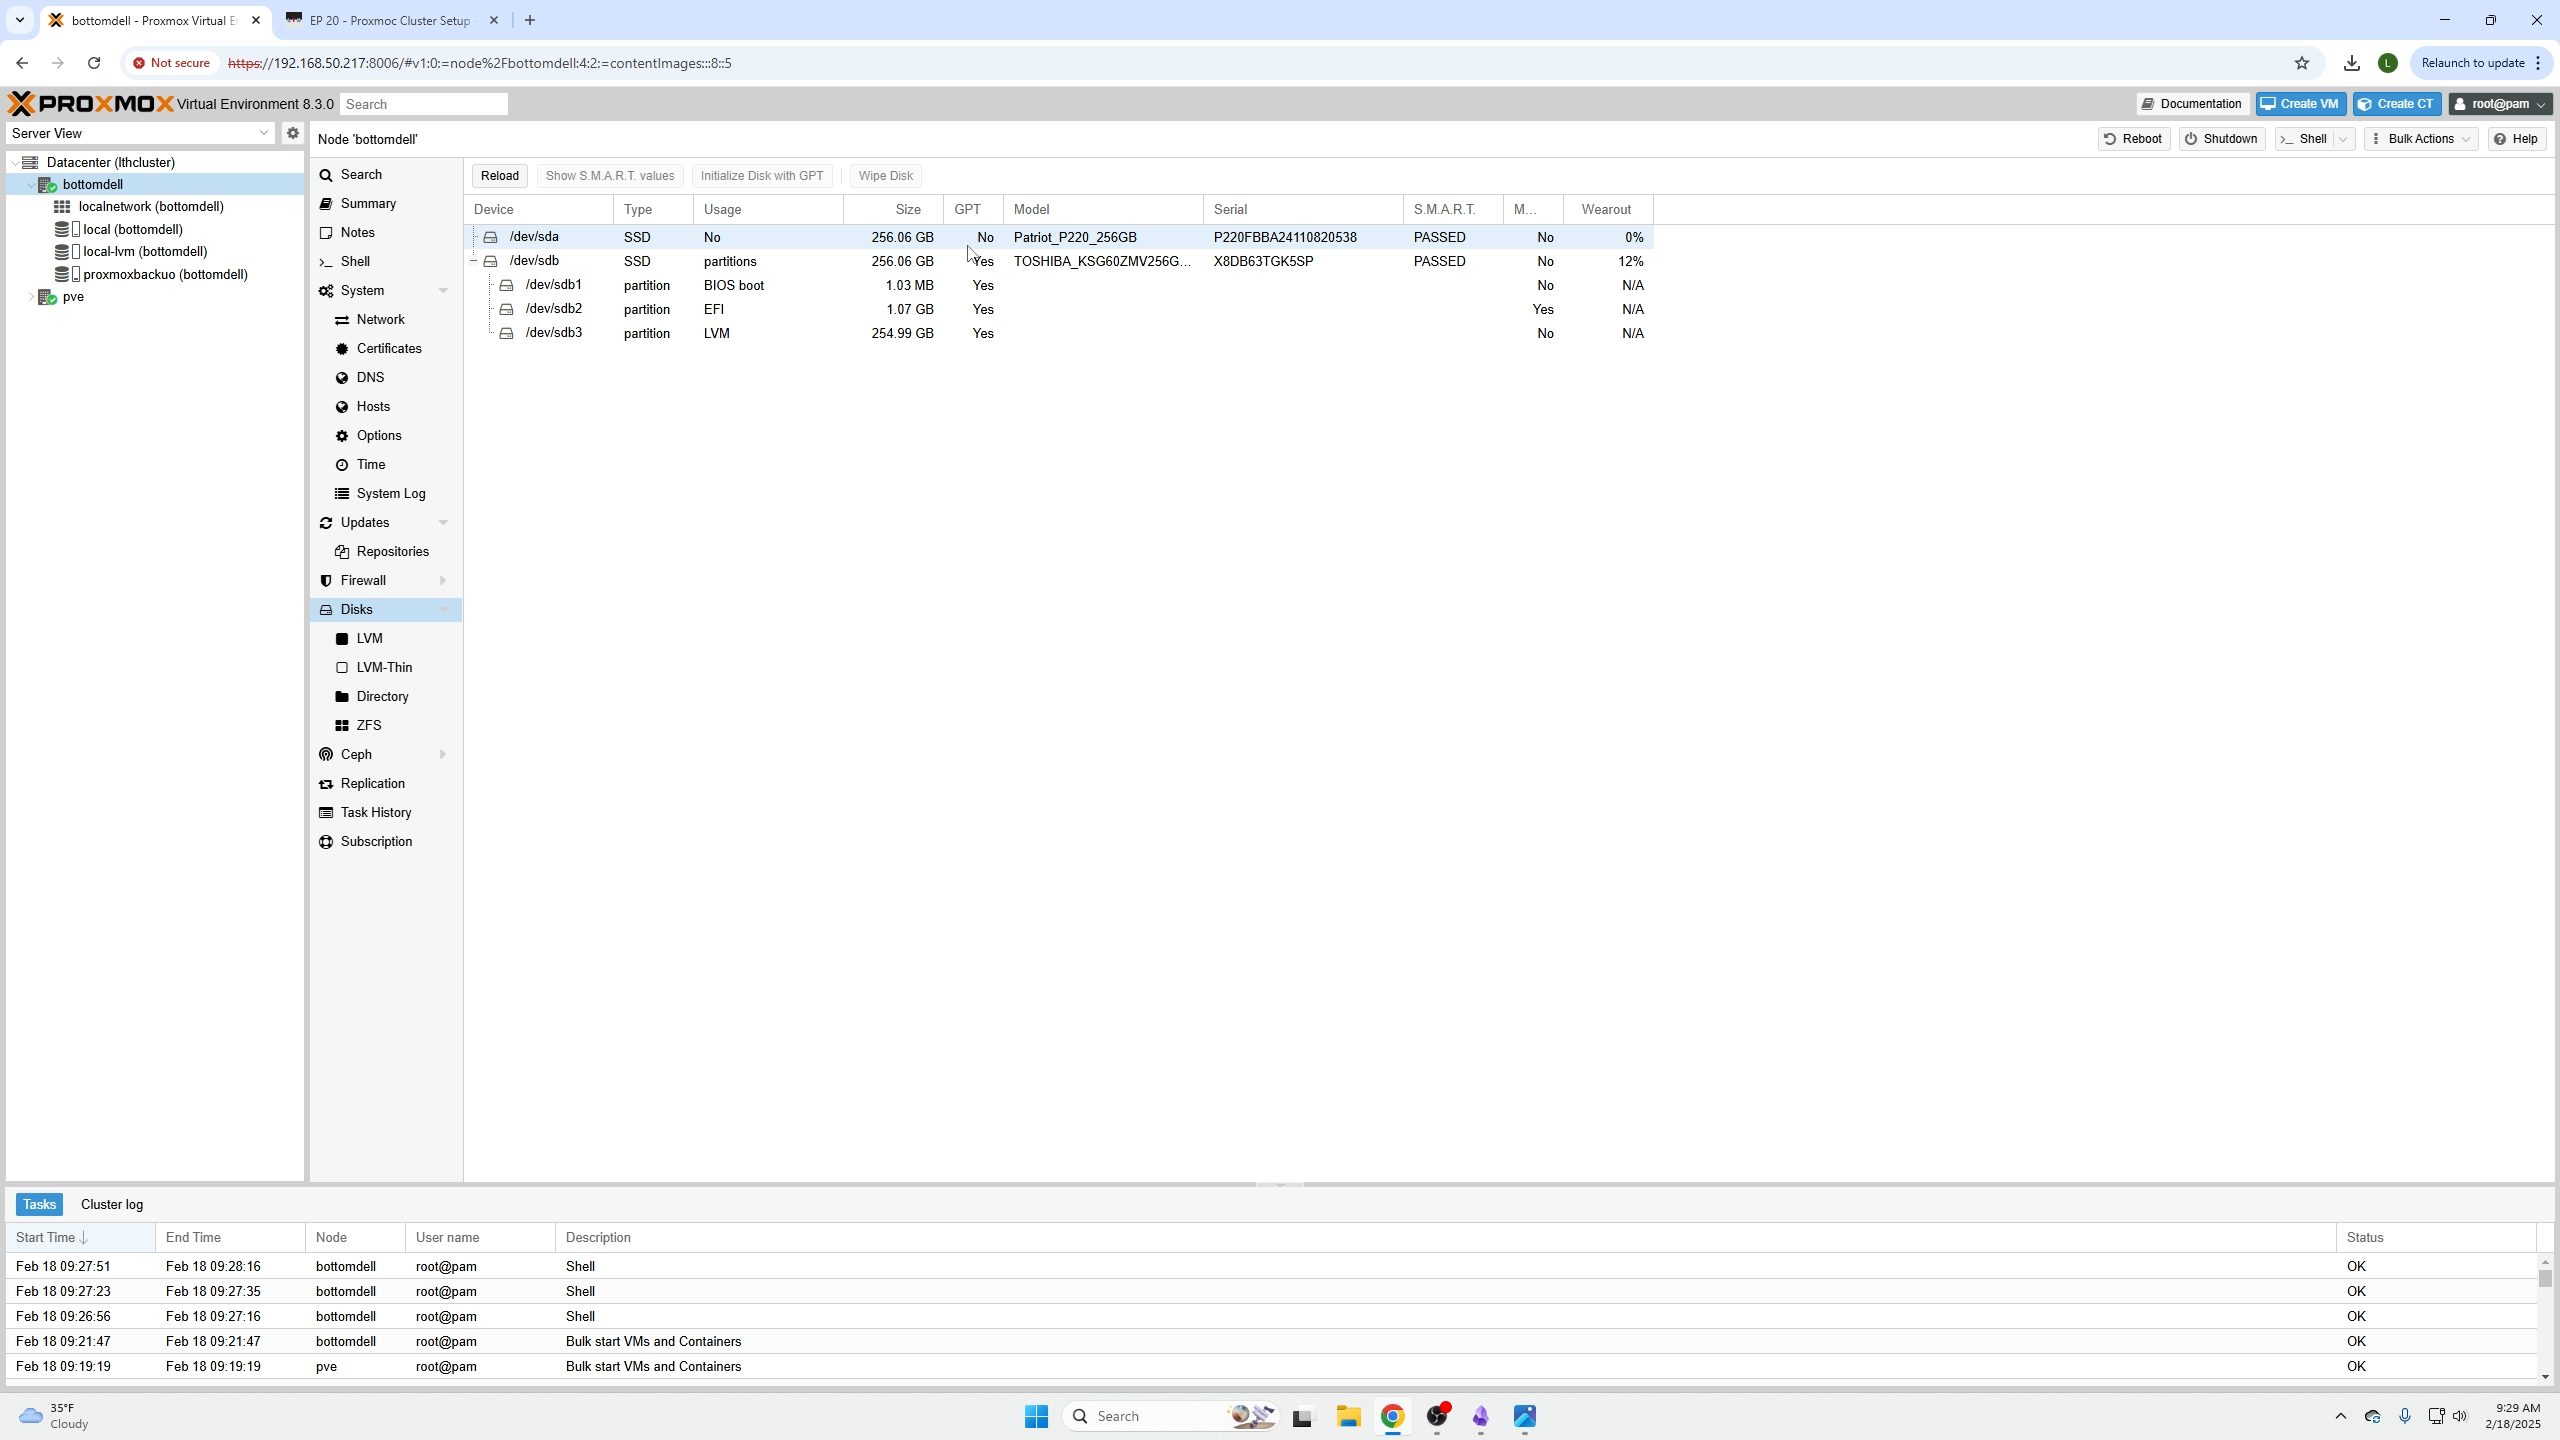
- Have dedicated storage for your Ceph pool (SSD, HDD). It CANNOT be the same disk you already use because it will be wiped.
Ensure you have an extra SSD or HDD installed for your Ceph pool.
Important
The following commands will need to be done on EVERY node (cluster size dependent).
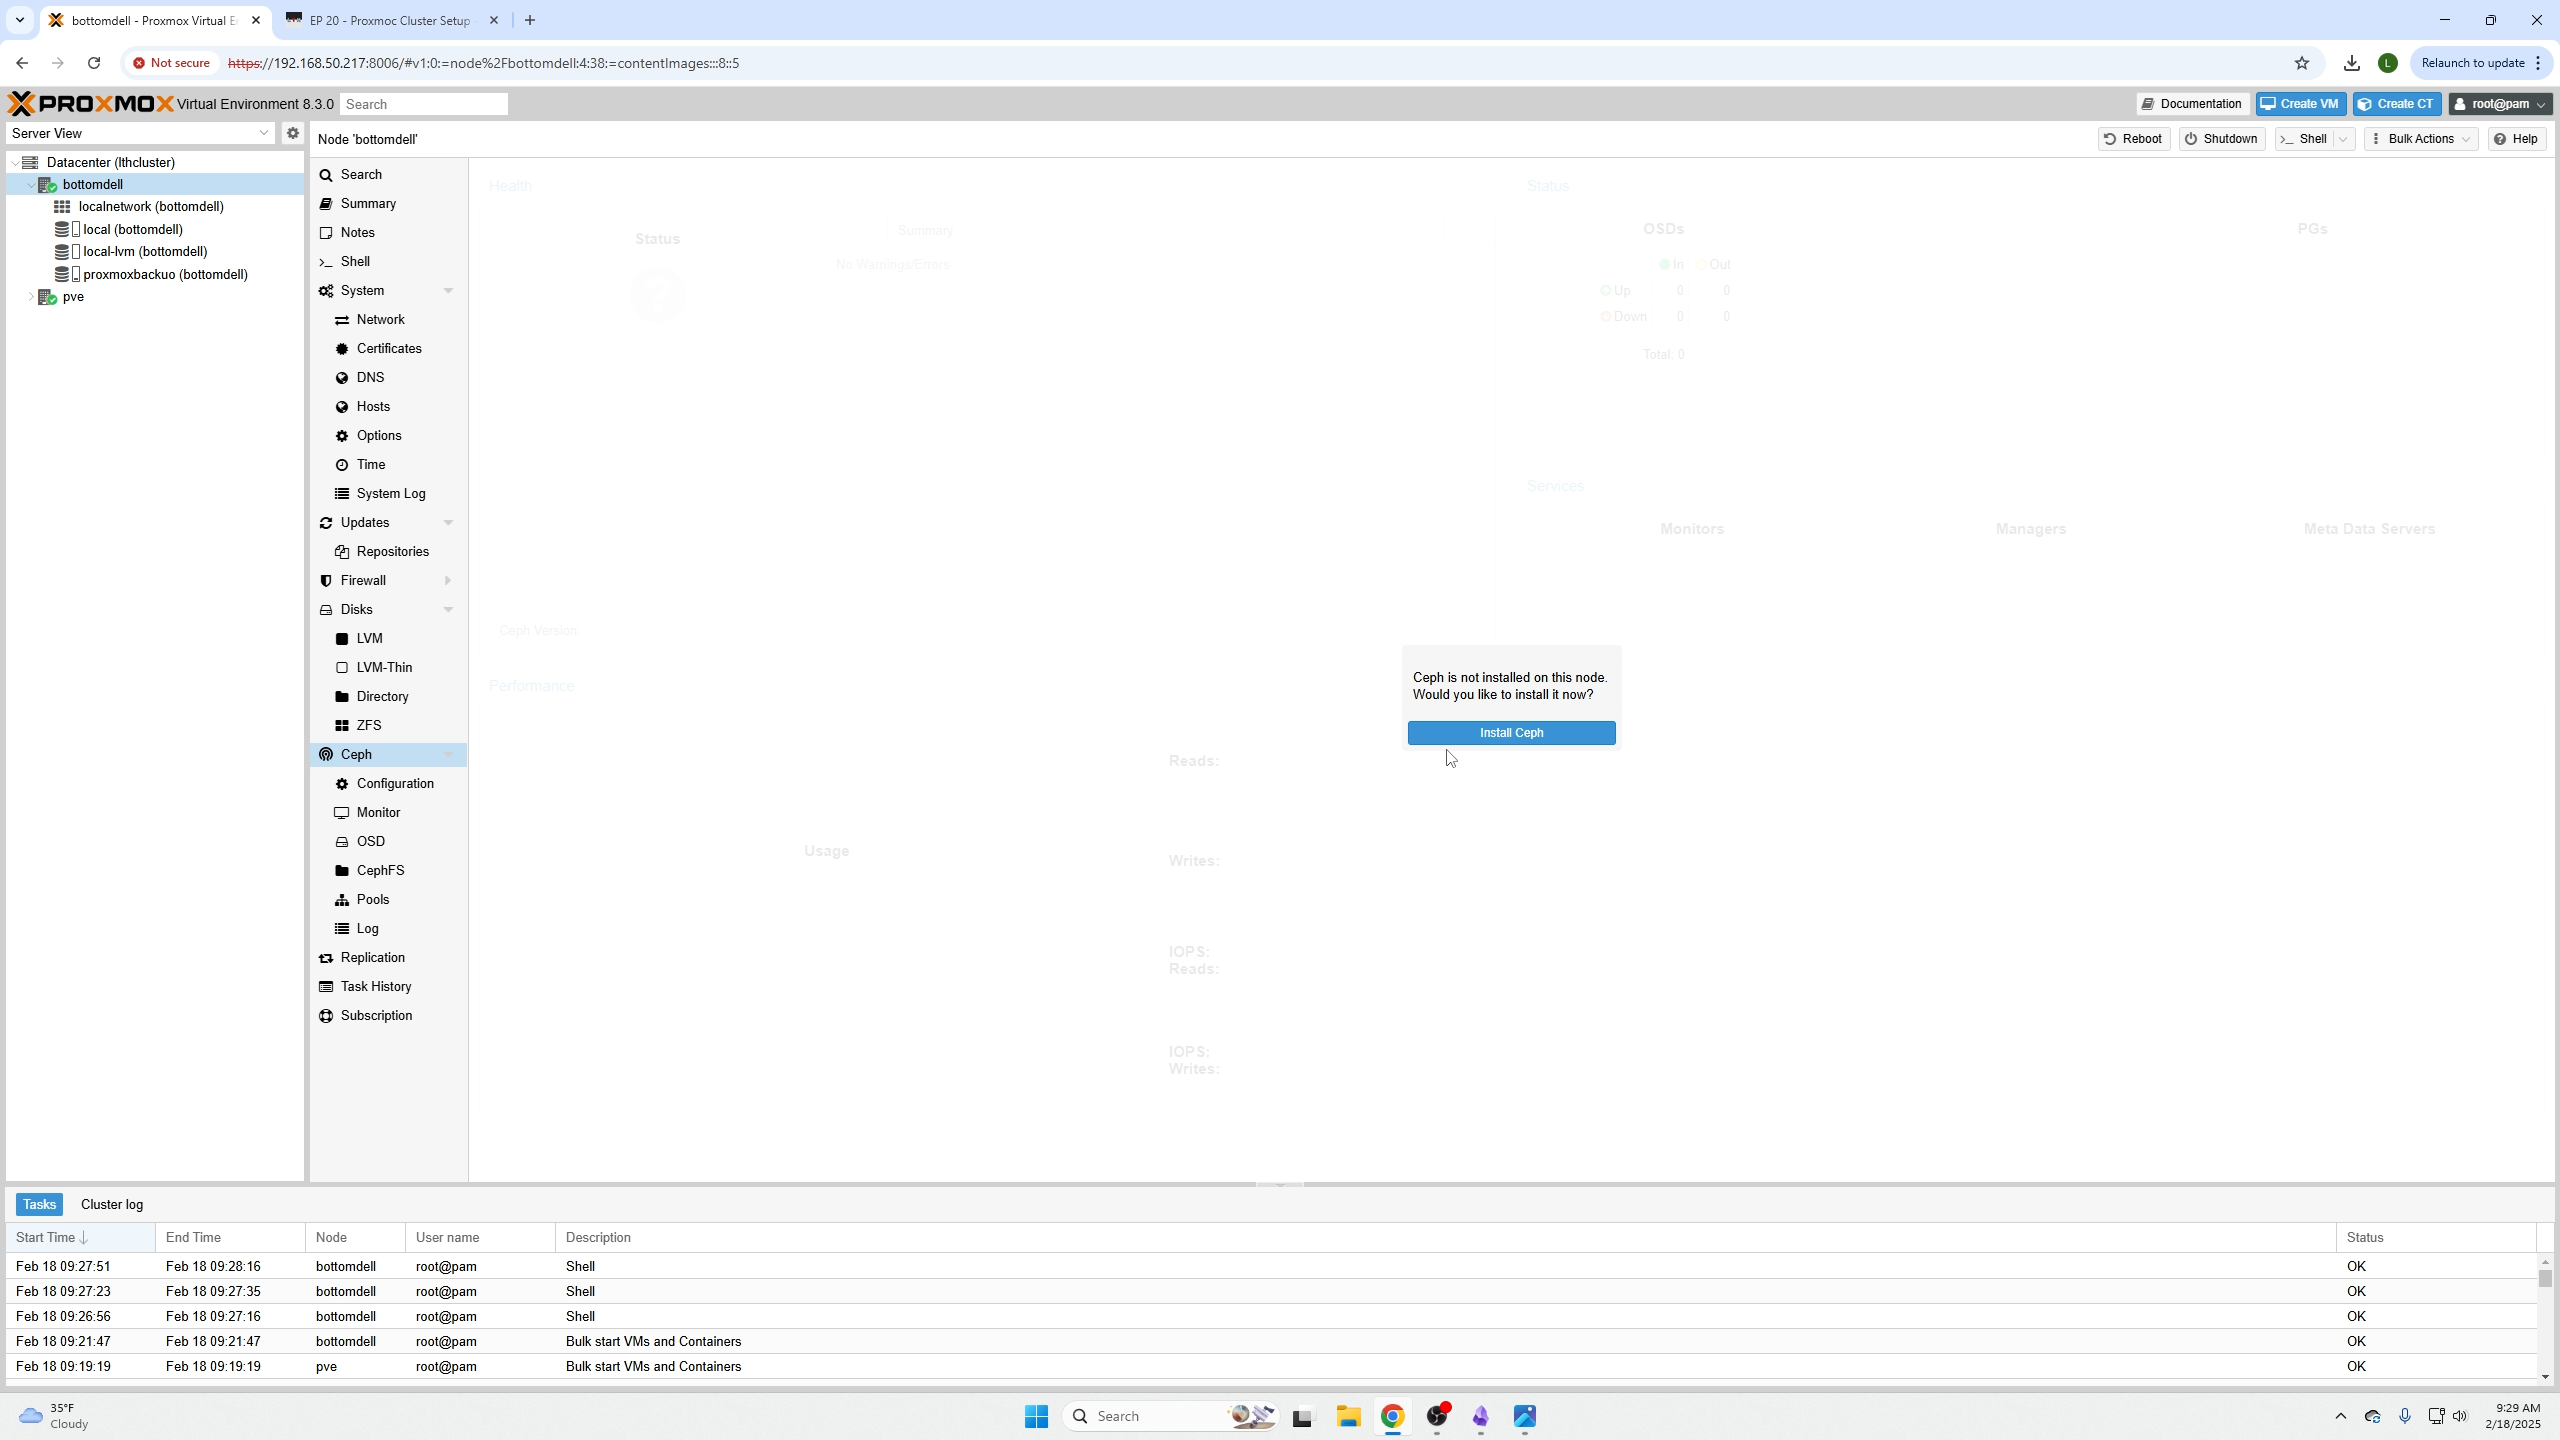
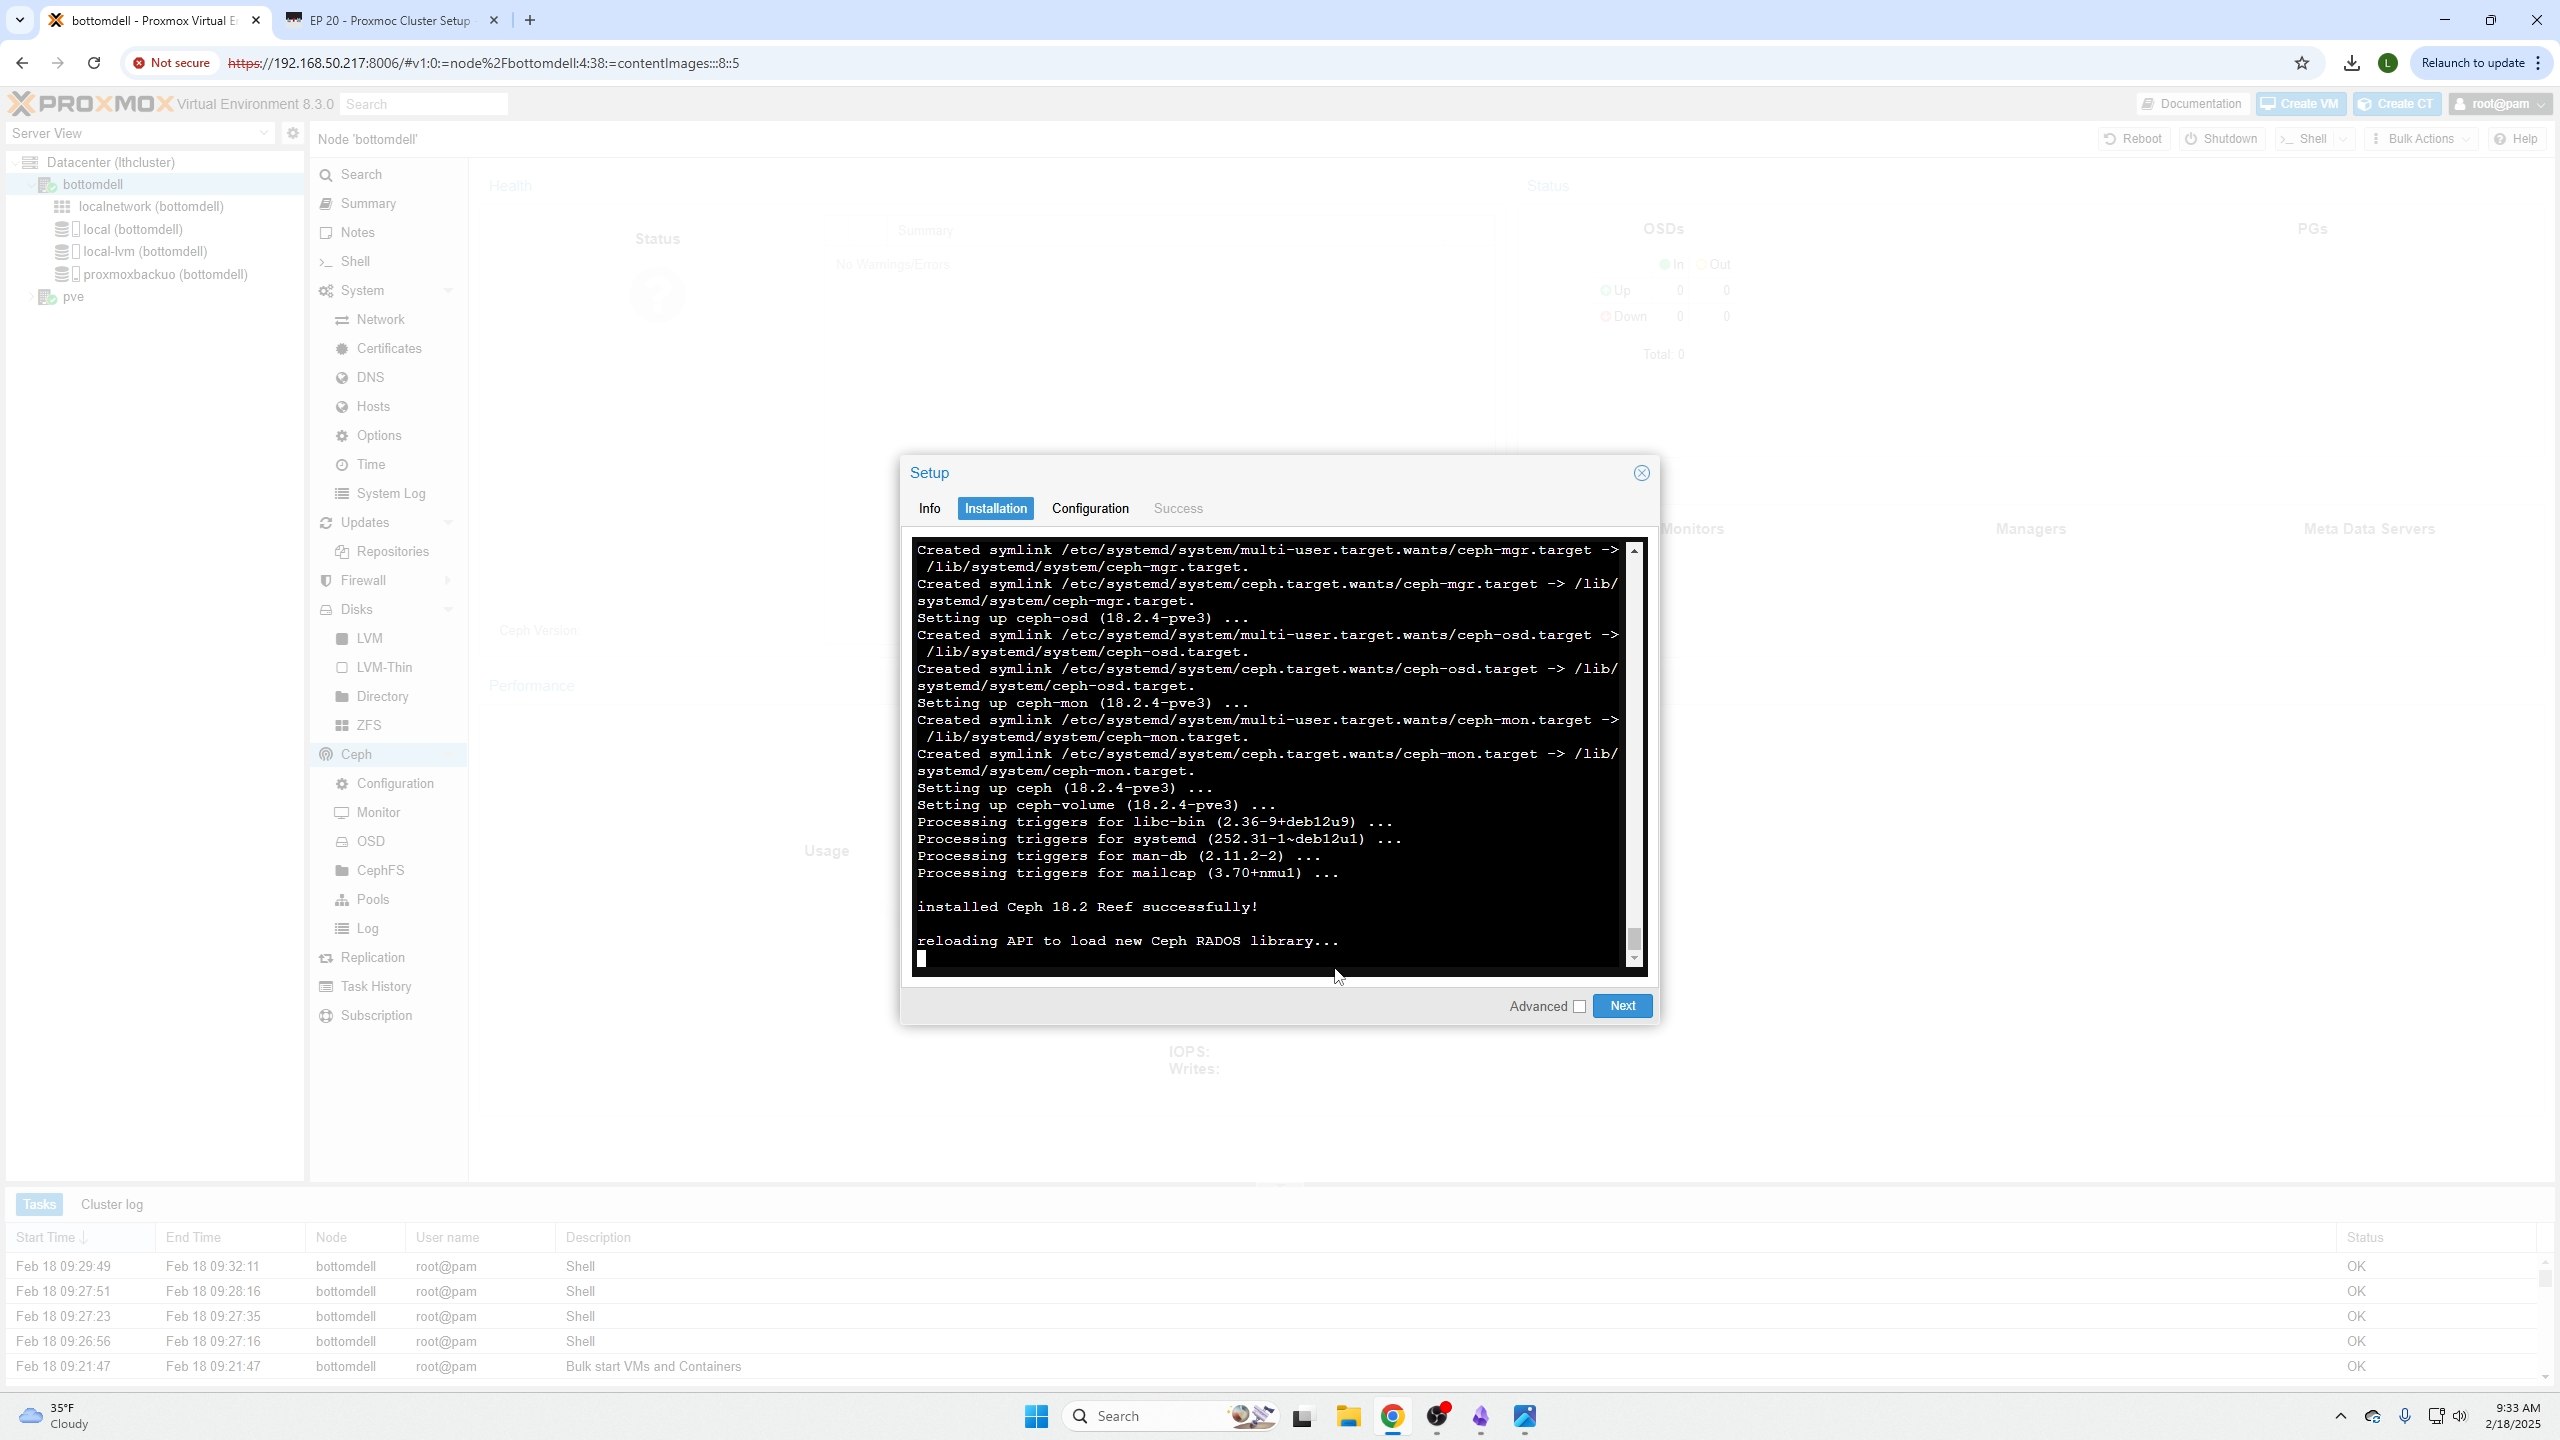
Click your node, go to Ceph, and click "Install Ceph."
Use Reef (version 18.2). Make sure you install the latest version available at install time. Select the No-Subscription option because we do not pay for Proxmox.
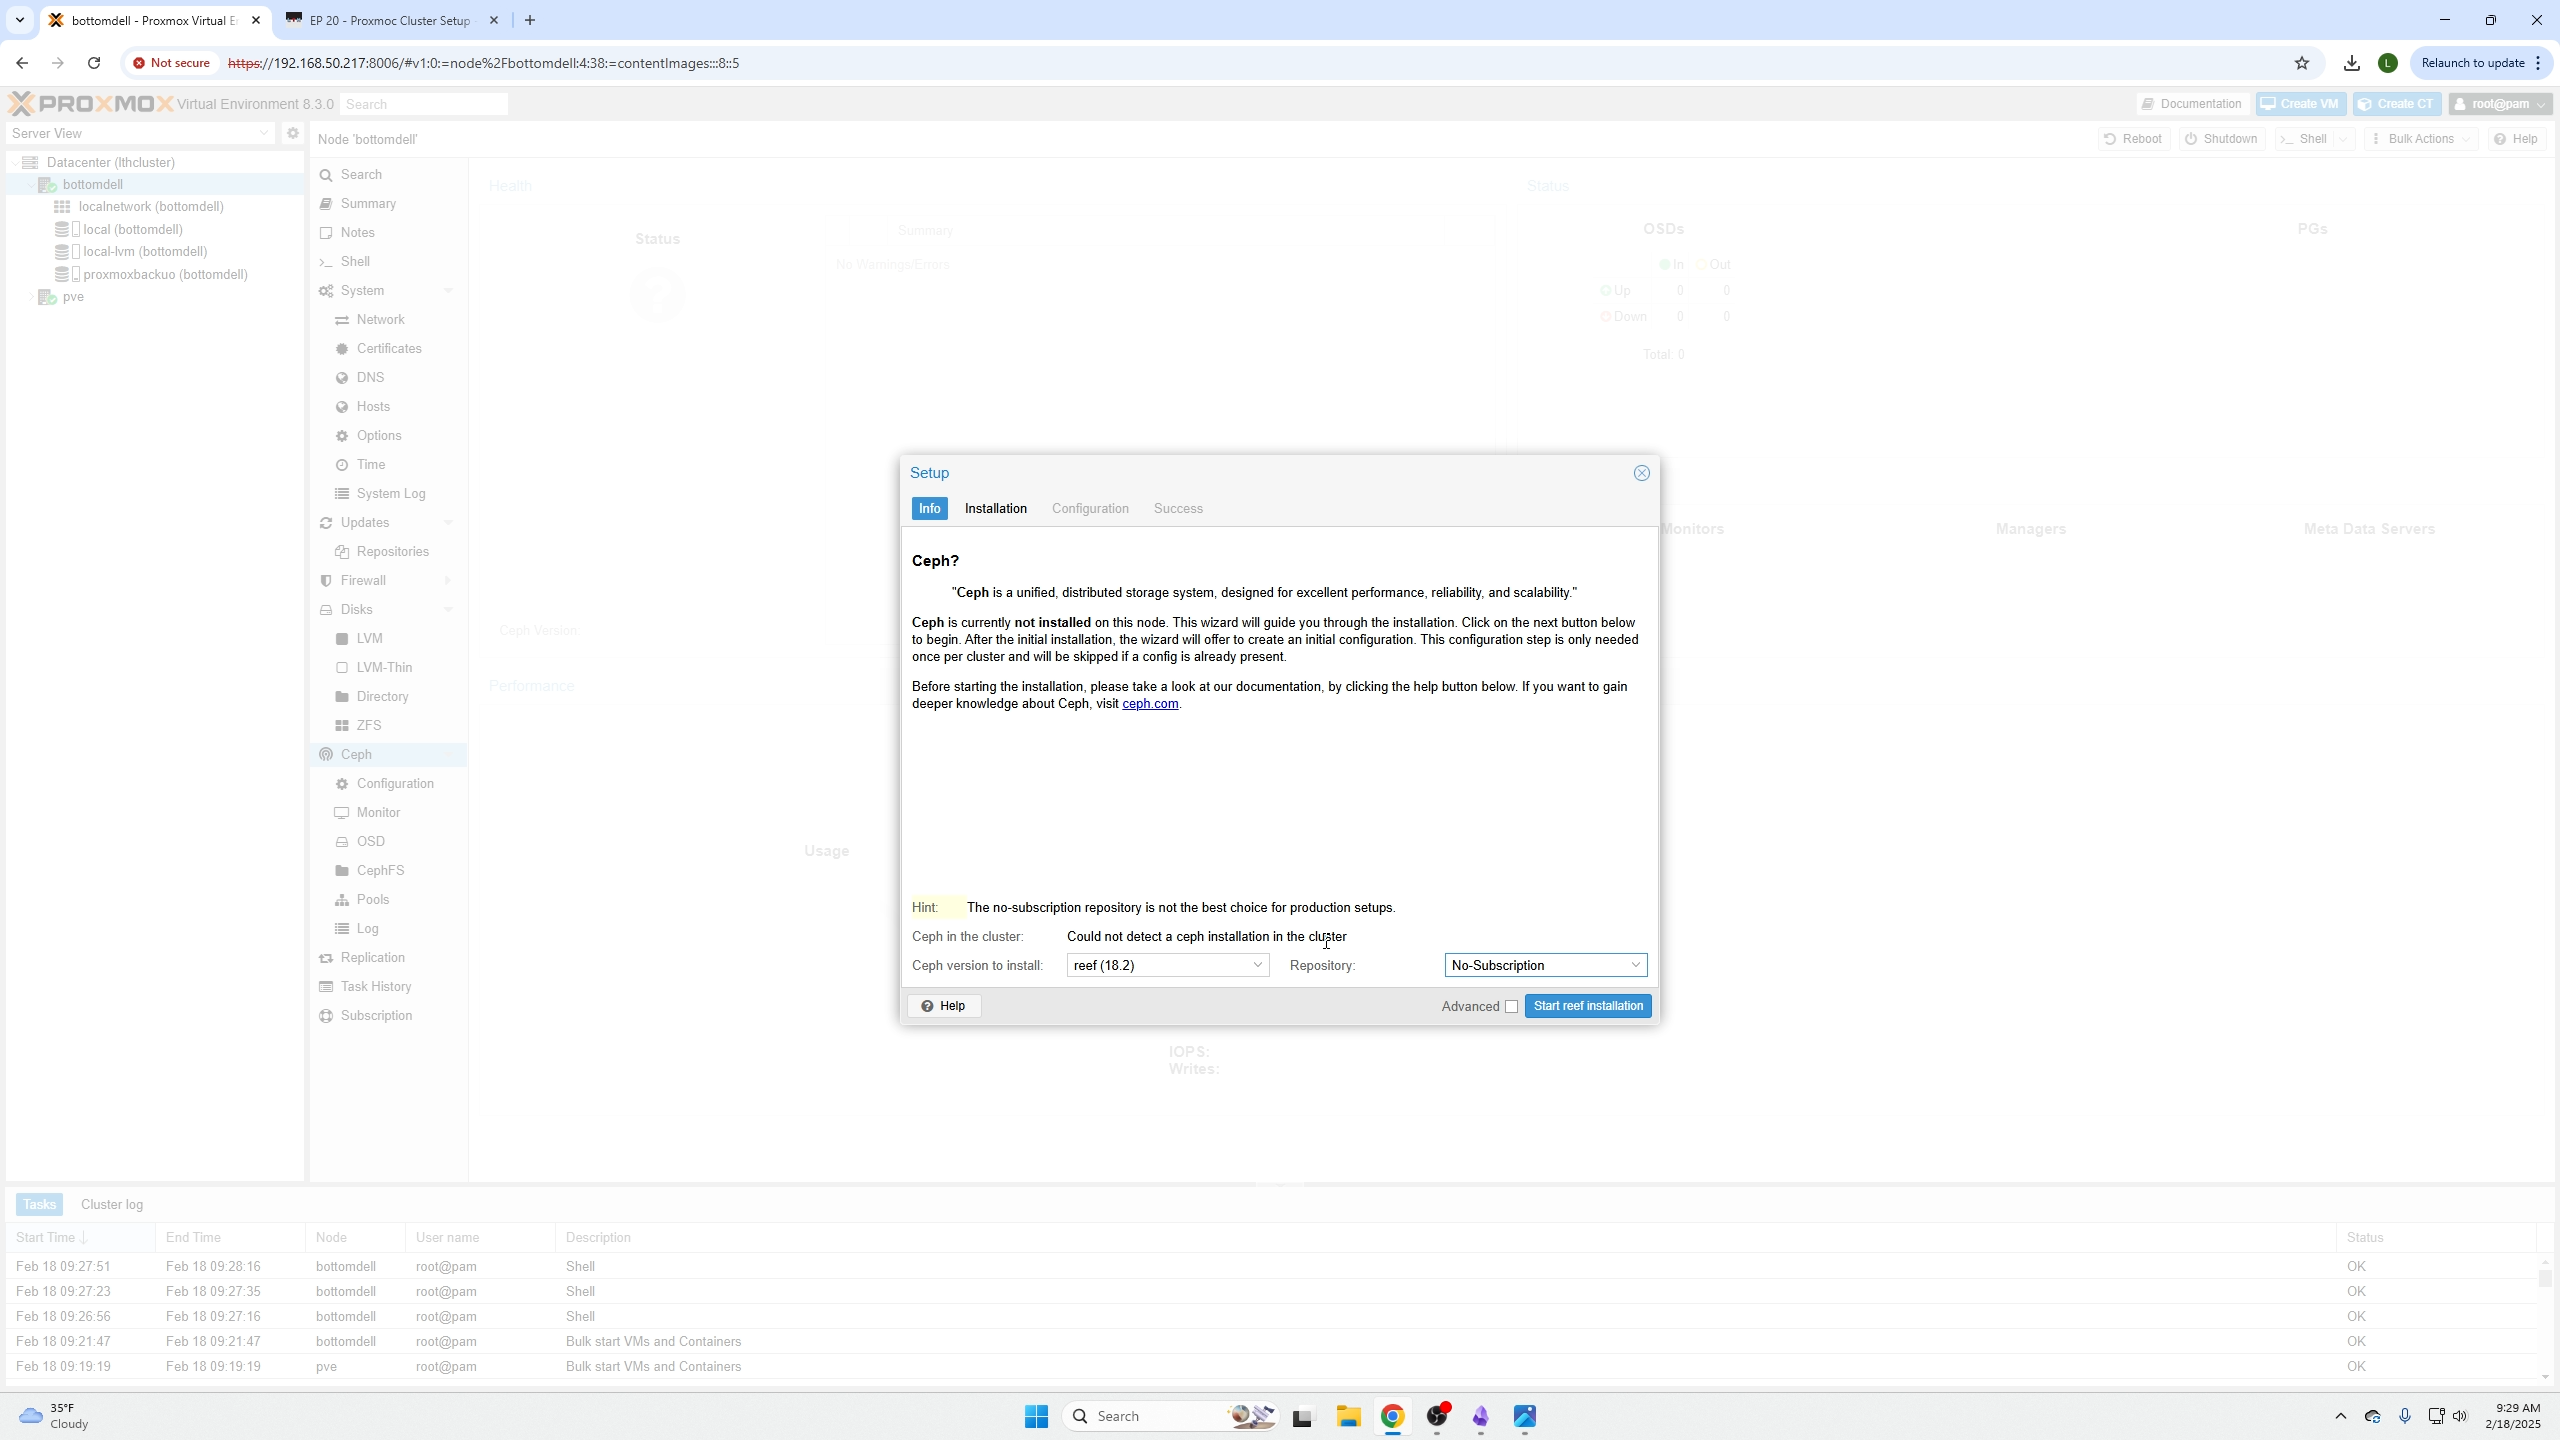
On the next screen, press enter to confirm and wait for the install to complete.
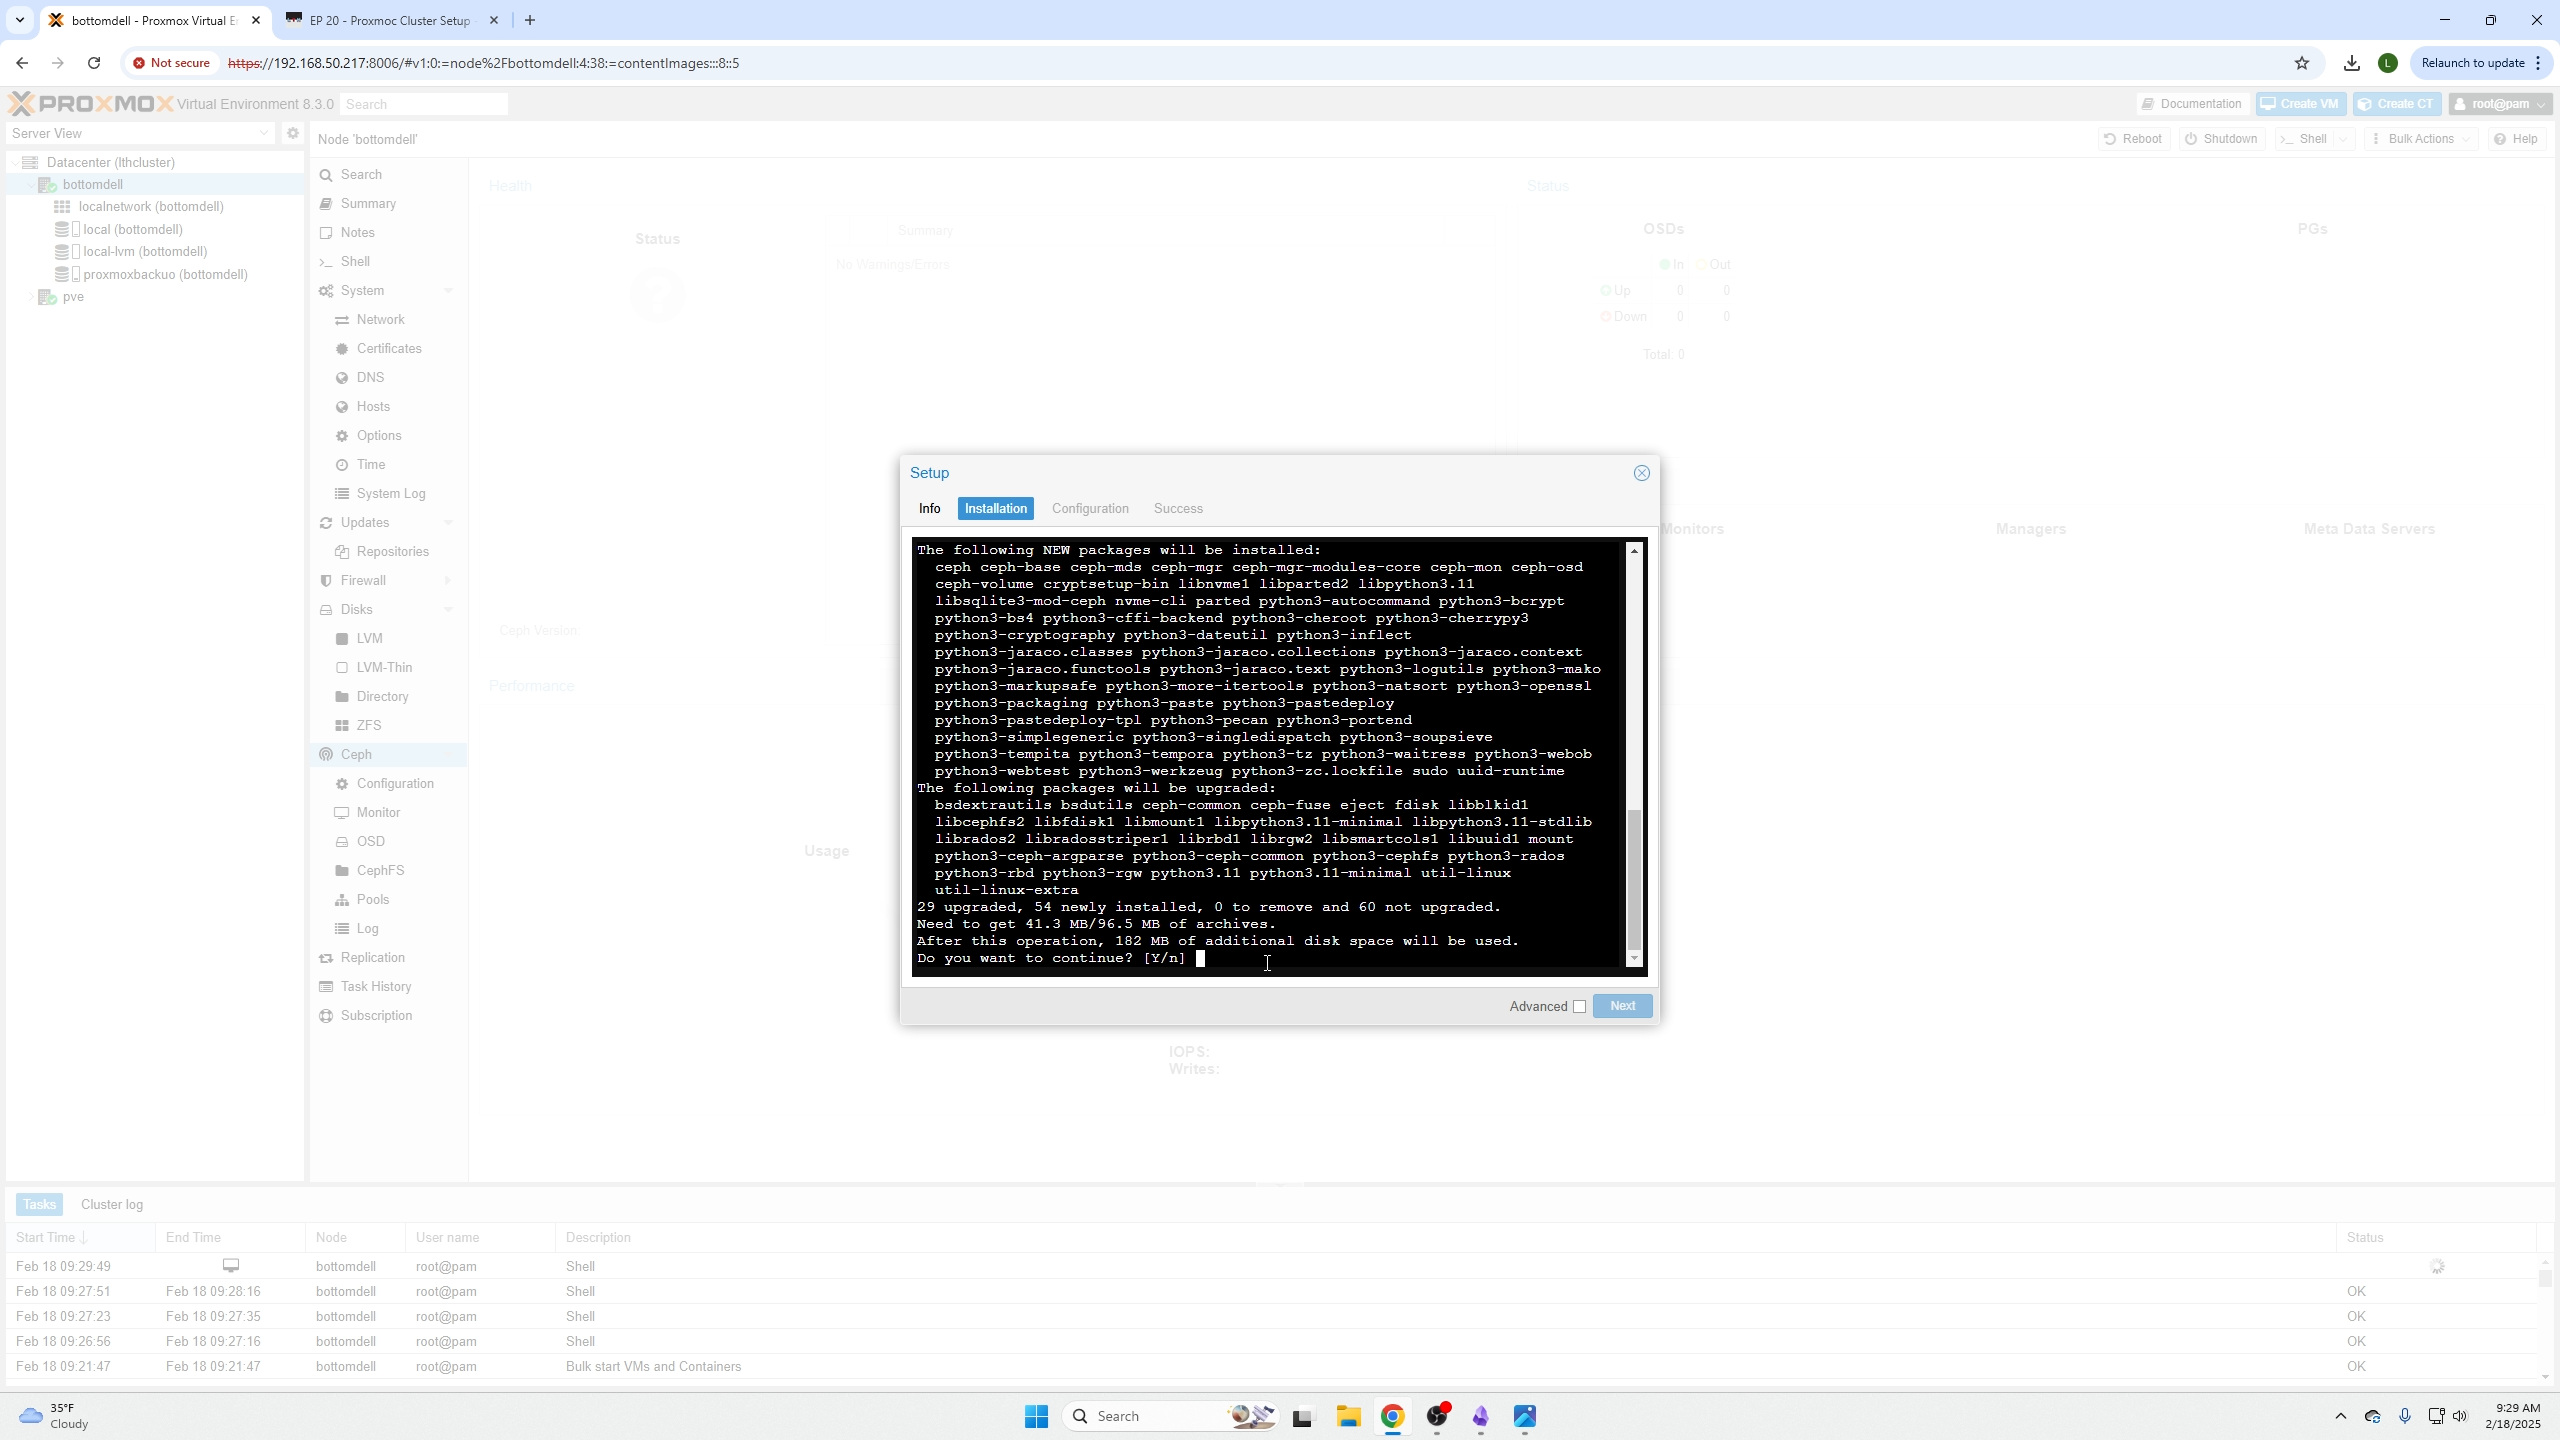
When the blue Next button is enabled, click Next.
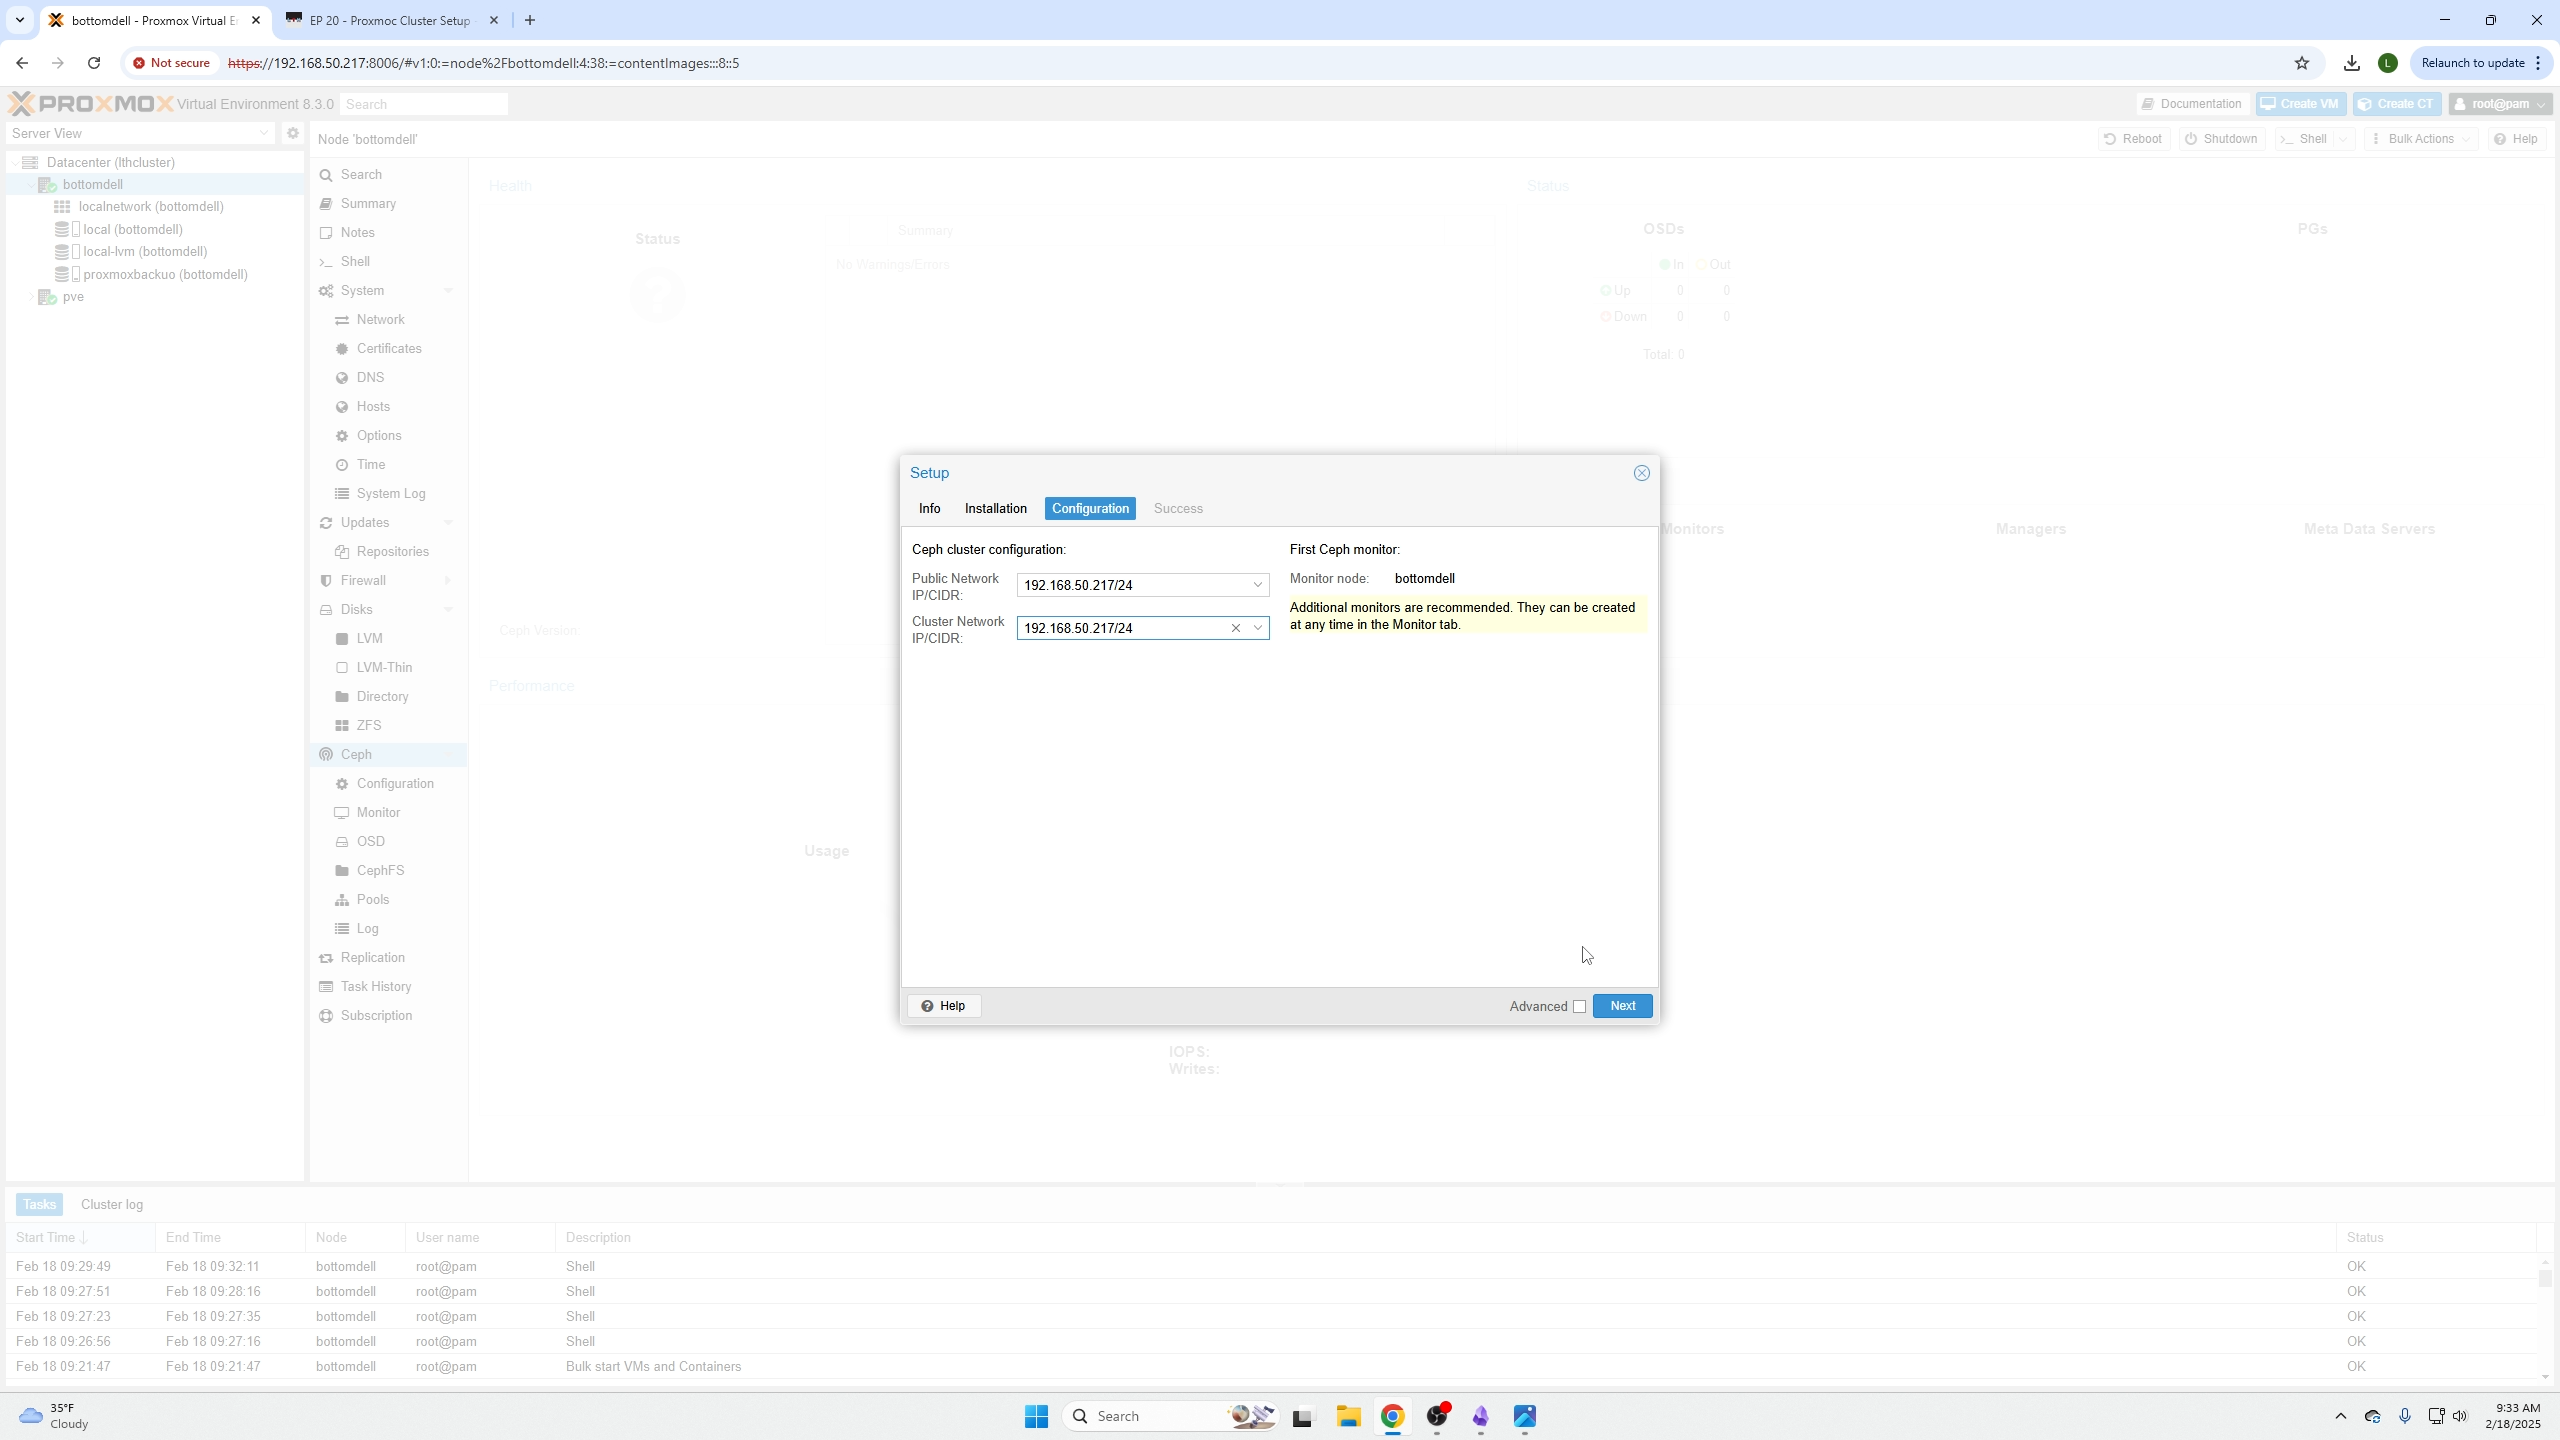
Your install should automatically select the network matching that of your node. Confirm and click Next.
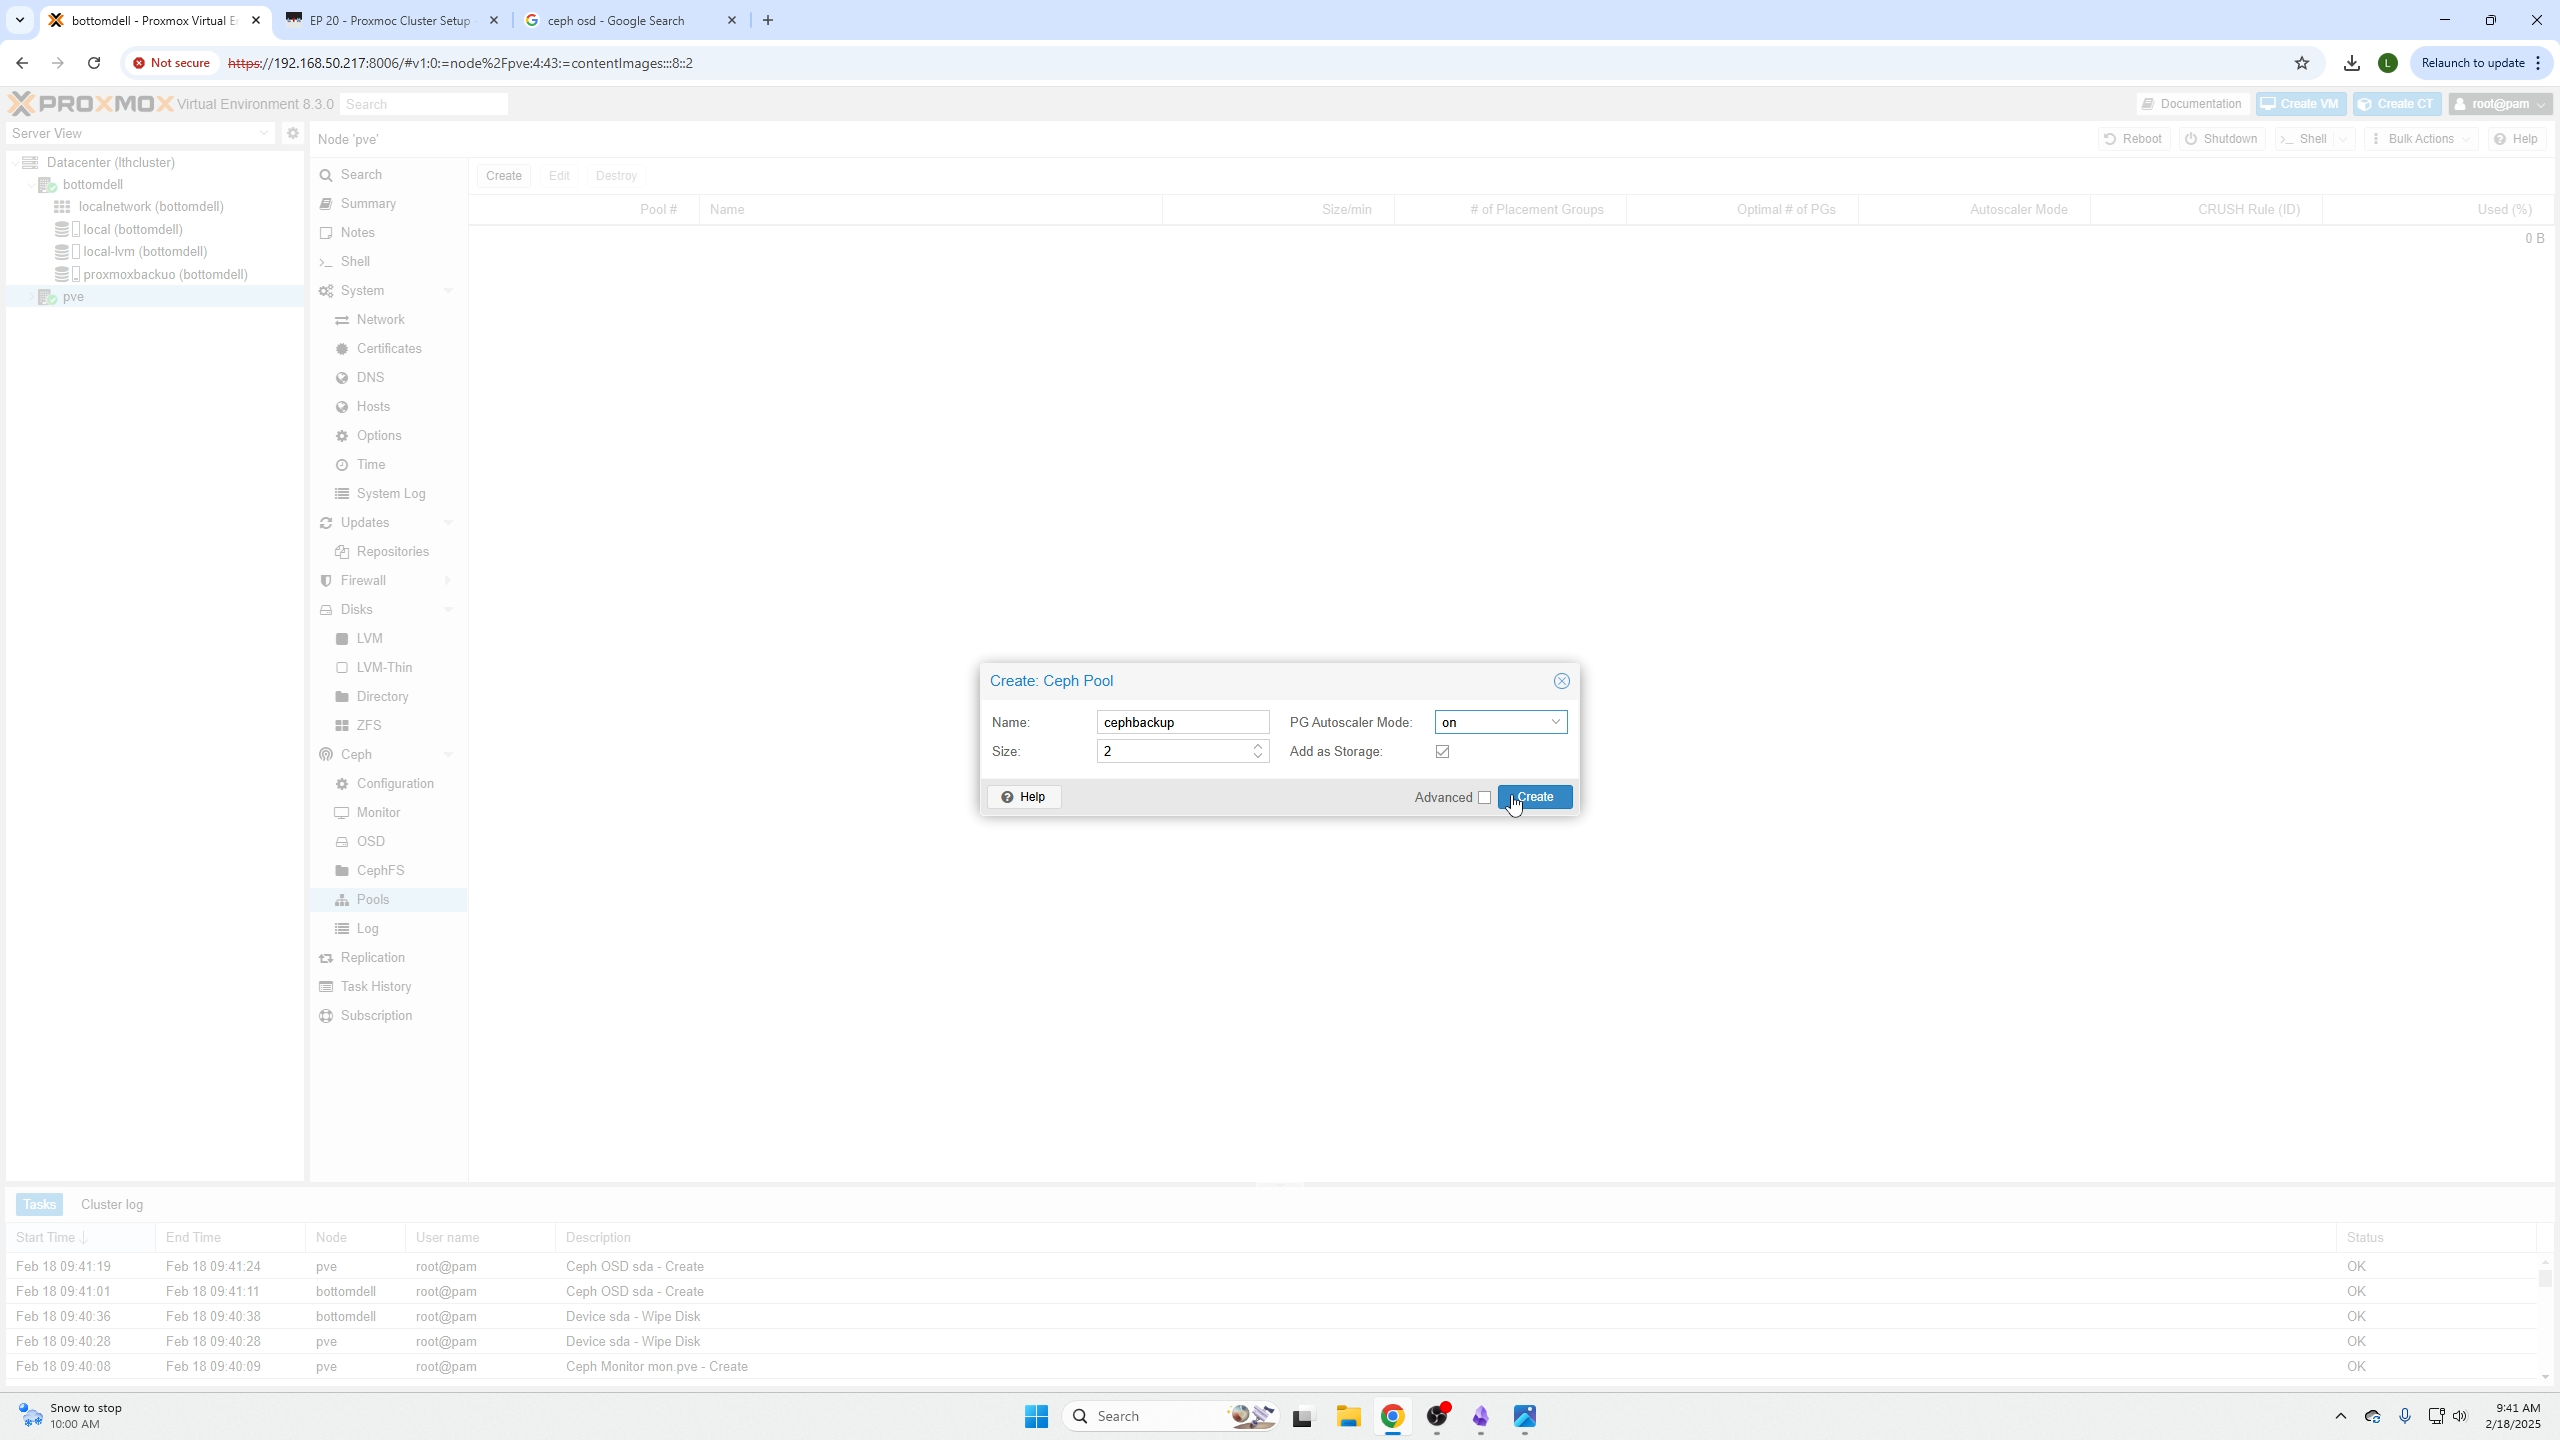
Create the Storage Pool
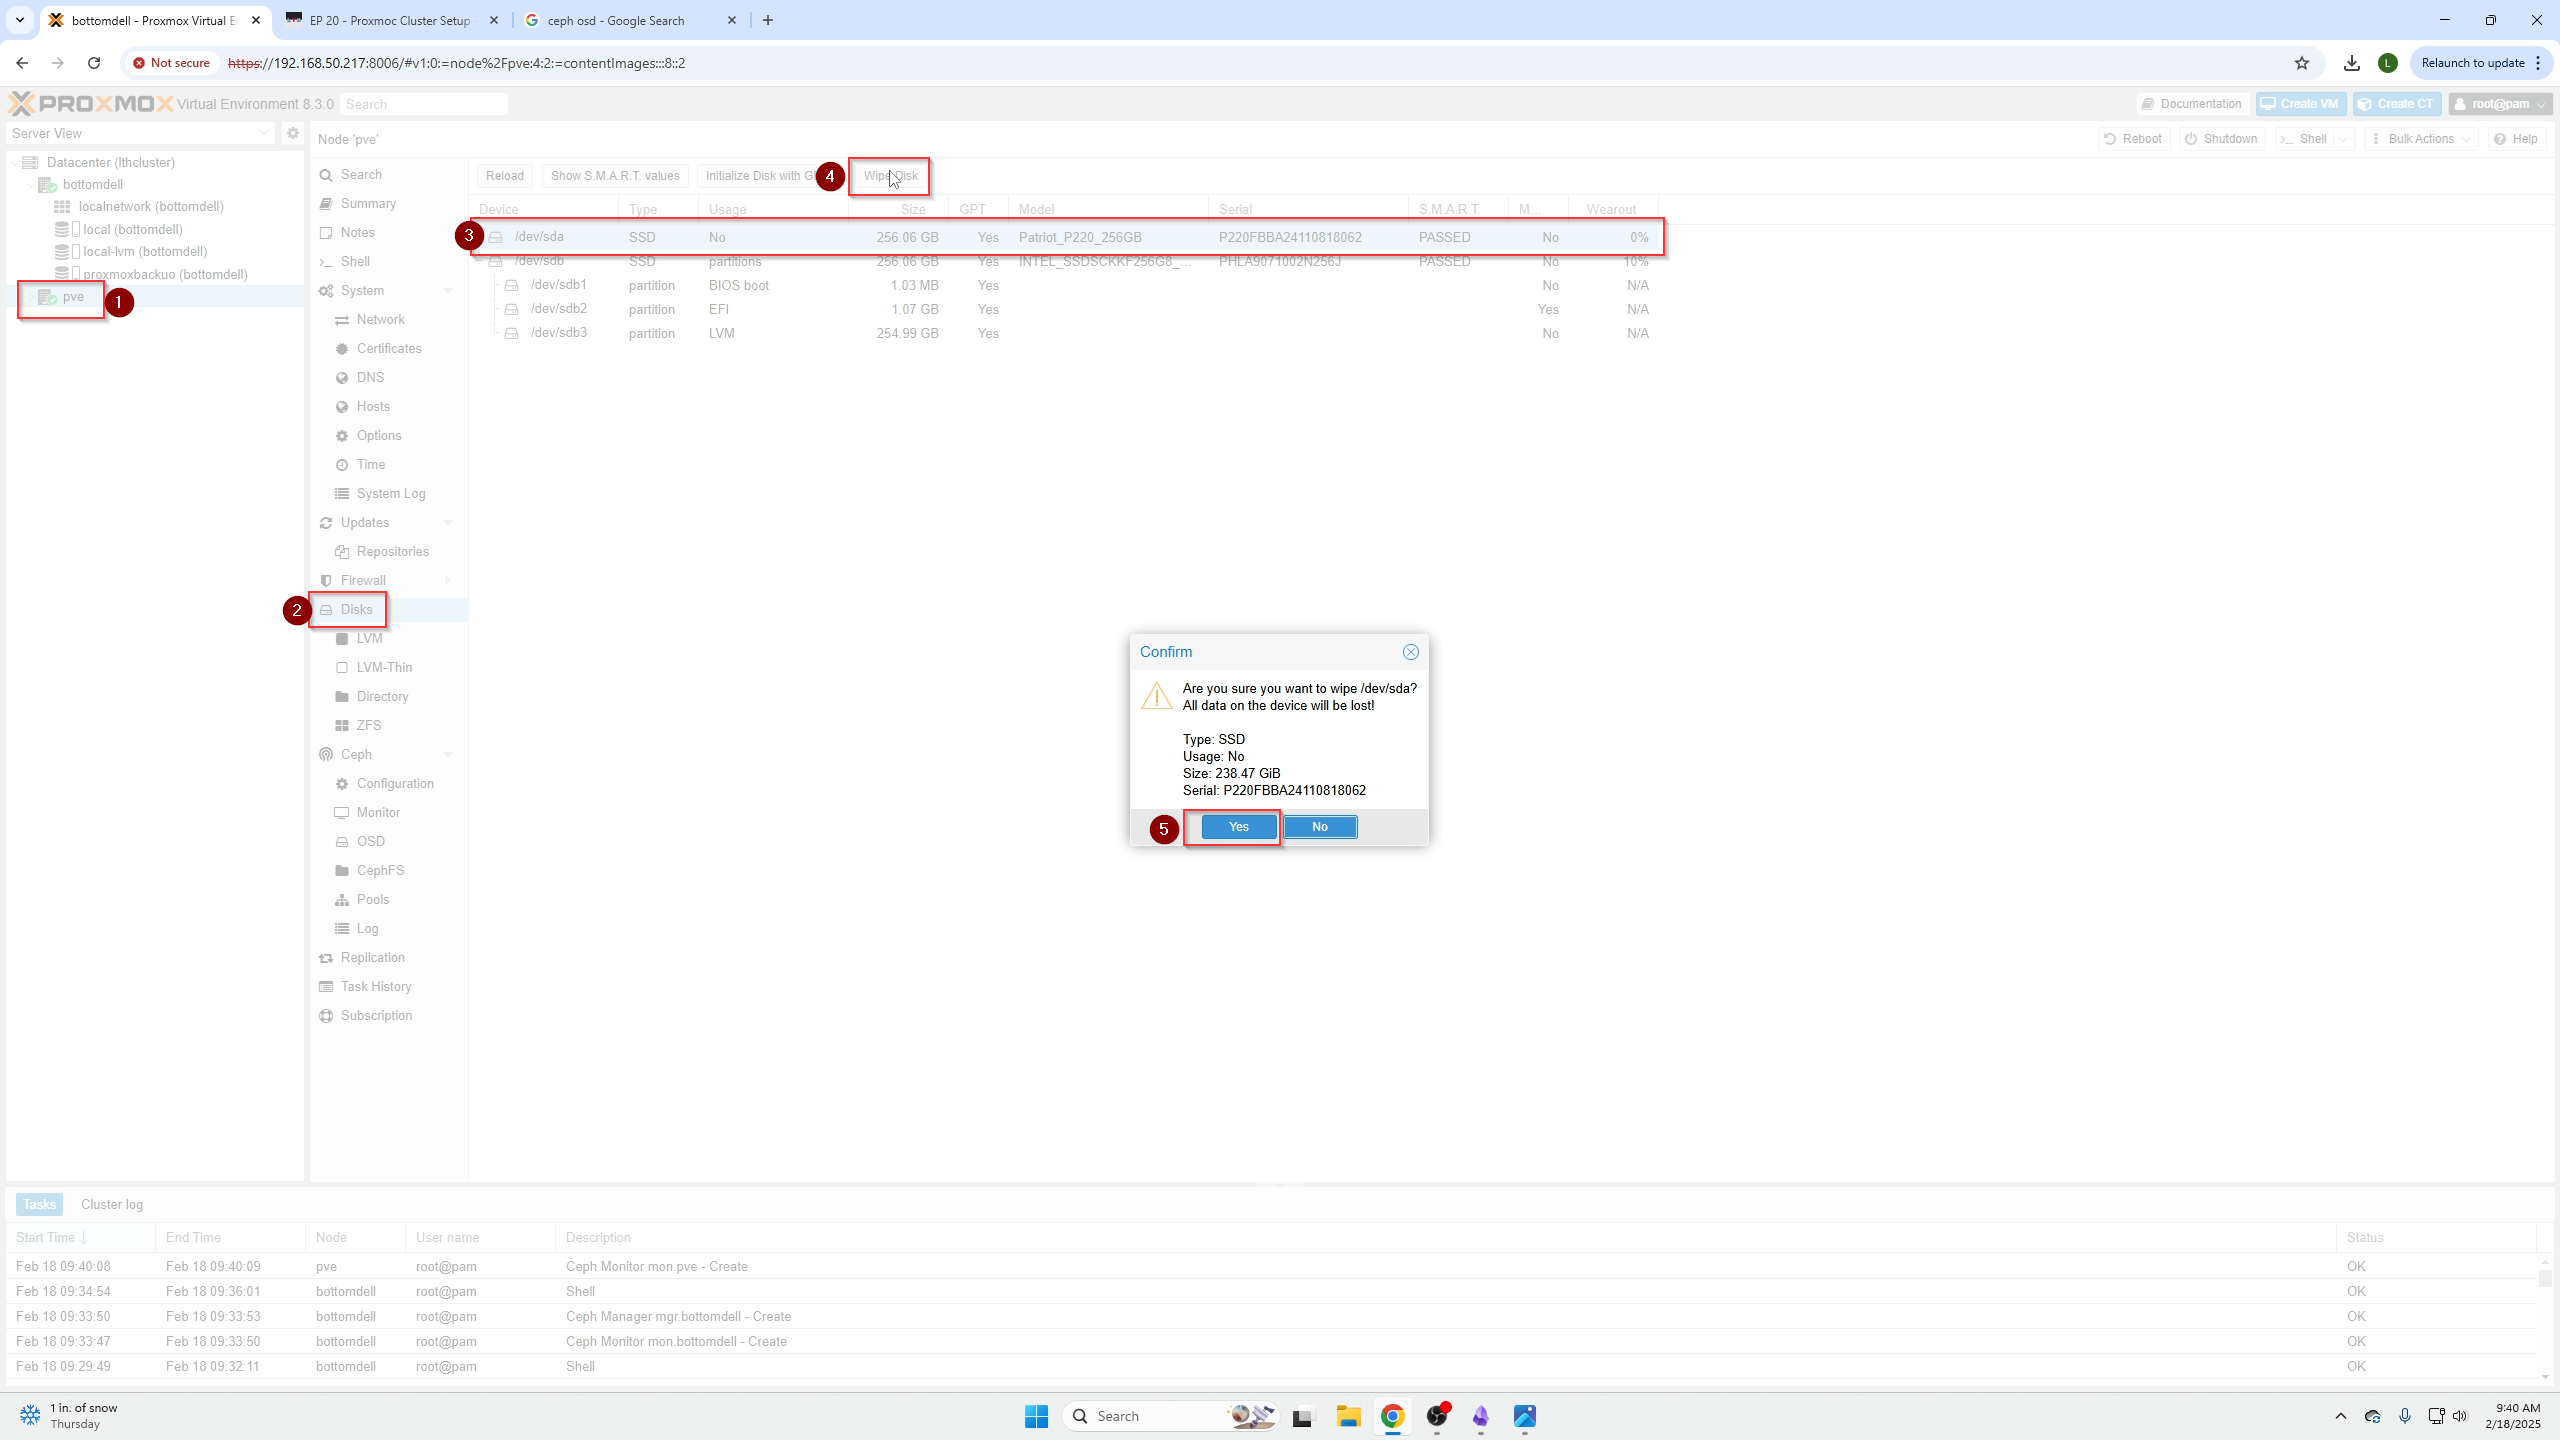
Click your node name, go to Disks, select your dedicated storage device, and click "Wipe Disk."
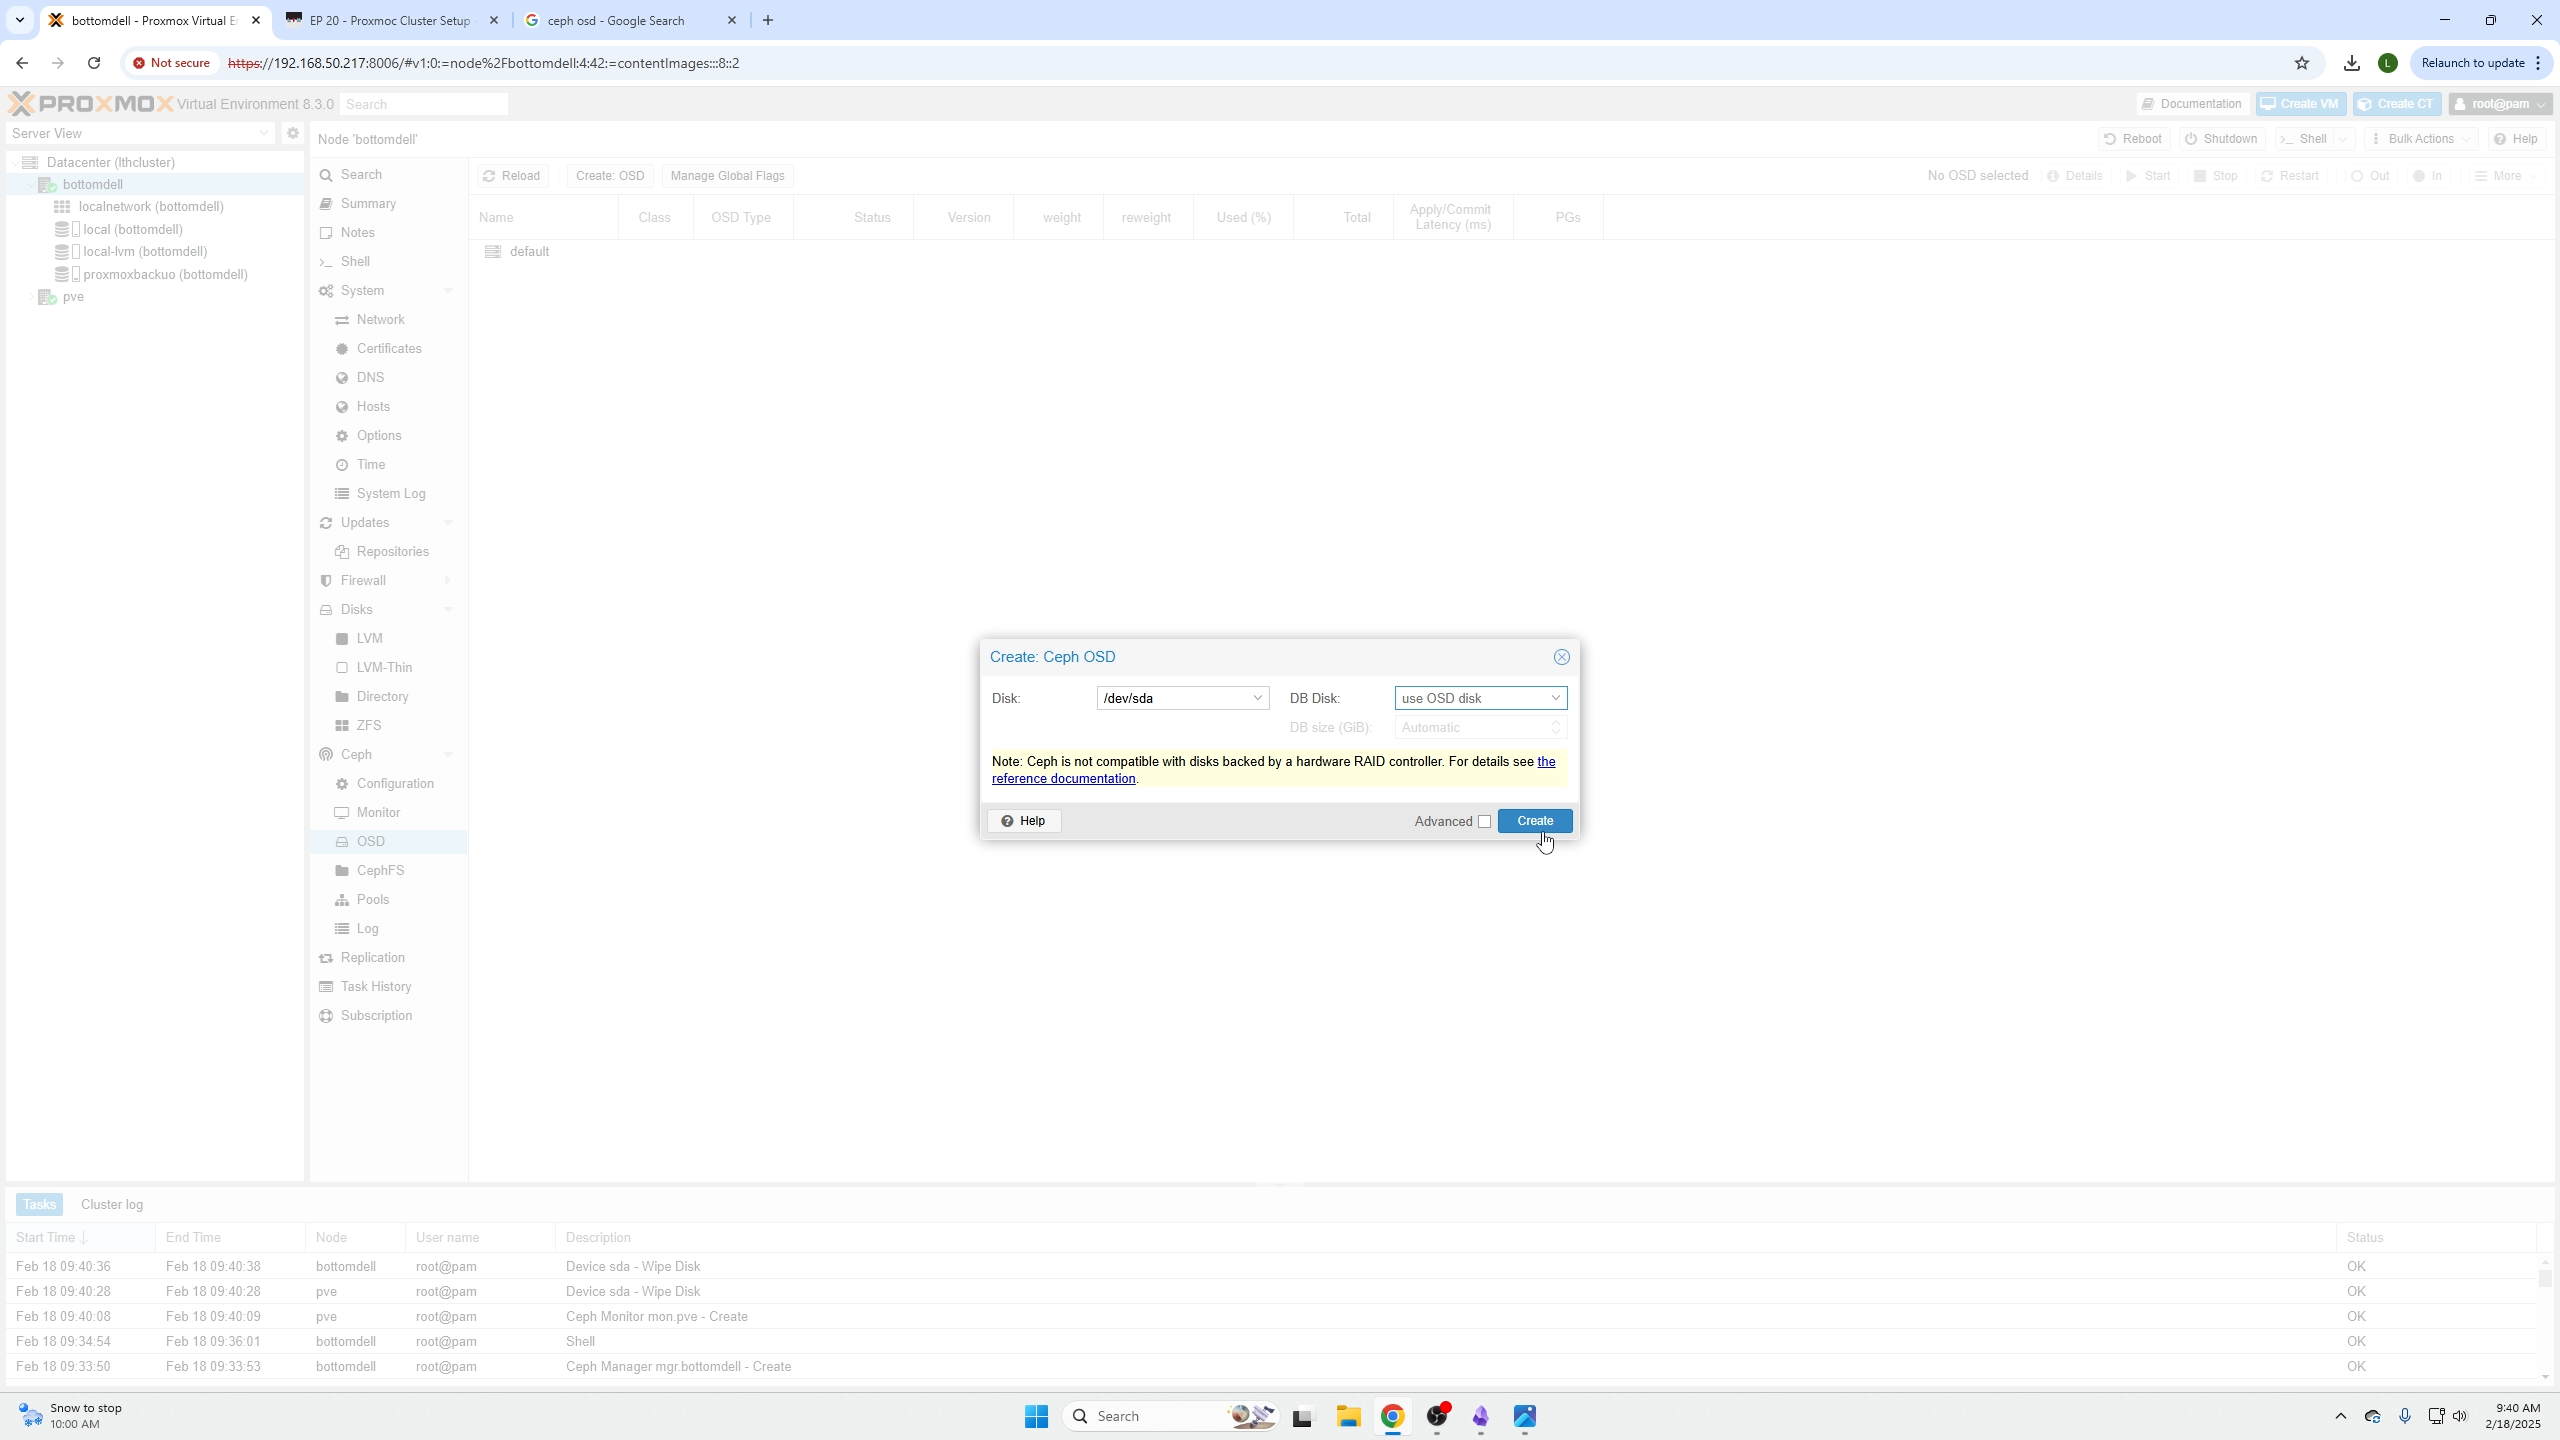
Return to the Ceph menu dropdown near the node name, select OSD, select the wiped device, and click Create.
Click Pools below the OSD menu, then click Create in the top left.
Set the pool size according to your number of nodes/OSD drives. For example, with two nodes and two drives, set pool size to two. Leave PG autoscaler mode on.
How to Perform Live Migrations of VMs
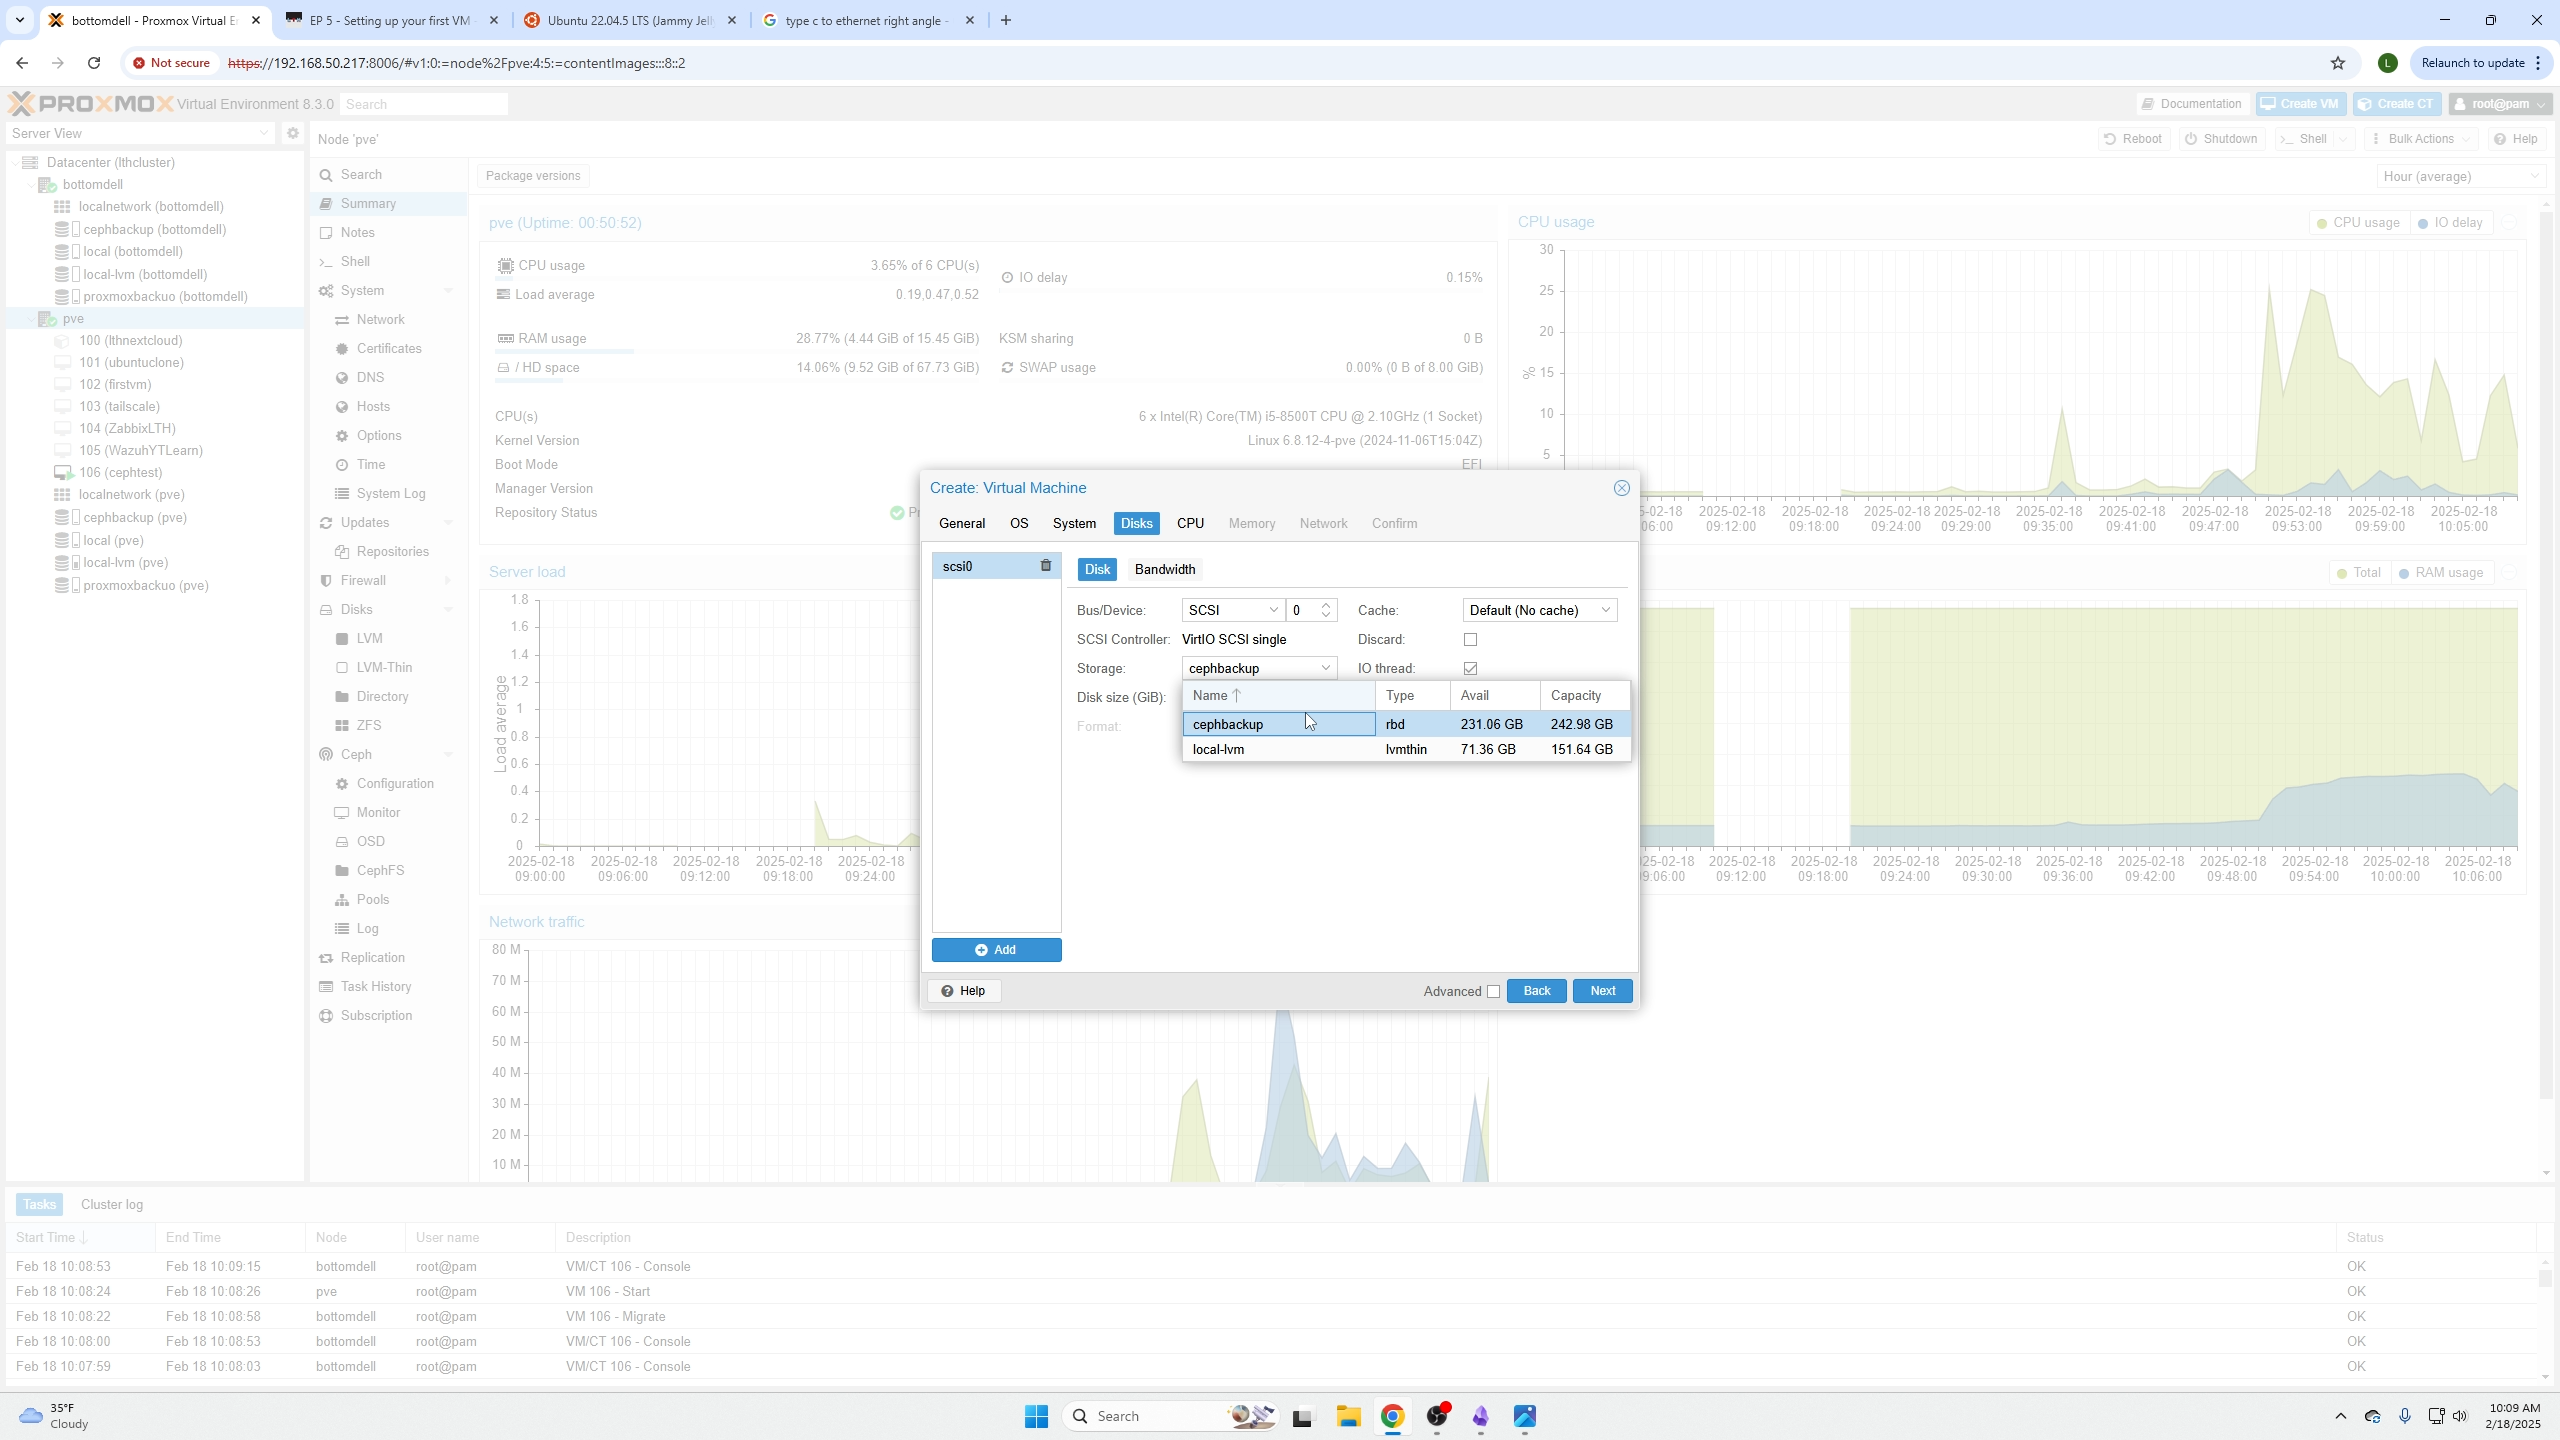
To live migrate a VM, its storage must reside on the Ceph pool.
When creating a VM, on the Disks page select your Ceph pool as the storage option.
Note
You can edit existing VMs to move their storage to the Ceph pool to enable live migration.
Removing Local Disk for Live Migration
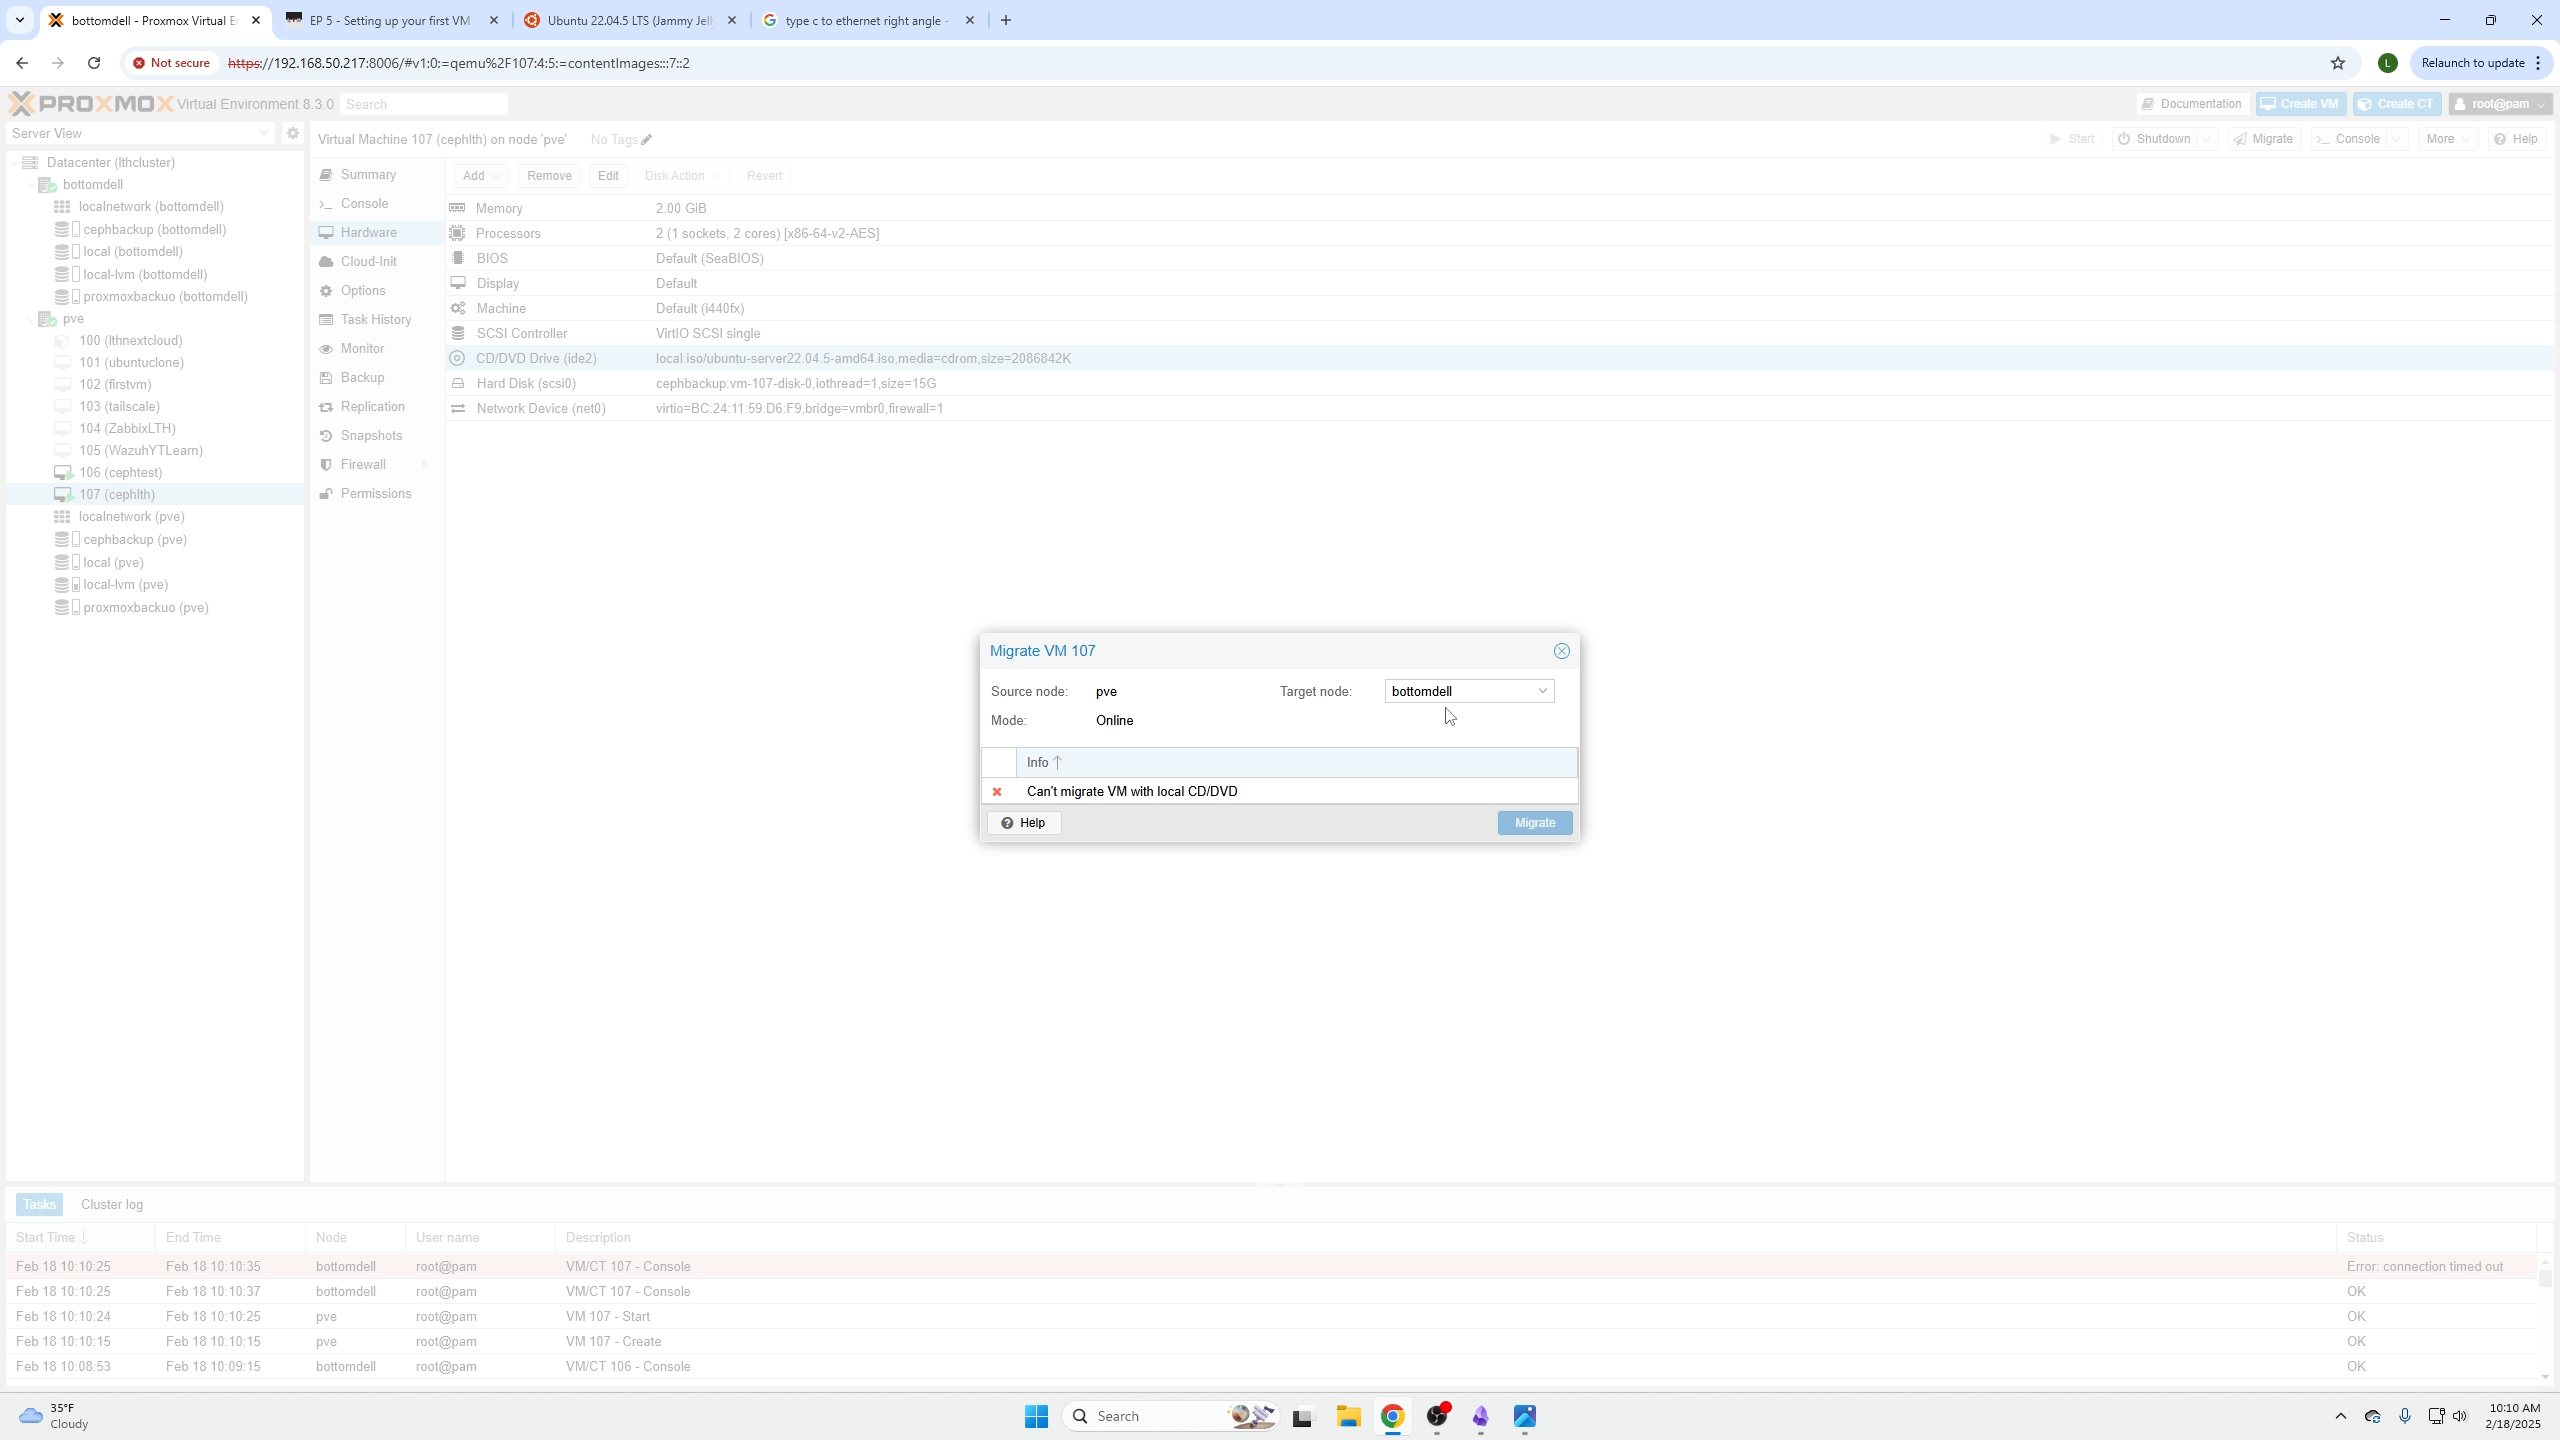
Live migration will NOT work if a CD/DVD device is attached. This device is only needed for initial OS installation.
Steps:
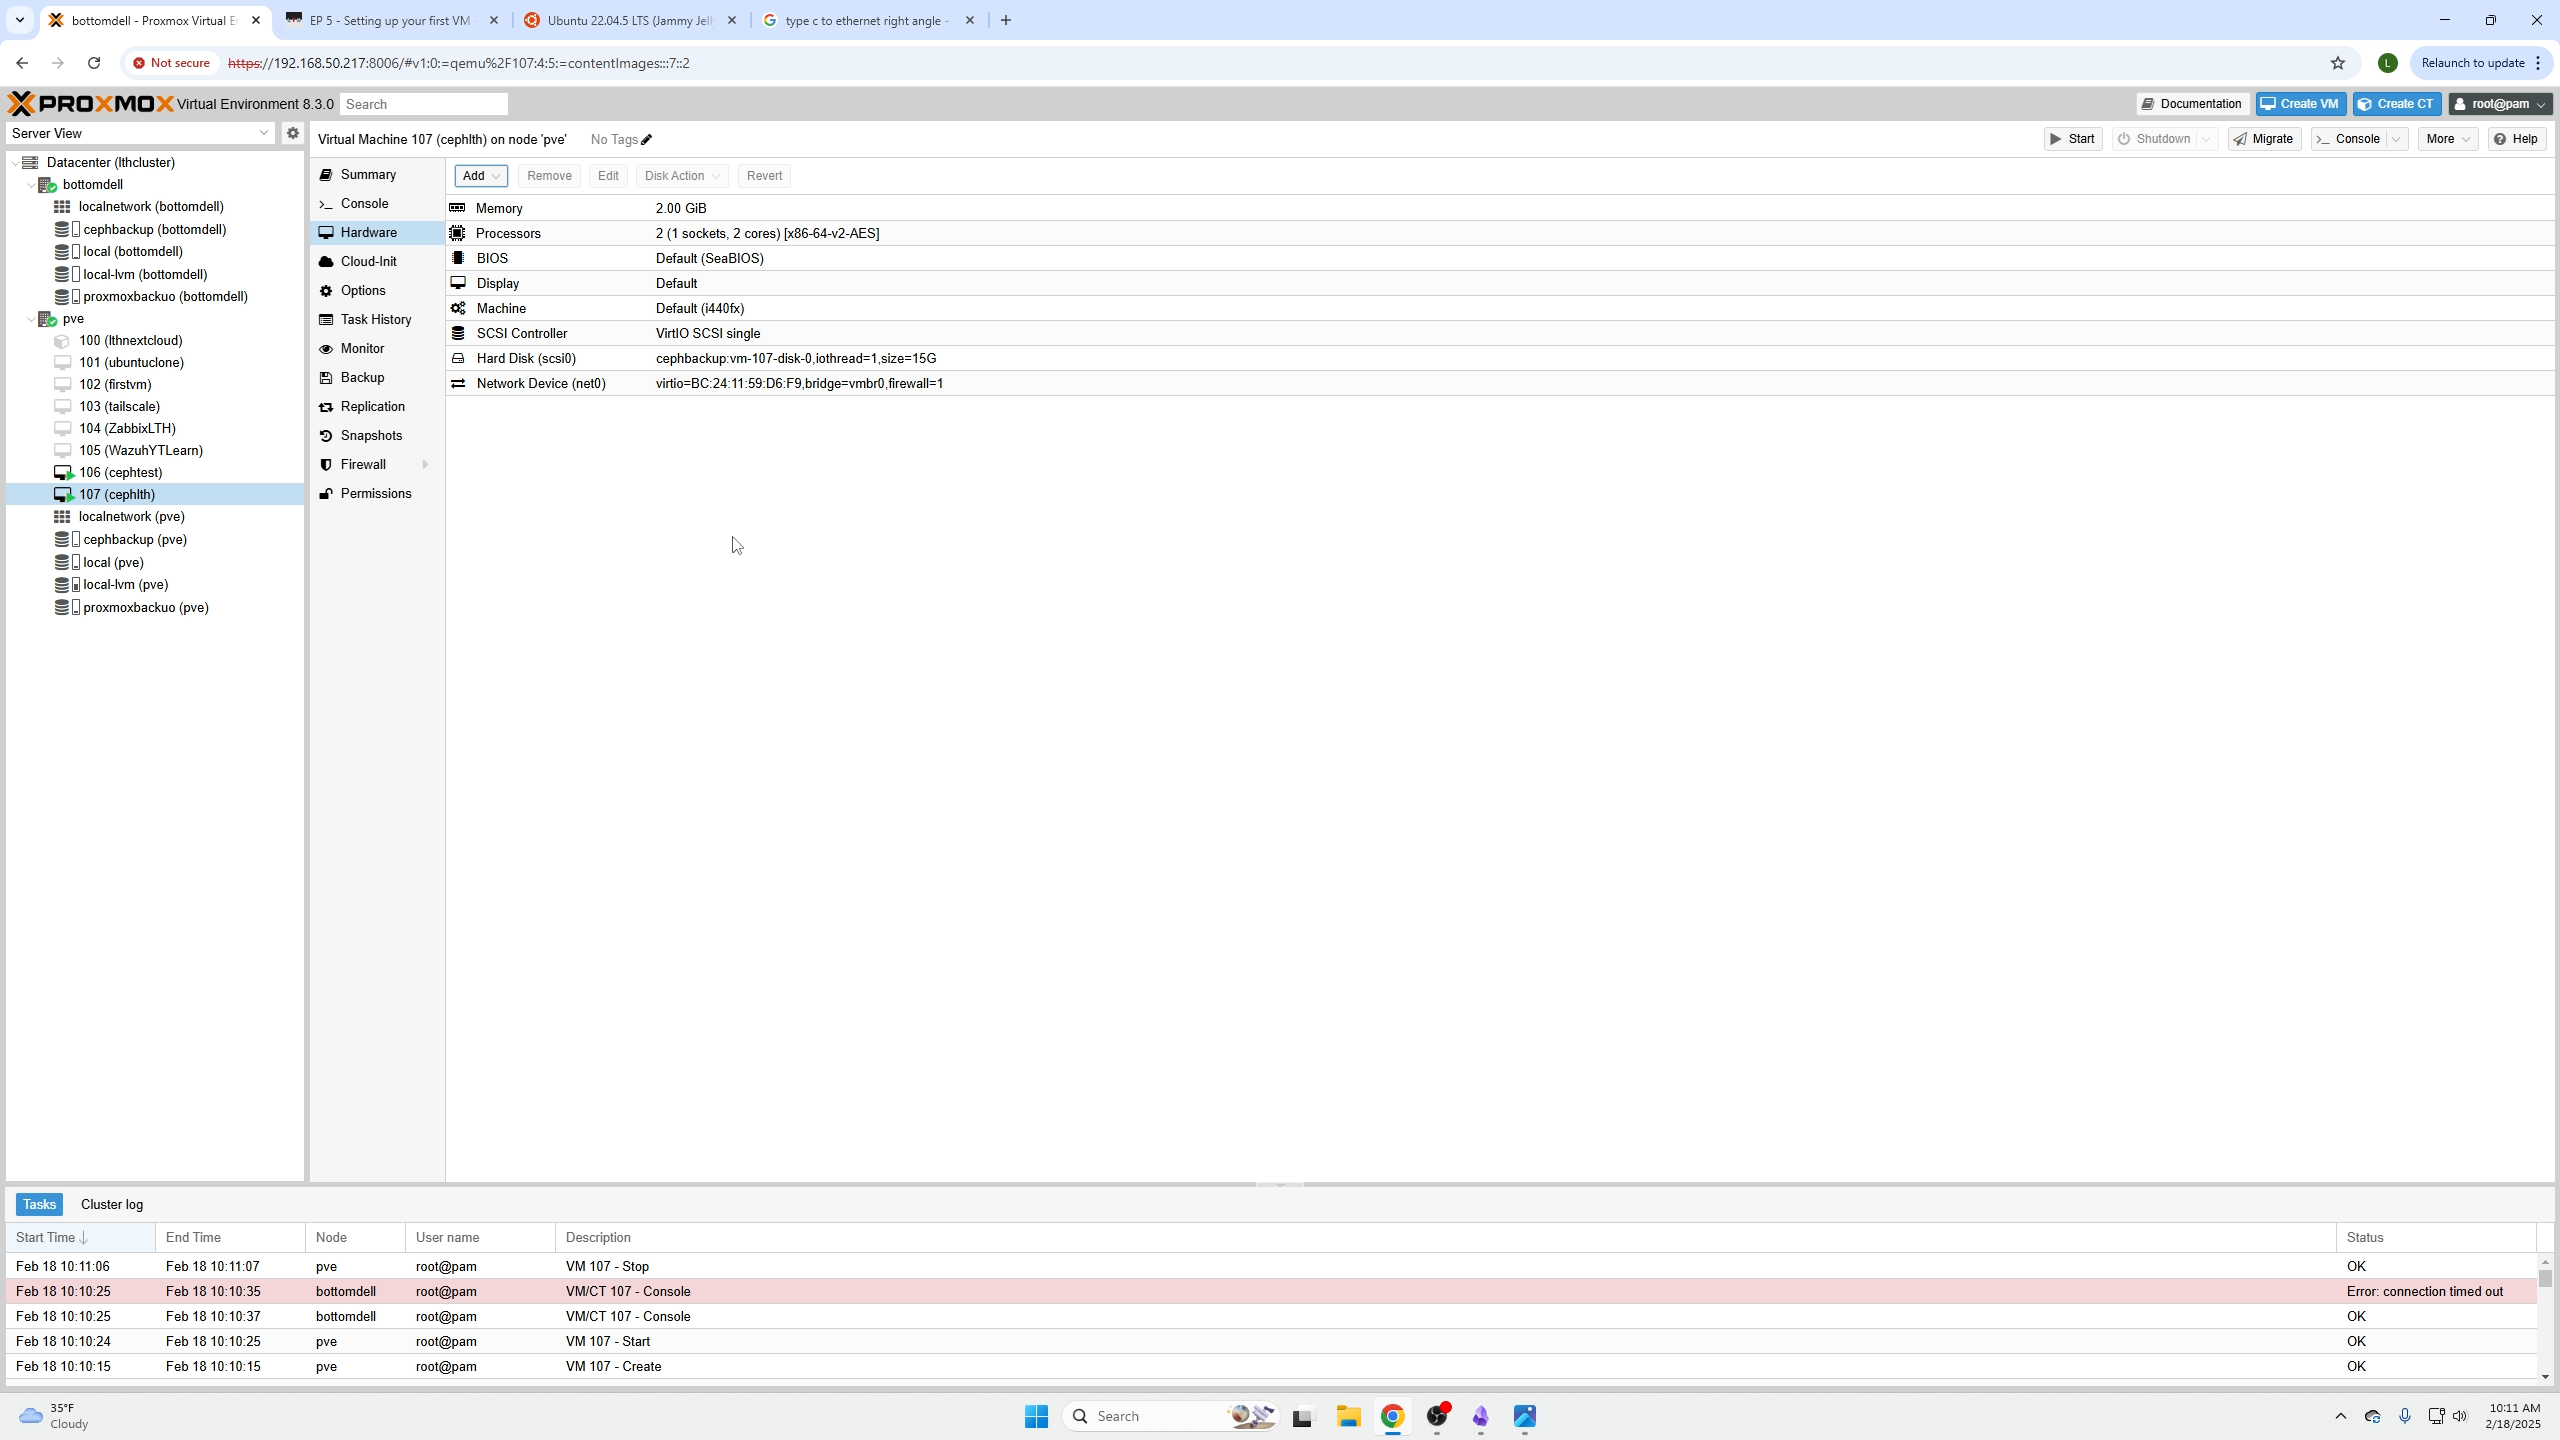
- Power off your VM.
- Select the CD/DVD device under Hardware.
- Click Remove.
- Power on the VM again.

Example of live migration failing with a local CD/DVD attached:
Example with CD/DVD removed:
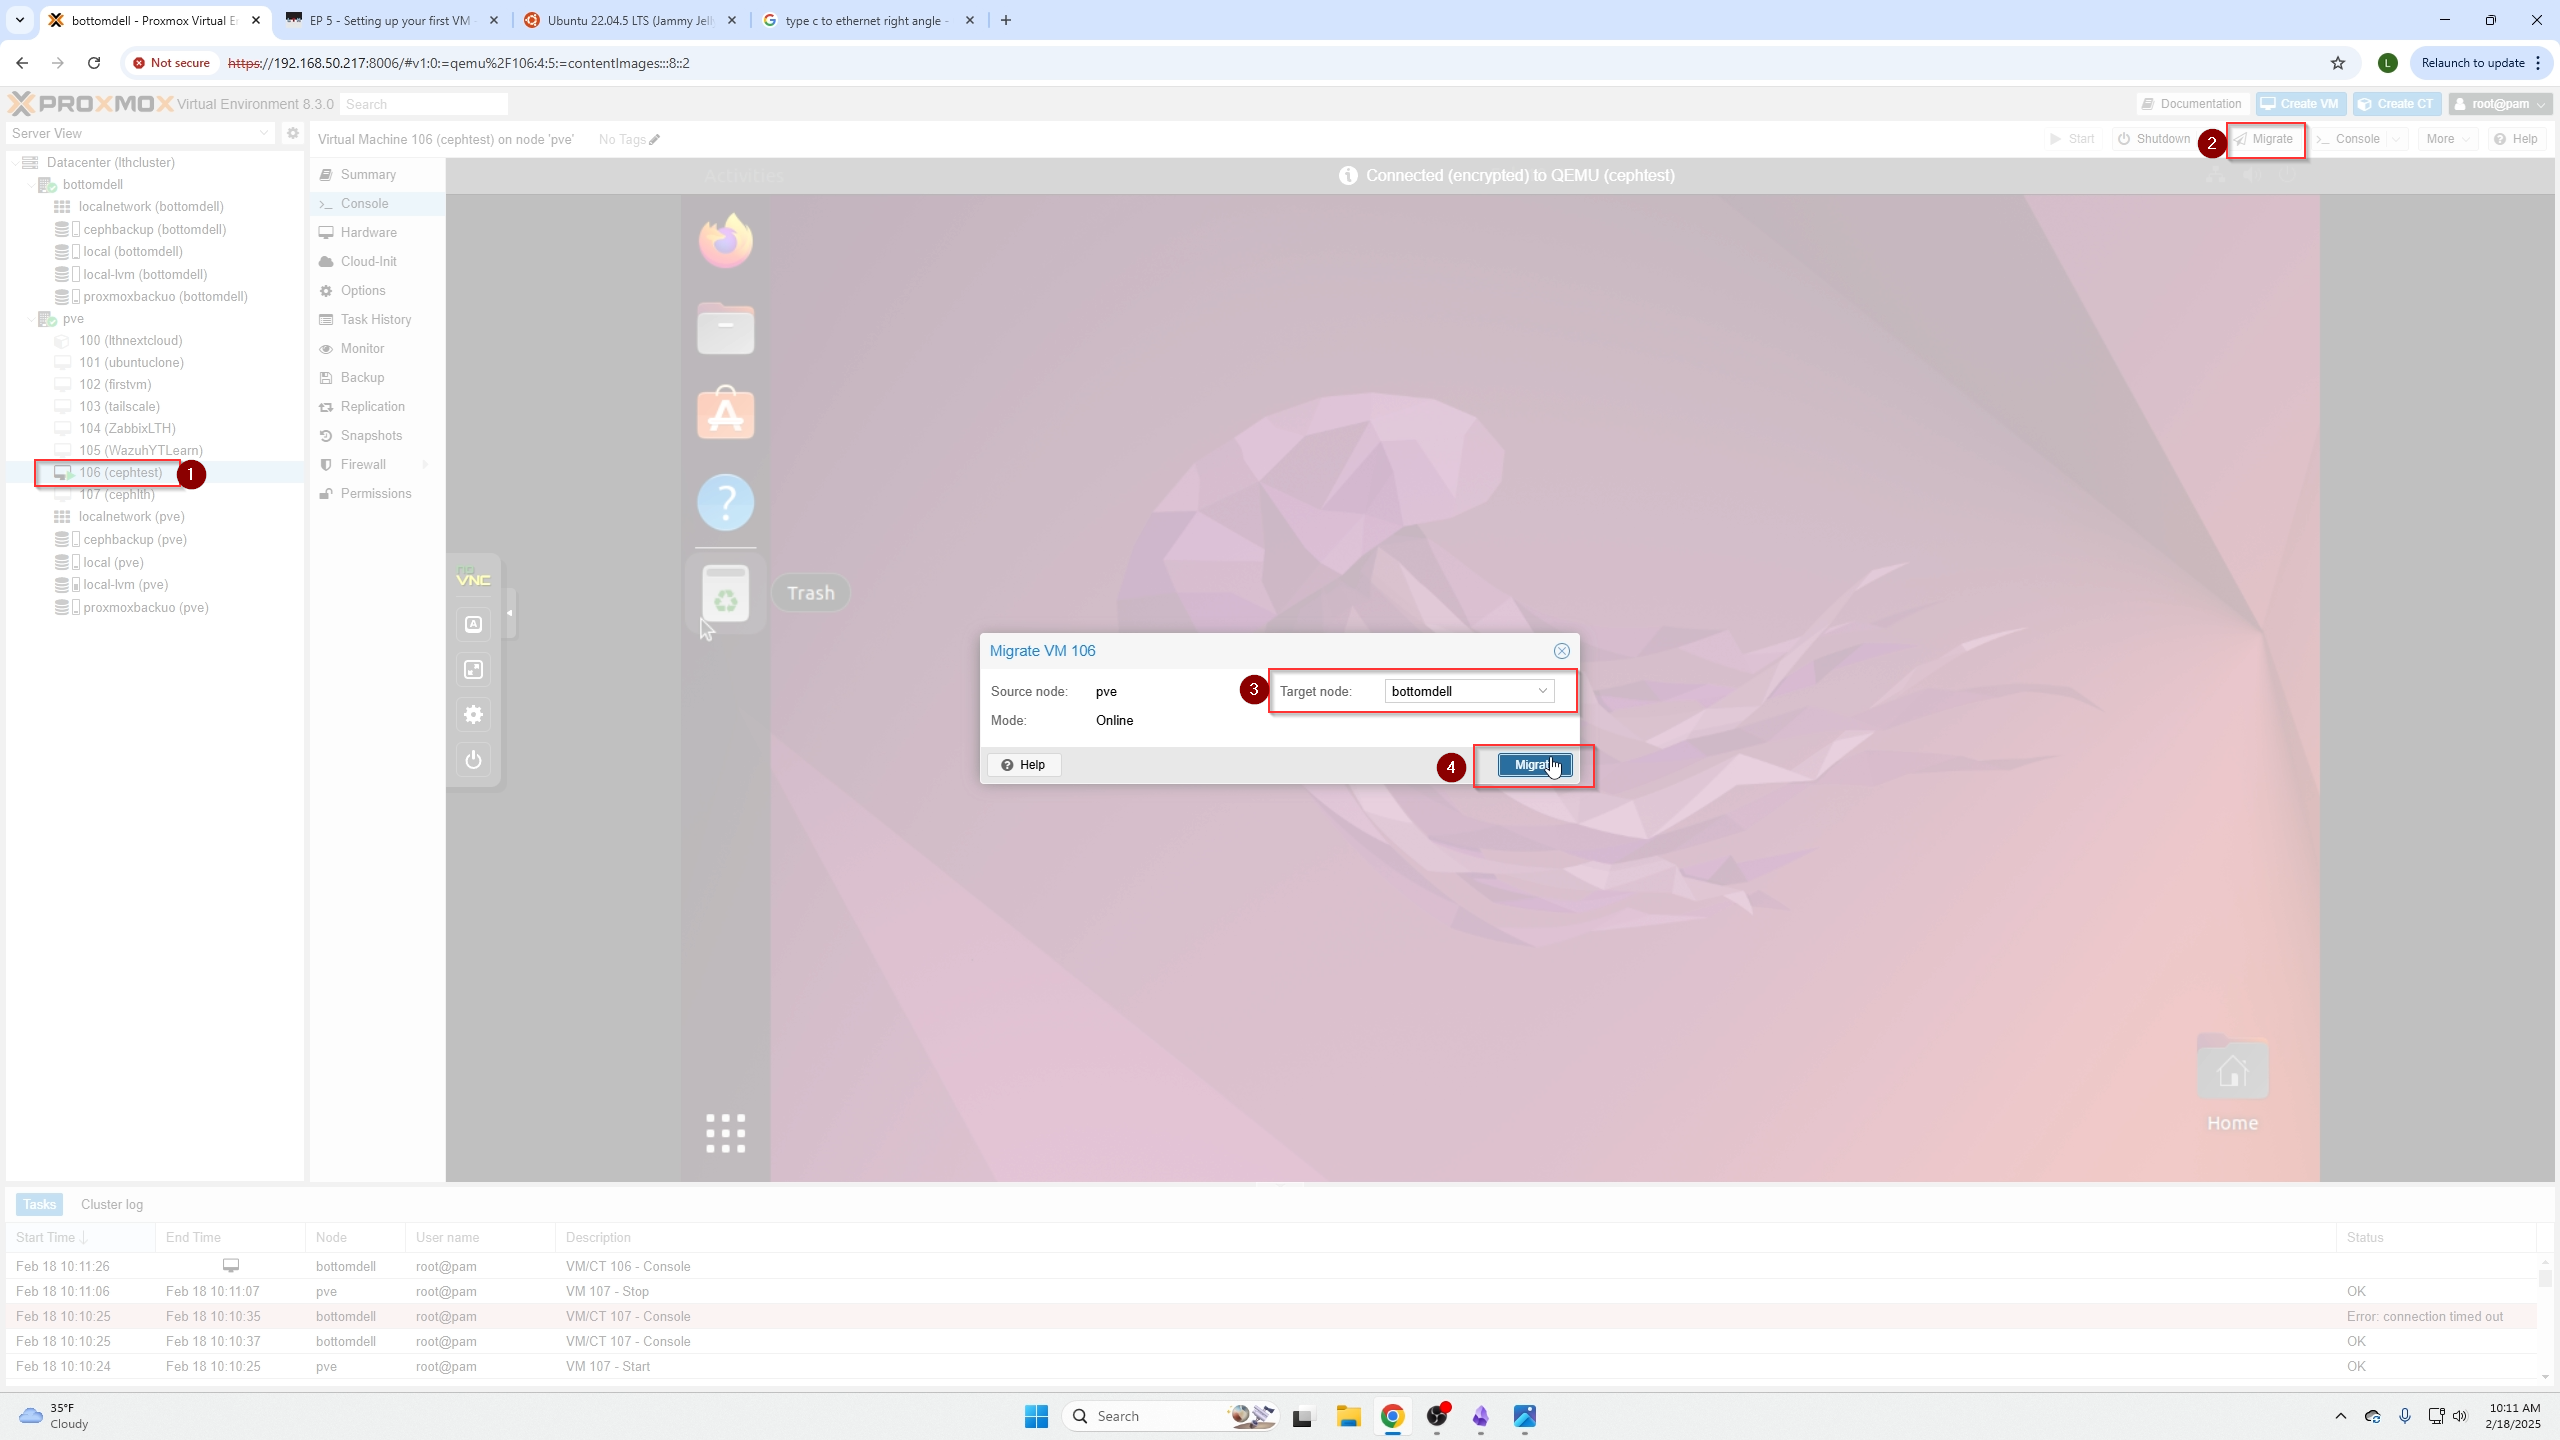
Now, with the CD/DVD removed and VM running, select the target node to migrate to and click Migrate.
Live feed of the migration process:
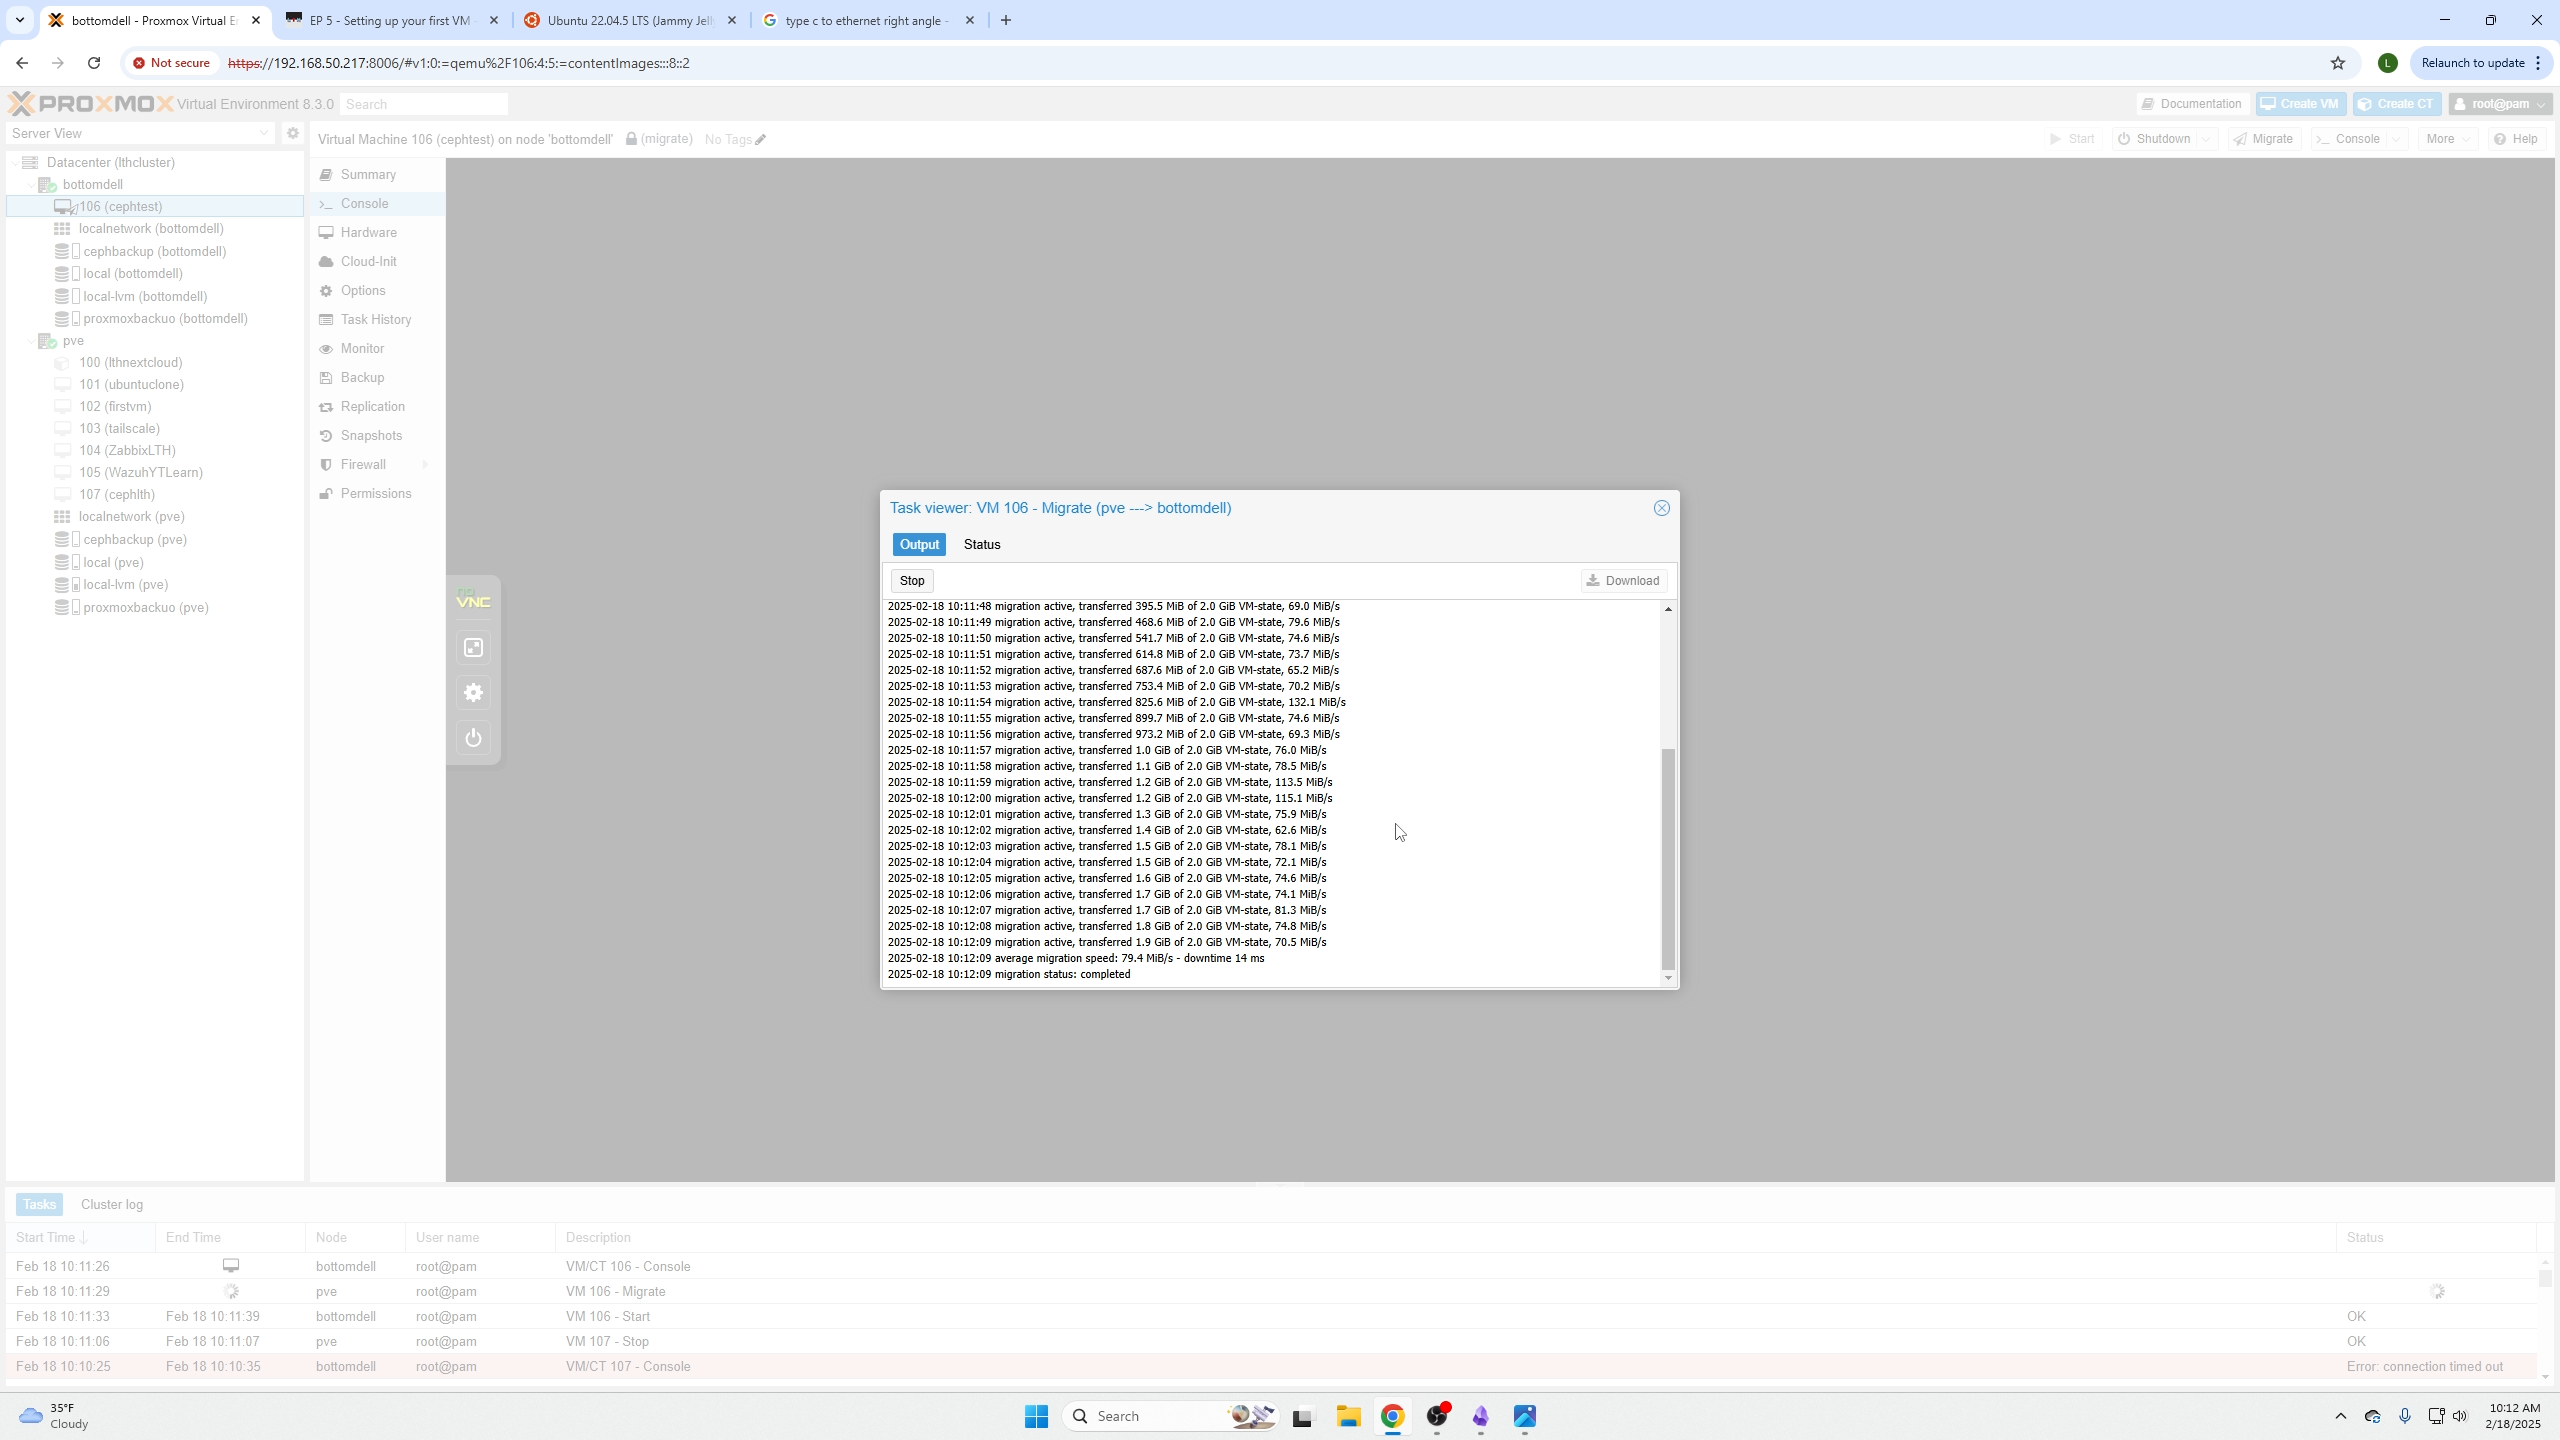
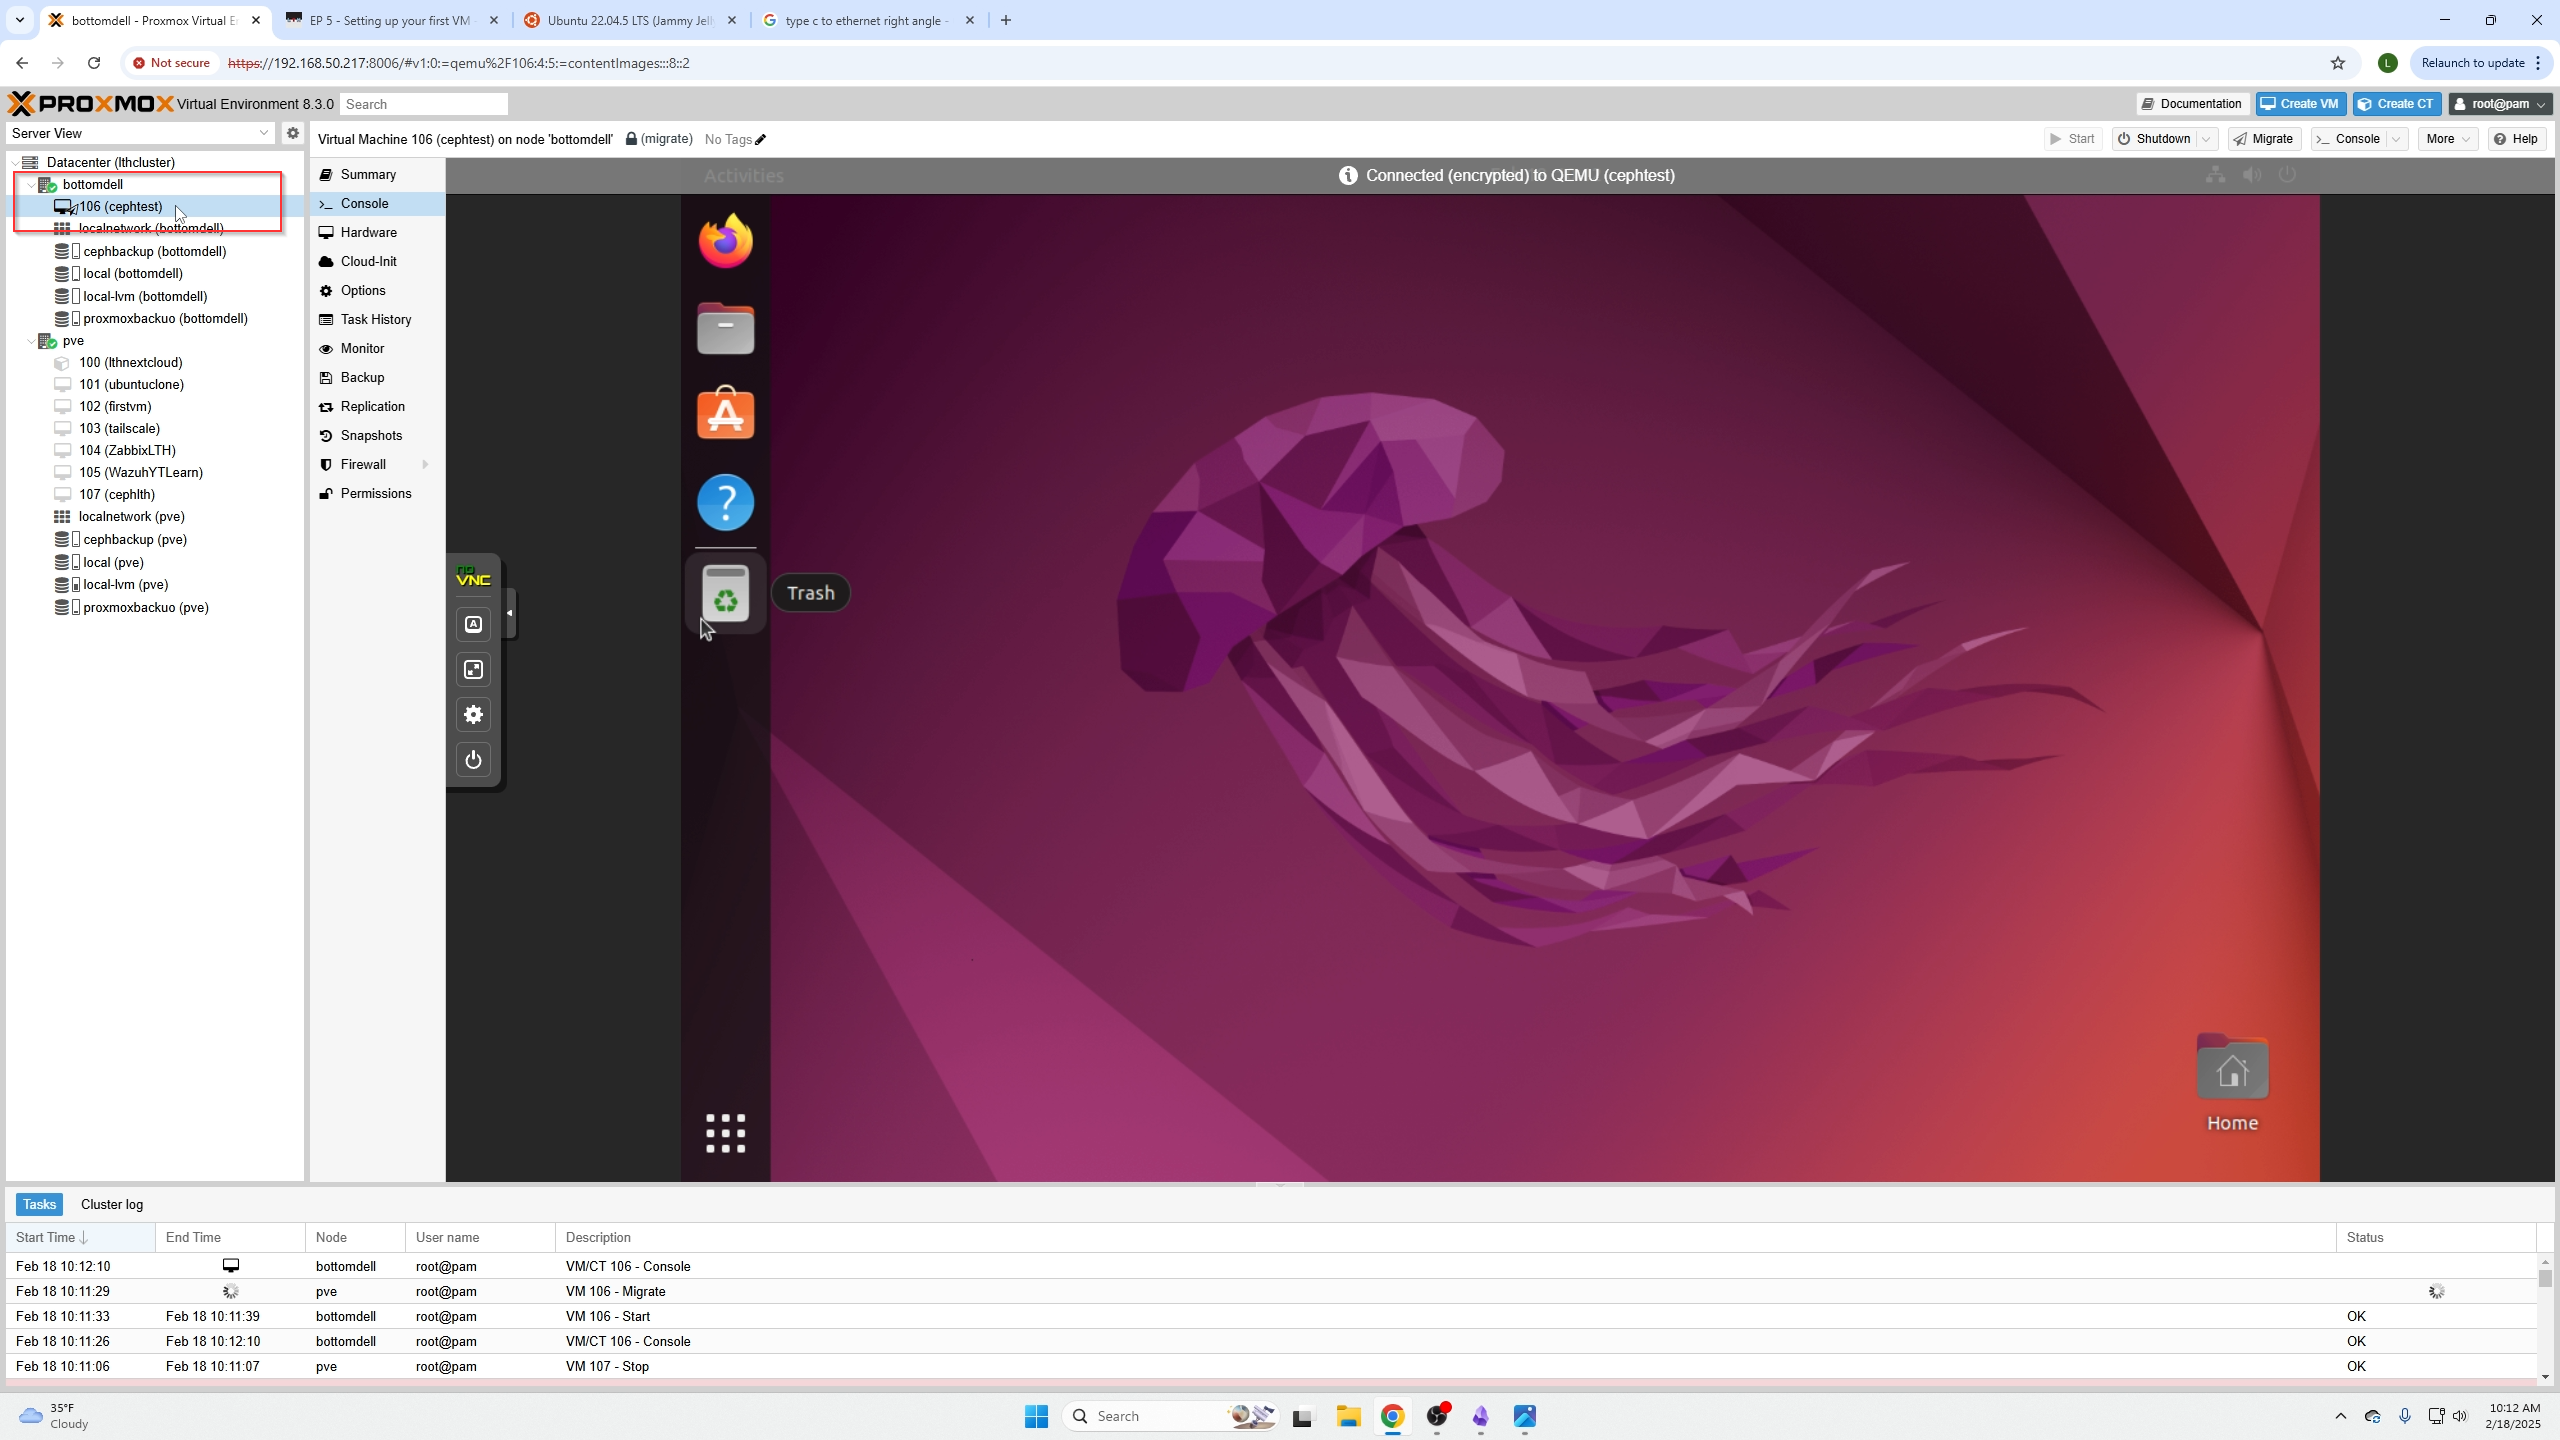
After migration, the VM runs on the new node with nearly zero downtime.
You can now move all VMs away from a node to perform maintenance without downtime or service disruption.

Conclusion
This video covered:
- How to wipe drives.
- How to create a Ceph Pool.
- How to live migrate VMs.
- How to update other systems without disrupting user availability.