How to Setup The Nginx Proxy Manager and DuckDNS for Local SSL Certificates
Create a Virtual Machine or Container
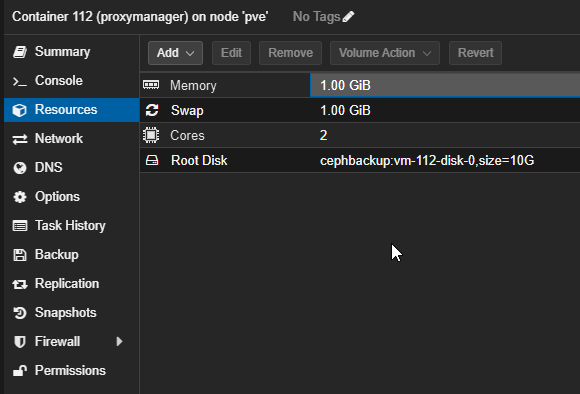
Set up a VM or CT on your preferred platform, here we create a CT on Proxmox.
Installing Docker
Follow Docker’s official documentation here.
First, update your system:
sudo apt update && sudo apt upgrade -y

Set up Docker's apt repository:
# Add Docker's official GPG key:
sudo apt-get update
sudo apt-get install ca-certificates curl
sudo install -m 0755 -d /etc/apt/keyrings
sudo curl -fsSL https://download.docker.com/linux/ubuntu/gpg -o /etc/apt/keyrings/docker.asc
sudo chmod a+r /etc/apt/keyrings/docker.asc

# Add the repository to Apt sources:
echo \
  "deb [arch=$(dpkg --print-architecture) signed-by=/etc/apt/keyrings/docker.asc] https://download.docker.com/linux/ubuntu \
  $(. /etc/os-release && echo "${UBUNTU_CODENAME:-$VERSION_CODENAME}") stable" | \
  sudo tee /etc/apt/sources.list.d/docker.list > /dev/null
sudo apt-get update

Install Docker packages:
sudo apt-get install docker-ce docker-ce-cli containerd.io docker-buildx-plugin docker-compose-plugin
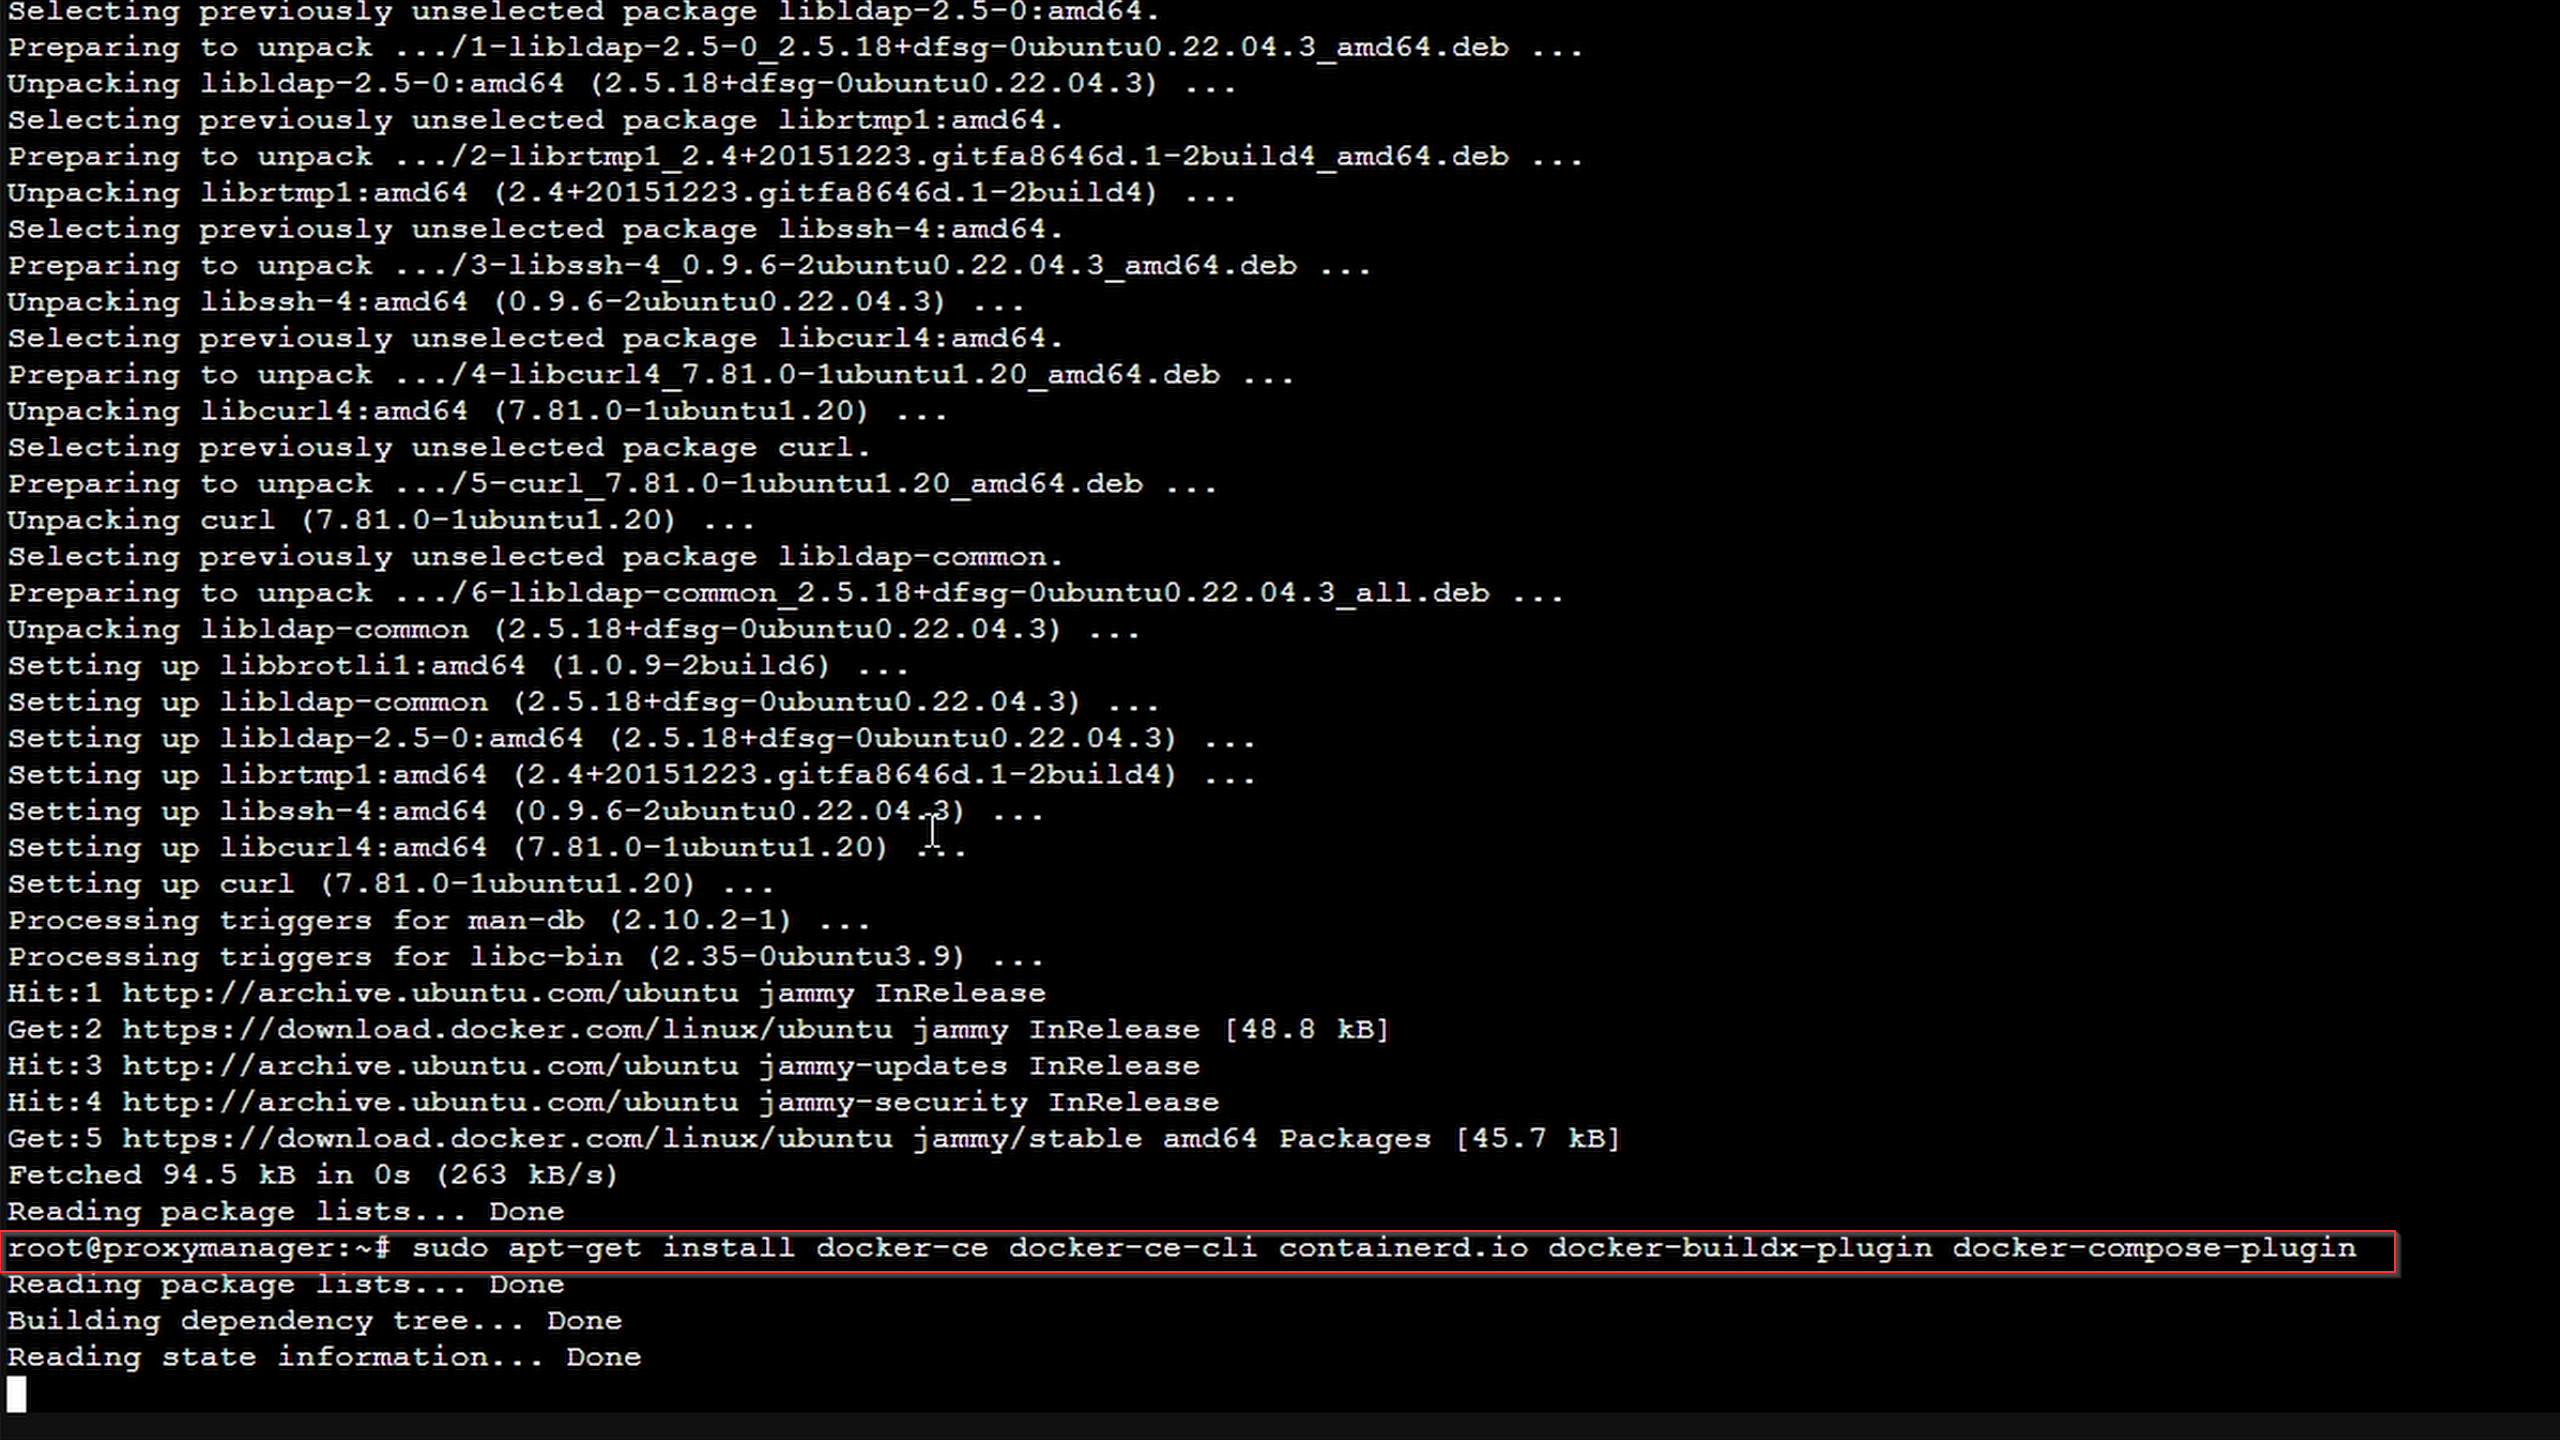
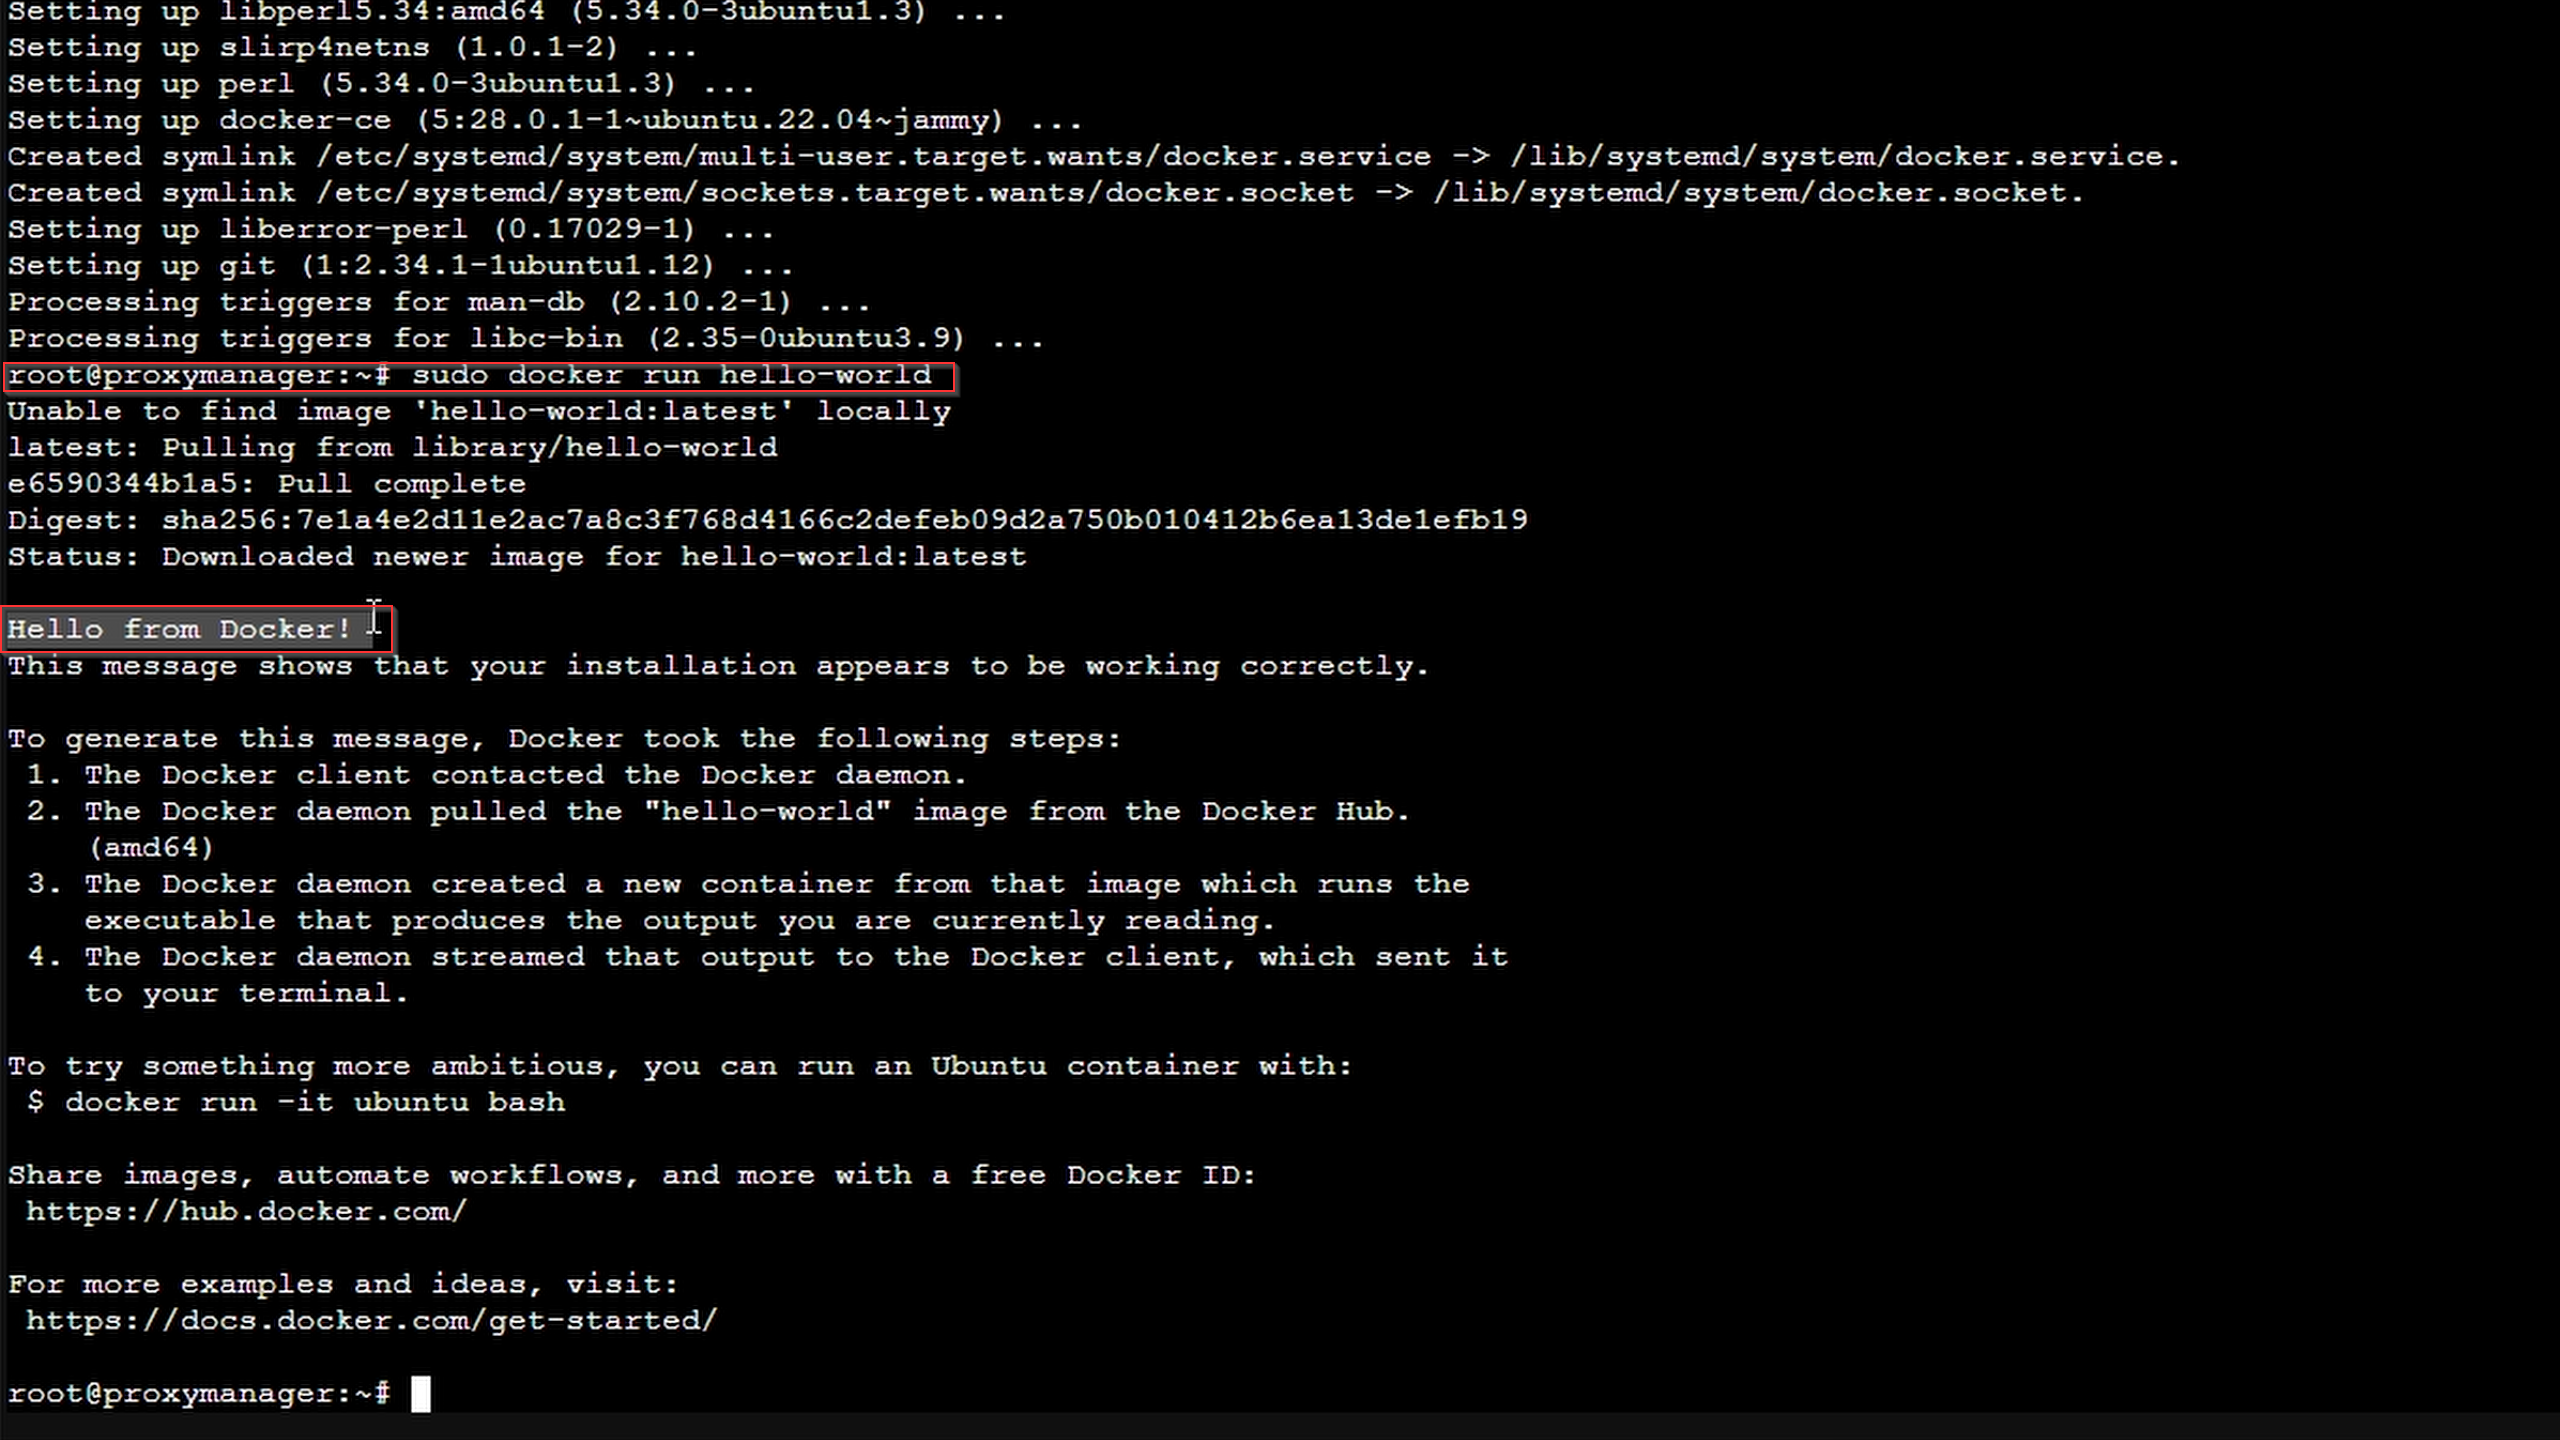
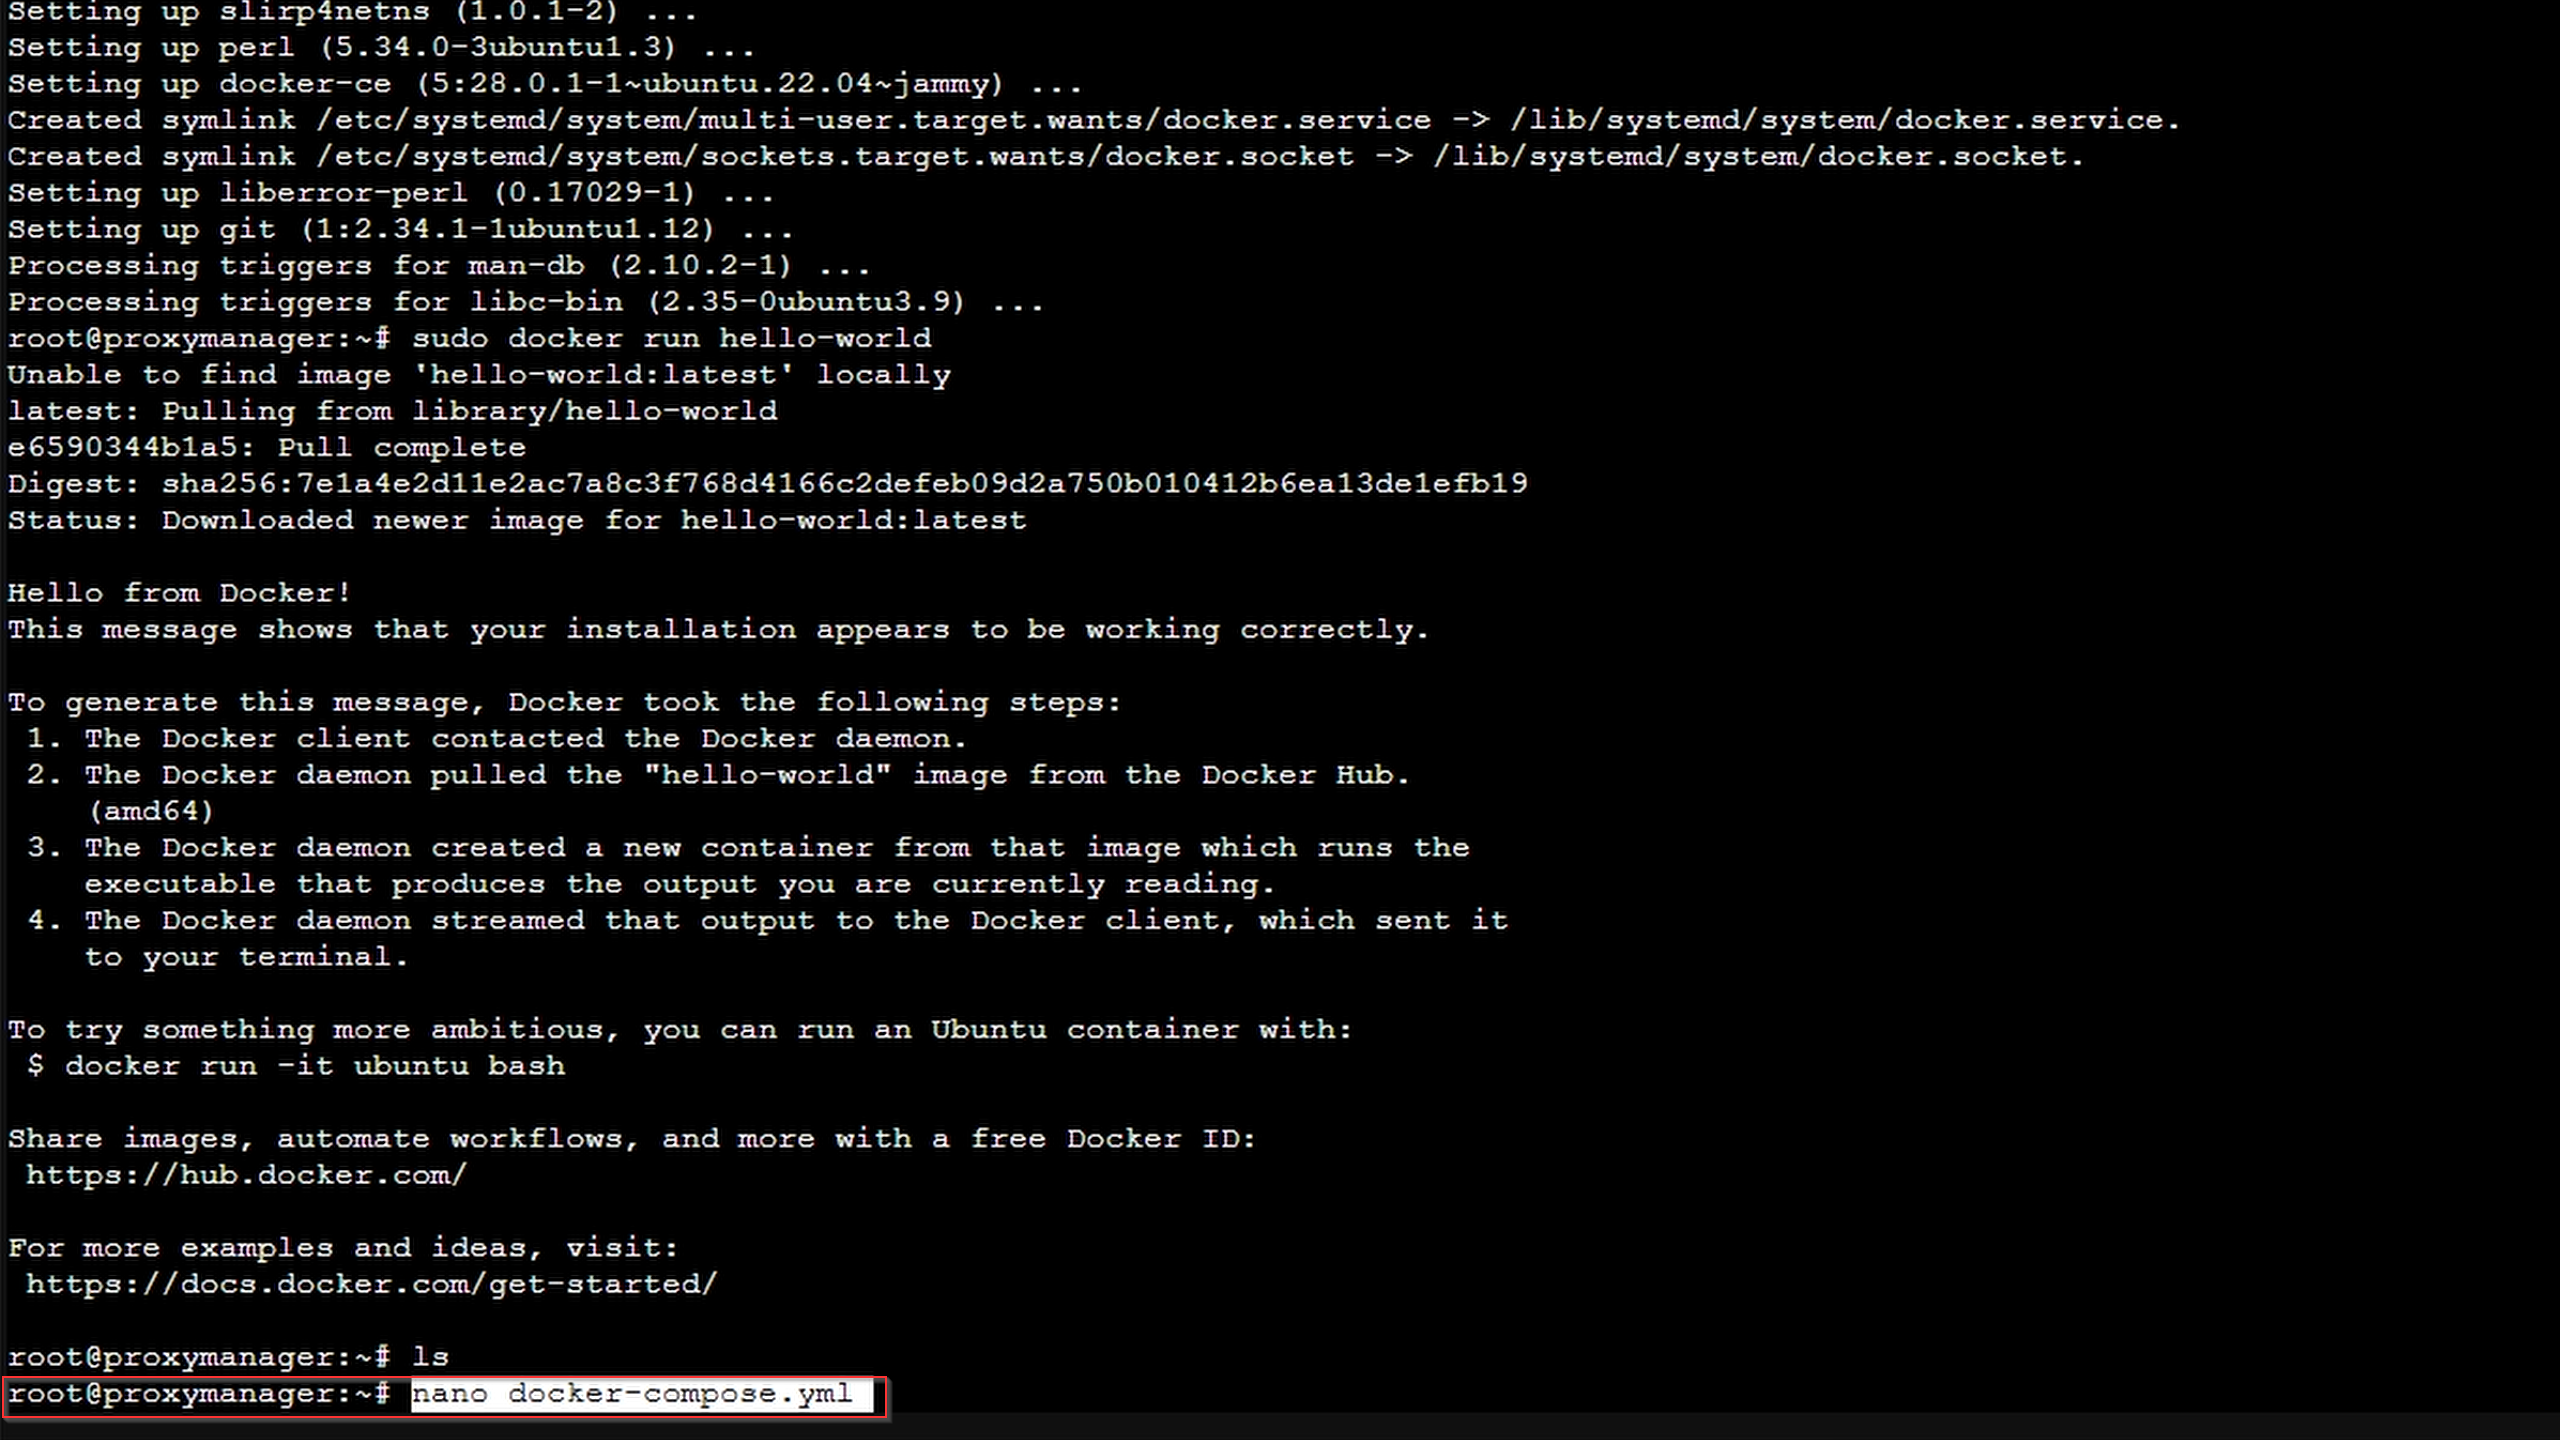
Verify installation:
sudo docker run hello-world
Creating the Nginx Docker Compose File
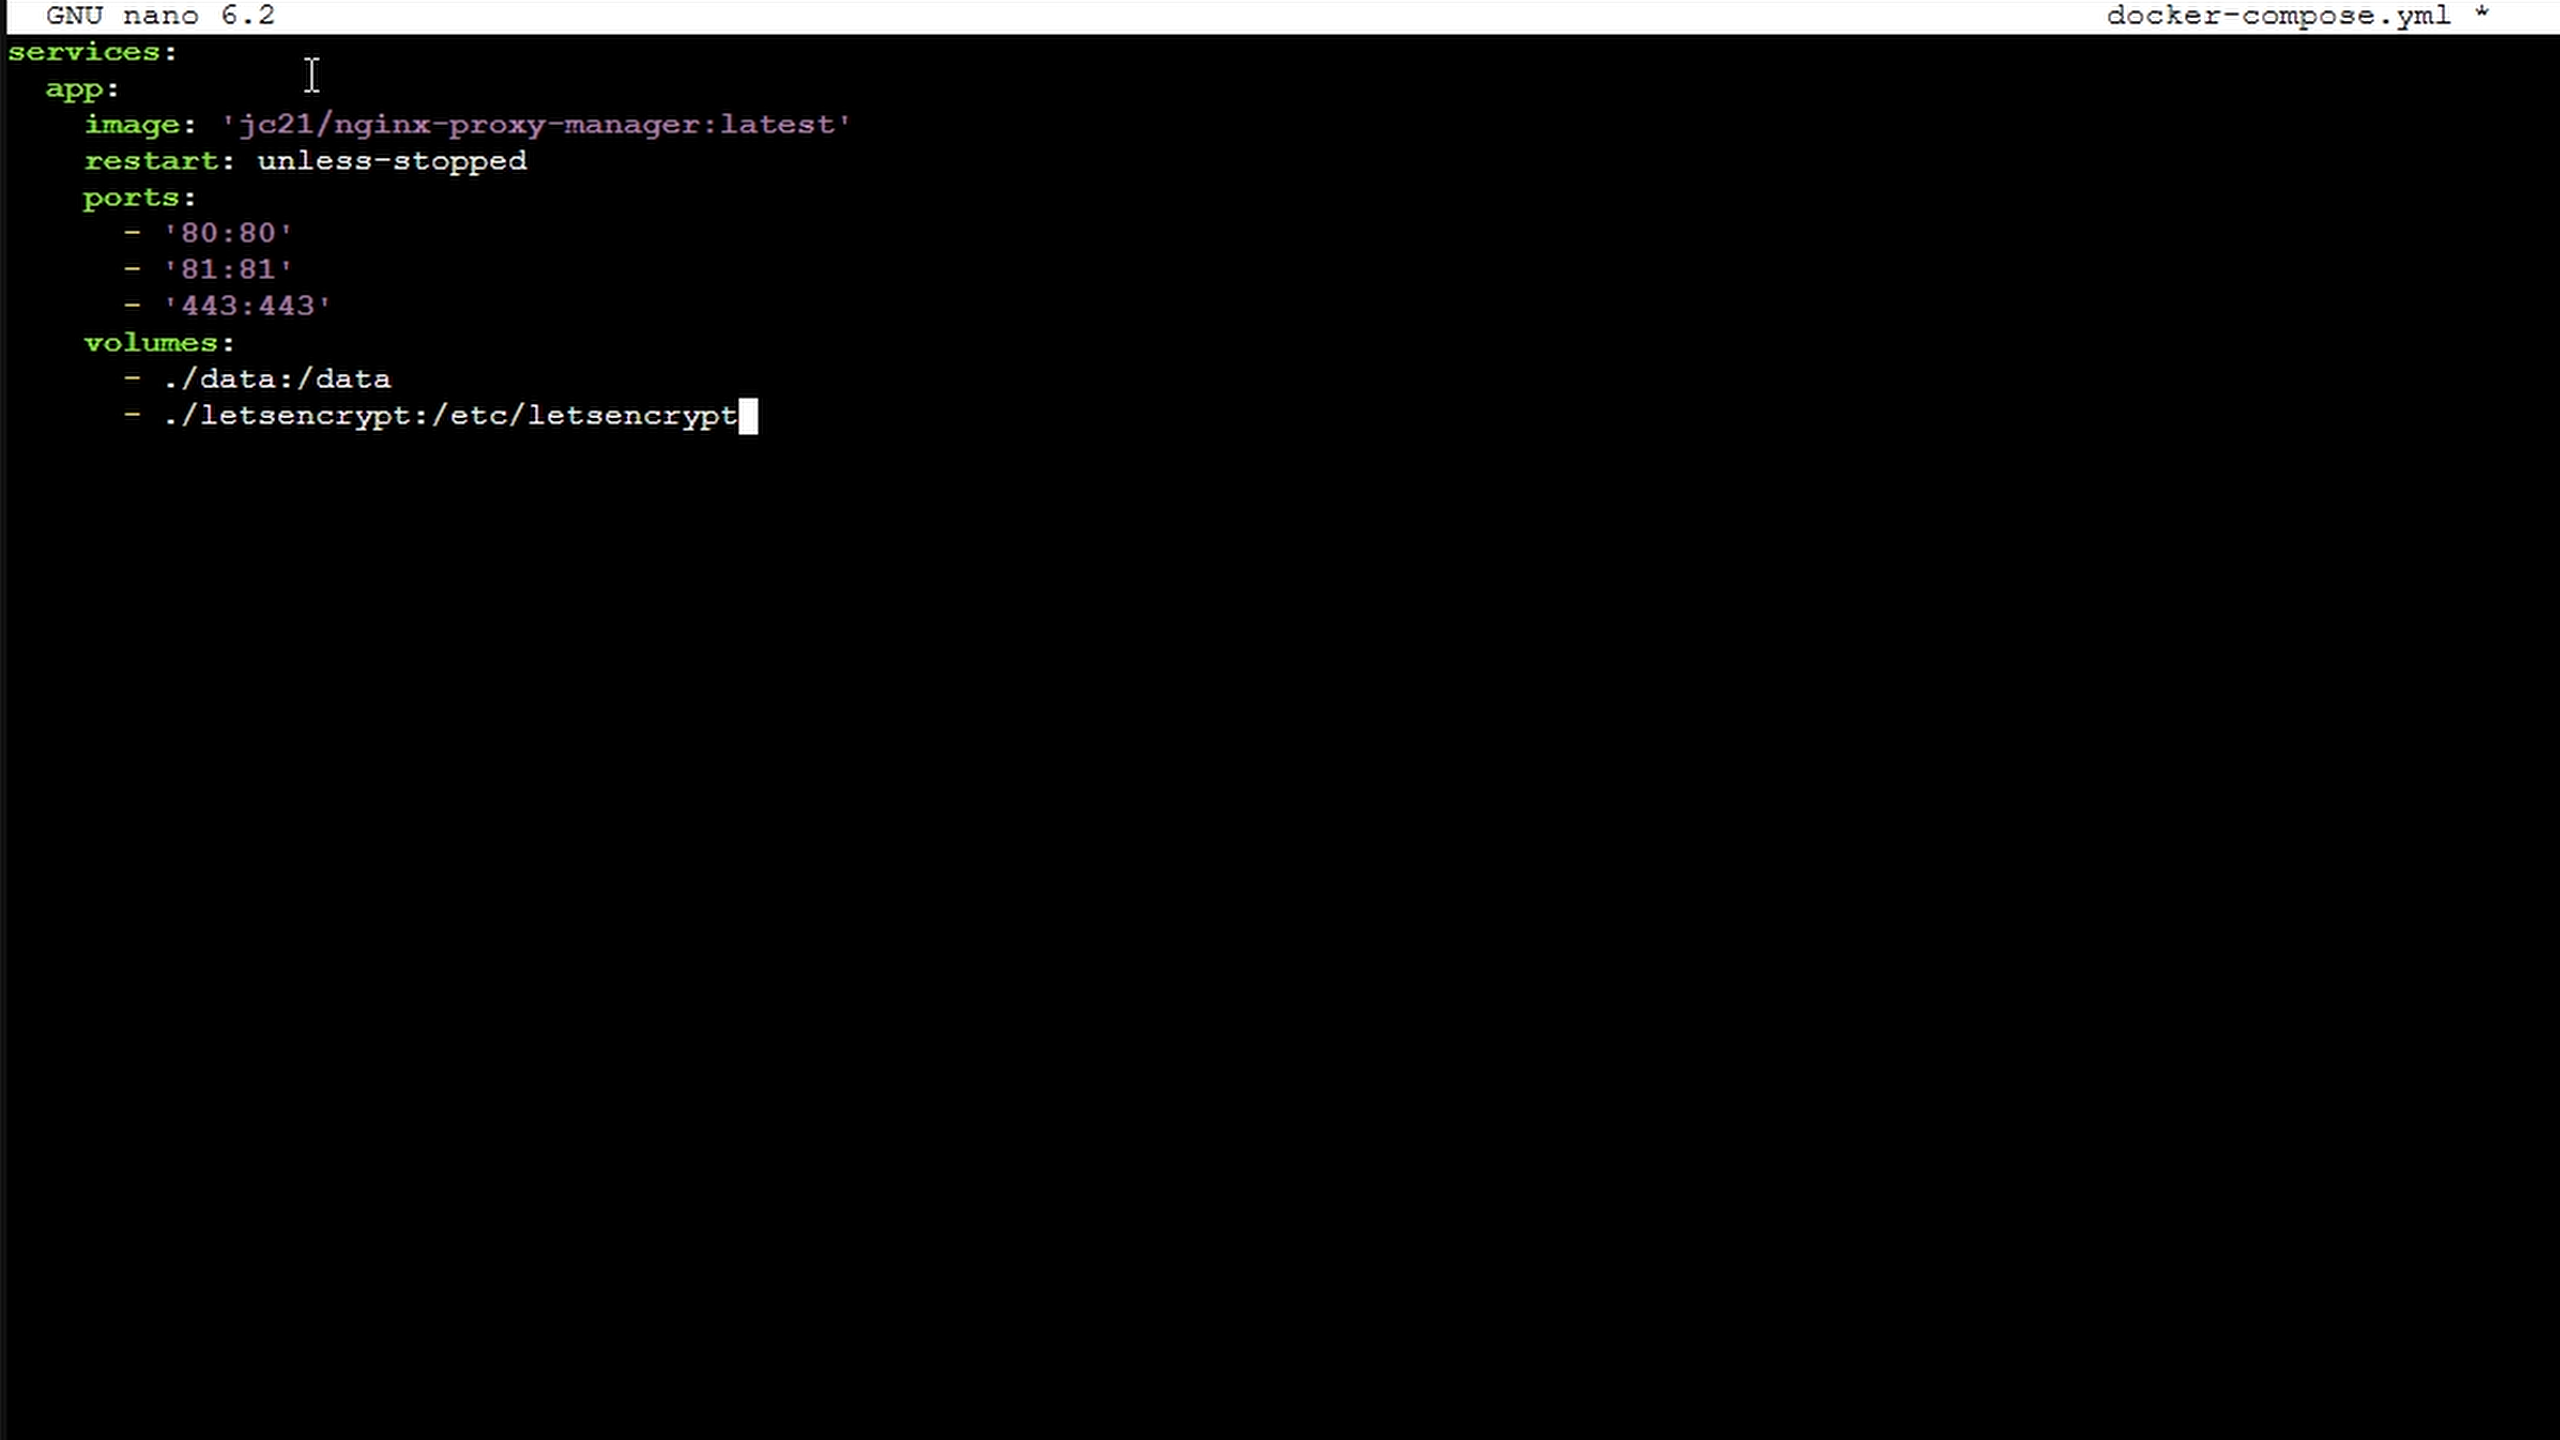
Create docker-compose.yml:
nano docker-compose.yml
Paste this minimum required content:
services:
  app:
    image: 'jc21/nginx-proxy-manager:latest'
    restart: unless-stopped
    ports:
      - '80:80'
      - '81:81'
      - '443:443'
    volumes:
      - ./data:/data
      - ./letsencrypt:/etc/letsencrypt
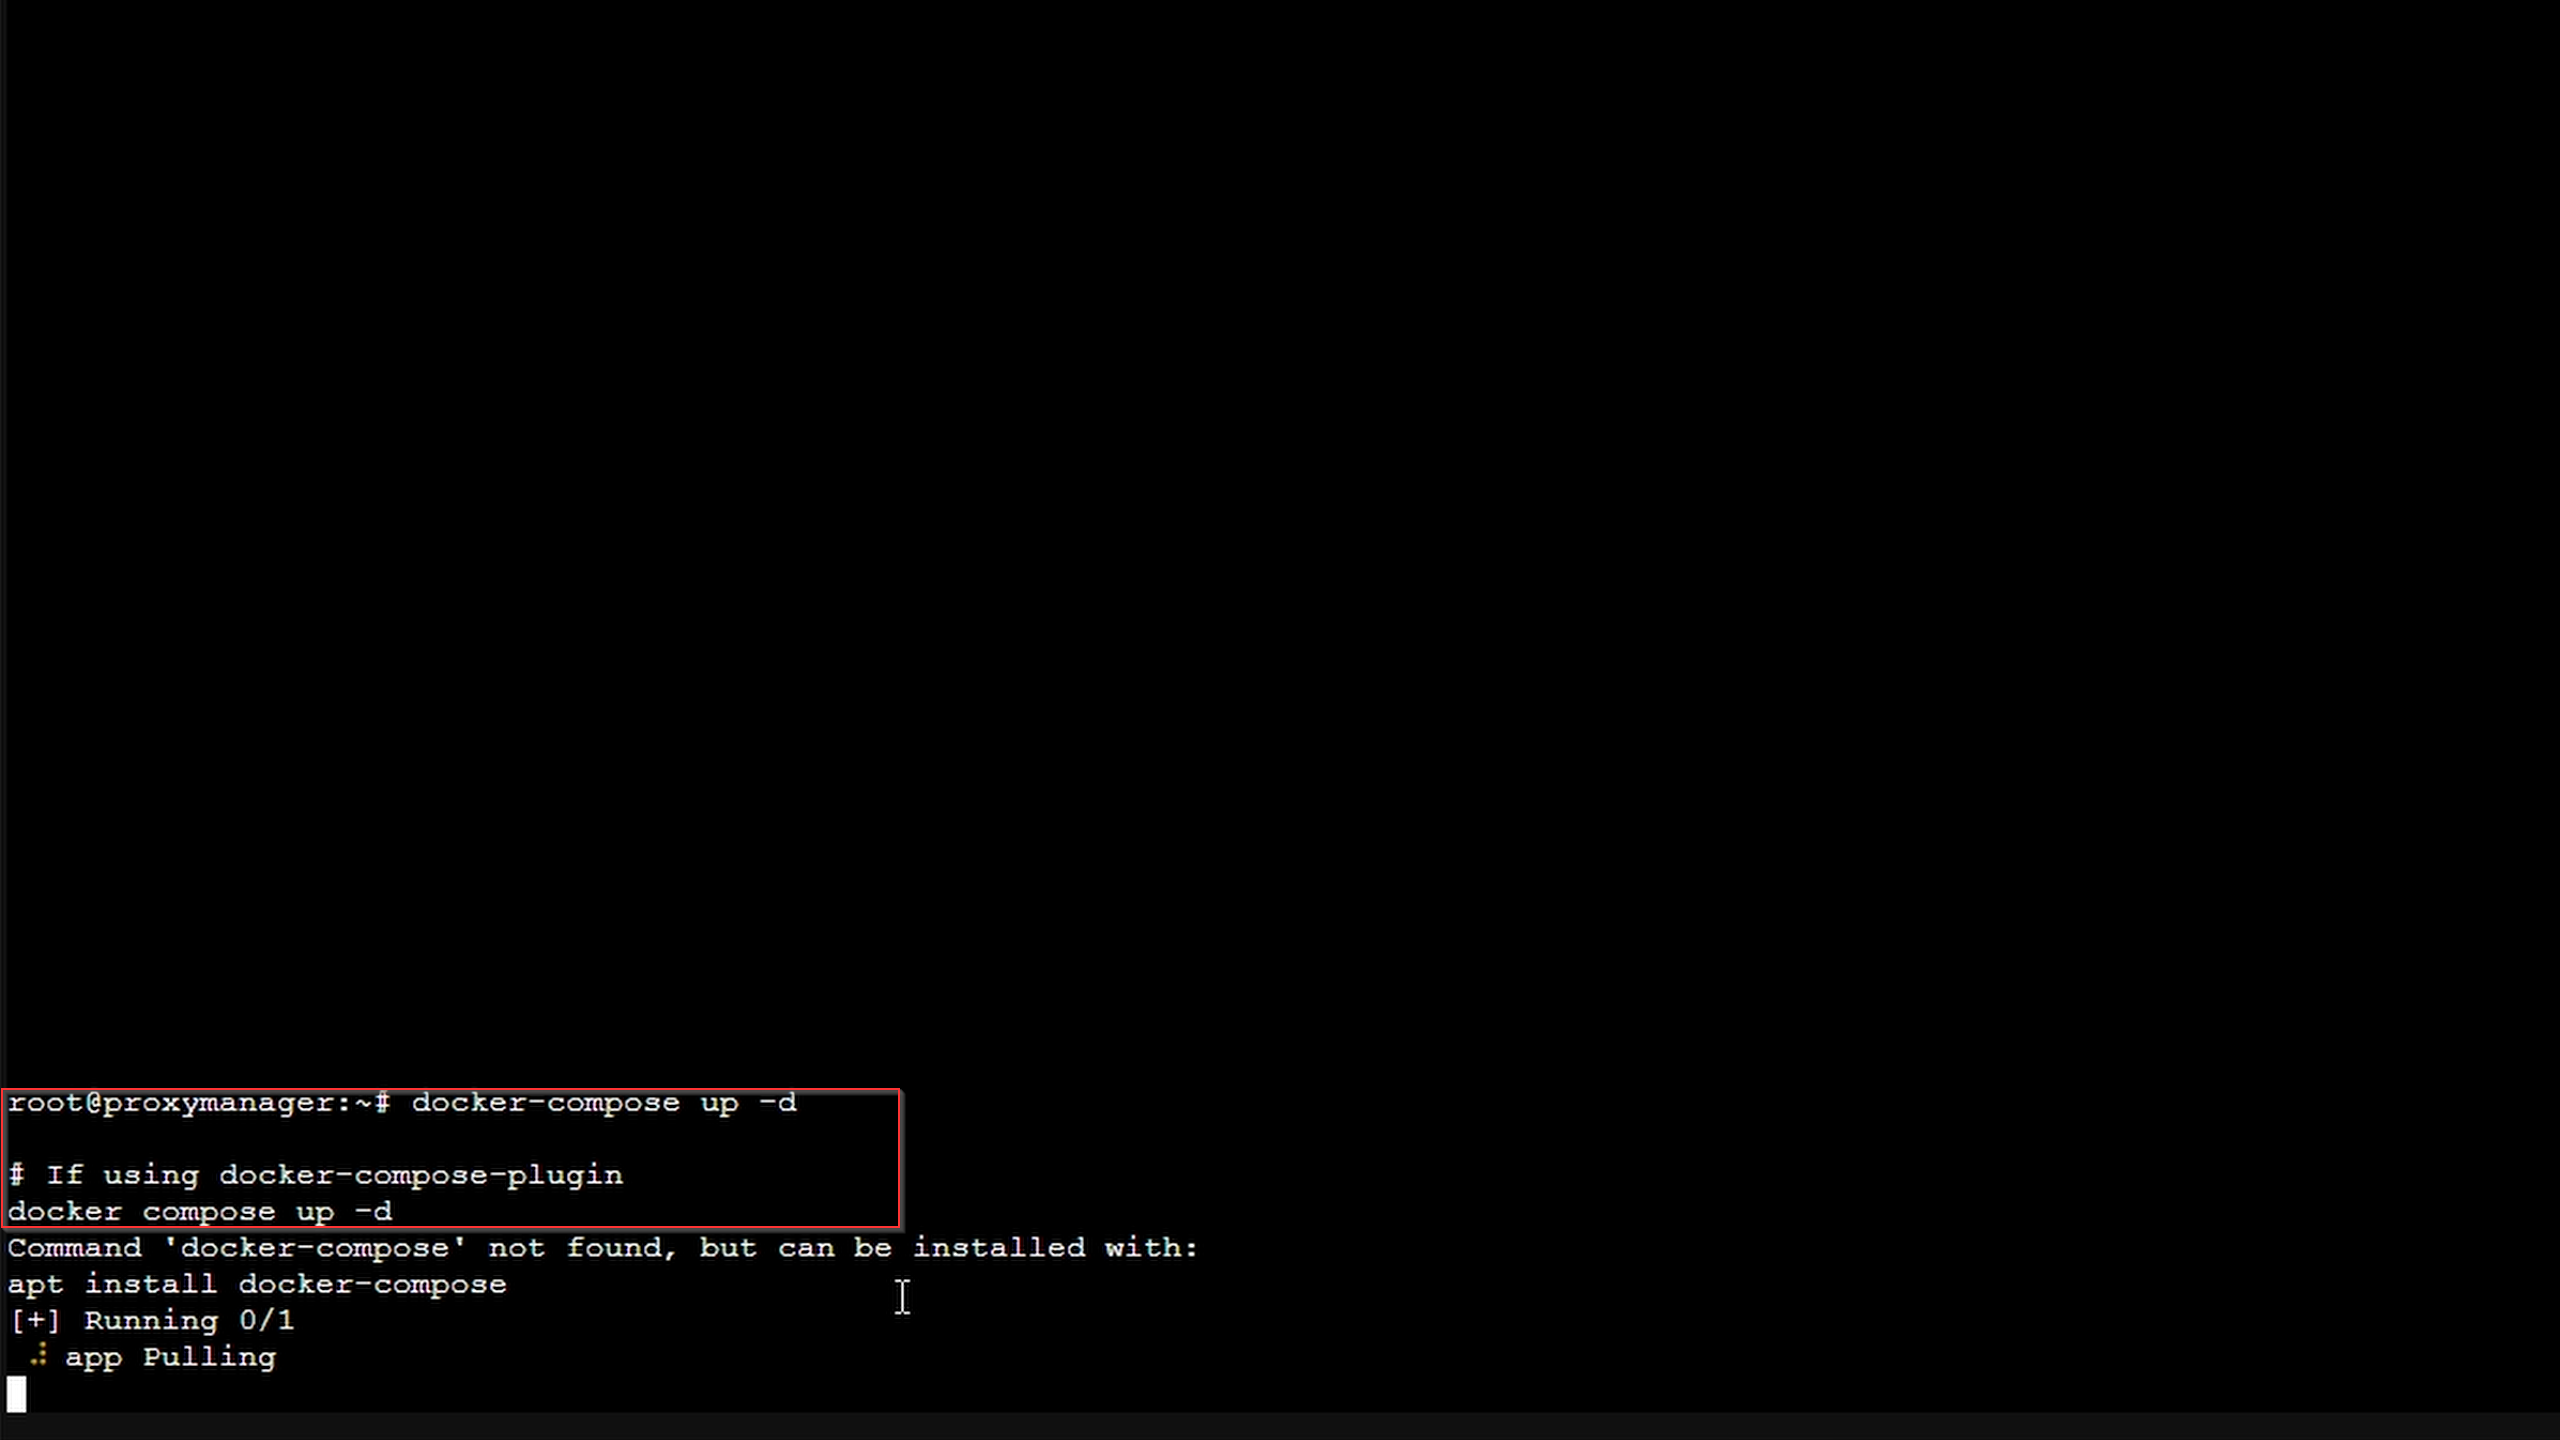
Bring up your stack:
docker-compose up -d

# If using docker-compose-plugin
docker compose up -d
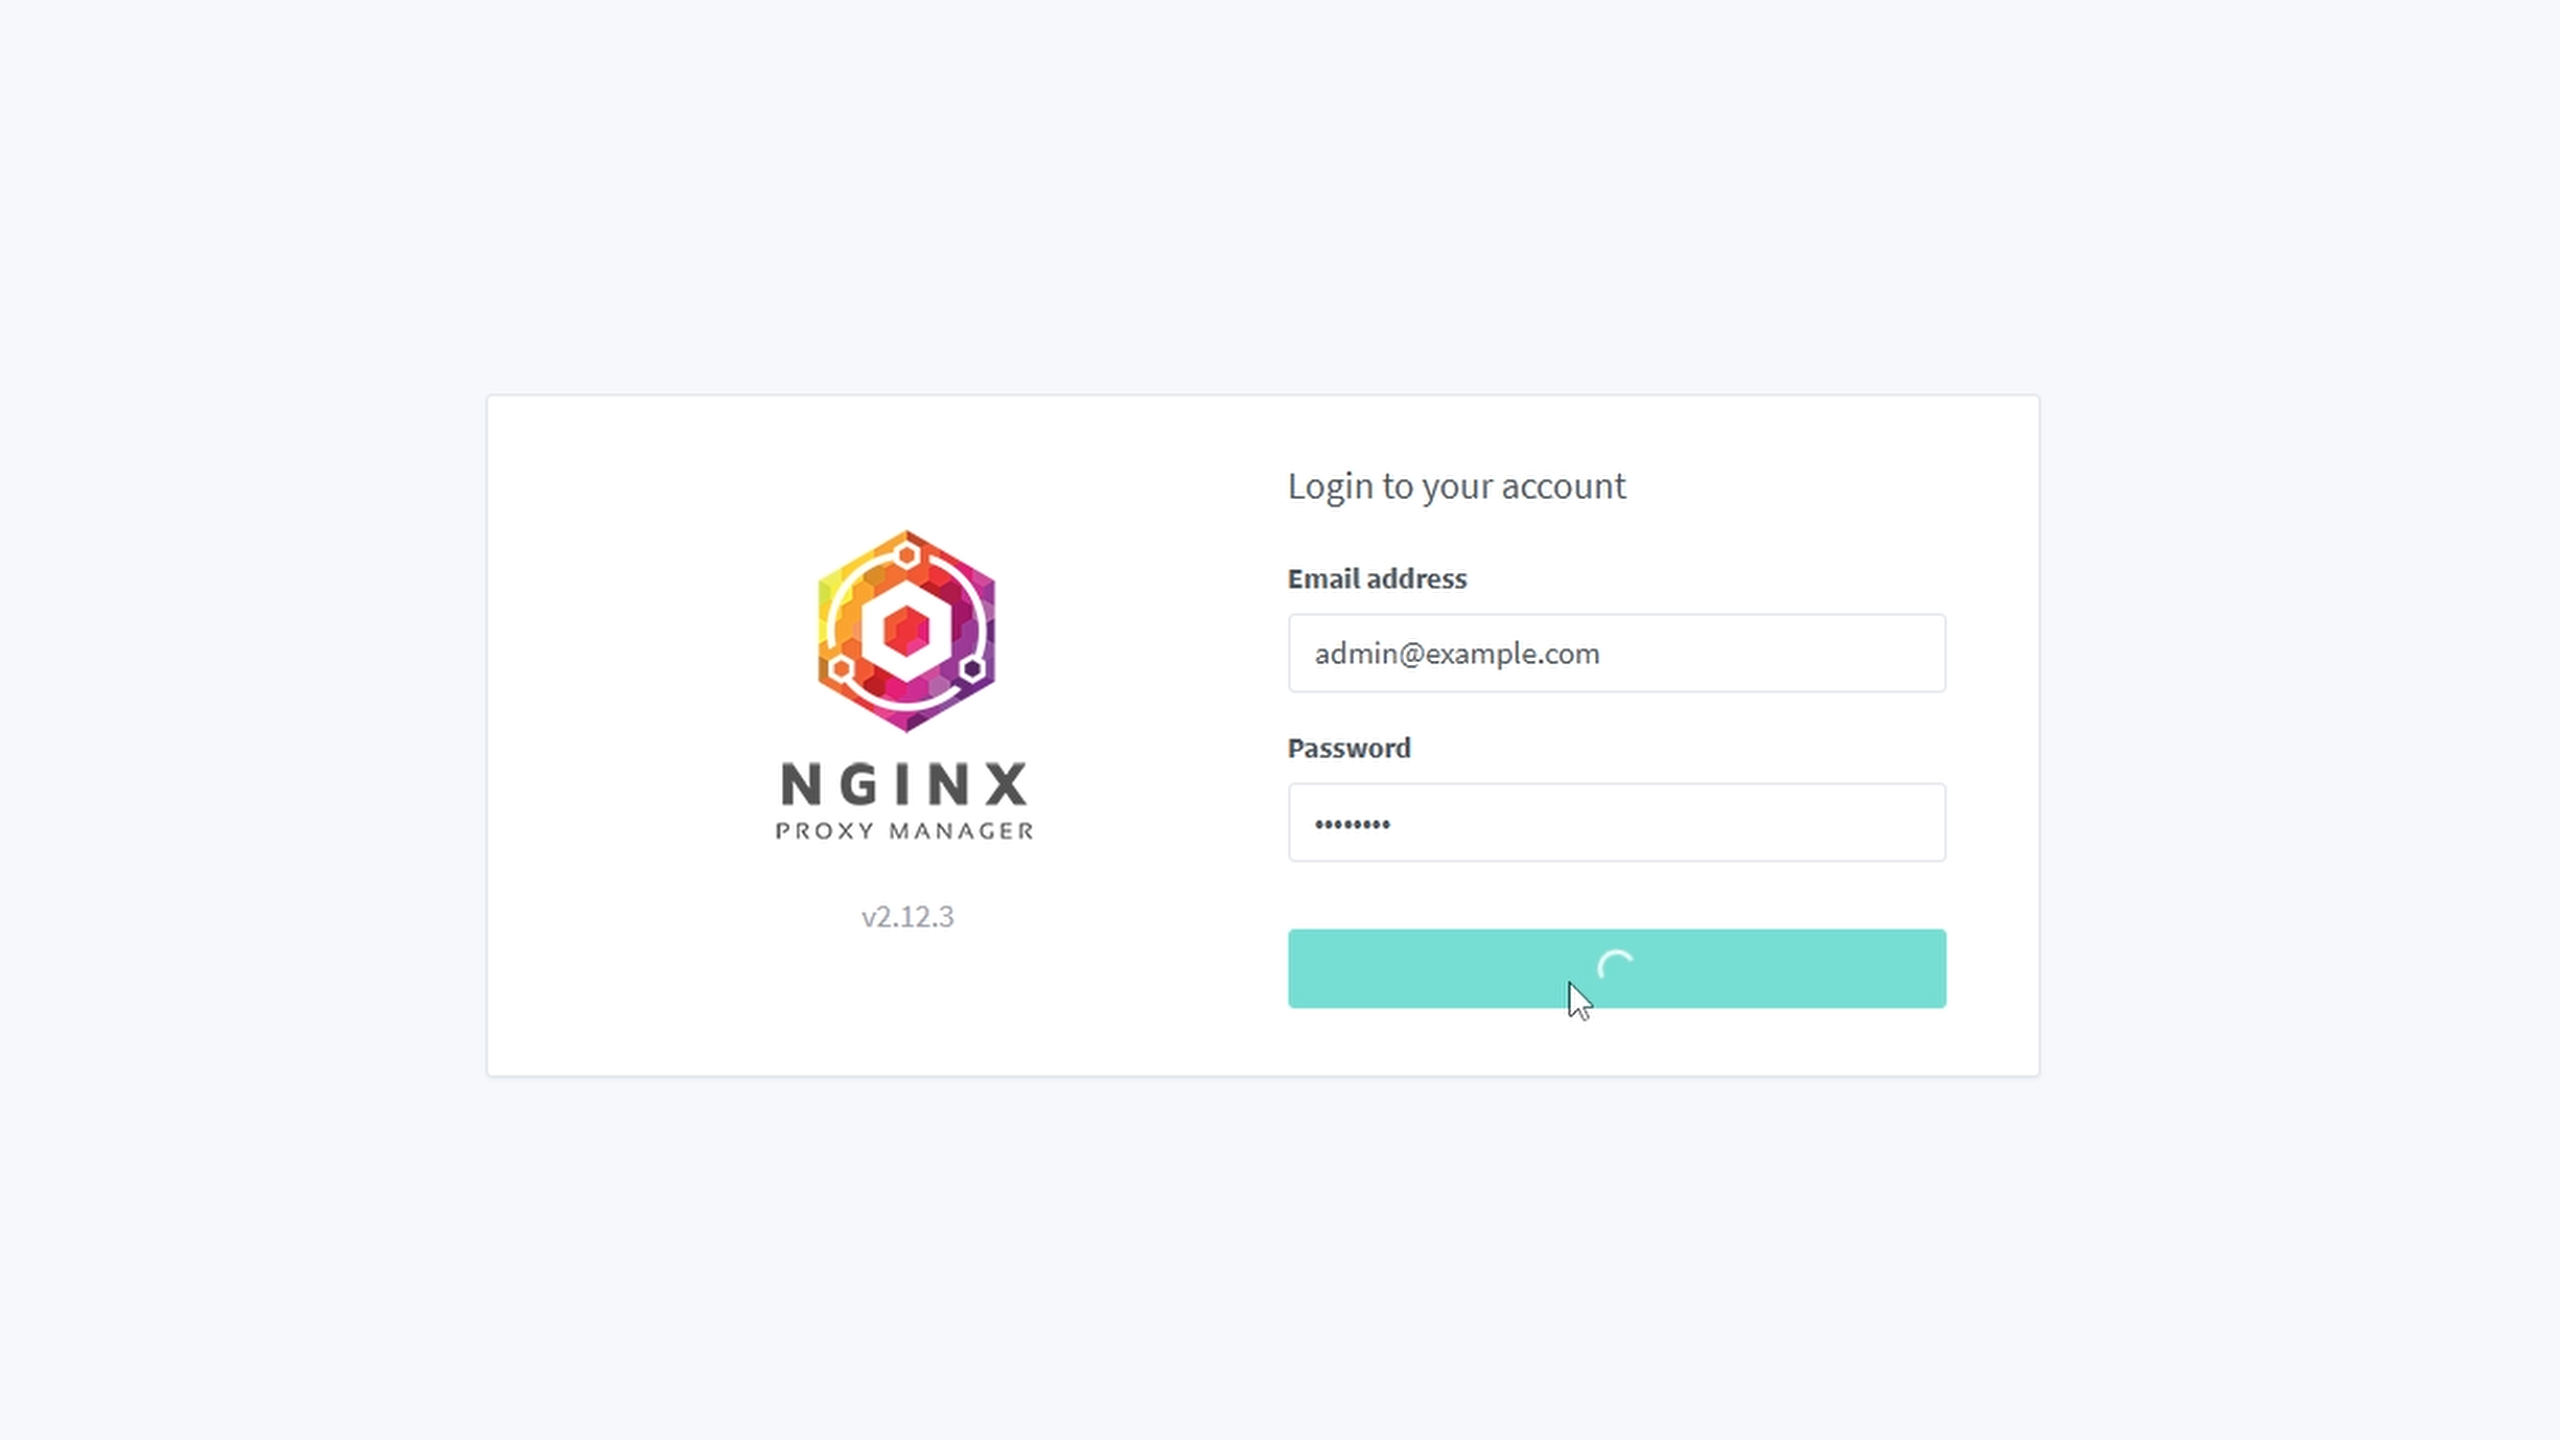
Login to Nginx Proxy Manager
When running, connect to your VM/CT IP on port 81 to access the admin interface. It may take a moment to generate keys.
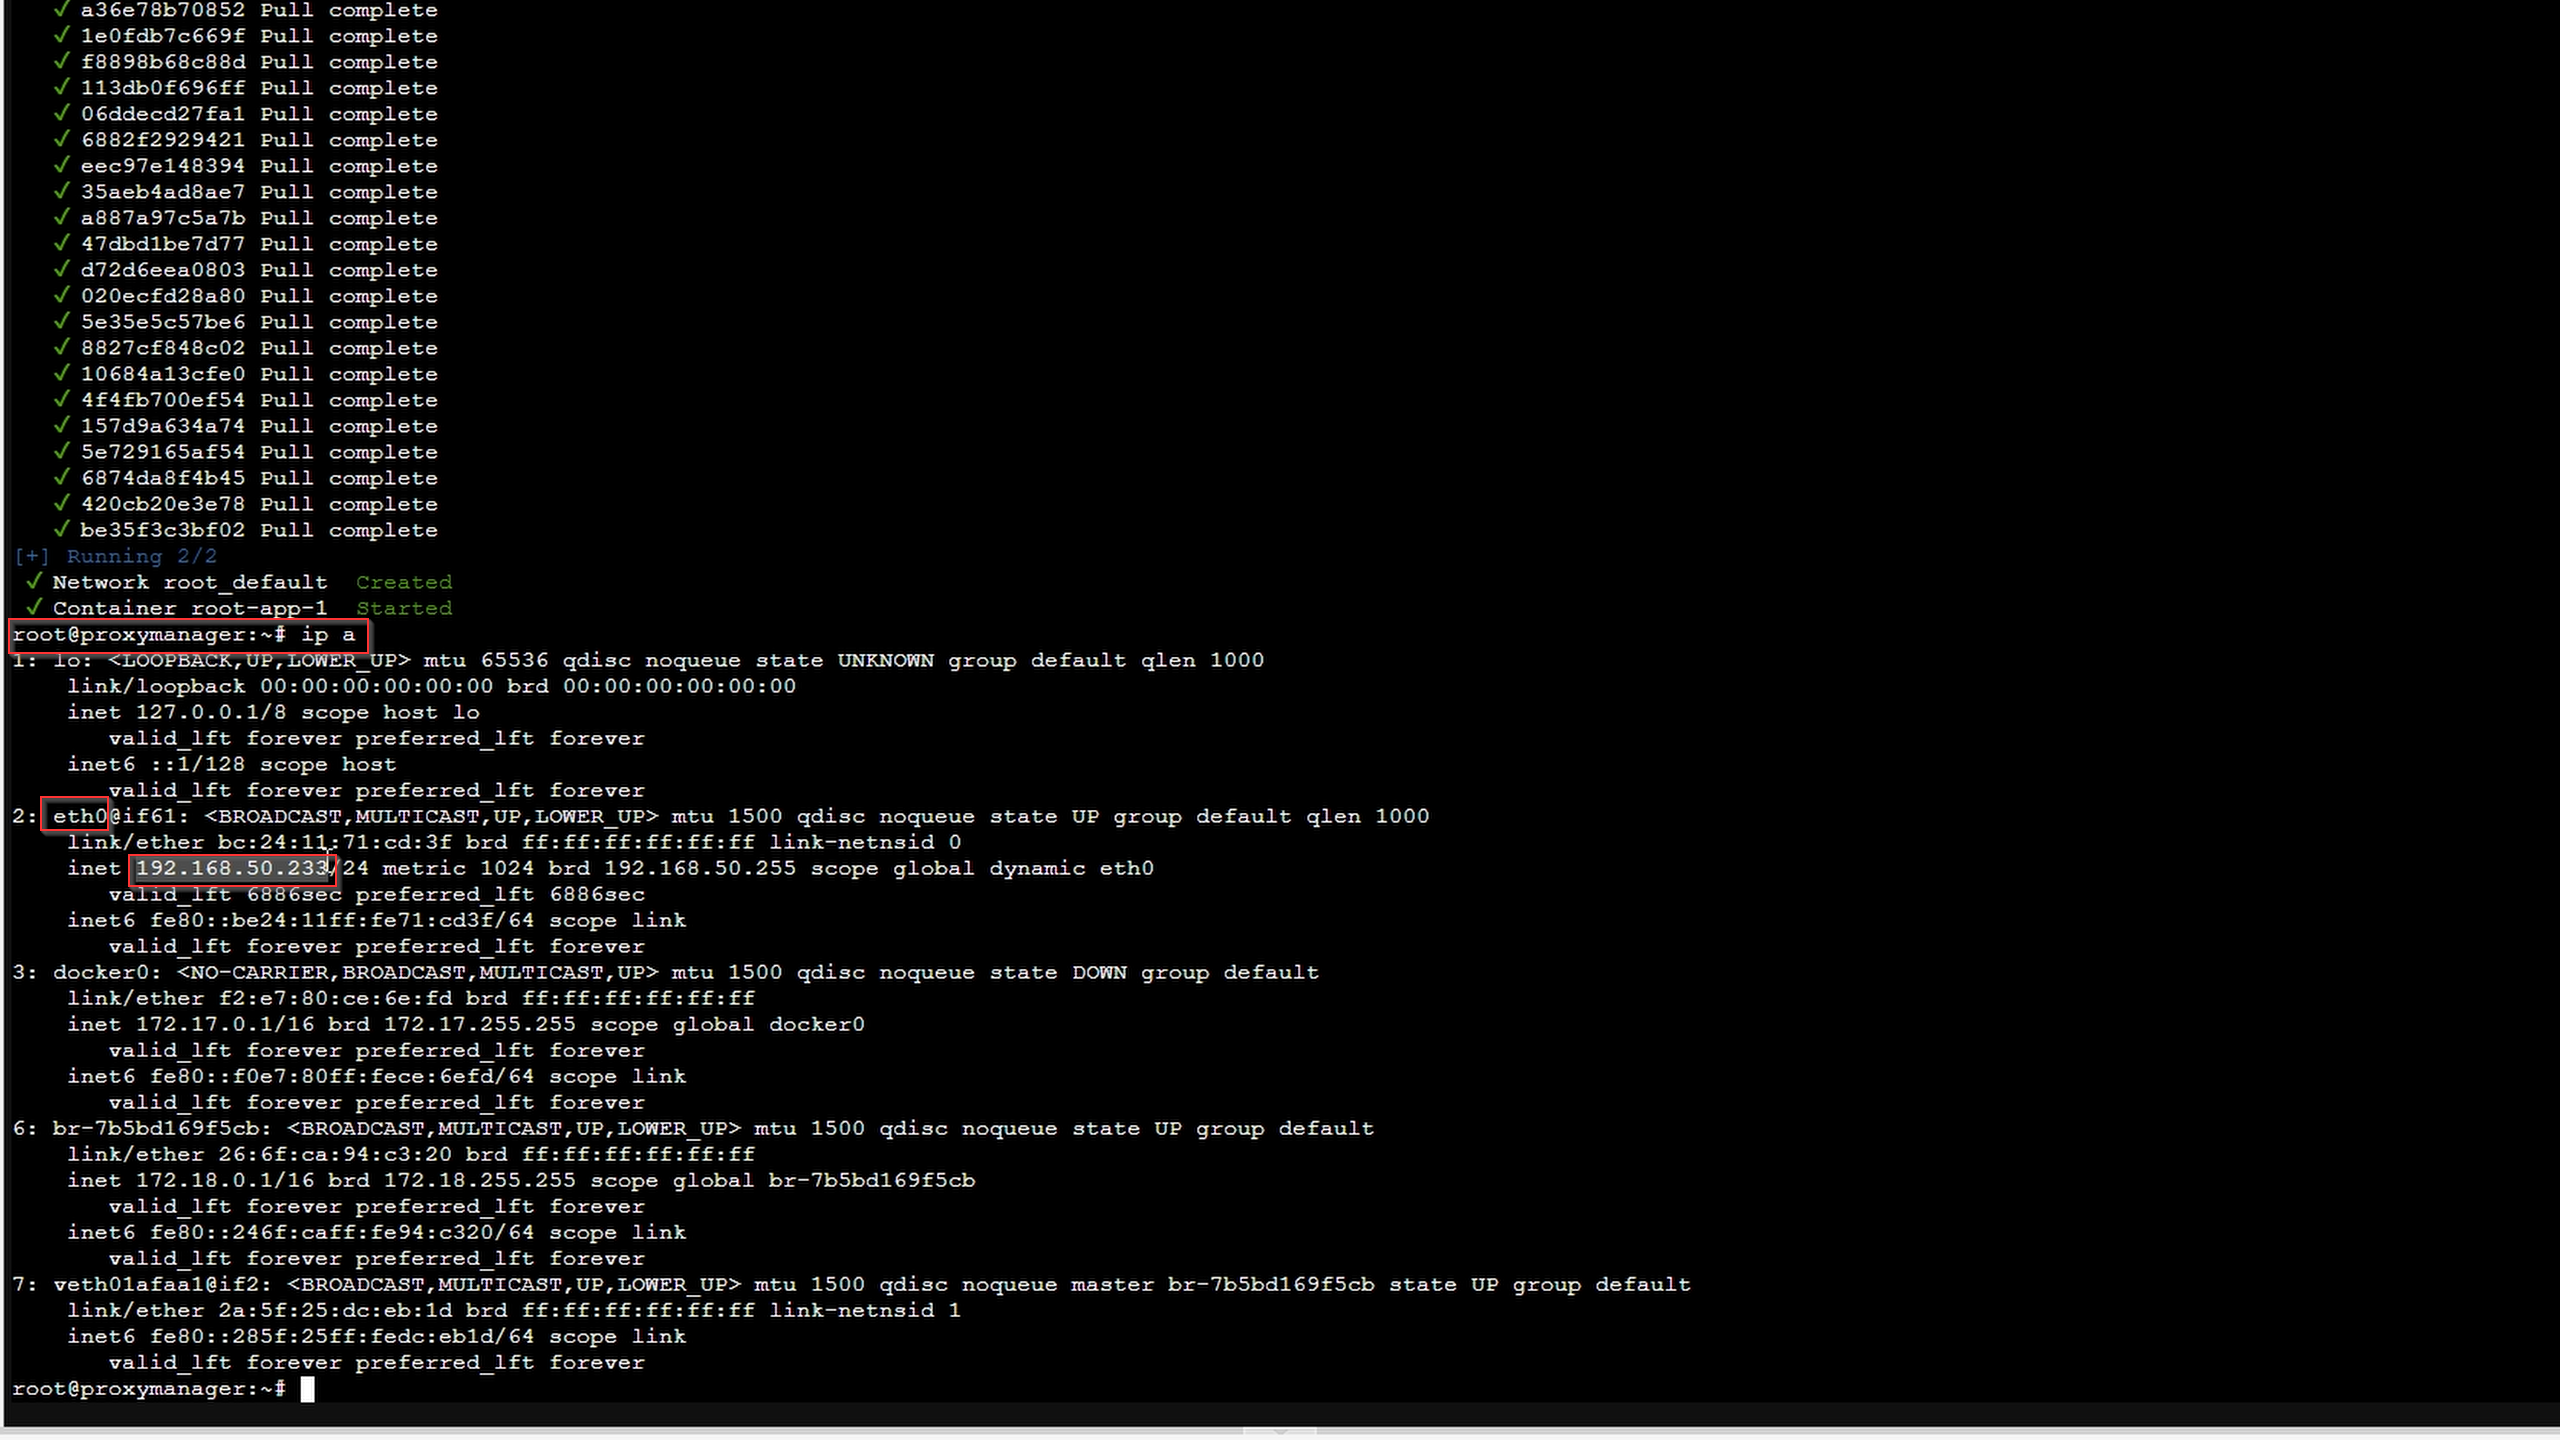
To find your IP:
ip a
Then in your browser:
http://<your VM/Container IP>:81
Default admin credentials:
Email:
admin@example.com
Password:
changeme
Creating your DuckDNS SSL Certificate
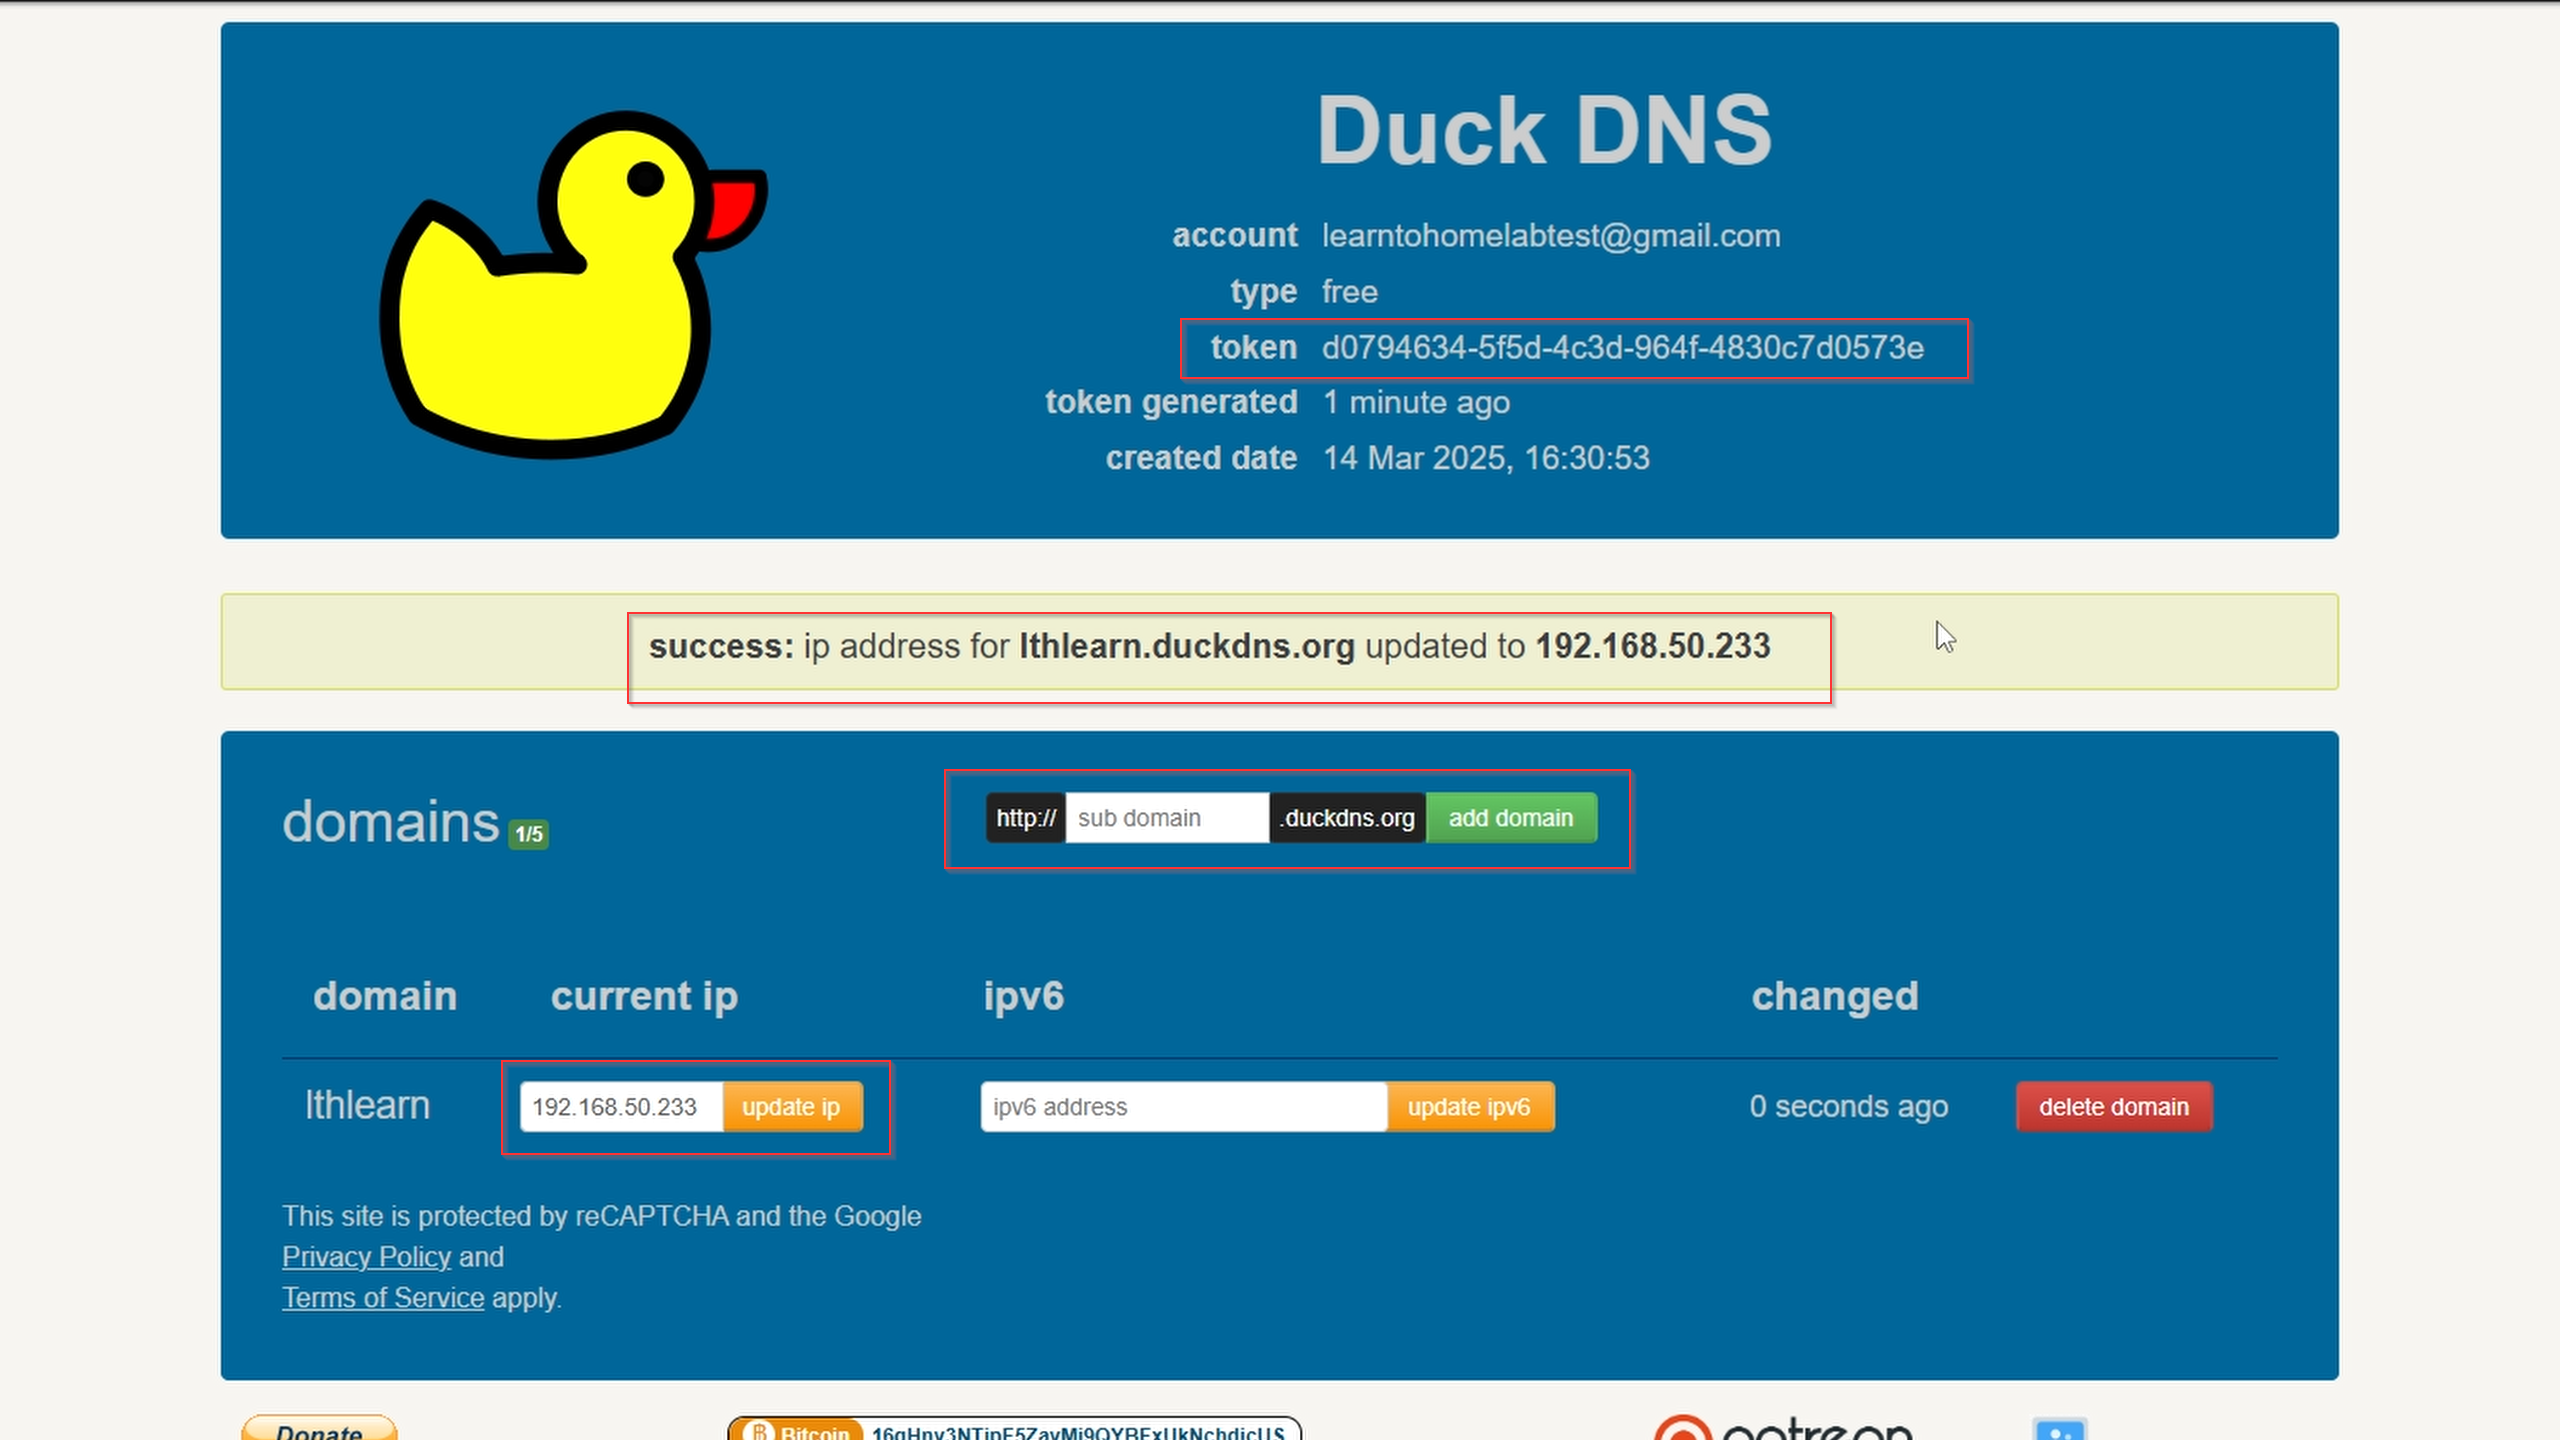
Go to DuckDNS and login with your Google or other account.
Create a subdomain and assign your Nginx Proxy Manager IP.
This is also where you get your token ID.
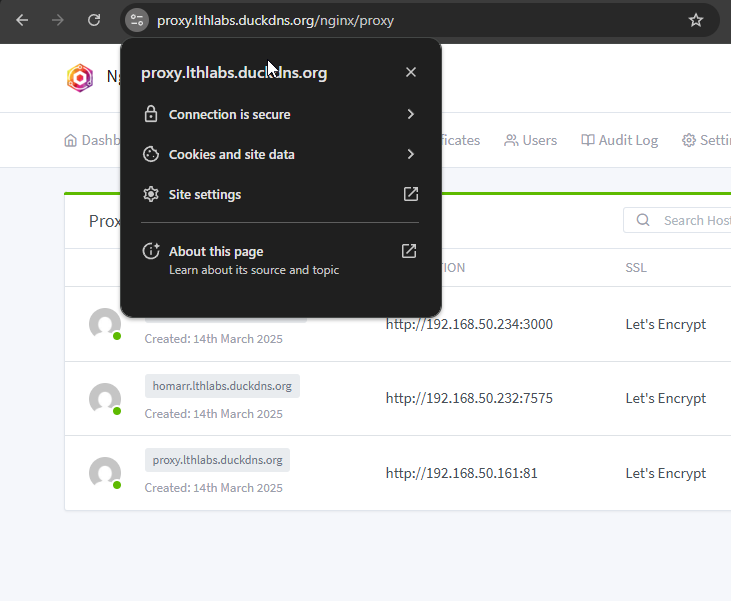
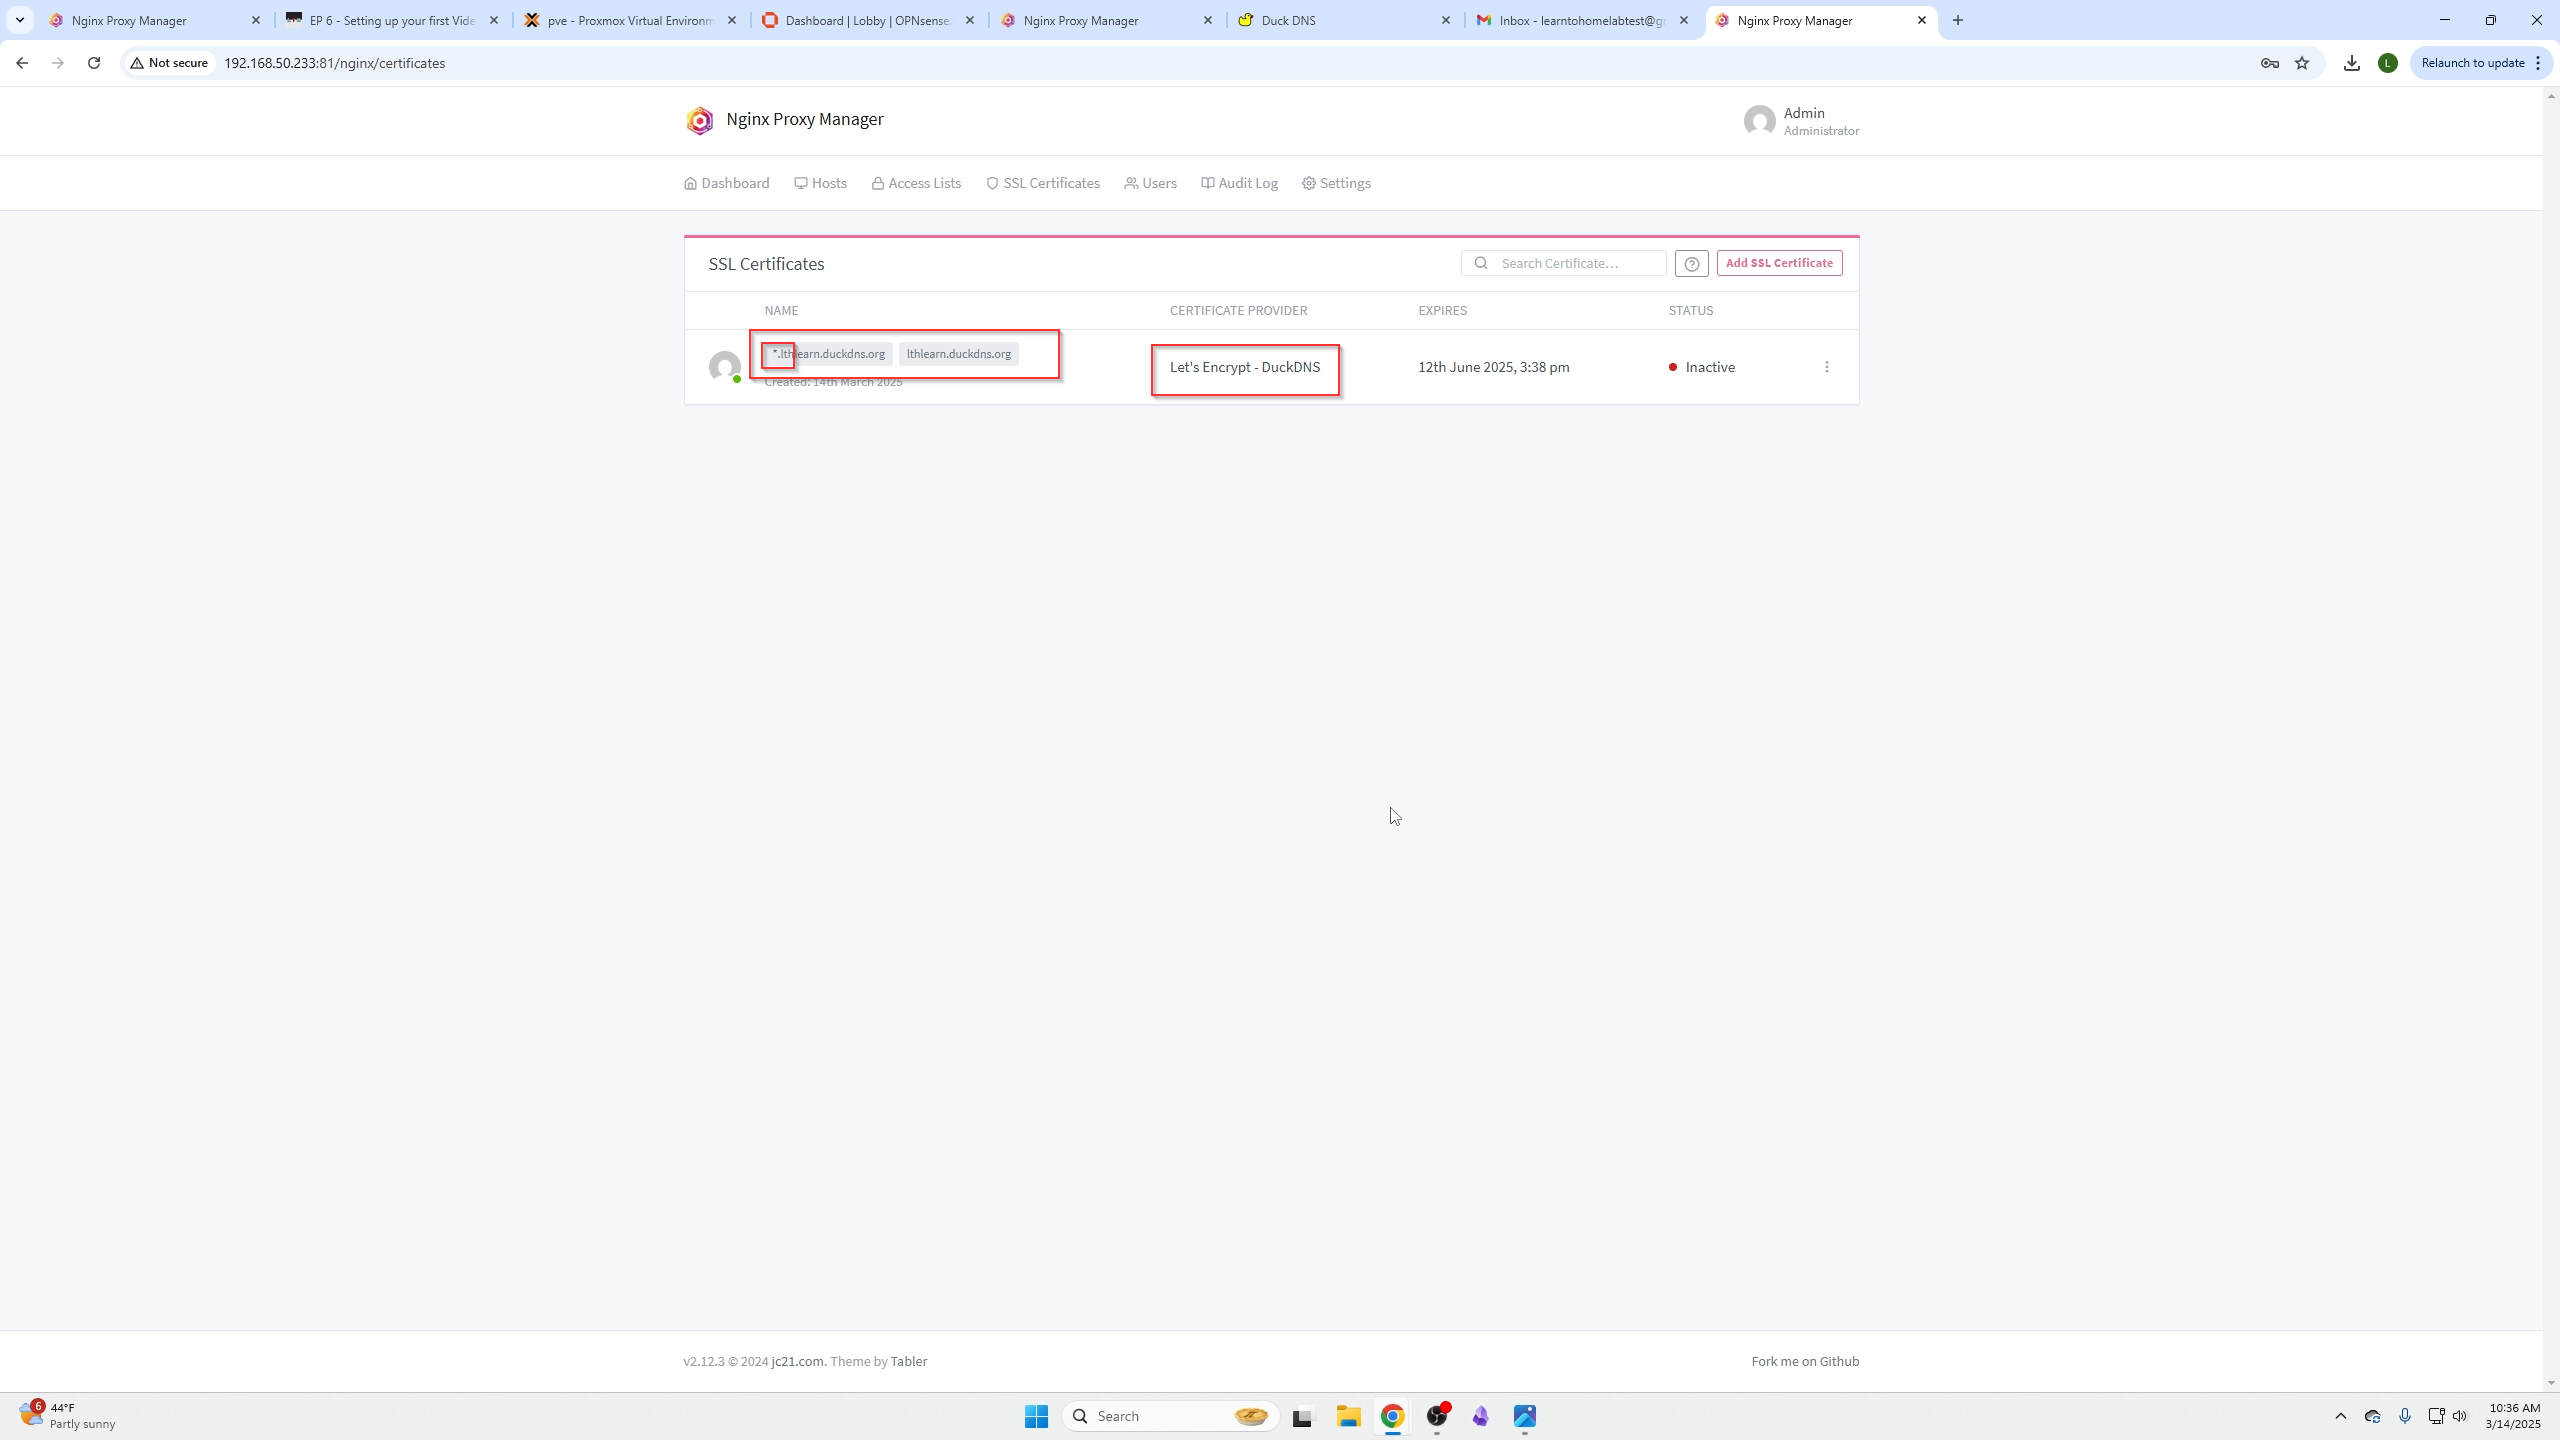
On Nginx Proxy Manager, go to SSL Certificates → Add SSL Certificate.
Enter:
- Your
<subdomain>.duckdns.org - And the wildcard
*.<subdomain>.duckdns.org(important for sub-subdomains)
Note
You may get a failure error after clicking SAVE due to DNS propagation delays. Wait a few minutes then try saving again.
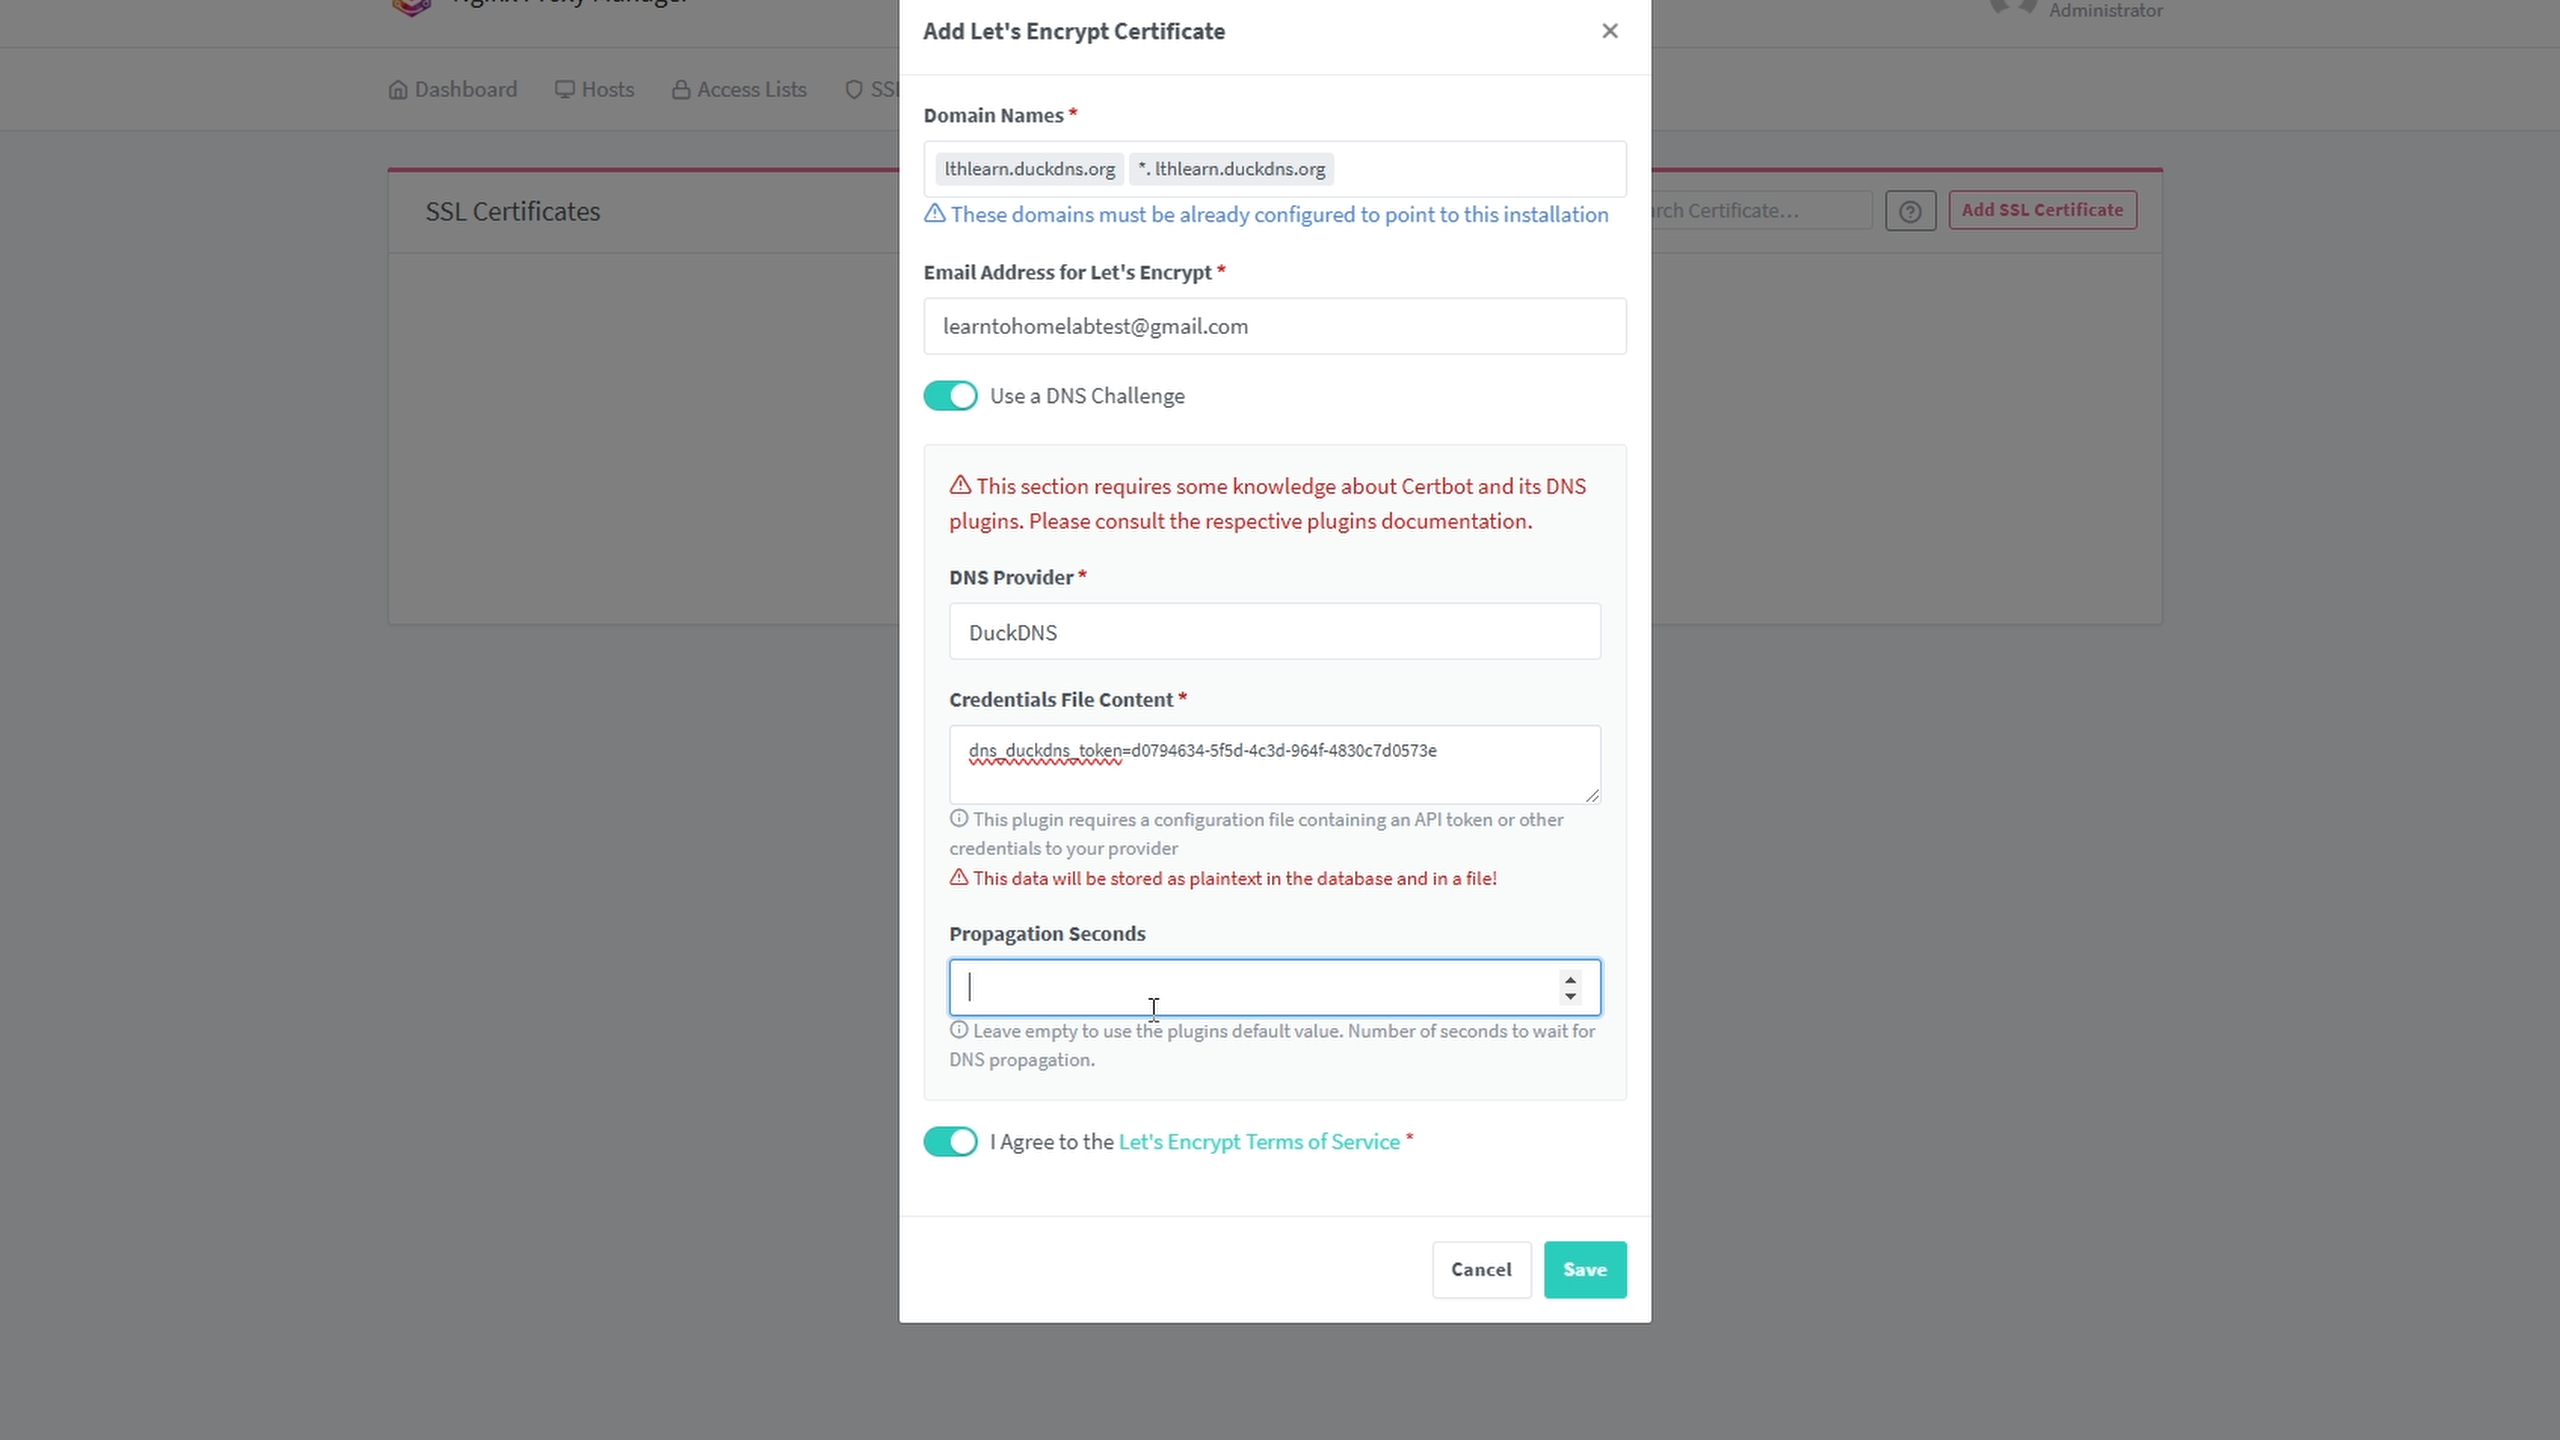
After about 5 minutes, you should see a successful SSL certificate.
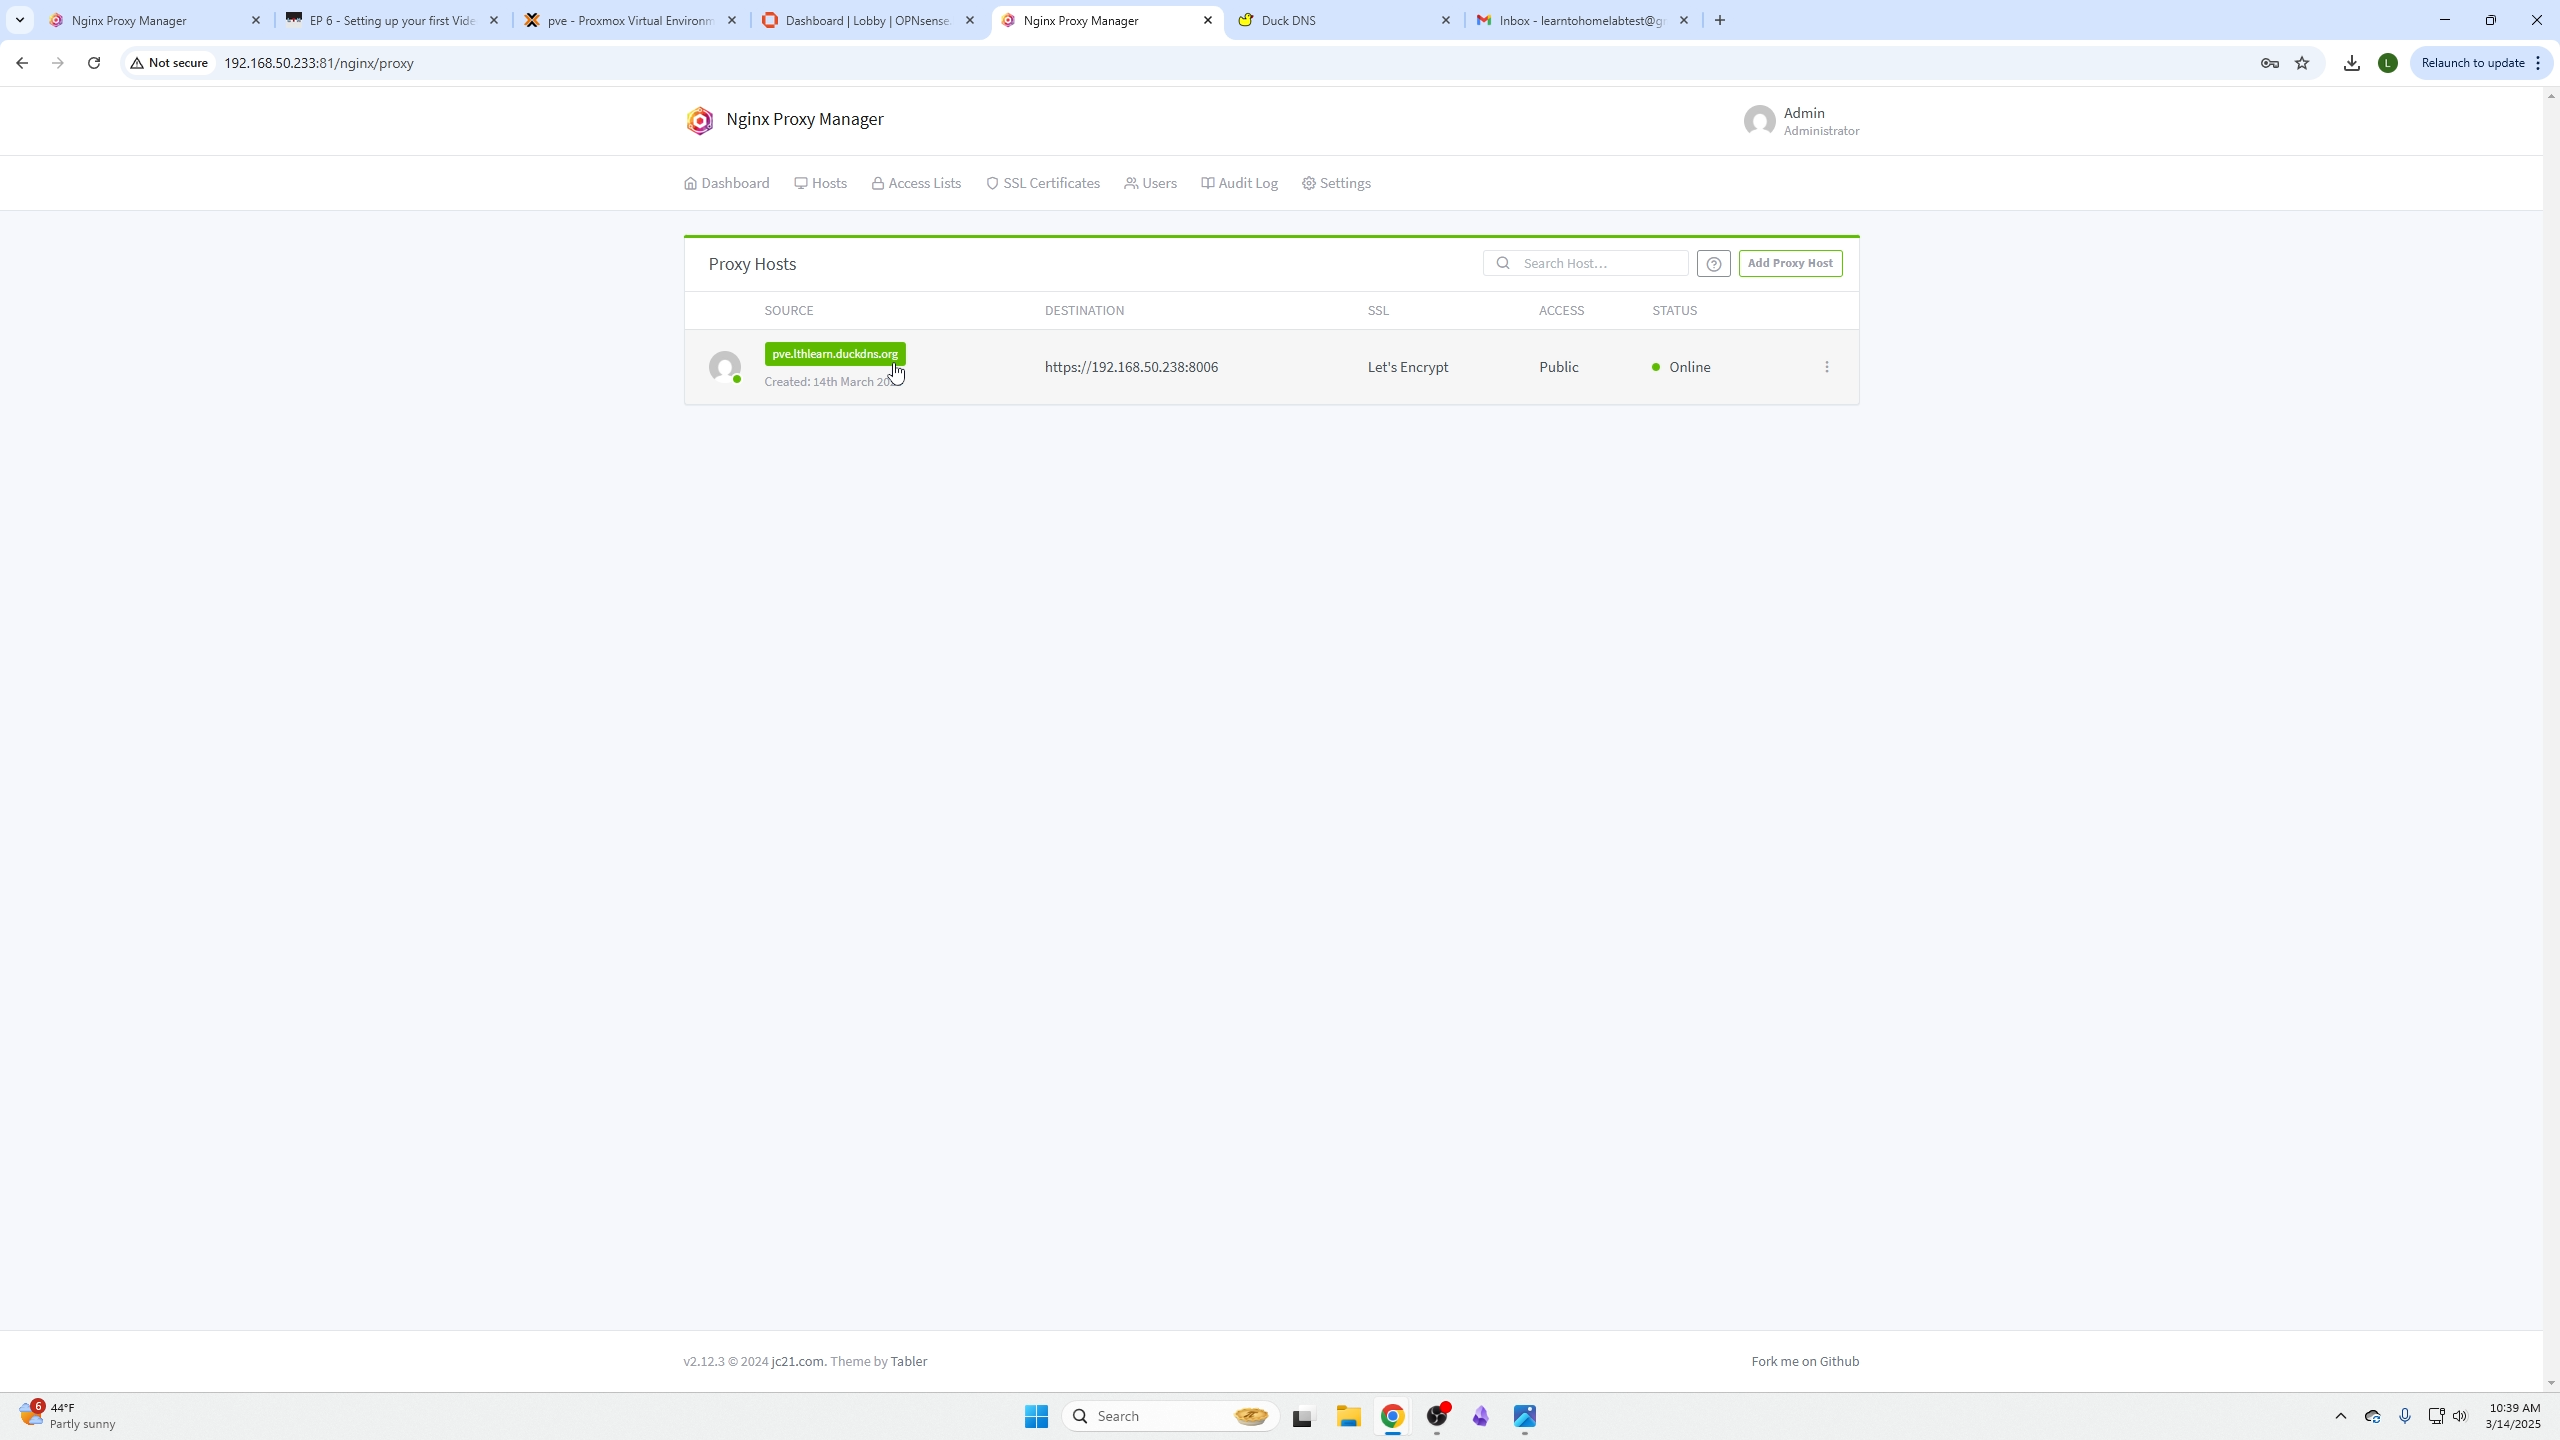
On Proxy Dashboard, click Hosts → Proxy Hosts → Add Proxy Host.
For example, add <pve>.lthlearn.duckdns.org using the wildcard *.
Remember Proxmox uses HTTPS by default; select HTTP for most services in the scheme box.
Note
Enable websockets support if your service requires it, e.g., for code boxes that auto-copy commands.
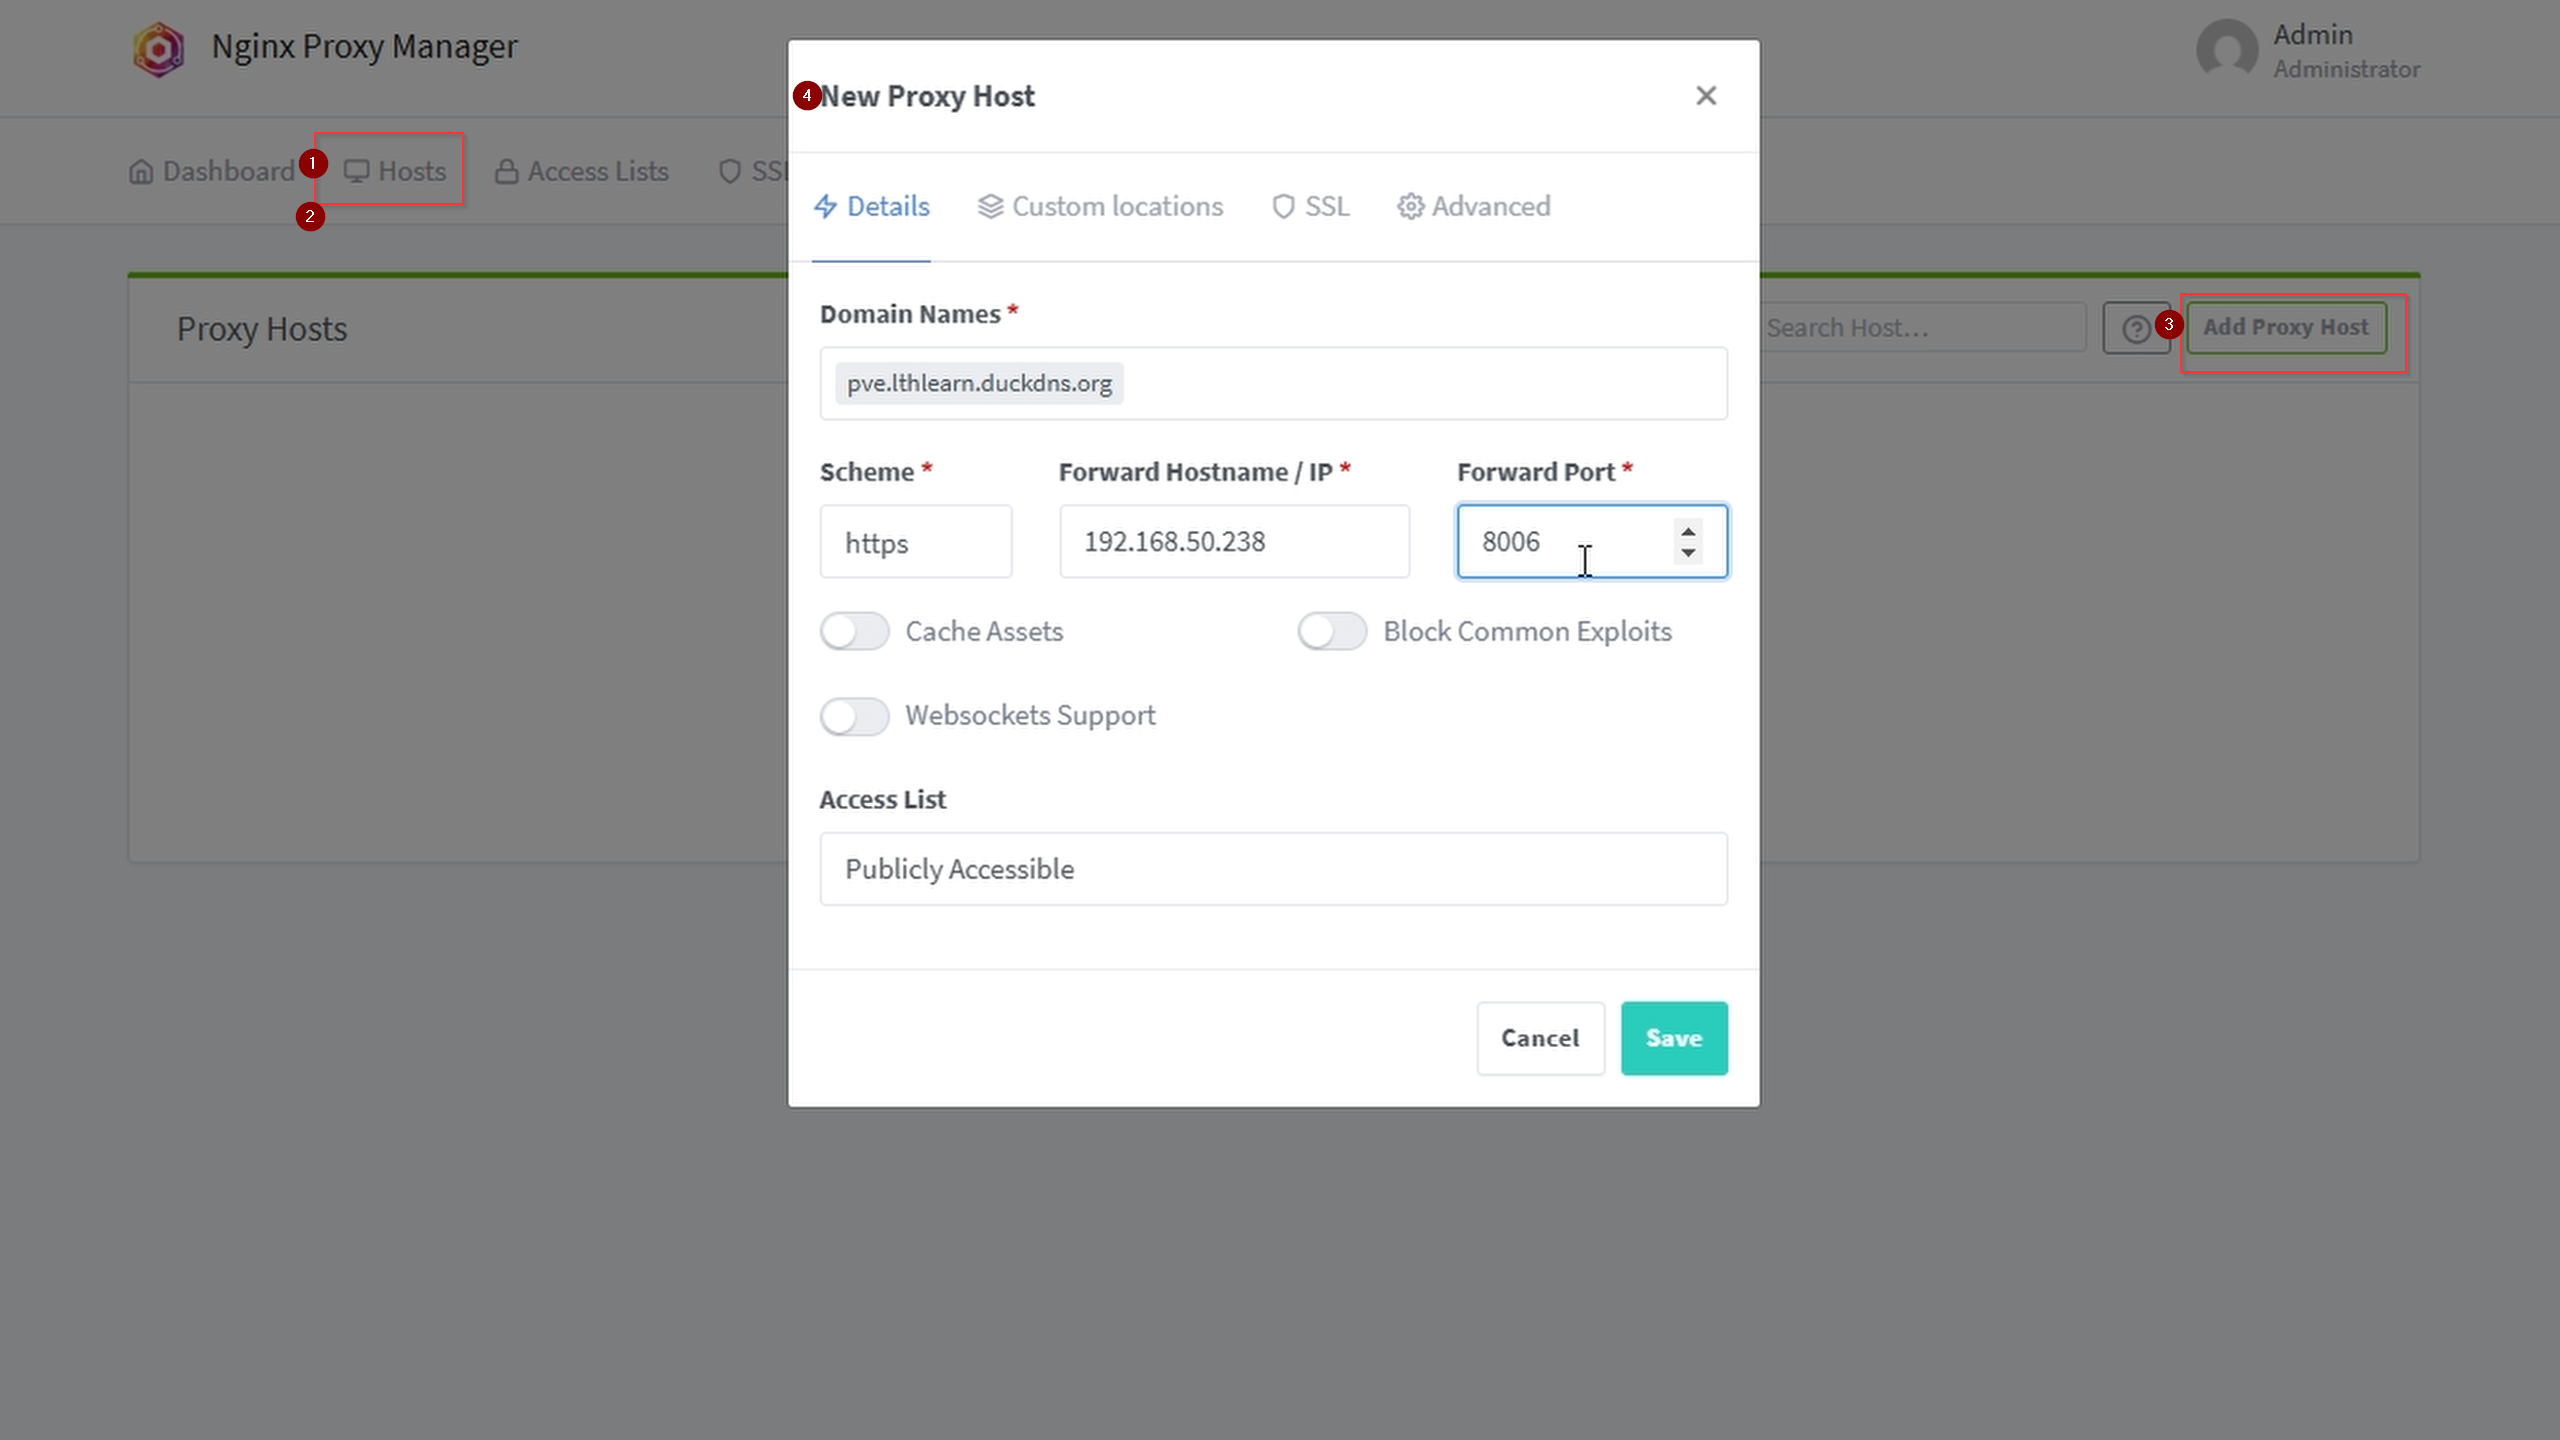
After saving, try clicking your domain. It may work unless blocked by firewall like OPNsense—next step needed.
Create OPNSense Local DNS Wildcard Entry
Enable Unbound DNS via Services → Unbound DNS → General Settings.
Make sure Unbound DNS is enabled.
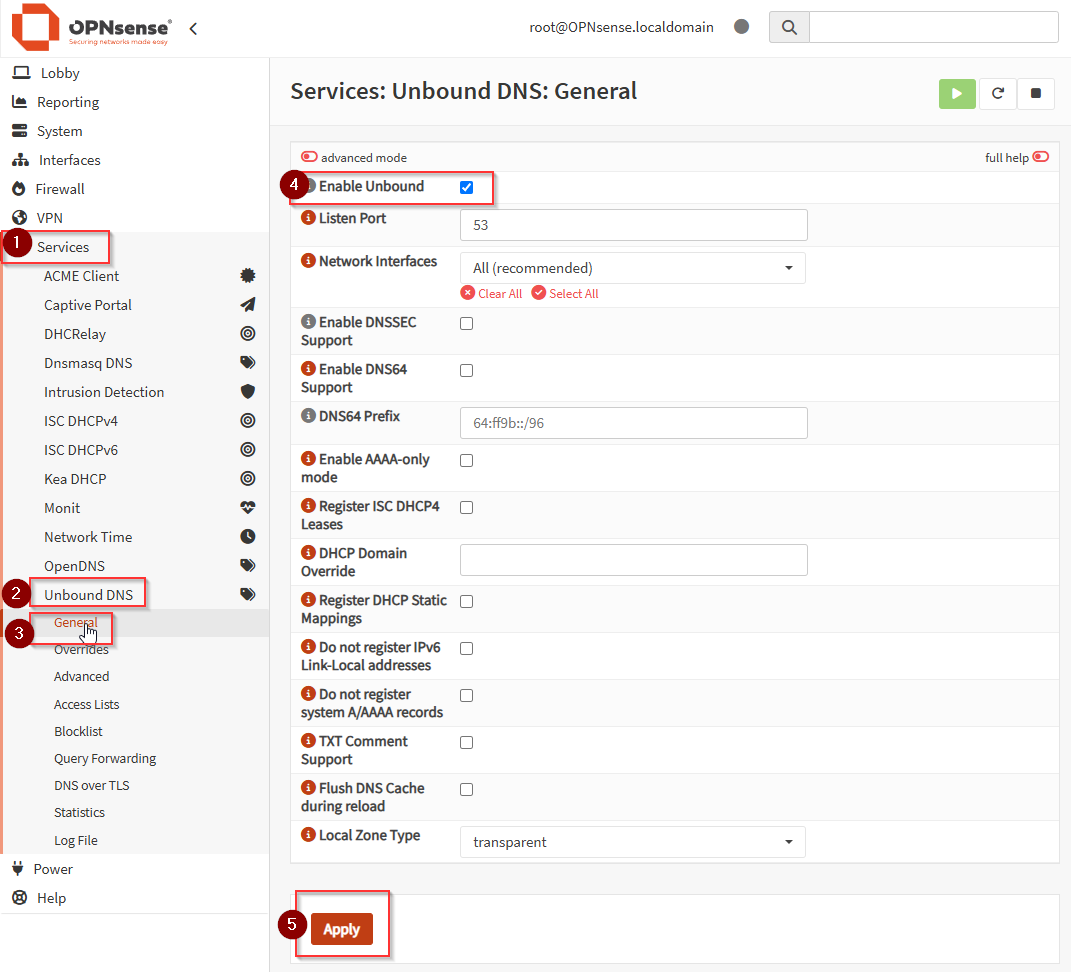
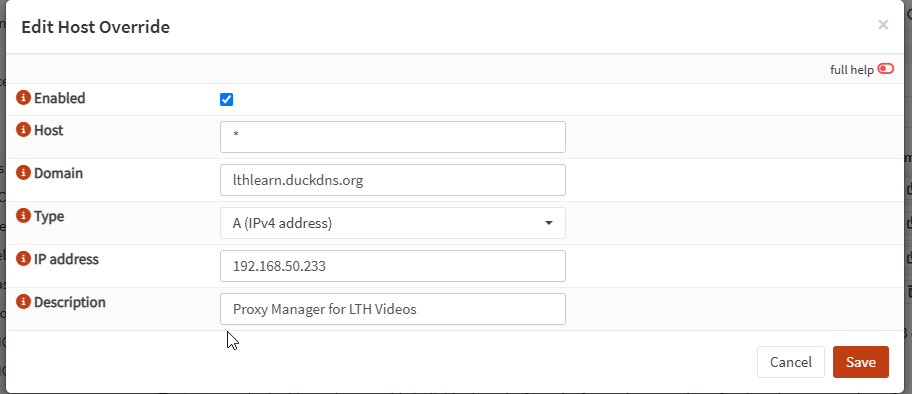
Add a Wildcard DNS Override under Services → Unbound DNS → Overrides.
Click + Add under Host Overrides.
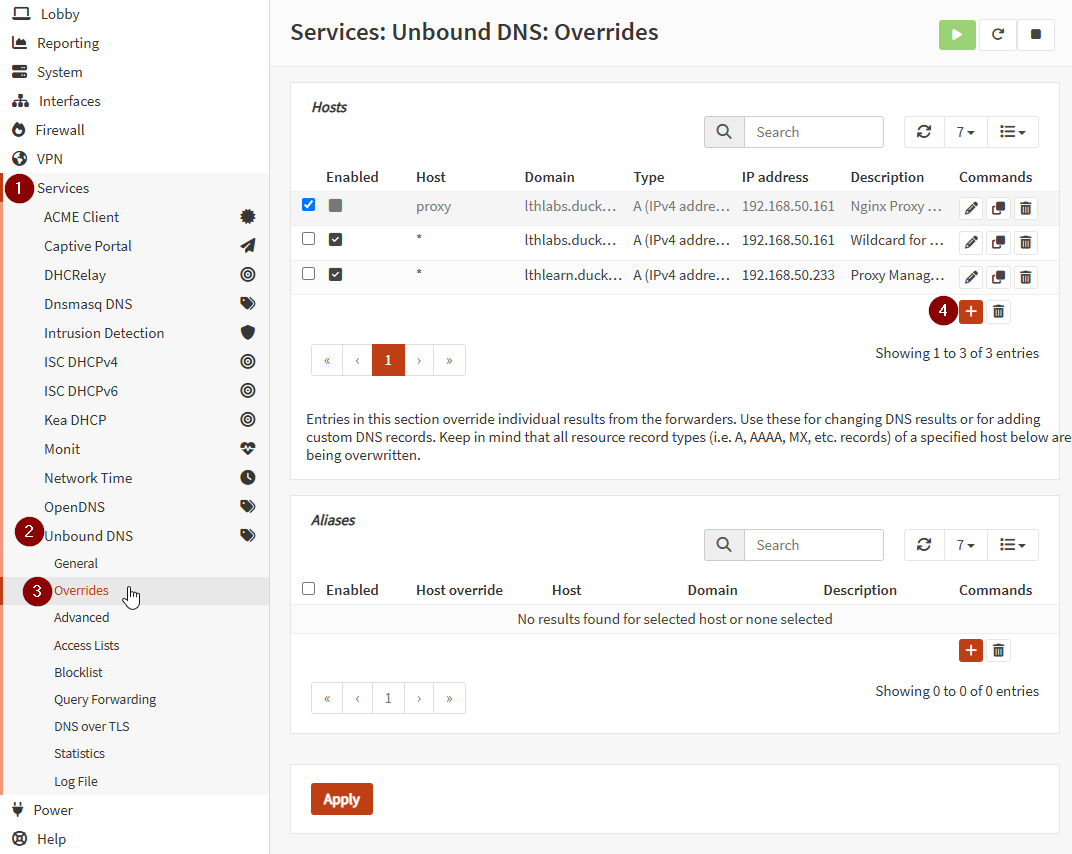
Set:
- Host: * (wildcard for all subdomains)
- Domain: duckdns.org
- Type: A (IPv4)
- IP Address: internal IP of Nginx Proxy Manager server (e.g., 192.168.50.234)
- Description (optional): Wildcard for DuckDNS domains
Save and apply.
Flush DNS Cache on your local machine (Windows cmd):
ipconfig /flushdns
Assign More Domains to Other Services
Return to Nginx Proxy Manager, click your domain, it should now work.
Repeat adding proxy hosts for all services to secure SSL and eliminate unsecure warnings.
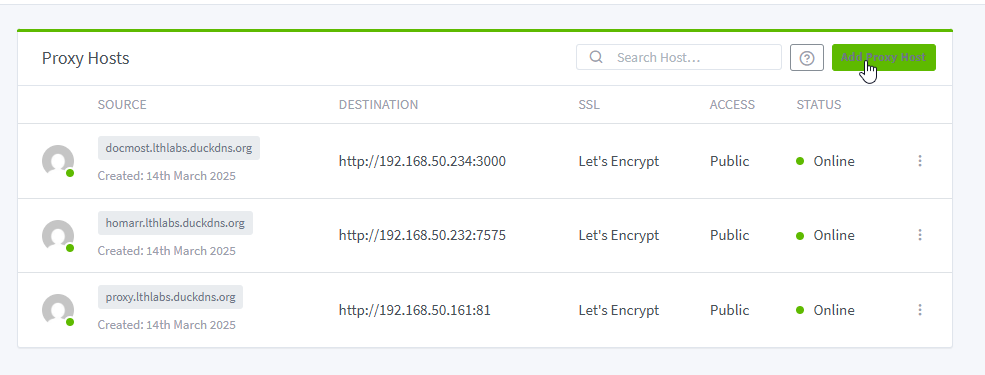
Secured websites are now working.