Move Proxmox VMs & Containers to a New Storage Drive
Reasons you may need to move VM & container storage:
!
Upgrading to a larger/faster drive, running out of space, moving to SSD/NVMe for performance, replacing failing hardware, decommissioning drives, reconfiguring RAID/storage pools, consolidating storage, workload separation, improving HA/live migration with network/shared storage, preparing for maintenance/upgrades, optimizing backup or disaster recovery, balancing cluster node resources, capacity expansion, and more.
Moving Proxmox VM Storage
- Prepare the VM:
- Shut down the VM (optional but recommended).
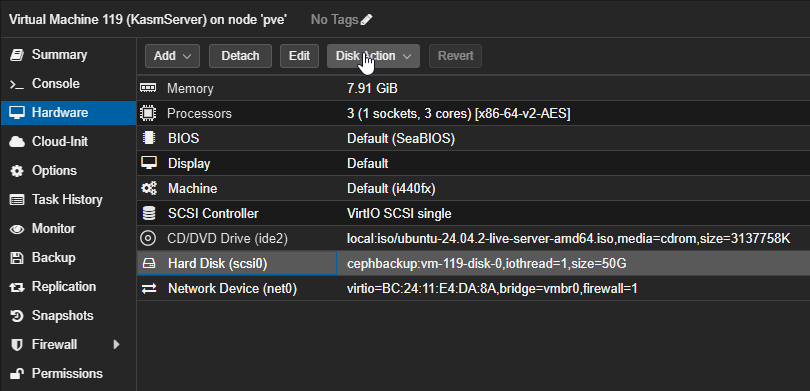
- Navigate:
VM → Hardware → Hard Disk(e.g.,scsi0).
- Initiate Move Storage:
- Click the "Disk Action" dropdown → select "Move Storage".
-
In the popup, select:
- Target Storage: choose your local storage (e.g.,
local,local-lvm).
- Target Storage: choose your local storage (e.g.,
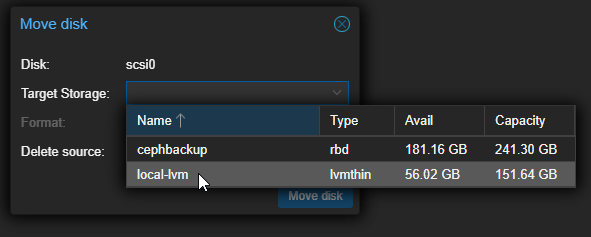
- Check Delete Source to remove original disk after migration.
- Click "Move Disk".
- Monitor Progress:
- Follow migration progress in Proxmox task log.
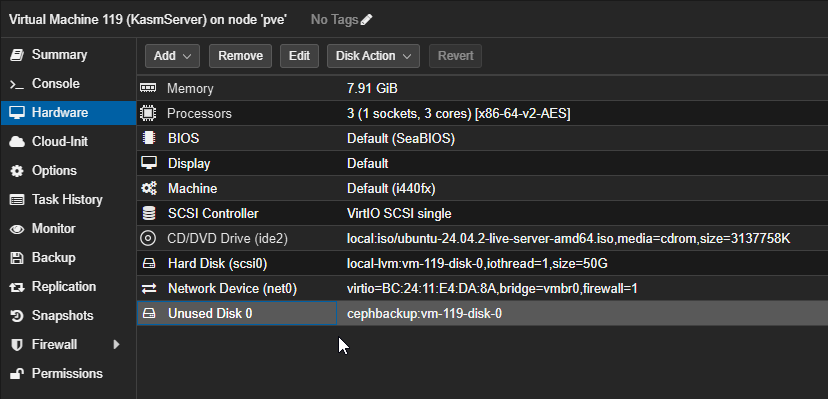
- Verify in
Hardware → Hard Diskthat disk now points to local storage. - Remove any unused disk entries.
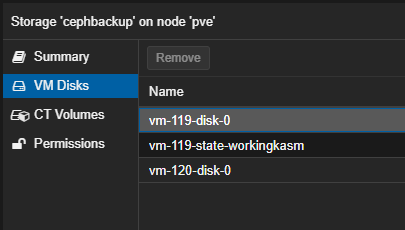
Note: Ceph pool cannot be destroyed or modified until all VM/container disks are removed.
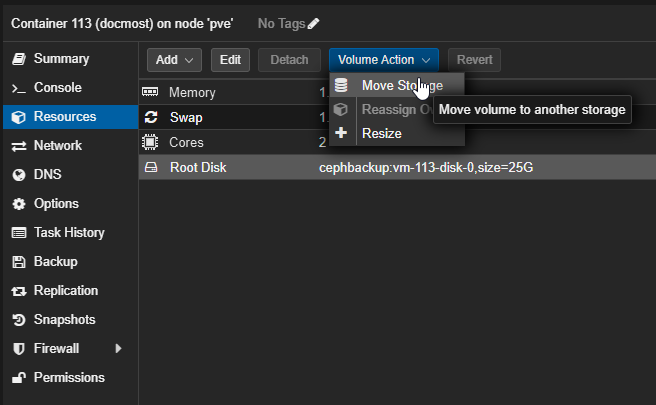
Moving Container Storage
- Turn off the container.
- Go to Resources tab (not hardware tab).
- Follow same move storage steps as for VMs.
Common Errors
VM is locked (snapshot) (500)
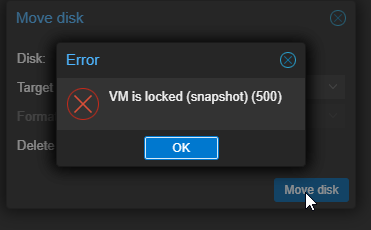
Step-by-step unlock in Proxmox shell (main node CLI)
- Identify locked VM (note VMID):
qm list
- Unlock VM:
qm unlock <VMID>
Example:
qm unlock 100
- Verify unlock:
qm config <VMID>
No lock icon should appear next to VM name in UI.
Unable to delete snapshot volume (500)
- Make sure VM is off.
- Unlock VM if locked:
qm unlock <VMID>
- Force delete orphaned snapshot:
qm delsnapshot <VMID> <snapshot-name> --force
Replace <snapshot-name> with actual snapshot name (e.g., BeforeDiskUpgrade).